
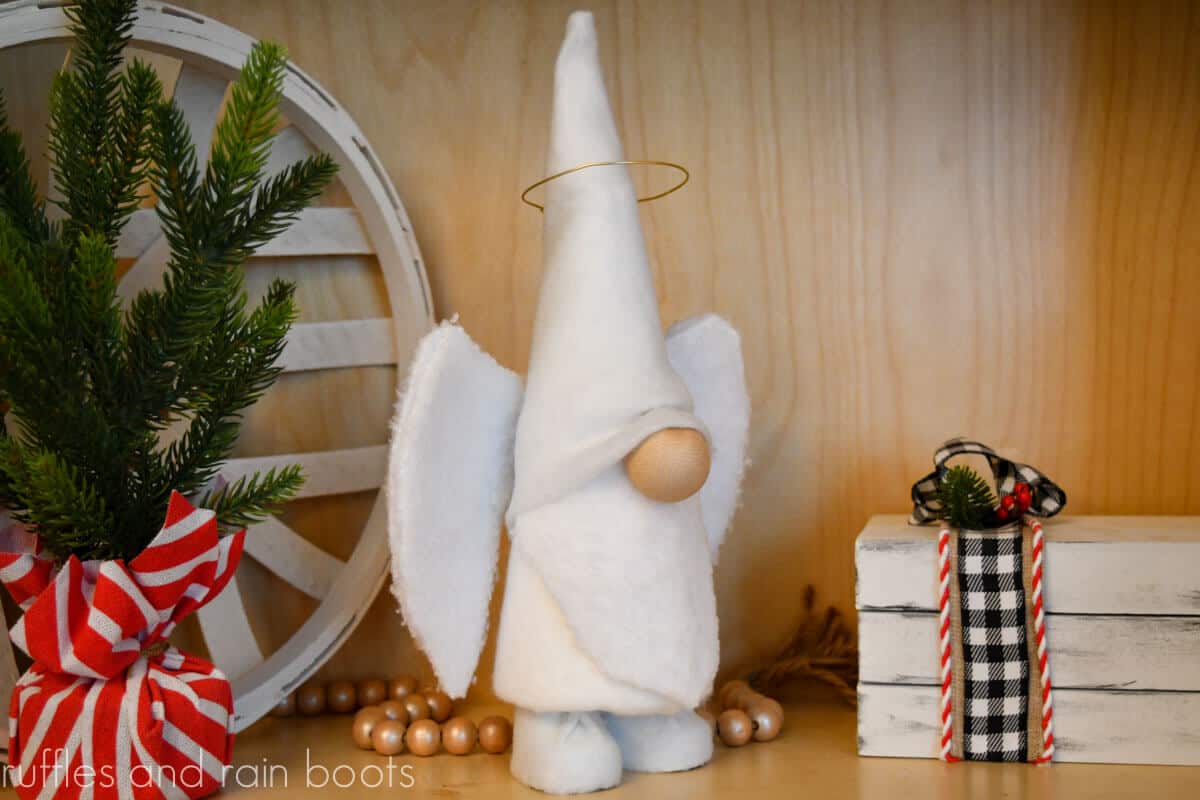
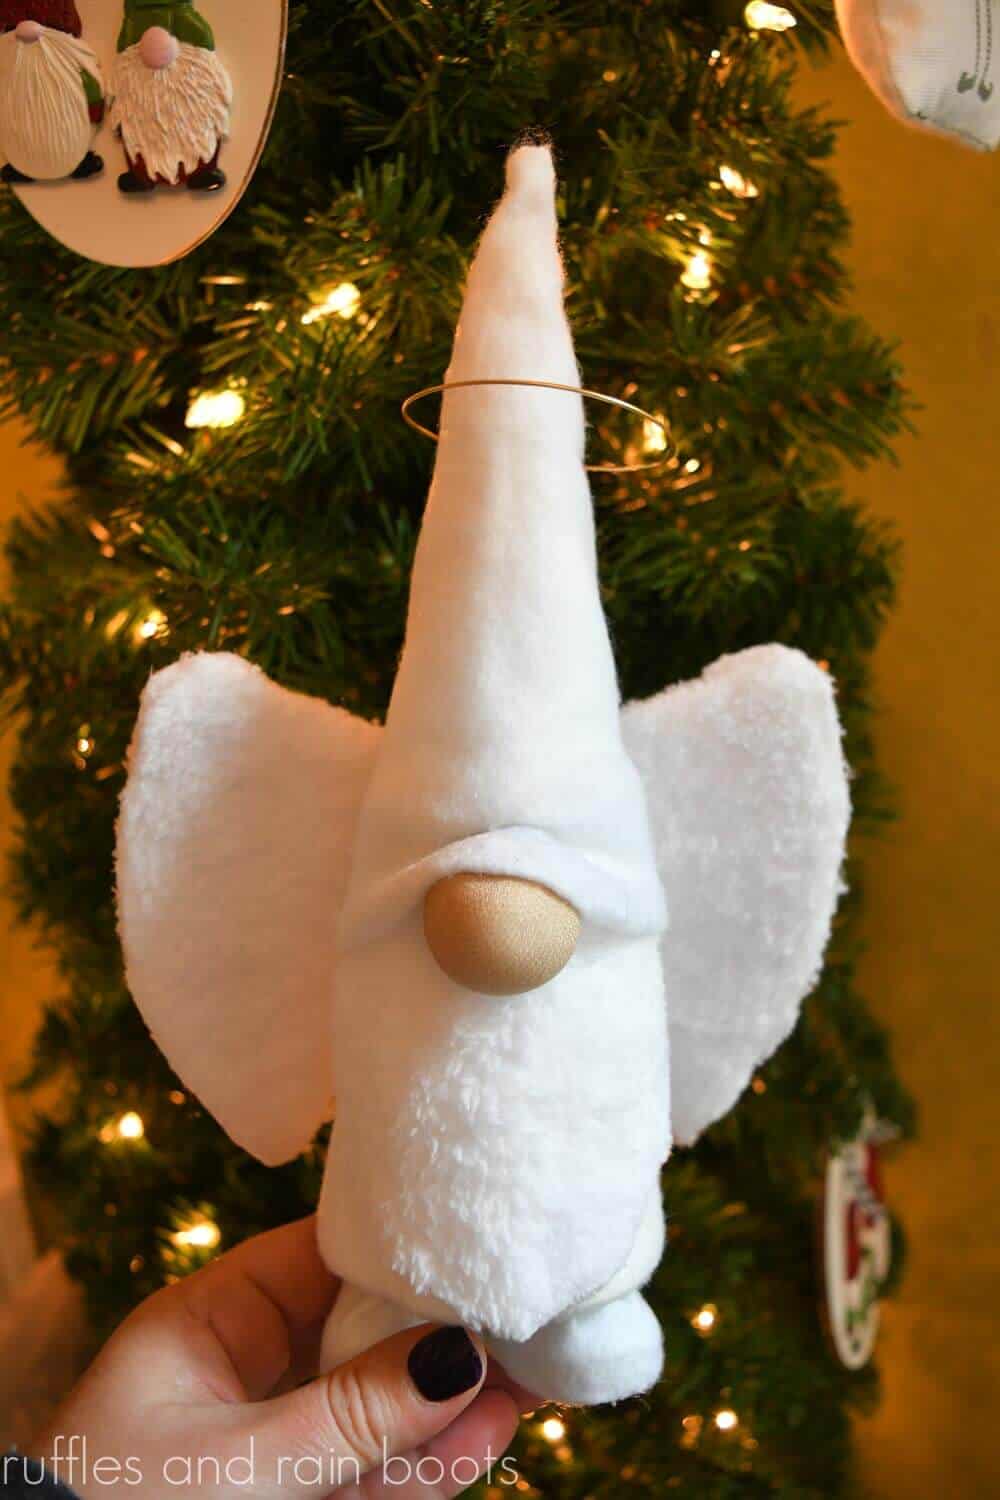
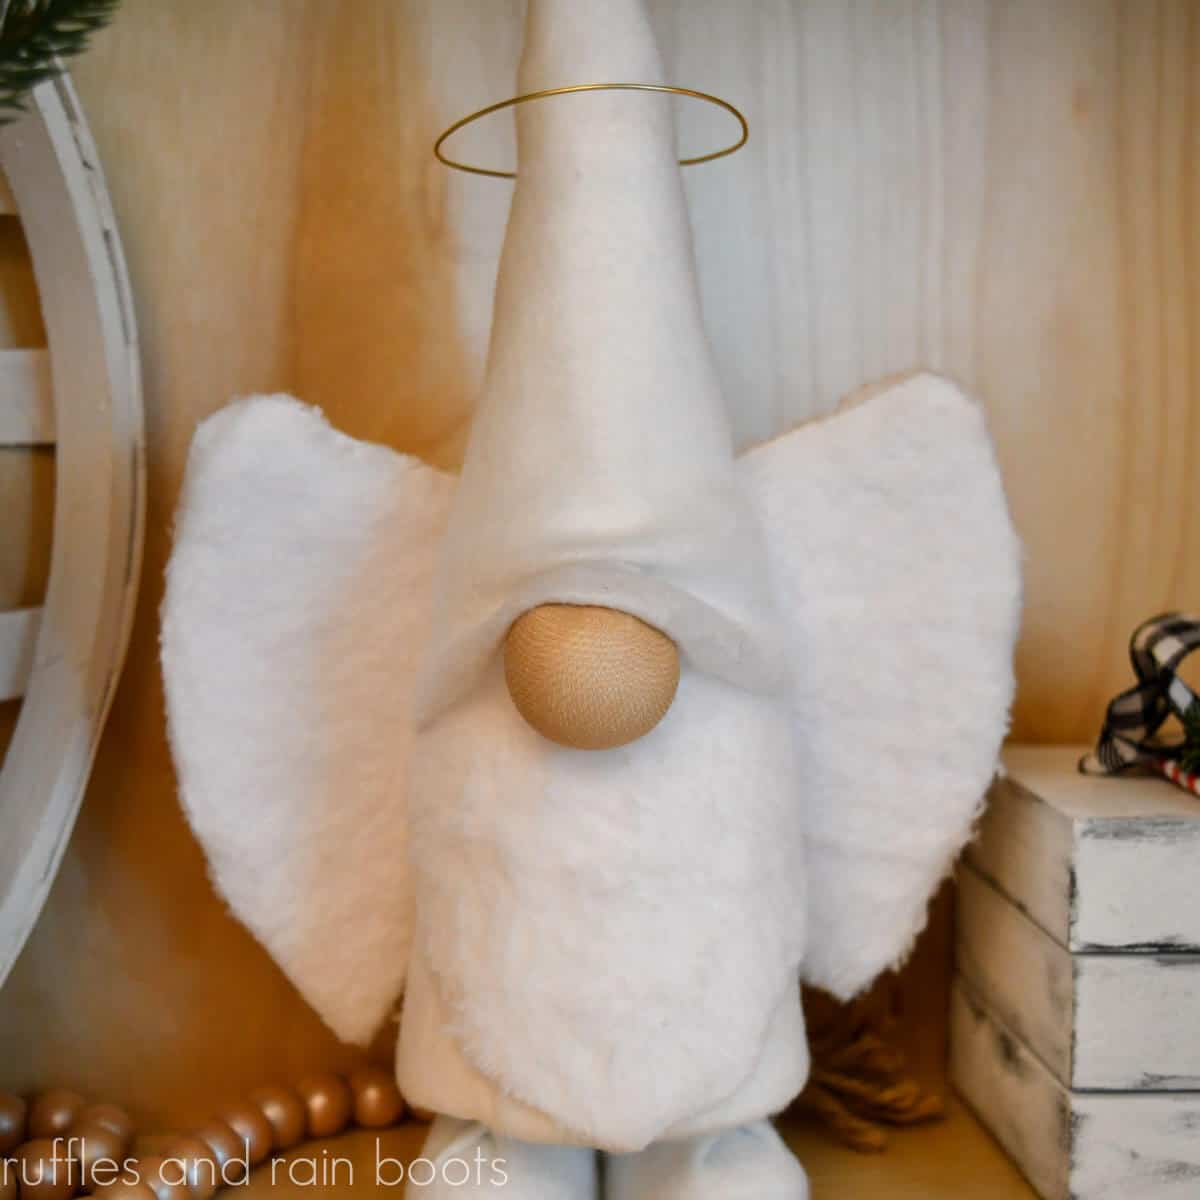
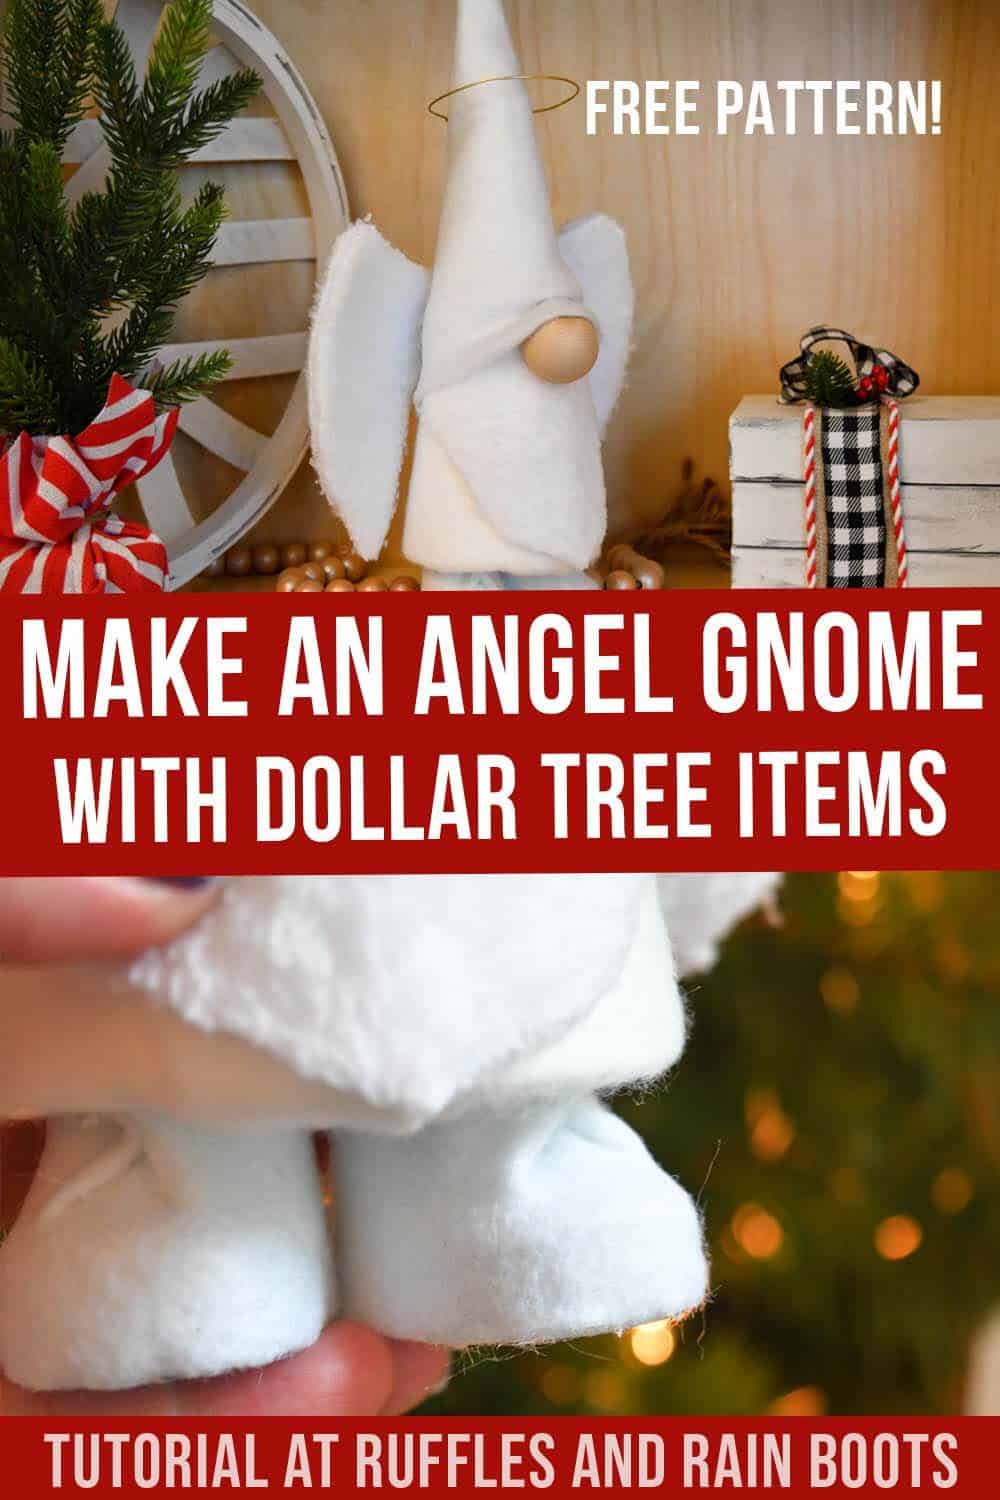
Dollar Tree Angel Gnome
You can make an elegant angel gnome using these free wing templates and simple Dollar Tree supplies. Gather up your materials and follow along with this free, step-by-step angel gnome tutorial.
What You'll Find On This Page
DIY Angel Gnome from Dollar Tree Finds
Here at Ruffles and Rain Boots, I love to put together inexpensive Christmas and other holiday decorations. The readers and viewers of the Ruffles and Rain Boots YouTube channel challenged me to make an angel gnome and of course, I had to comply.
First, I put together this Christmas angel gnome design with the free wing templates. But because everyone loves crafting for the holidays using inexpensive finds, I made this cutie, as well. Let’s get started.
RELATED READING: The Best Christmas Gnomes to Make or Buy
No Time to Make Now? Save for Later
If you need to gather up supplies or just want to share this fun and free gnome tutorial, share this to your favorite group on Facebook or save it to Pinterest.
As an Amazon Associate, I could earn from qualifying purchases. Links could be affiliate or partner links.
Tips for Making This Dollar Tree Christmas Craft
Listen, friends – I’m an honest person. When something goes well, I share it. When I use the WRONG supply, I share that, too.
- Click to download the free angel wing template before you get started. Nothing else needs a pattern.
- If you want a soft, fluffy beard and set of angel wings, use the Dollar Tree’s microfiber cleaning cloth in white found in the automotive section. I used the muffler first and it created a huge mess and didn’t look great.
- Making a nose the way I share below is fun, but remember there are tons of options for gnome noses: wood rounds, wood beads, pompoms, and even ping pong balls.
- Be sure to share if you make this sweet angel gnome. Join us in the DIY Gnomes and Crafts with Friends Facebook group here.

Get the Free Wing Template
Add the free wing template to your cart by pressing the button below.
How Do I Make This Dollar Tree Christmas Gnome?
I’m so glad you asked! Below is our full written tutorial and you can find the step-by-step angel gnome video tutorial here. Let me know in the comments here or on YouTube if you have questions (or suggestions)!
Dollar Tree Angel Gnome

Using basic supplies found at all Dollar Tree stores, you can make this no-sew angel gnome. Follow the step by step instructions and watch the full length video for tips.
Materials
- Dollar Tree Styrofoam Cone (6.9")
- Crafter's Square White Felt
- White Car Towel (Microfiber) OR White Muffler
- Nose (I used nylon slipper socks stuffed with fluff)
- Gold Wire OR Gold Wreath Lights
- Free Angel Wing Pattern (choose one)
- Lightweight Cardboard (for wing base)
- optional, Dollar Tree Booties (Party Favor) or Boot Ornaments
- optional (if using booties), small rocks or vase filler
Tools
- Hot Glue Gun and Glue Sticks
- Scissors
Instructions
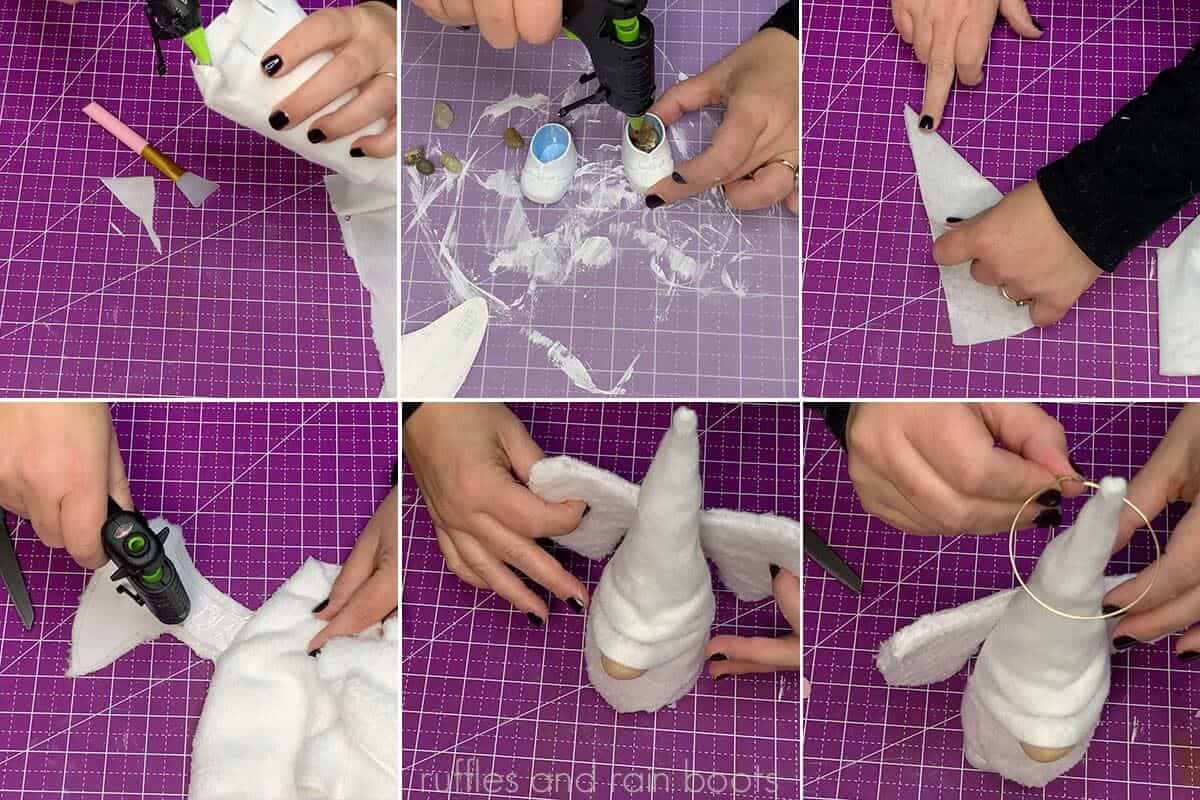
- Use the white felt to wrap the Styrofoam cone up to about 2 inches from the top. Be sure to leave an overhang on the bottom so that you can trim and fold over the bottom to create a clean edge. Glue down the top.
- Use the free angel wing pattern and trace the desired shape onto lightweight cardboard. If your cardboard is brown and you are using the muffler, paint it white. If using the shammy, leave it as is because it will cover everything.
- Glue the template to the shammy and cut out with a 1/4 inch seam allowance. Flip it over and glue the uncovered side to the shammy, as well. Cut it out and glue together the outside edges.
- If making the booties, paint them white until the blue is covered. Let dry.
- Glue in rocks or vase filler to add weight. Be sure to keep the rocks inside the top edge, as we will glue this to the bottom of the cone.
- Cut two pieces of felt at 6 inches wide by 1.5 inches high. Glue the middle of the felt piece to the toe, wrap around the sides gluing only along the bottom edge (near the sole), and secure in back. Fold down the front and glue (watch video for details). Trim the back edge around the opening of the shoe.
- Fold the felt over onto itself so that it is 4.5 wide. Cut a triangle with 8 inches on the height along the folded edge. Measure up 1.5" and cut to the fold edge in a downward curve. Please see the full video tutorial for a visual. Glue the long edge together and once dry, turn right side out.
- Use one of the nylons and fill with cuts of shammy or muffler to fill. Stuff into the toe, tie off a knot, cut off excess, and glue to the body of the gnome.
- Cut the beard from the shammy as wide as half the width of the cone. Line up the beard's point with the middle front of the angel and secure. Add the nose and secure the hat down.
- Bend the wire around anything round, twist it together, and cut off an extension piece. Stick that wire into the back of the gnome after sliding it down onto the cone hat.
- Glue the cone onto the booties and display!

Notes
I recommend using the car shammy and do not recommend the muffler as it sheds horribly. When you cut off the backing from the fur, you can see how sparse it really is, so if you opt to use it, keep the two layers together.
More Christmas Crafts You Might Like
- Angel Gnome with Fluffy Wings – Friends, this is an elegant angel gnome you can whip up with heirloom quality.
- Farmhouse Christmas Gnomes – These sock gnomes – YES, they’re made of socks – are placed on ornaments to really elevate their style.
- Gnome Christmas Ornaments – Perfect for a holiday tree or gift tag, these ornaments work up quickly with scraps from your craft room.
Please Share This Fun and Free Craft Idea
Your shares are how this site grows and I am sincerely grateful. Please share this to our favorite crafting group on Facebook. Thank you!
Meet the Creator
Hi there, I’m Sarah Nenni-Daher. I’m a crafty gal and always have at least 14 projects going at once. I am a crafter, designer, DIYer, and pattern maker. I share my creations here and in the Ruffles and Rain Boots® Shop.
Here at Ruffles and Rain Boots®, you’ll find DIY gnomes, crafts, gifts, cupcakes, laser crafts, and so much more. I love sharing video tutorials over on YouTube and chatting with other crafters in my Facebook groups. We’d love to have you!