
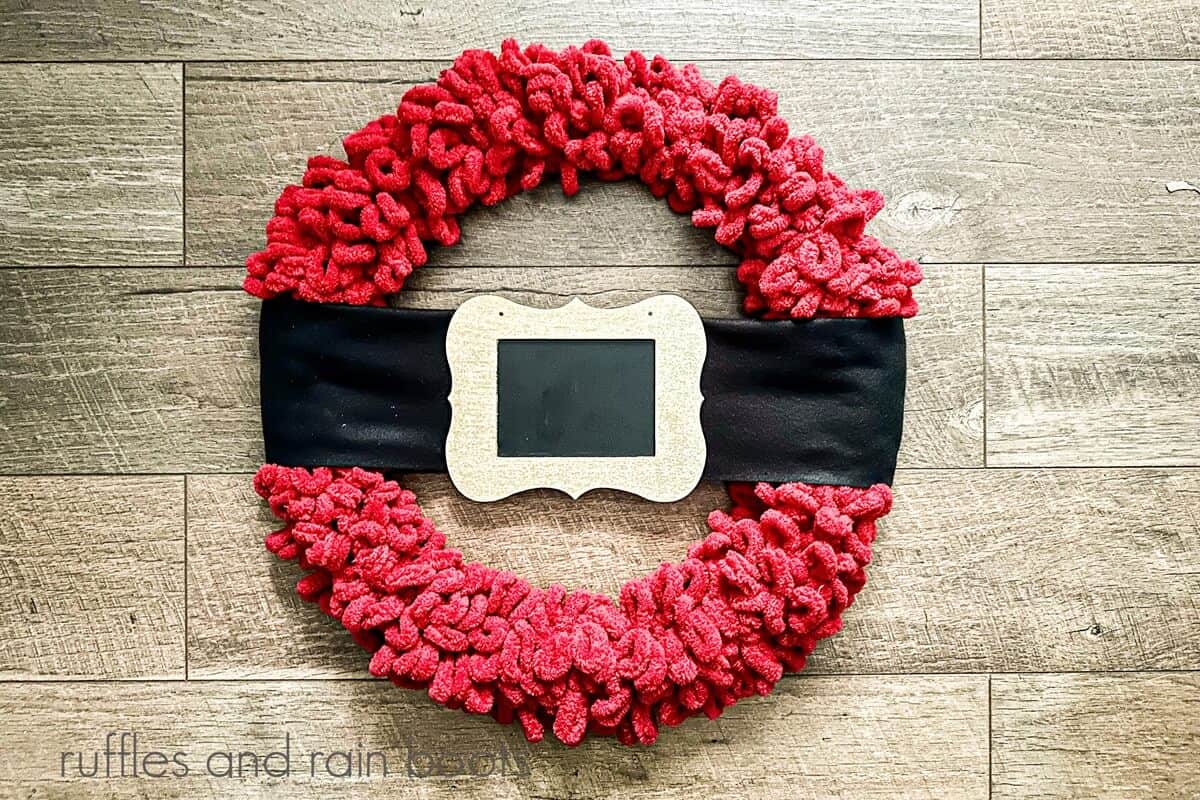
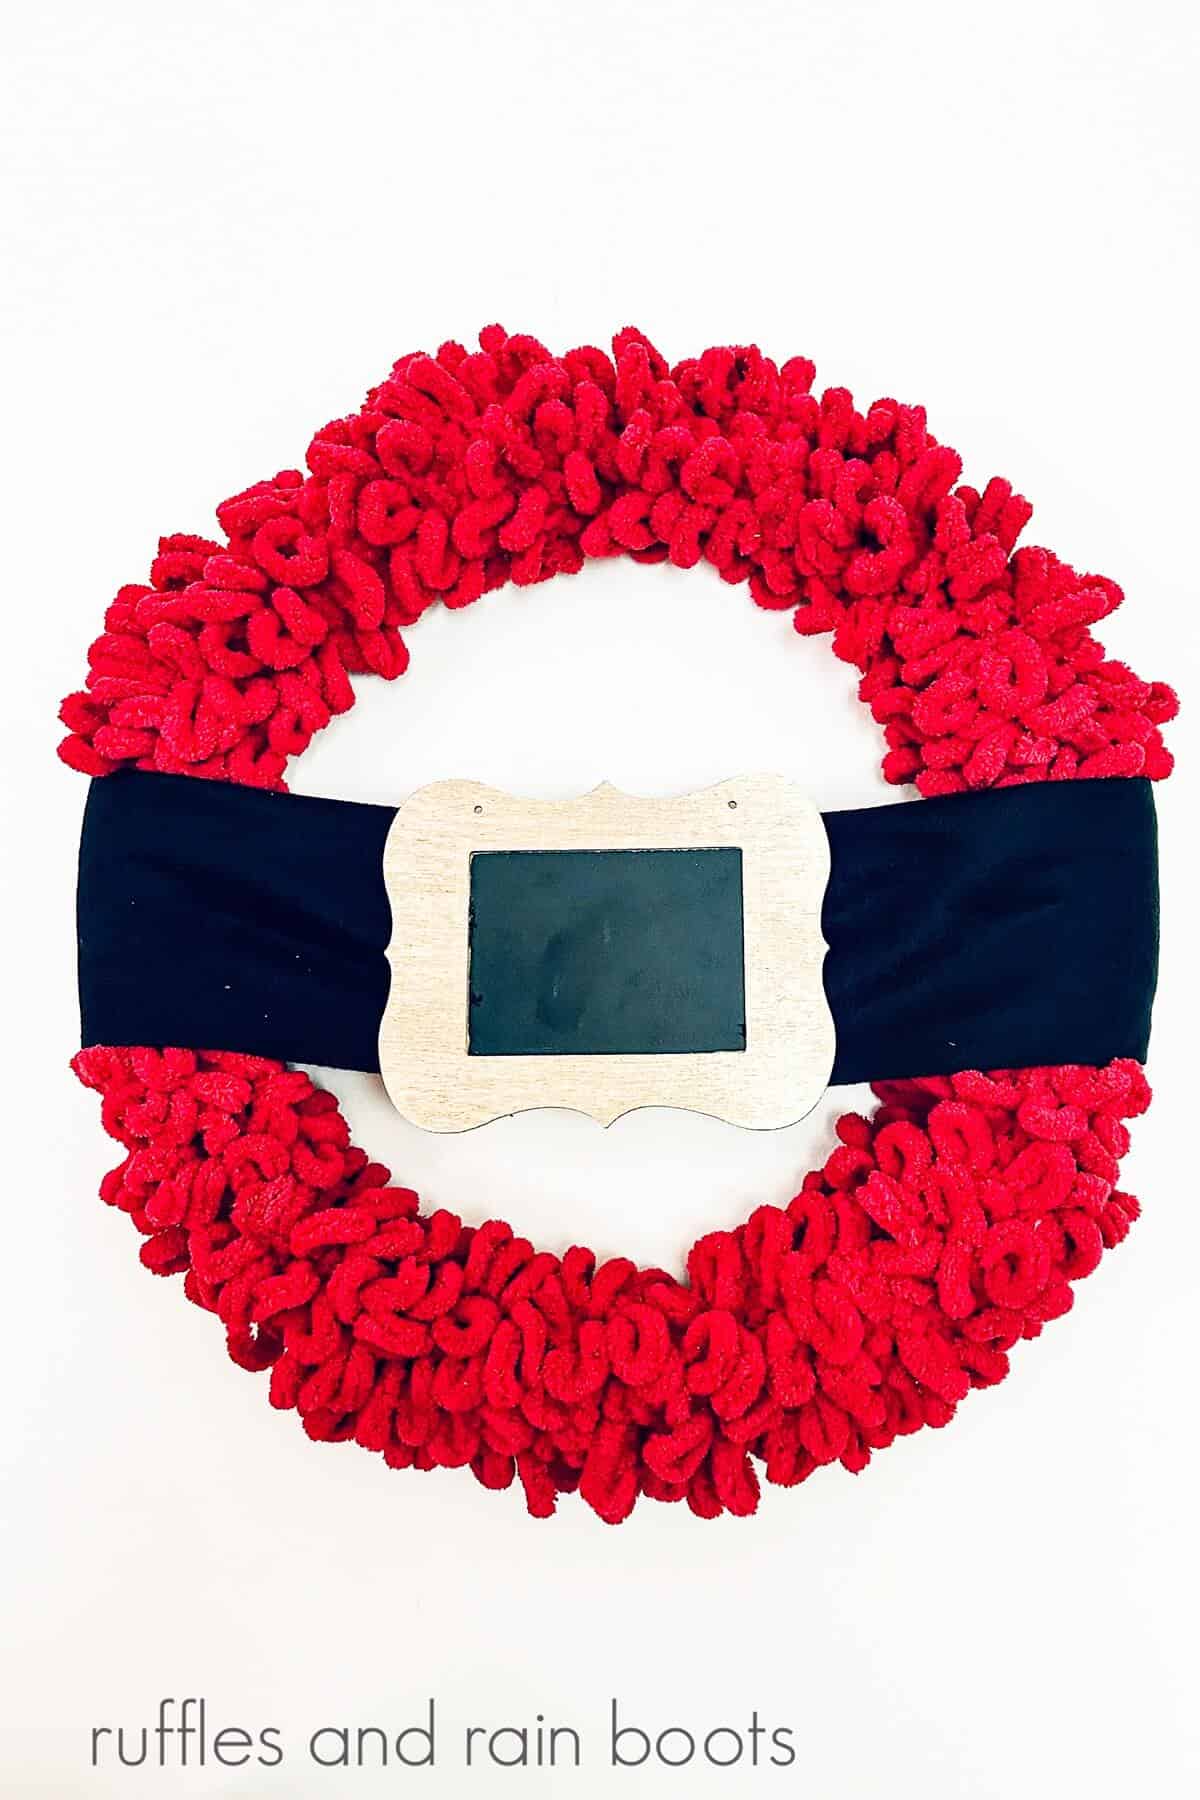
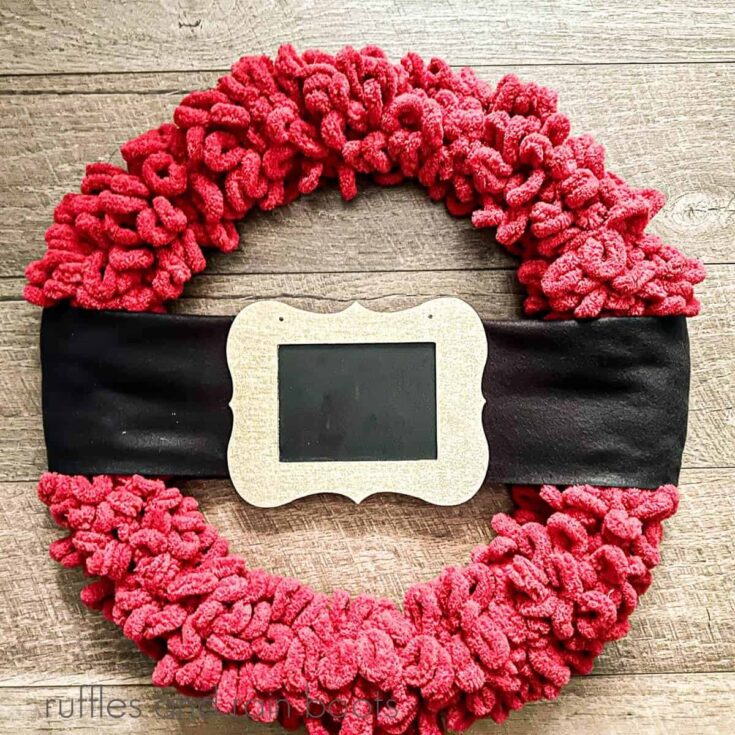
Dollar Tree Santa Belt Wreath
Ho Ho Ho! It’s time for Santa to head out on his sleigh and deliver all his presents. That thought inspired us to design a fun and easy decorative piece to add to our holiday decor. We thought this Dollar Tree Santa belt wreath was the perfect thing.
Not only is this project simple to make, it is economical as well. We were able to make this craft for less than $10. We could find most of the materials at Dollar Tree and the rest we already had on hand or found at our local JoAnn.
RELATED READING: Easy Dollar Tree Santa Crafts
What You'll Find On This Page
Dollar Tree Christmas Wreath
Here at Ruffles and Rain Boots, we love crafting, especially during the holidays. Our favorite items to make are the ones we can share with you that are quick and will fit into everyone’s budget.
This Dollar Tree Christmas wreath came about when we saw the wooden frame. I mentioned to my kiddo that it looked like Santa’s belt buckle and then we saw the fleece scarf. Before we knew it, a new design was born!
If you need to run to the Dollar Tree for supplies for this craft, bookmark this page to make it easy when you are ready to put together your wreath.
As an Amazon Associate, I could earn from qualifying purchases. There may be affiliate links within this article.
This is an adult and older child-friendly craft project. If yours is good with a hot glue gun, you or they can create this wreath in less than 30 minutes. The part that will take the longest to accomplish is waiting for the paint to dry on the frame.

RELATED READING: DIY Dollar Tree Santa Wreath – That Beard!!
Tips For Making A Dollar Tree Santa Belt Wreath
- We already had a can of gold spray paint, so we used that for the buckle but you can use acrylic paint or foil to have a shiny, gilded look.
- To cover up the chalkboard area of the frame, we used painter’s tape. Not only does this cover the entire area perfectly, but it comes up quite easily. You can also use paper, but you do run the risk of having the paint bleed through.
- When wrapping the yarn, be sure to do so firmly but not so tightly that it compromises the shape of the wreath form. If you pull too tightly, it can bend the form out of shape and then you will have a wonky belt.

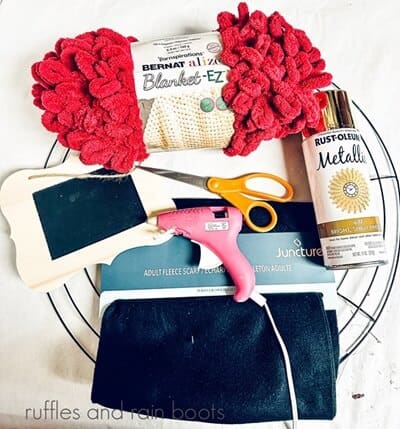
Supplies For This Dollar Tree Christmas Wreath
Below are the supplies we used, but check your craft and Christmas bin for what you need before heading to the store. Read the tips section above for tips on painting the wooden scalloped frame we used for the belt buckle.
- 18-inch Wire Wreath Form
- Black Fleece Scarf
- Scalloped Wooden Frame with Chalkboard Center
- Gold Spray or Acrylic Craft Paint
- Painters Tape
- Crimson Bernat Alize Yarn (I got mine with a coupon at JoAnn but Walmart and Amazon also carry it)
- Hot Glue Gun and Glue Sticks
- Scissors
How To Make A Santa Belt Wreath
Each step for this Dollar Tree craft is detailed below to make it easy for you to follow. Keep this page open while you are creating your Santa belt wreath. If you would rather have a printable how-to, scroll down and select the print button.
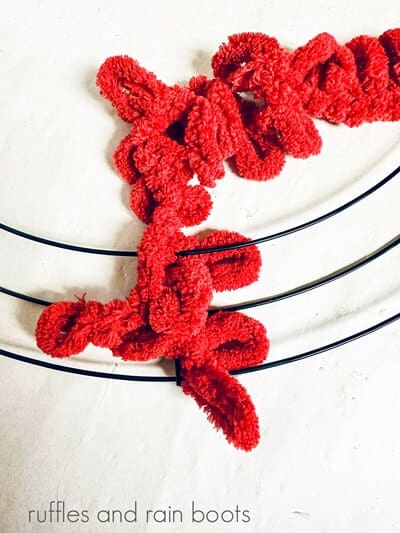
Tie the end of the yarn to the wreath form.
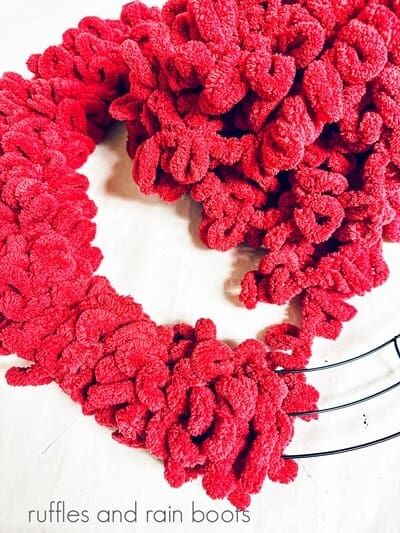
Wrap the yarn firmly around the entire wreath form.

Complete covering the wreath form, using the entire bundle of yarn. Glue the end of the yarn to the wreath form.
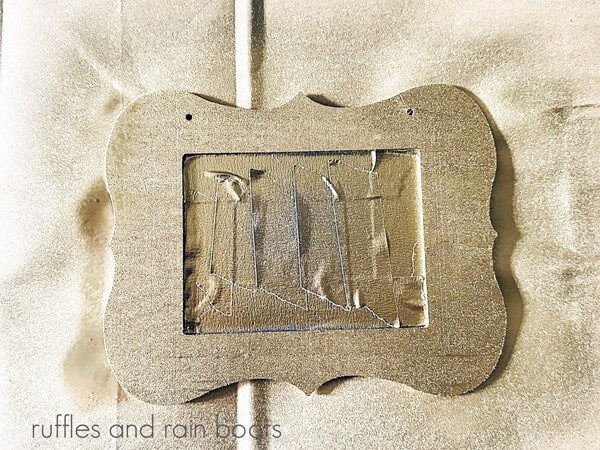
Cover the chalkboard center of the frame with painter’s tape and then paint the outside of the frame with gold paint. Let it completely dry. You may need to paint two coats.

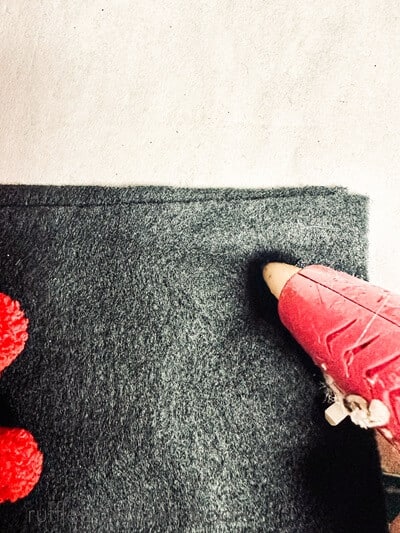
Fold the fleece scarf in half lengthwise and cut the scarf to 24 inches in length.

Add hot glue to the backside of the frame.
Add hot glue to the center of the scarf and then place the frame in the center of the fleece scarf. Press firmly so that it adheres to the fabric. Allow the glue to dry.
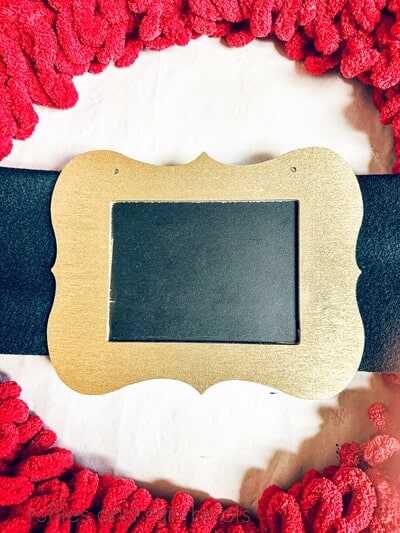
Add hot glue to one of the ends of the scarf and press it firmly to the backside of the wreath. Stretch the scarf across the front of the wreath and then glue down the other side to the back of the wreath.
Notes For Making A Dollar Tree Santa Belt Wreath
- If you cannot find the black fleece scarf at Dollar Tree, use a roll of the faux leather “ribbon,” use black stretch fleece, or flannel fabric from a craft store.
- If you use a 14″ or smaller frame, adjust the amount of fabric you need for the belt.
More Holiday Crafts You May Enjoy
- Christmas Laser Crafts to Make and Sell: Check out this collection of laser crafts you can make with your laser for the holidays.
- Candy Cane Christmas Bath Bomb Recipe: Make these DIY bath and beauty skincare bath bombs in just minutes with supplies from your pantry and craft bin.
- How to Make Cute Christmas Gnome Ornaments: You can easily make these gnome ornaments in about 15 minutes.
- Dimensional Christmas Gnome Ornaments: We took a traditional gnome look from a holiday napkin, added filling, and created a plush ornament.
Please Save or Share
Your shares are how this site grows and I sincerely appreciate it. Please save this project to your favorite holiday craft pin board or share it on Facebook.

Dollar Tree Santa Belt Wreath
This Dollar Tree Santa belt wreath craft comes together quickly with minimal supplies and just a few dollars. We got virtually all our materials from the Dollar Tree and what we didn’t find there, we had in our craft bin or found at JoAnn with a coupon, so we got a great price on it. We love sharing such a simple craft project for Christmas with you. You don’t need fancy equipment either. You just need a hot glue gun and some scissors.
Materials
- 18-inch Wire Wreath Form
- Black Fleece Scarf
- Scalloped Wooden Frame with Chalkboard Center
- Gold Spray or Acrylic Craft Paint
- Painters Tape
- Crimson Bernat Alize Yarn
Tools
- Hot Glue Gun and Glue Sticks
- Scissors
Instructions
- Tie the end of the yarn to the wreath form.
- Wrap the yarn tightly around the entire wreath form.
- Complete covering the wreath form, using the entire bundle of yarn. Glue the end of the yarn to the wreath form.
- Cover the center of the frame with painter’s tape and then paint the outside of the frame. Let it completely dry. You may need to paint two coats.
- Fold the fleece scarf in half lengthwise and cut the scarf to 24 inches in length.
- Add hot glue to the backside of the frame.
- Add hot glue to the center of the scarf and then place the frame in the center of the fleece scarf. Press firmly so that is adheres to the fabric. Allow the glue to dry.
- Add hot glue to one of the ends of the scarf and press it firmly to the backside of the wreath. Stretch the scarf across the front of the wreath and then glue down the other side to the back of the wreath.
Meet the Creator
Hi there, I’m Sarah Nenni-Daher. I’m a crafty gal and always have at least 14 projects going at once. I am a crafter, designer, DIYer, and pattern maker. I share my creations here and in the Ruffles and Rain Boots® Shop.
Here at Ruffles and Rain Boots®, you’ll find DIY gnomes, crafts, gifts, cupcakes, laser crafts, and so much more. I love sharing video tutorials over on YouTube and chatting with other crafters in my Facebook groups. We’d love to have you!