
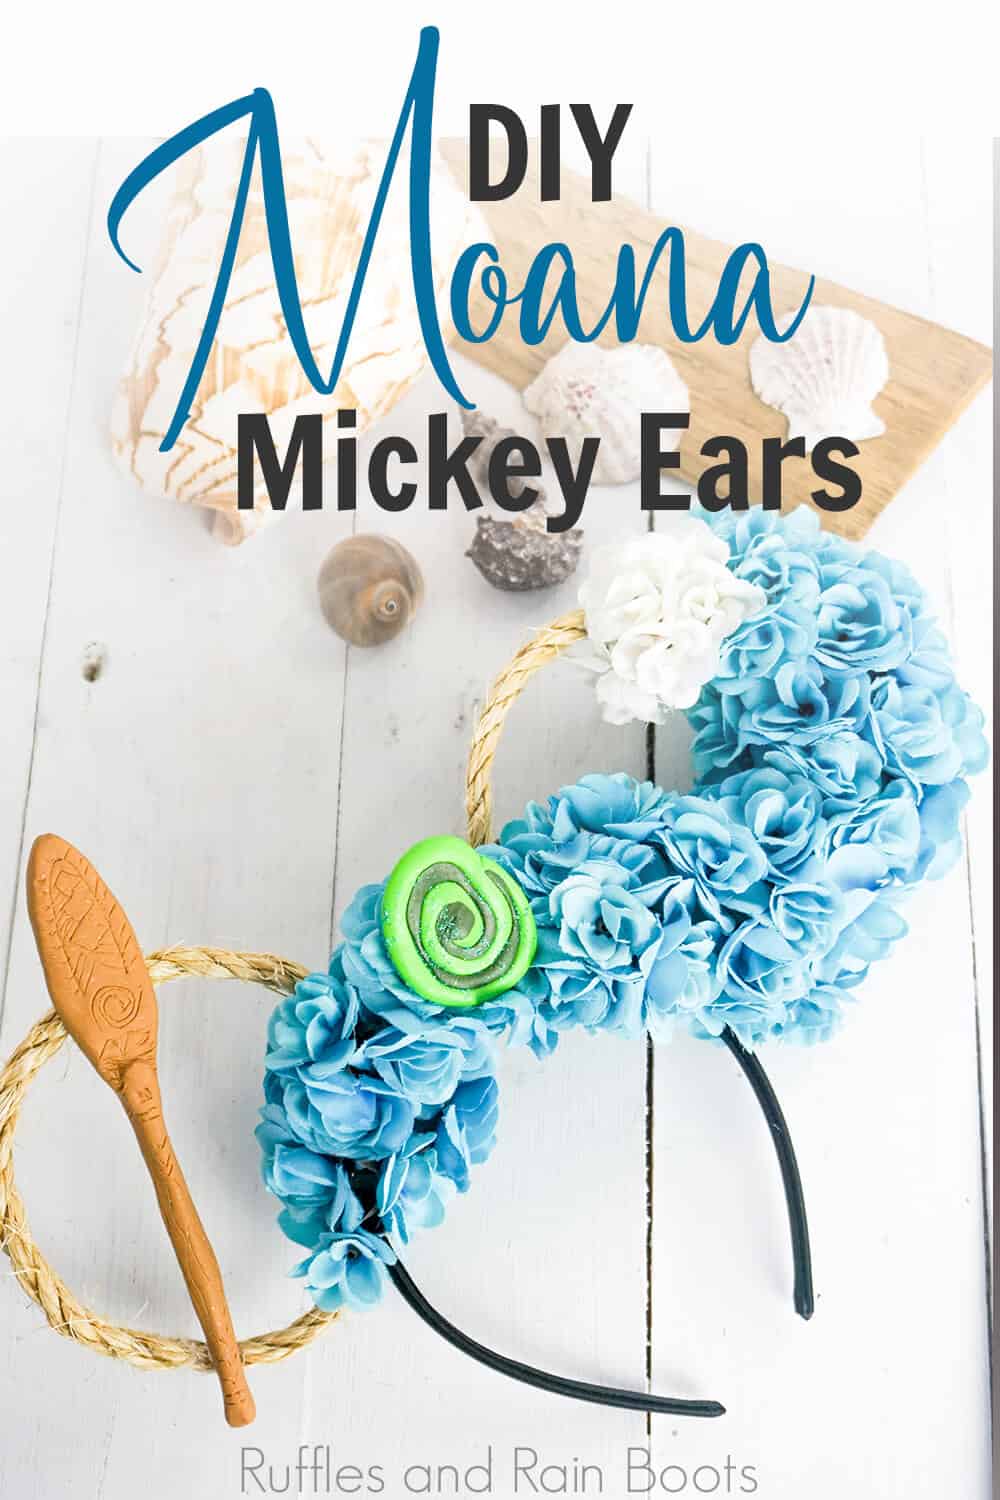
Ride the Wave with these Gorgeous DIY Moana Mickey Ears for Disney
I can’t help but be excited. These beautiful floral DIY Moana Mickey Ears are everything I’d hoped and more–and still they call me! I want to wear these Moana Mickey ears for Disney ALWAYS!
DIY Moana Mickey Ears
Here at Ruffles and Rain Boots, we absolutely love making all our favorite Mickey ears for Disney. It’s just so fun to see the best parts of the best characters come to life in a pair of Minnie ears we can wear at the park, on Disney cruises, or anywhere Mickey ears are welcome. Seriously–my kid sometimes wears hers to the park.
RELATED READING: DISNEY VILLAIN MICKEY EARS
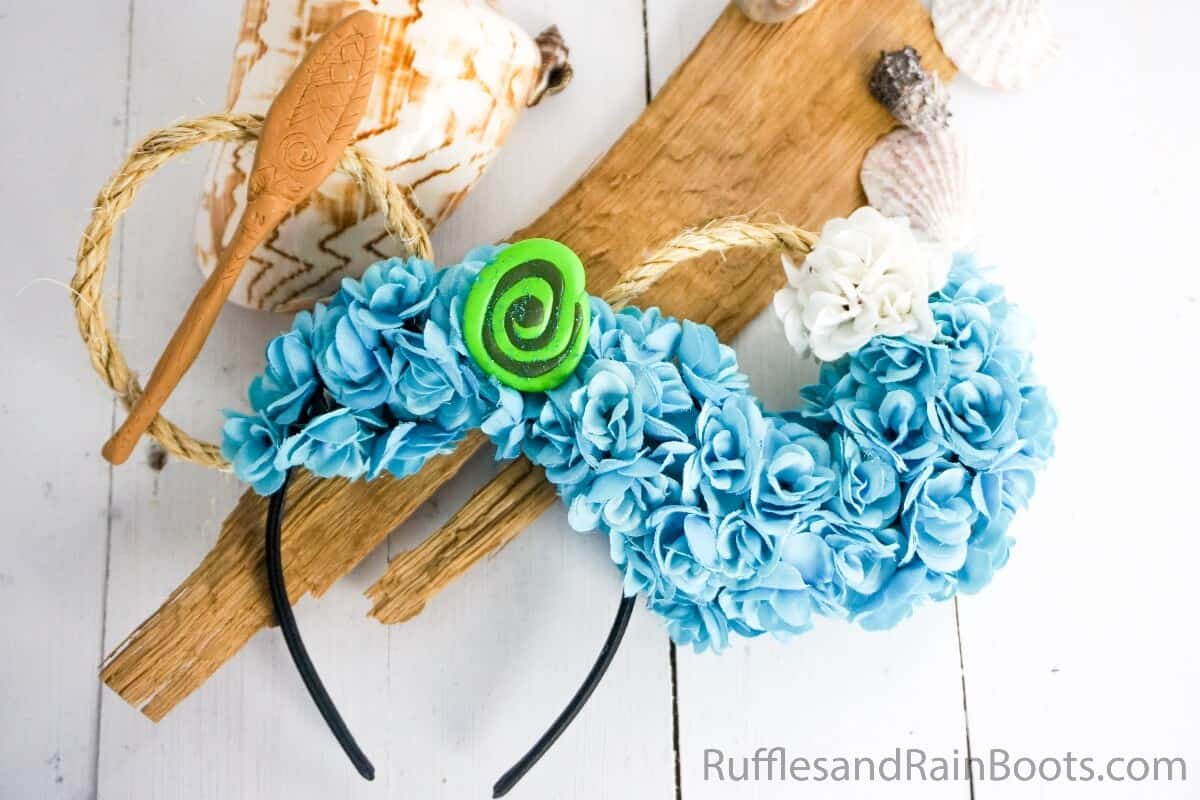
One of the BEST I just finished making and I’m SO PROUD of is these beautiful floral DIY Moana Mickey ears. They’re elegant, they’re totally on-theme with the rope, the oar, the flowers, the wave, and oh, yeah, the Heart of Tefiti. I seriously couldn’t love these Moana Mickey ears for Disney more. Let’s get started.
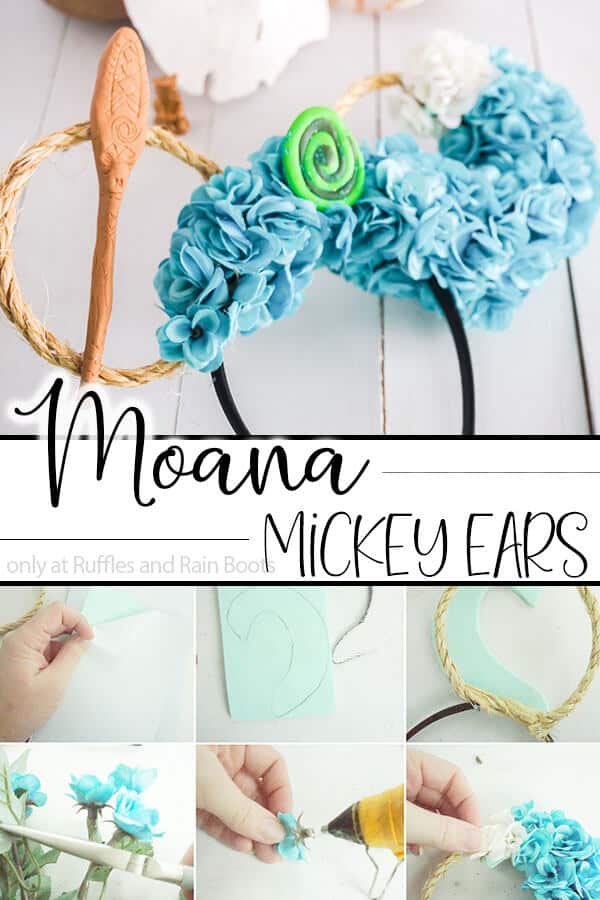
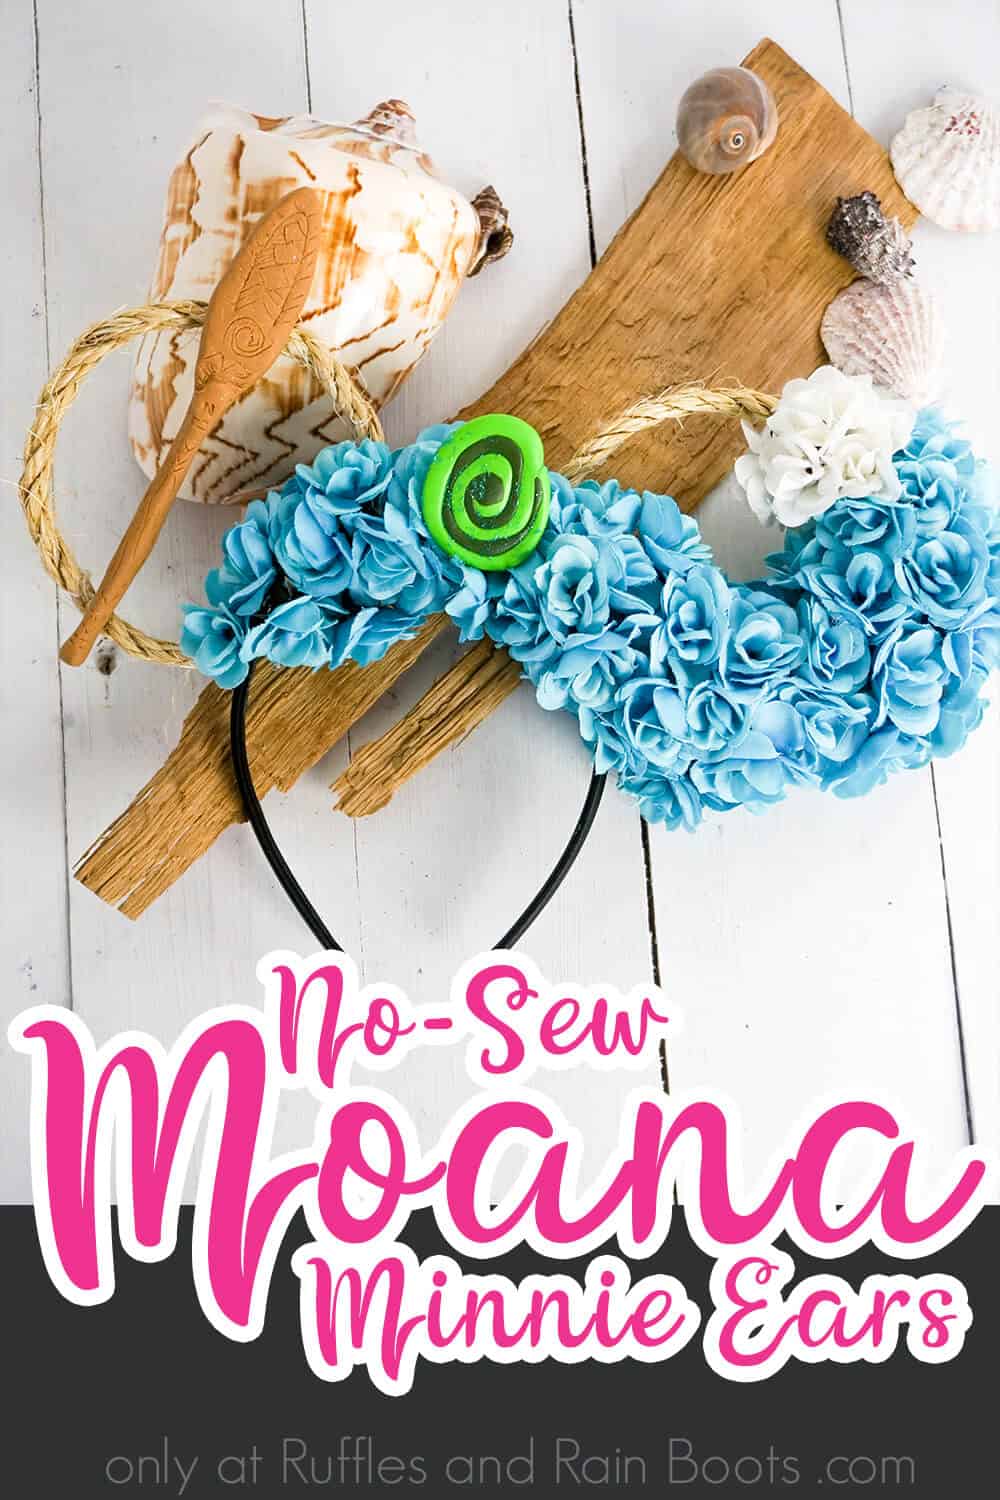
No Time to Make This Now? Pin it for Later
You’re busy, I get it. Pin this to your favorite DIY Disney Princess Mickey ears board on Pinterest and it’ll be here for when you’re ready.
Tips to Make Moana Mickey Ears for Disney
- Get your free printable wave form template here.
- You don’t HAVE to use foam sheets for the wave form. You can try to wing it, but your wave might not have a perfect shape and then you’ll have sad looking DIY Moana Mickey ears. You can try to use cardboard, but your cardboard might show through if the flowers don’t meet up just right. So, you have some options, but just think before you skip the foam sheets.
- Cut all the flowers off to the nub. I know it’s a pain, but you don’t want any to stick out more than the others and you really don’t need the flowers to hang off. Easiest to just trim at the nub.
- When you’re unraveling the rope for these Moana Mickey ears for Disney, don’t try to do more than a couple of inches at a time. And should the twine not be interested in twisting itself back nicely after you insert the wire, you can add a dab of hot glue to make it stay better.
How Do I Make DIY Moana Mickey Ears?
I’m so glad you asked. Below is our written tutorial. If you’re making a DIY Disney Princess Mickey ears playlist on YouTube, here is our DIY Moana Mickey ears video tutorial.
DIY Moana Mickey Ears

I can't help but be excited. These beautiful floral DIY Moana Mickey Ears are everything I'd hoped and more--and still they call me! I want to wear these Moana Mickey ears for Disney ALWAYS!
Materials
- Black Headband
- Floral Wire
- 20-30 Miniature Peony, Teal Blue
- 5-10 Miniature Peony, White
- Rope Twine
- 2 Blue or Light Blue Foam Sheets
- Polymer Clay in green, black, brown, and white
- Printable Pattern
Tools
- Round Form (about 4-inches in diameter like a large cup or paint roll)
- Scissors
- Wire Cutters
- Hot Glue Gun and Hot Glue
- Wax Paper
- Baking Sheet
- Oven
Instructions
- Preheat the oven according to clay's package directions. To make the Heart of Tefiti, roll a quarter-sized portion of green polymer clay into a thin cylinder with one narrow end and lay it flat on your wax paper.
- Mix 1/4 dime-sized portion of black polymer clay with 1/2 quarter-sized portion of green polymer clay until the color is consistent throughout. Roll this dark green into a thin cylinder with one narrow end and lay it beside the lighter green cylinder, with the narrower ends side-by-side.
- Beginning at the narrower end, roll the green and dark green cylinders into a flat spiral together. Smush the end into the side and make sure the dark green is not touching the outside edge. Place on the wax paper on the baking sheet and set aside.
- To make the oar from clay, mix 2 quarter-sized portions of brown polymer clay with 1 quarter-sized portion of white polymer clay until the color is consistent throughout.
- Roll into a thick cylinder about 4-inches long. Flatten and lengthen one end into a rounded point. Roll the other end and lengthen to make a cylinder. Lay this shape flat on your wax paper on your baking sheet. Using the flat side of a butter knife, trace shapes into the oar like arrows, a swirl pattern, lines, etc.
- Bake oar and Heart of Tefiti per the directions on your polymer clay package.
- Allow to cool completely before touching.
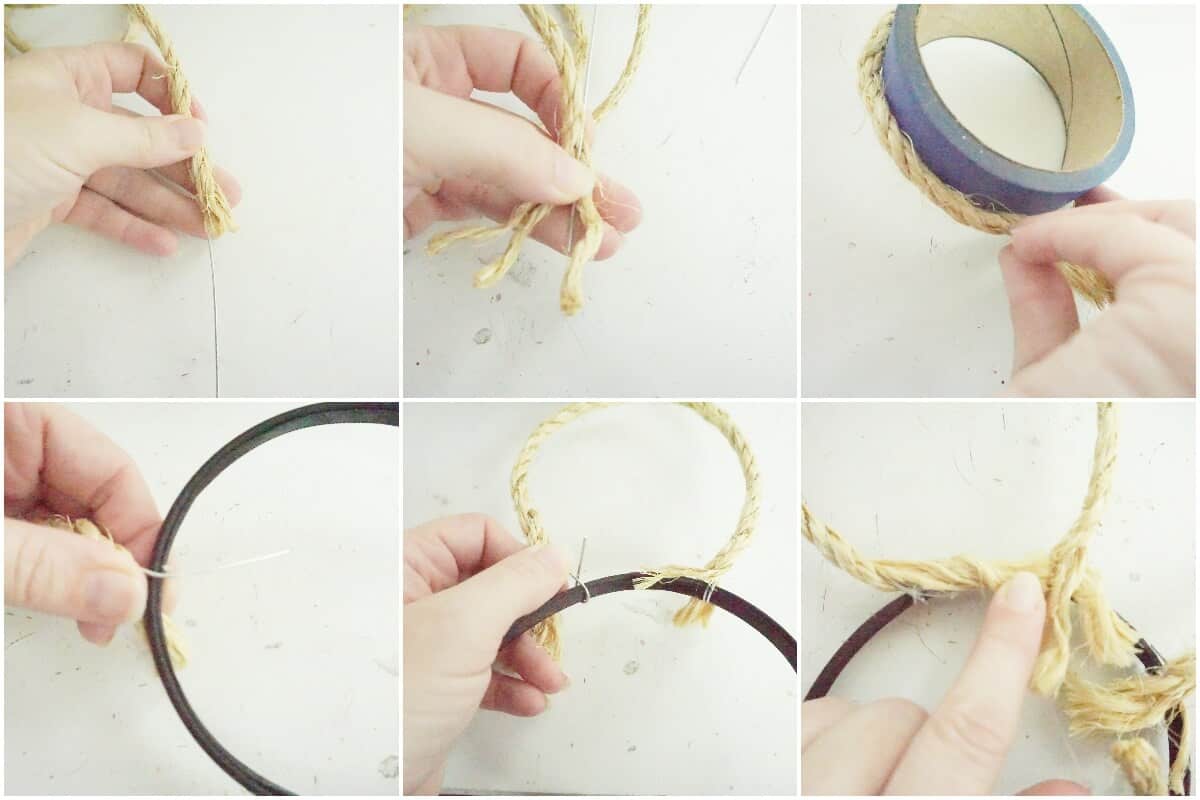
- To make the ears, start by finding a shape that is about 4-inches in outer diameter. Cups, unless very large, are generally too small. I found a roll of tape that was about the right size (you can also use a compass).
- Unroll a portion of rope twine about the length necessary for one entire 4-inch diameter circle (not just the shape of the ear, but the bottom, too), however, mark the location where you want the ear shape to stop, as this is where you will complete your wire-insertion (known as the “stopping point of the ear shape” below).
- Untwist a portion of the rope about 2-inches long and insert between them a piece of wire, leaving about 2-inches of wire exposed past the end of the rope. Retwist the twine over the wire, ensuring the wire is tucked in the center. Repeat in 2-inch sections with the length of rope portion up to the “stopping point of the ear shape." Trim wire to be about 2-inches longer than the “stopping point of the ear shape.”
- Repeat wrapping twine around wire exercise for the second ear shape.
- Wrap wired ear around your form and make the ear shape. Be sure to wrap the wire exposed wire around the headband stopping on the top side to protect the wearer. You can also hot glue this, covering the sharp point, to further protect the wearer from an unwanted poke.
- Hot glue un-wired portion of rope to the top of the headband on the back, further strengthening the connection of the ear to the headband and completing the rope circle. Trim any unnecessary rope twine remaining.

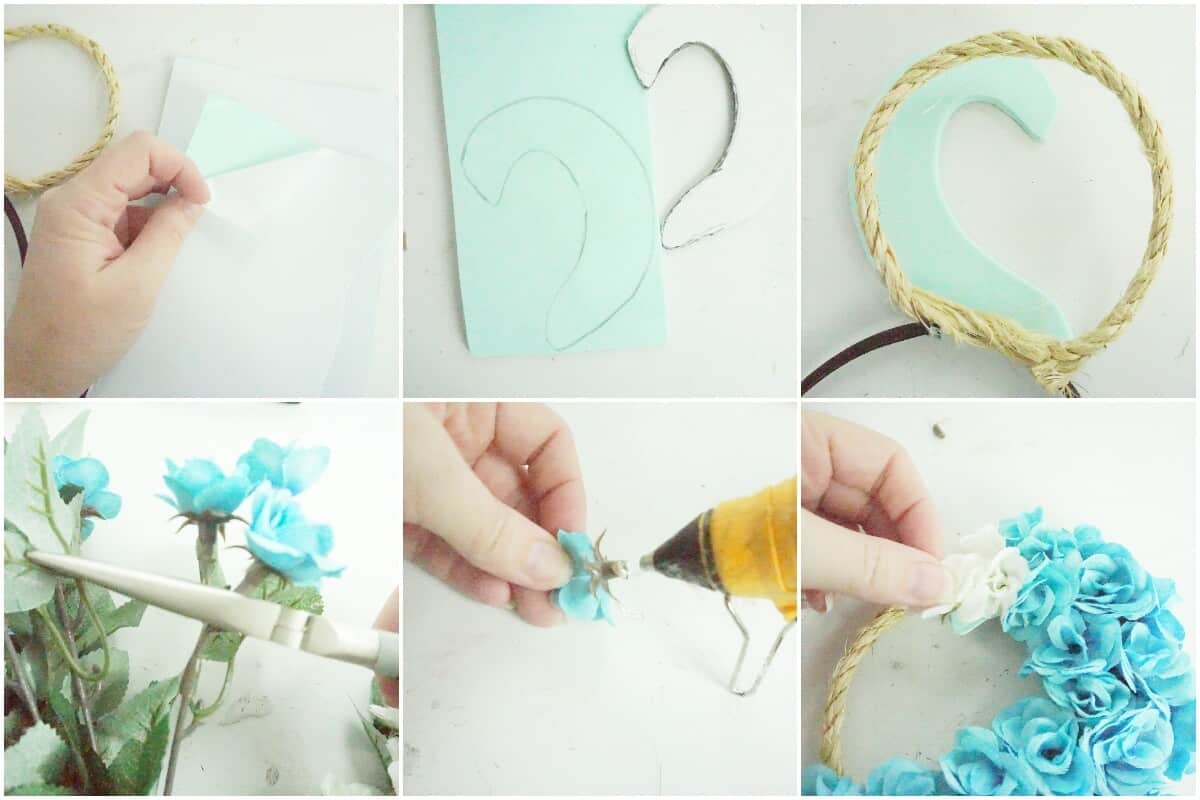
- Cut the wave shape from the free printable pattern. Remove the backing from each of the foam sheets and stick them together evenly. Trace the wave shape onto the front of one of the foam sheets and cut it out. Hot glue the wave shape form onto the desired ear on the side and bottom.
- Trim all flower stems to ¼-inch long, both for consistency and so they don’t stick out from the ears very much.
- Hot glue blue flowers on the front of the ears across the bottom and side of the wave shape form, leaving the remaining 1 ½-inch portion of the wave’s top bare (for the white flowers).
- Flip the ears and hot glue blue flowers on the back of the ears across the bottom and side of the wave shape form, leaving the remaining 1 ½-inch portion of the wave’s top bare (for the white flowers).
- Hot glue white flowers on the front and back of the wave shape portion that is still bare. Fill in any holes with smaller flowers. Add additional blue flowers across to the other ear on the front and back of the headband, as desired.
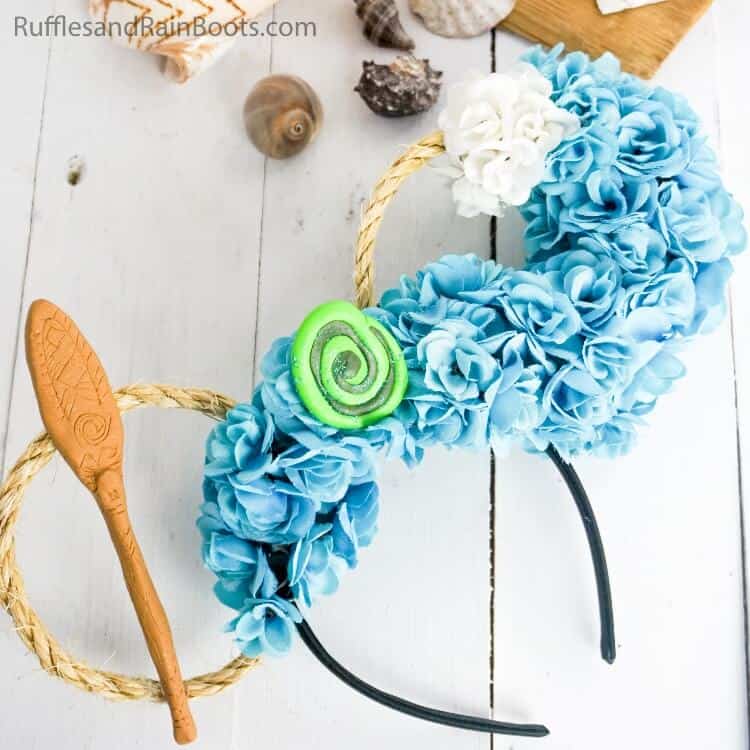
- Hot glue oar in place across the ear opposite of the wave. Hot glue Heart of Tefiti in the center of the ears amid the wave flowers.
Notes
For more fun Disney Princess Mickey ears, visit RufflesandRainBoots.com
Creativity, Delivered
Would you like inspiration delivered right to you each week? Sign up for the once-weekly Ruffles and Rain Boots newsletter and you’ll get that and more! Get access to the exclusive libraries full of free SVGs, hand lettering practice, and so much more.
More DIY Disney Princess Mickey Ears You Might Like
- The BEST Snow White Mickey Ears – The original Disney Princess, she’s everything a gentle princess should be–and these ears reflect that perfection!
- Princess Leia Mickey Ears – She IS a Disney princess. Fight me.
- Princess Jasmine Mickey Ears – All sorts of teal, sparkles, and a ton of fun, if Princess Jasmine is your favorite, these are the DIY Disney Princess Mickey ears for you!
Please Save This to Pinterest
Your shares are how this site grows and I am sincerely grateful. Know a friend who’d like this? Please share it on Facebook or save it to your favorite DIY Disney Princess Mickey ears board on Pinterest.
Meet the Creator
Hi there, I’m Sarah Nenni-Daher. I’m a crafty gal and always have at least 14 projects going at once. I am a crafter, designer, DIYer, and pattern maker. I share my creations here and in the Ruffles and Rain Boots® Shop.
Here at Ruffles and Rain Boots®, you’ll find DIY gnomes, crafts, gifts, cupcakes, laser crafts, and so much more. I love sharing video tutorials over on YouTube and chatting with other crafters in my Facebook groups. We’d love to have you!