
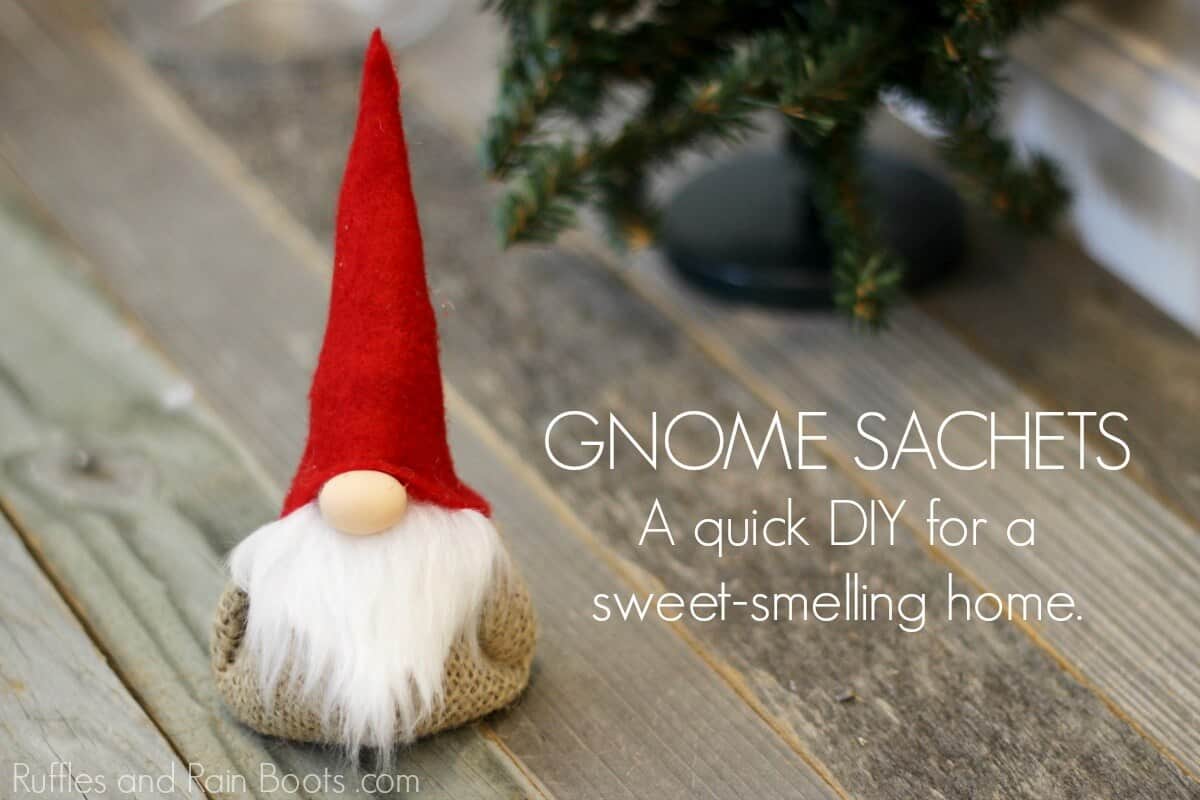
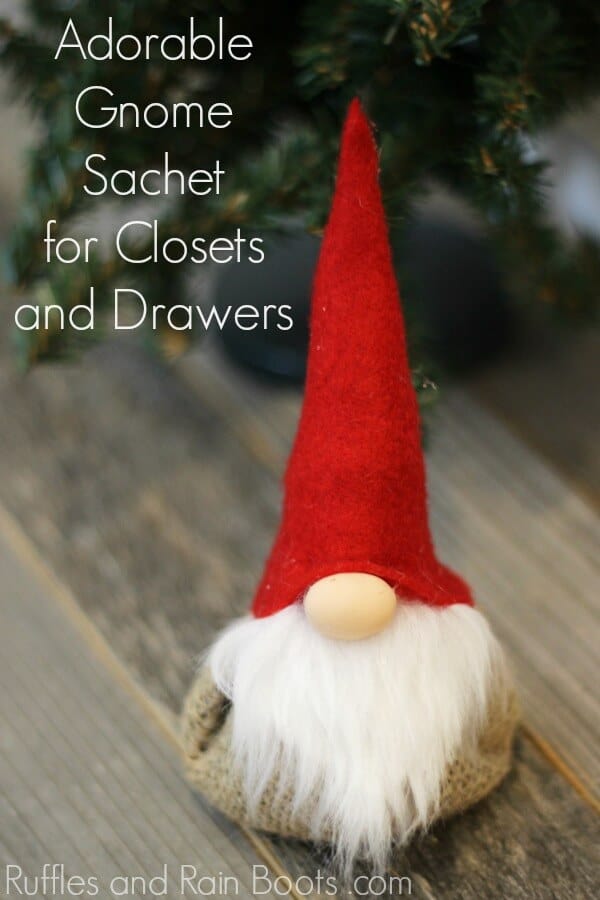
Gnome Lavender Sachet DIY
This gnome lavender sachet is adorable, smells great, and is a work-horse in a closet or drawer. It’s a quick craft that everyone will love and it requires no sewing, so grab your glue gun.
RELATED READING: DIY Sachet Gnomes for Fall
What You'll Find On This Page
DIY Felt Gnome Lavender Sachet
If you’re new to Ruffles and Rain Boots, I’ll let you in on a secret: I love making DIY gnomes. Scandinavian gnomes, Nordic gnomes – whatever you call them, they always make me smile. And it turns out, I’m not the only one who wants to add these cuties into their decor as gnomes have exploded in popularity over the last couple of years.
A friend of mine, Herchel, is going to share her adaptation of one of my little DIY gnomes. I hope you love it as much as I do.
My name is Herchel Scruggs, blogger behind Gym Craft Laundry and the maker behind the oh-so-adorable lavender sachet gnomes.
Last summer, my daughter and I adapted Sarah’s Scandinavian Christmas gnome tutorial into a hanging ornament to declutter our craft stash. We didn’t have clay at the time so my resourceful little helper used an Apple Jack (of the cereal variety) for the gnome’s nose. We had such a good time that we went out and bought clay to make a gnome that would last a bit longer and not attract bugs to the tree.
RELATED READING: Gym Craft Laundry’s Popular Burlap Angel Ornament
Reasons You Should Make This Gnome Lavender Sachet
Here are a few reasons you need these adorable little relaxation-inducing gnomes in your life:
- You’ll add creativity into your life without turning one of your kid’s rooms into a craft room. It’s an easy, quick craft that can be made with scraps.
- There’s always room for a sachet because life can be smelly. This gnome DIY makes it less so.
- Gnomes help you channel their hygge-inspired calming benefits (the lavender helps, too).
- This works in closets, drawers, and cars. See #2 (life is smelly).
- You can make this same craft into a sachet, an ornament, or even a package tag.
No Time to Make This Right Now? Save or Share for Later
If you need to gather up the supplies from your craft room or just want to share how fun this quick gnome craft is, save it to a fun pin board or share it to a crafting group on Facebook. It will be easy to find later.
As an Amazon associate, I can earn from qualifying purchases. There could be affiliate links within this article.
Before You Get Started with this Quick Gnome Craft
Here at Ruffles and Rain Boots, we make a LOT of gnome crafts. I love to share things I learn through a project, so here are a few tips:
- Use up your scraps! This is a scrap-busting project, so get creative with the materials you have in your stash. If you have dried rose petals, use those. If you have fabrics instead of felt, those will work, too!
- If all you have on hand is a wide-weave burlap, add a cheesecloth, muslin, or other thin fabric liner so the filling stays in place.
- When using a flimsy fabric (that won’t hold its shape like felt), stuff the gnome hat with Poly-fill or fabric scraps.
- If you don’t have any dried flowers on hand, no problem. Scent scraps or Poly-fill with essential oils.
More Gnome Crafts You Might Like
- Gnome Treat Jar – Grab a hot glue gun for this quick and easy craft that everyone just ooh’d and ahh’d over!
- DIY Welcome Mat with Gnome – You don’t need a cutting machine to make this adorable welcome mat, just the tricks I share here.
- Gnome Sayings – Want to make your own gift tags for any gnome crafts? Use these gnome sayings and puns.
Please Save or Share This
Your shares are how this site grows and I am sincerely grateful. Do you have a local craft group? Share this with them on Facebook and make it your next craft night project!
How to Make a Gnome Sachet
Below is the written tutorial for this quick scrap buster. If you want to add it to your Christmas crafts playlist on YouTube or are a visual learner, here is the gnome lavender sachet video tutorial.
DIY Gnome Lavender Sachet
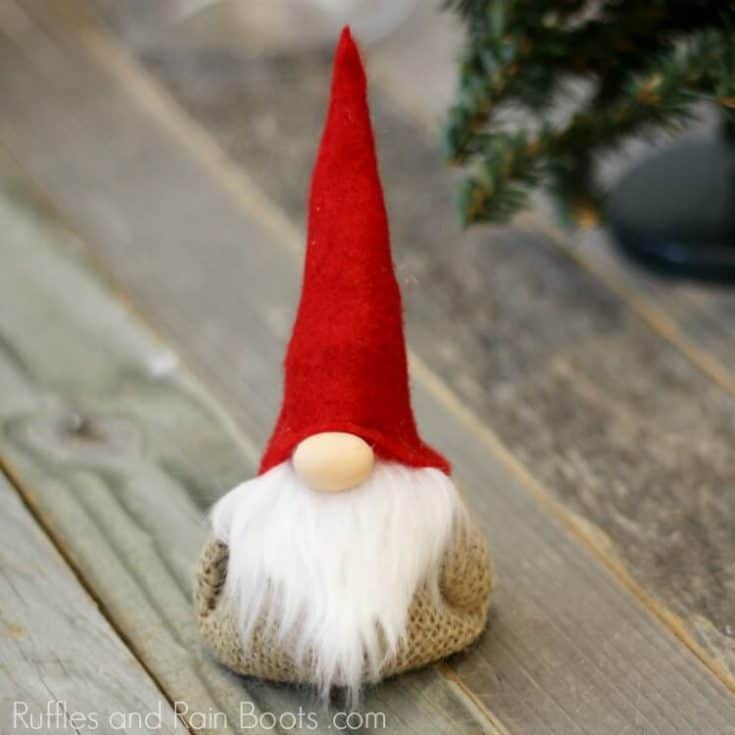
These no-sew gnome lavender sachets are done in no time and are the most adorable deodorizers ever! You'll be done in about 20-minutes, so let's get started.
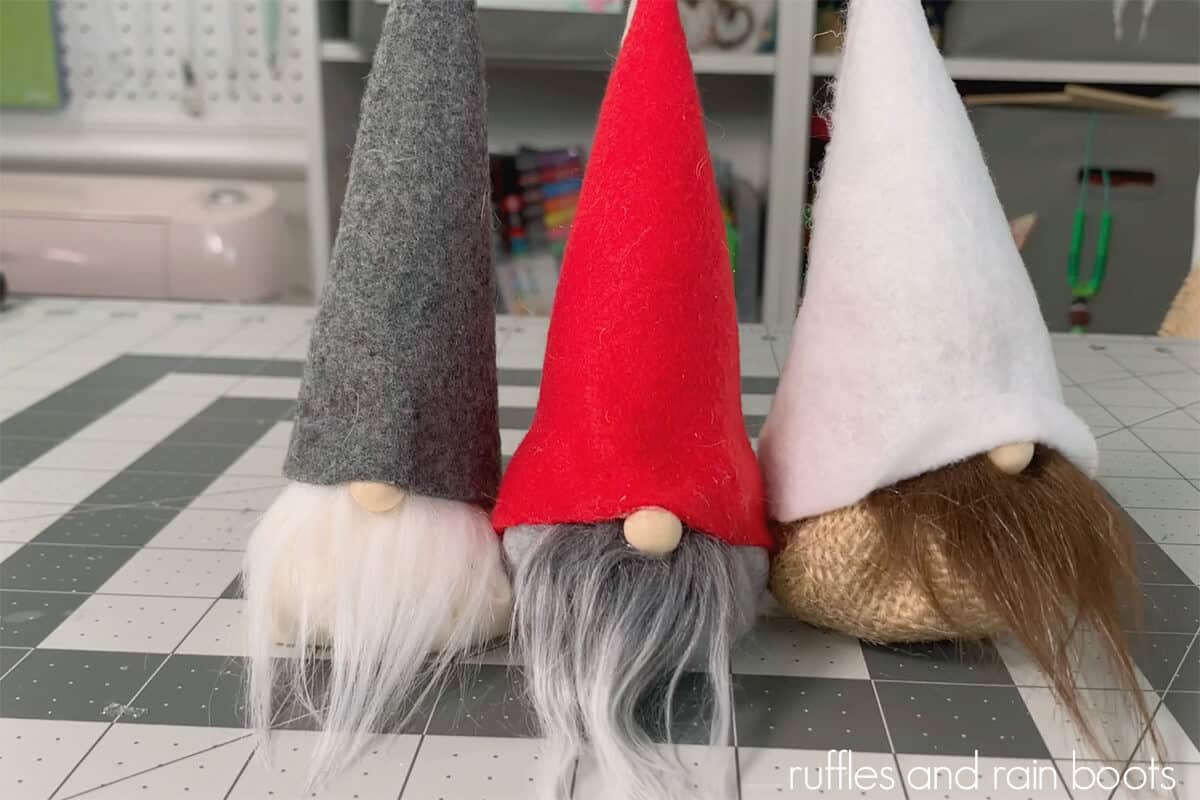
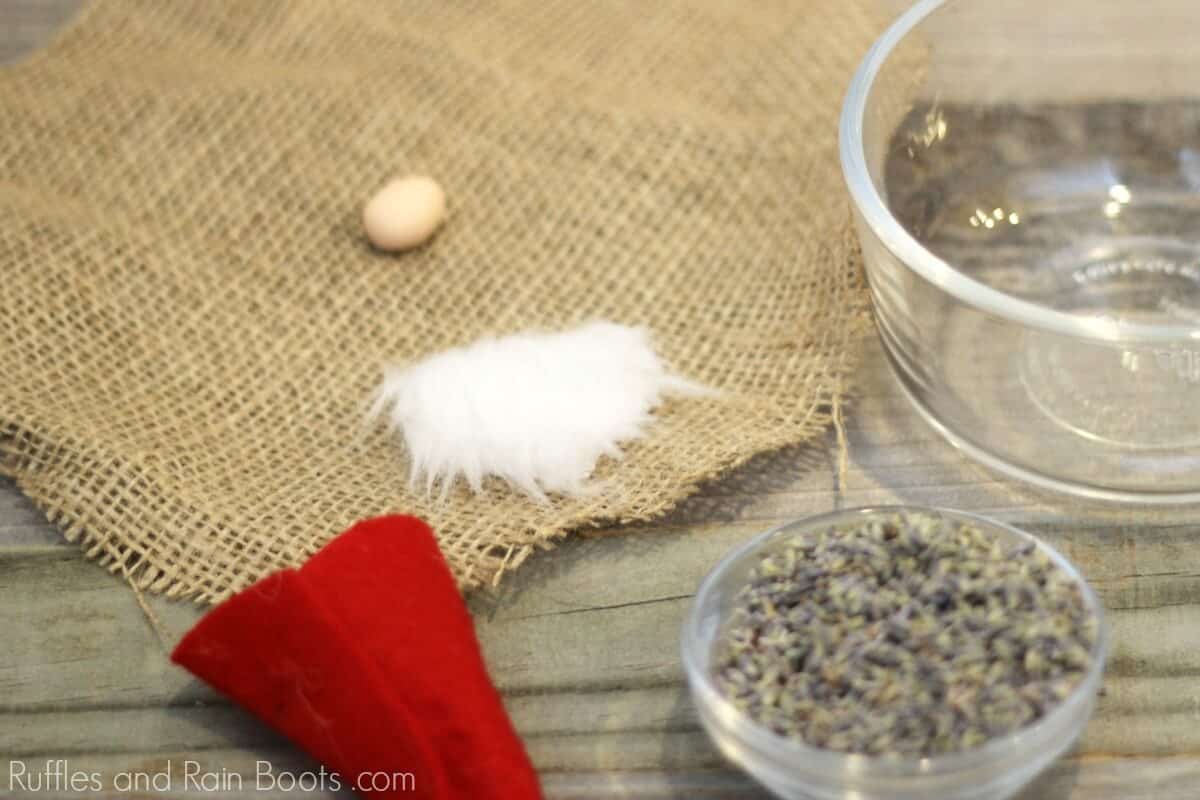
Materials
- felt for the hat
- burlap for the body (or cheesecloth)
- faux fur
- gnome nose (can be clay, beads, wood knobs)
- bowls (two sizes)
- 1/2 cup dried lavender (or rice scented with essential oil)
Tools
- scissors
- glue gun and sticks
- rubber band, small elastic, or twine to tie
- razor blade or craft knife to cut faux fur
Instructions
- I work best when I have all items cut and ready for use. Gather your supplies after checking your craft stash.

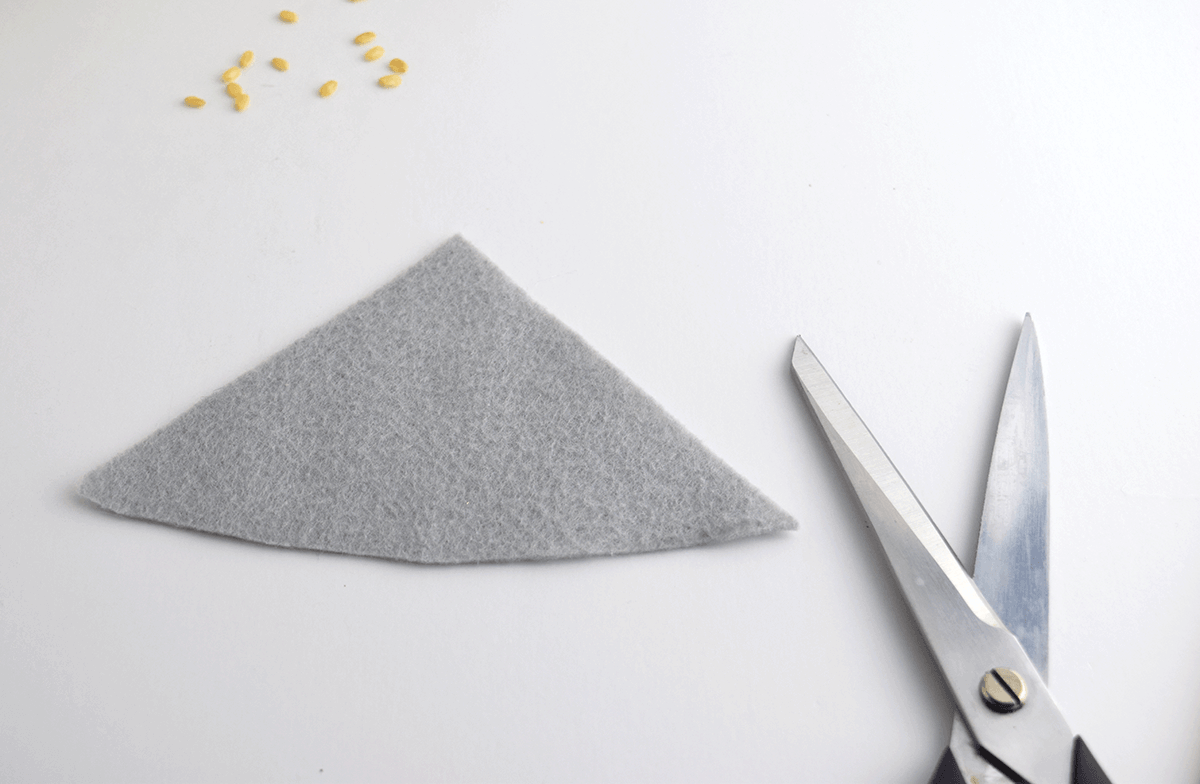
- Use the smaller bowl to cut a circle from your craft felt. Trim the sides to form a triangle with a slightly rounded bottom (image sourced from a previous project). Use hot glue to secure the edges to form a hat.

- Using a razor blade or craft knife, cut the backing of the faux fur into a triangle shape to form the beard.
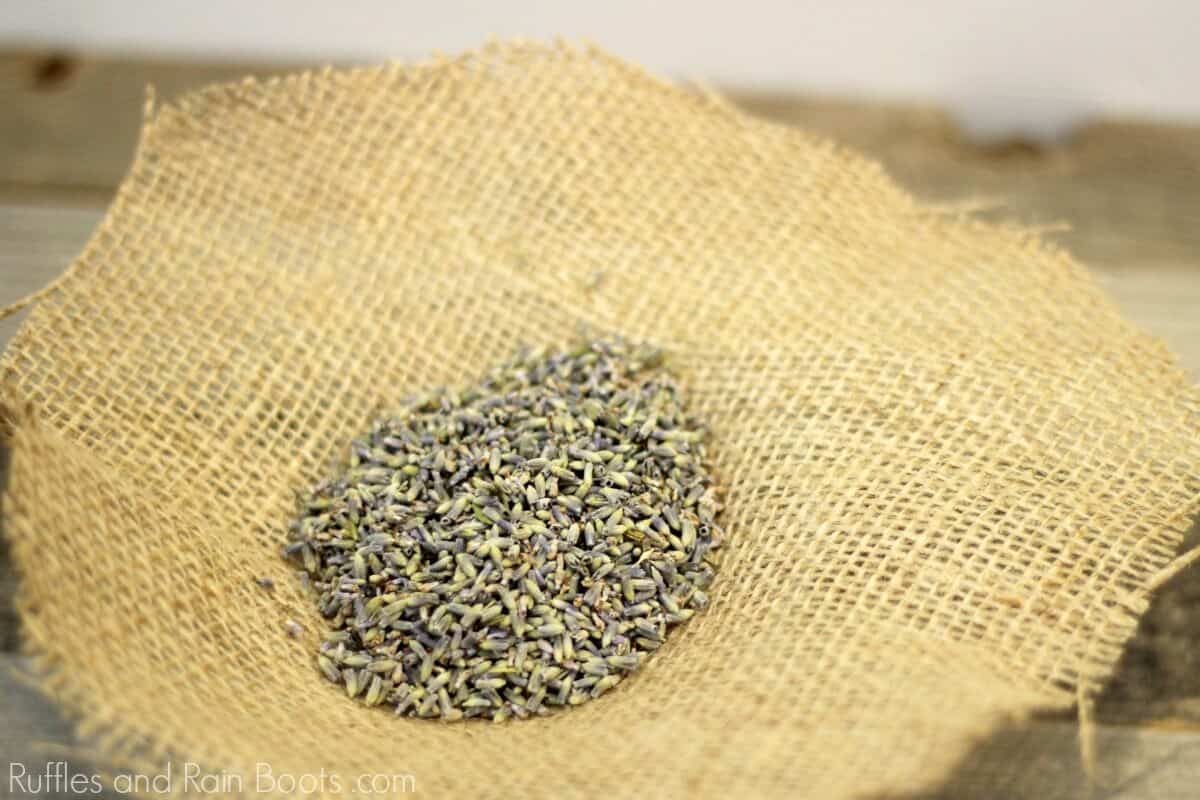
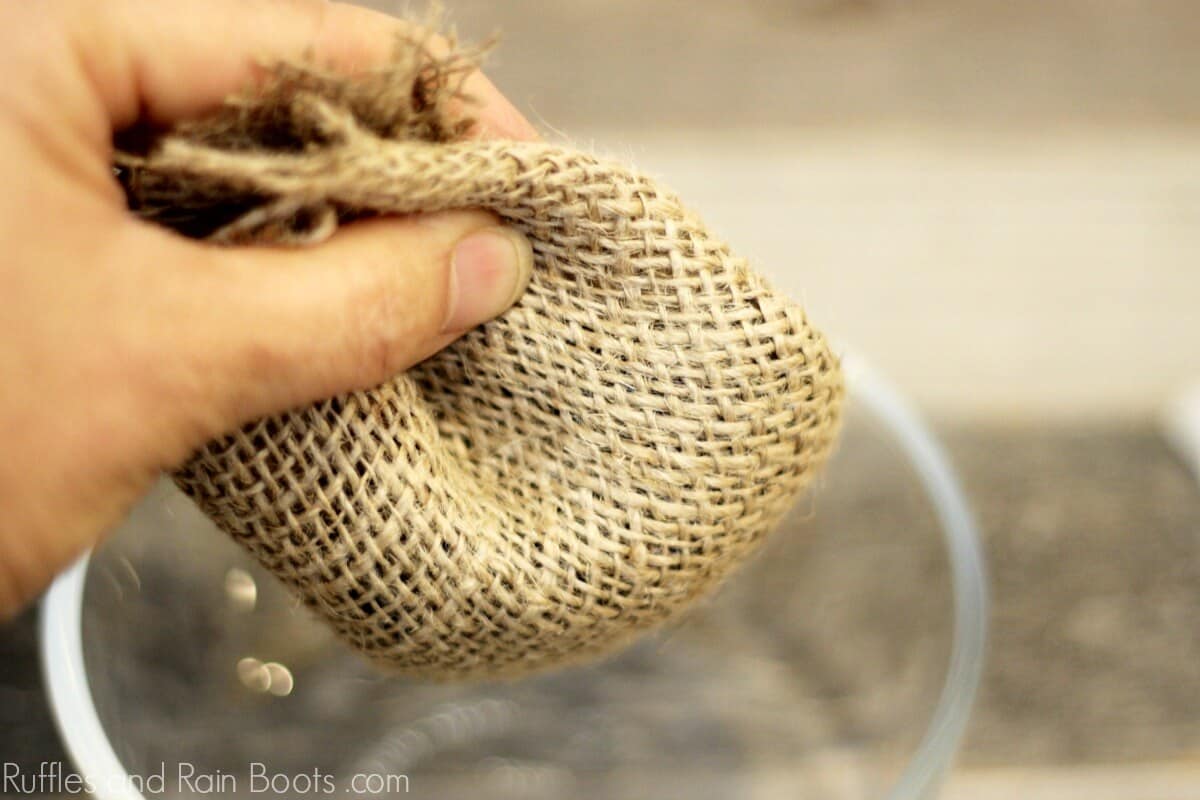
- Trace a circle using the large bowl onto the burlap or cheesecloth. This will form the gnome body we will scrunch and secure to hold our lavender.
- Place the burlap into a bowl and pour in the dried lavender.
- Gather up the edges of the fabric, pinch together, and secure with a rubber band.
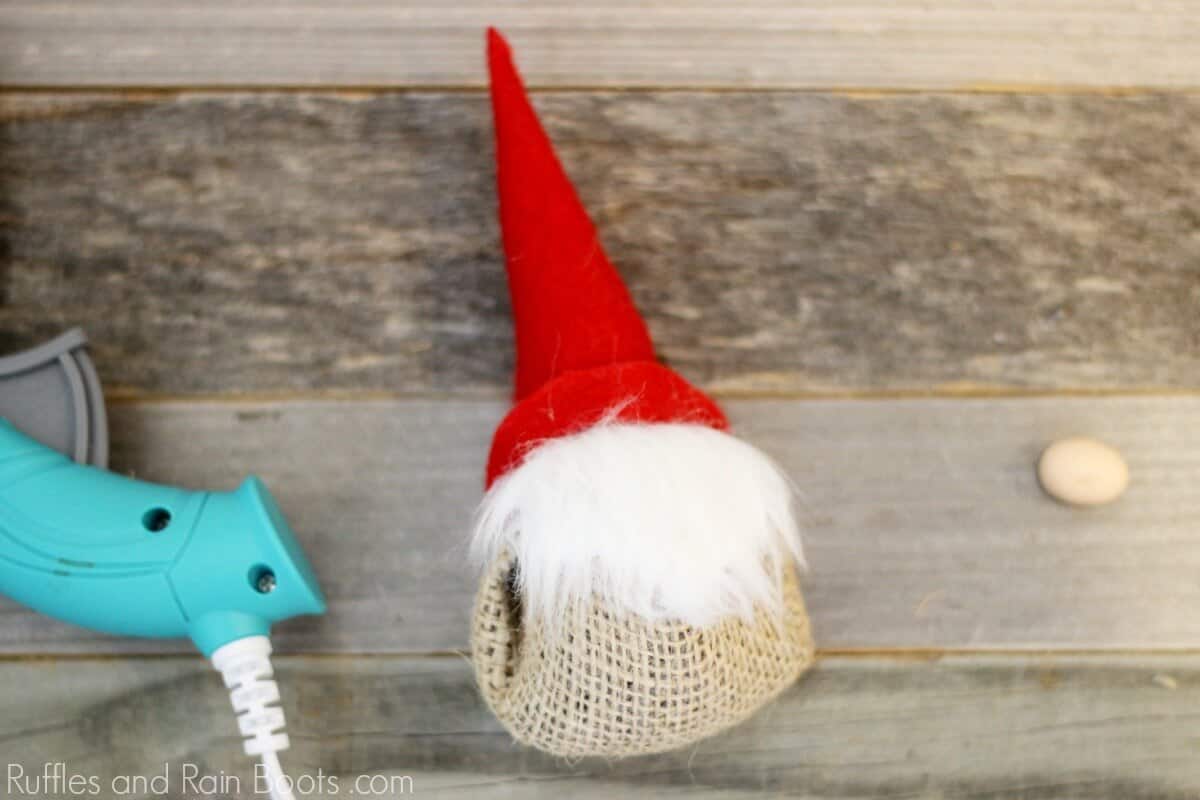
- Place the hat over the sachet. Add a small dab of hot glue in the back to secure it. Flip up the front brim.
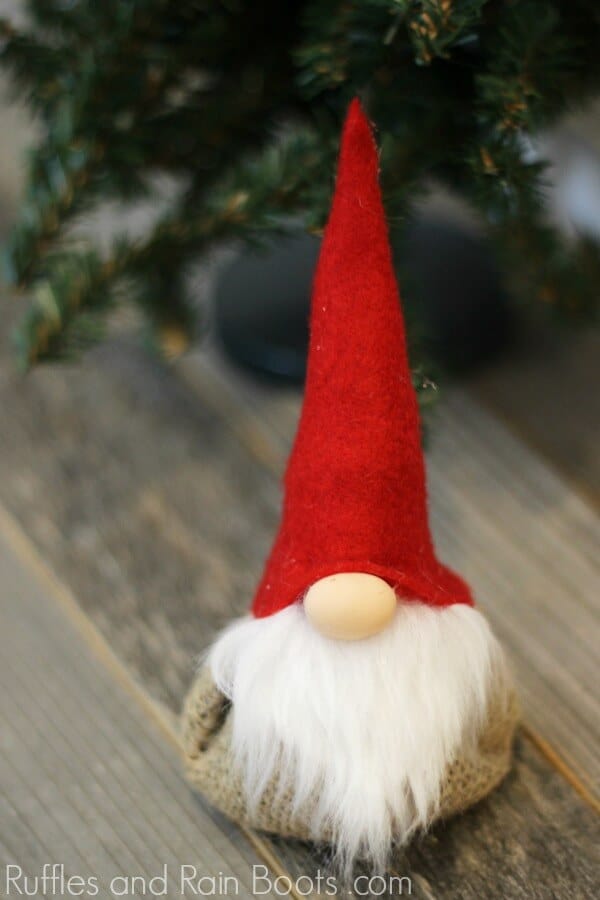
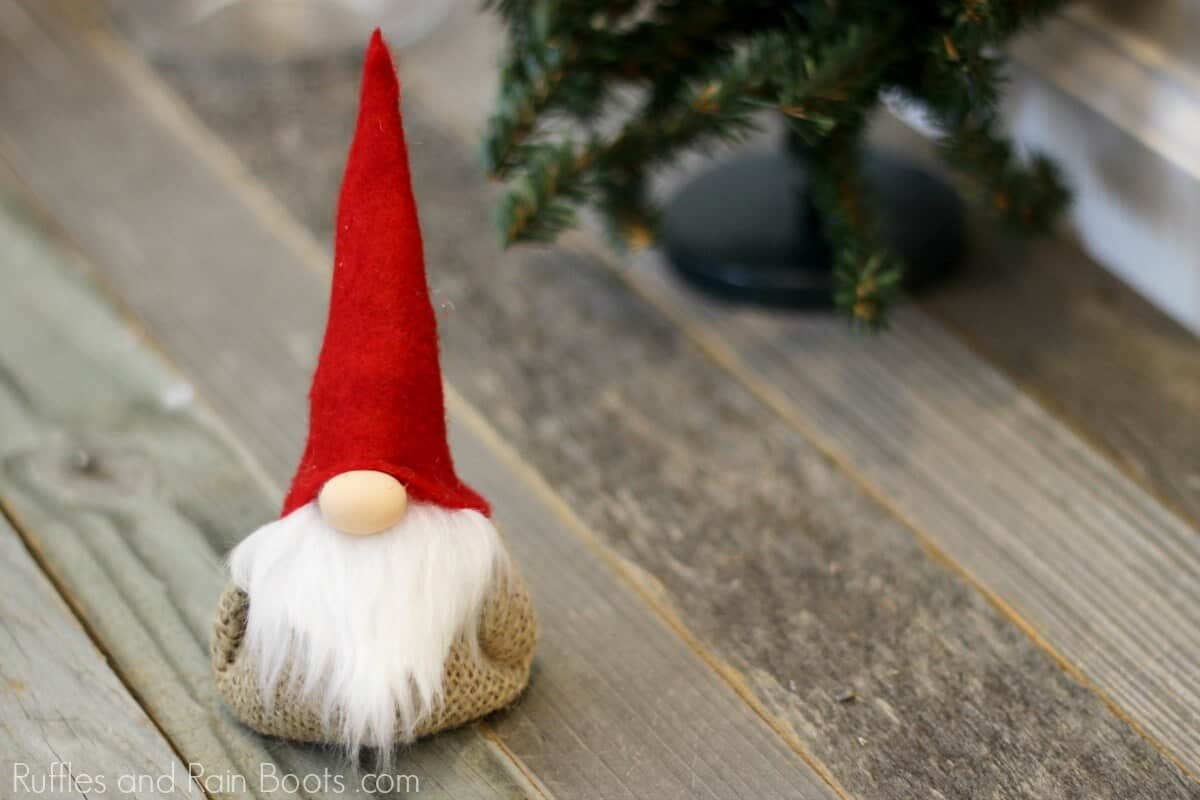
- Place the faux fur at the bottom edge of the flipped-up brim and secure with hot glue. Glue down the nose and flip the hat back into position (it should slightly cover the top of the nose and the entire top edge of the beard.
- You're done! Isn't he just the cutest gnome lavender sachet you've ever seen?

Notes
For more DIY gnome tutorials, visit Ruffles and Rain Boots.

Beautiful, I am going to make these Lavender Sachets for my family nd friends.