
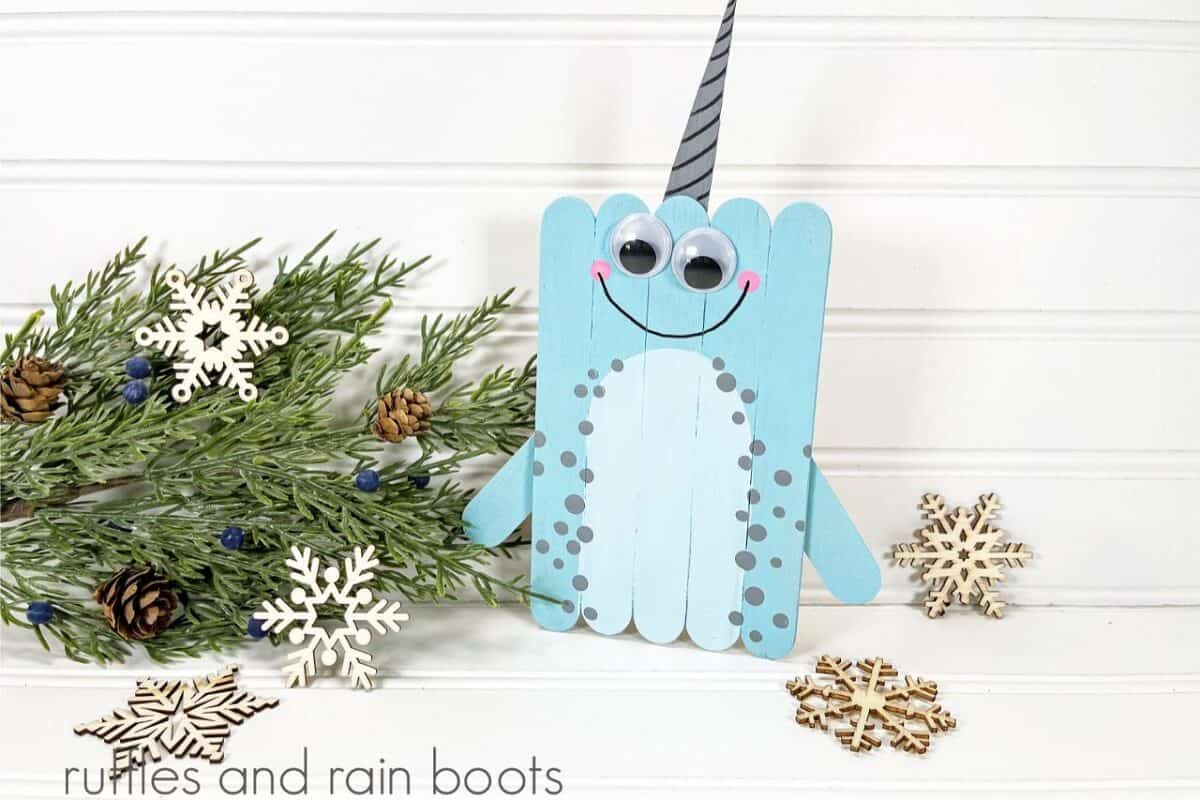
Dollar Tree Craft Stick Narwhal DIY
This adorable craft stick narwhal DIY is a fun way to spend some time with the kiddo. They will love helping you glue and paint this happy character from the Arctic Ocean group of animals.
Using simple supplies from the Dollar Tree or your craft bin, this Kawaii narwhal craft comes together in less than 30 minutes and will cost less than $2. If you’re working with very young children, be sure to read the tips to prepare for them.
RELATED READING: This Free Printable Narwhal Card is Too Cute!
What You'll Find On This Page
Dollar Tree DIY Craft
Here at Ruffles and Rain Boots, I love to peruse the local dollar store for craft supplies to make new projects. One of the reasons I love shopping here is that we are able to make more crafts for less money than we would at the big box craft stores.
If you’re working on the Arctic Ocean learning fun, are discussing Arctic animals, or you just have a child who loves cute narwhals like mine, this will be a hit. Add a string and hang it as a door ornament, tie it to a birthday gift, or use it as a puppet.
No Time to Make This Now? Save or Share This Super Cute Craft
If you need to gather some supplies, save this kid’s craft project to your favorite DIY pin board or share it on Facebook. Using the sharing buttons makes it easy when you are ready to make this easy and fun DIY.
As an Amazon Associate, I could earn from qualifying purchases. There may be affiliate links within this article.
Tips for Making A Craft Stick Narwhal
- If you don’t have a new pencil with an eraser handy to make the cheeks and spots on the Kawaii narwhal’s face, ask the kids to create a circle.
- If working with very young children, assemble the narwhal (including horn) and let them decorate.
- When using a glue gun to glue the craft sticks together, make sure the front of the narwhal where you will be painting is kept free of excess glue. You can paint over it, but it looks less appealing.
- By cutting down the craft sticks for the bodies, you can add a few baby narwhals to the family.
- If you have VERY young ones, you can set this up as a paper craft, as well. Use thick card stock for the body, glitter card stock or foam for the horn (tooth), and let them decorate.

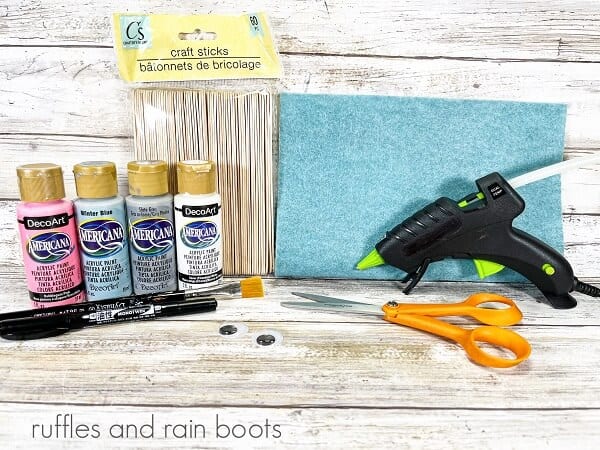
Supplies for the Craft Stick Narwhal
Below are the supplies I used for this fun animal craft idea. I’ll also add some alternatives to give you some ideas on how to use up what might be in your supplies already.
- Wooden Craft Sticks (I used jumbo)
- Wiggle Eyes
- White, Light Blue, Grey, and Pink Craft Paint
- Glue Gun and Glue Sticks (can use a kid-safe glue but it will need to dry)
- Paintbrush
- Scissors
- Marker
- 2 New Pencils (optional)
- Ruler
How to Make a Dollar Tree Narwhal Craft
Each step for this adorable narwhal craft for kids is detailed below so it’s easy to follow. Keep this page open while you are creating the Dollar Tree craft project. If you would rather have a printable how-to, scroll down and select the print button.
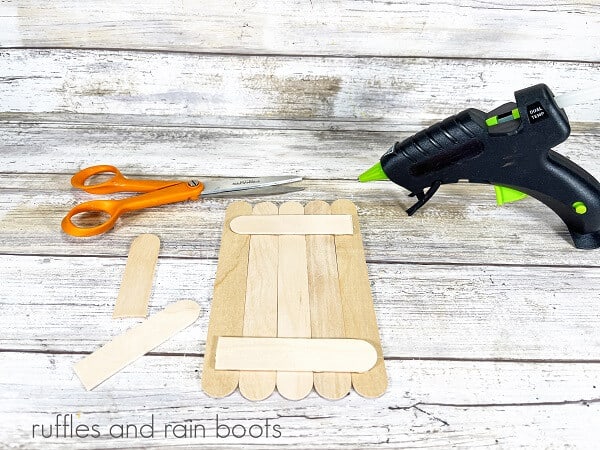
Line up five craft sticks and cut one in half. Glue the sticks together using the glue gun, placing a half stick at the top and bottom.

Cut two craft sticks lengthwise in half with scissors. Cut one of the pieces into a triangle by snipping of the edges (more at the top than the bottom). Two of the remaining three pieces will become the fins.
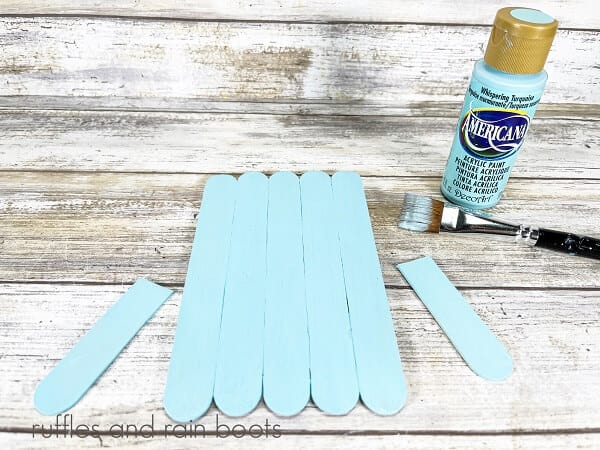
Paint the body and fins with light blue acrylic craft paint.

With the grey acrylic craft paint, paint the narwhal’s tusk.

Paint a large arch to create the Narwhal’s belly using a paler blue. I mixed the blue used on the body with a bit of white paint.

Attach the tusk to the top back of the body and the fins to the sides using the glue gun.

Attach two wiggle eyes and paint the cheeks. Kids LOVE using the end of a pencil for this – dip the eraser into some pink acrylic craft paint and use it as a stamp.

Dip a pencil eraser into grey acrylic craft paint and stamp circles. We varied the spots in size.

Using a black marker, draw a smile and lines on the tusk.
Notes for Making A Craft Stick DIY
- For smaller hands, you can use school glue or tacky glue instead of a hot glue gun. Build in time to allow the pieces to dry before moving on to the next step.
- Wooden craft sticks are semi-porous, so they will absorb the first coat of paint quickly. A second coat may be needed if a darker color is desired.
- When cutting craft sticks, do so cautiously as they can splinter apart.
More Craft Projects and Treats You May Enjoy
- Easy Narwhal Cupcakes: Your day is not complete until you see these chunky, ridiculously easy cupcake cuties!
- Felt Charmander Craft: Make this fun craft with the kids or make it on your own if you’re a Pokemon fan.
- Fun and Easy Watercolor Gnome Bookmark Craft: Make these pretty bookmarks by drawing gnomes from basic shapes and turning them into a fun DIY or gift idea.
Please Save or Share
Your shares are how this site grows and I sincerely appreciate it. Please save this Dollar Tree craft project to your favorite DIY pin board or share it on Facebook.

Craft Stick Narwhal
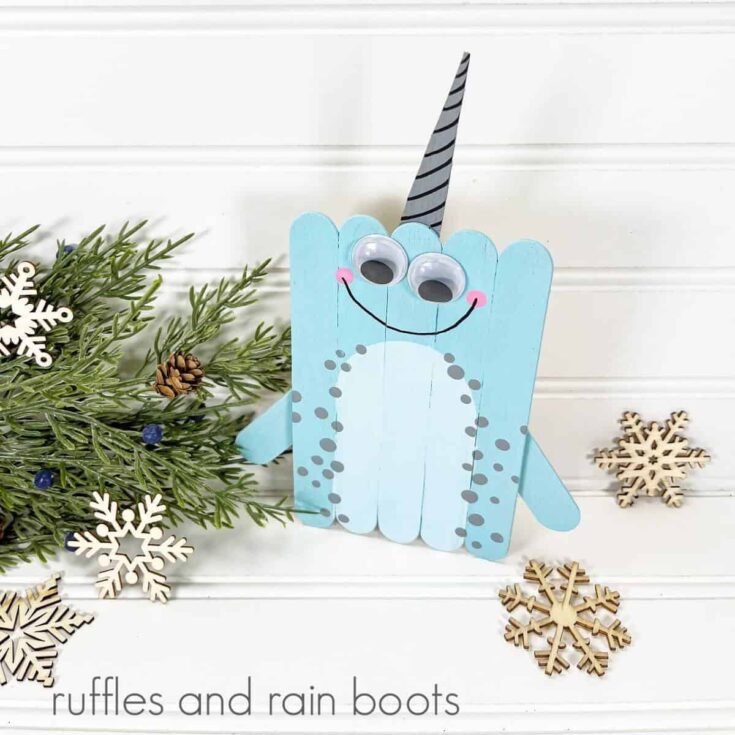
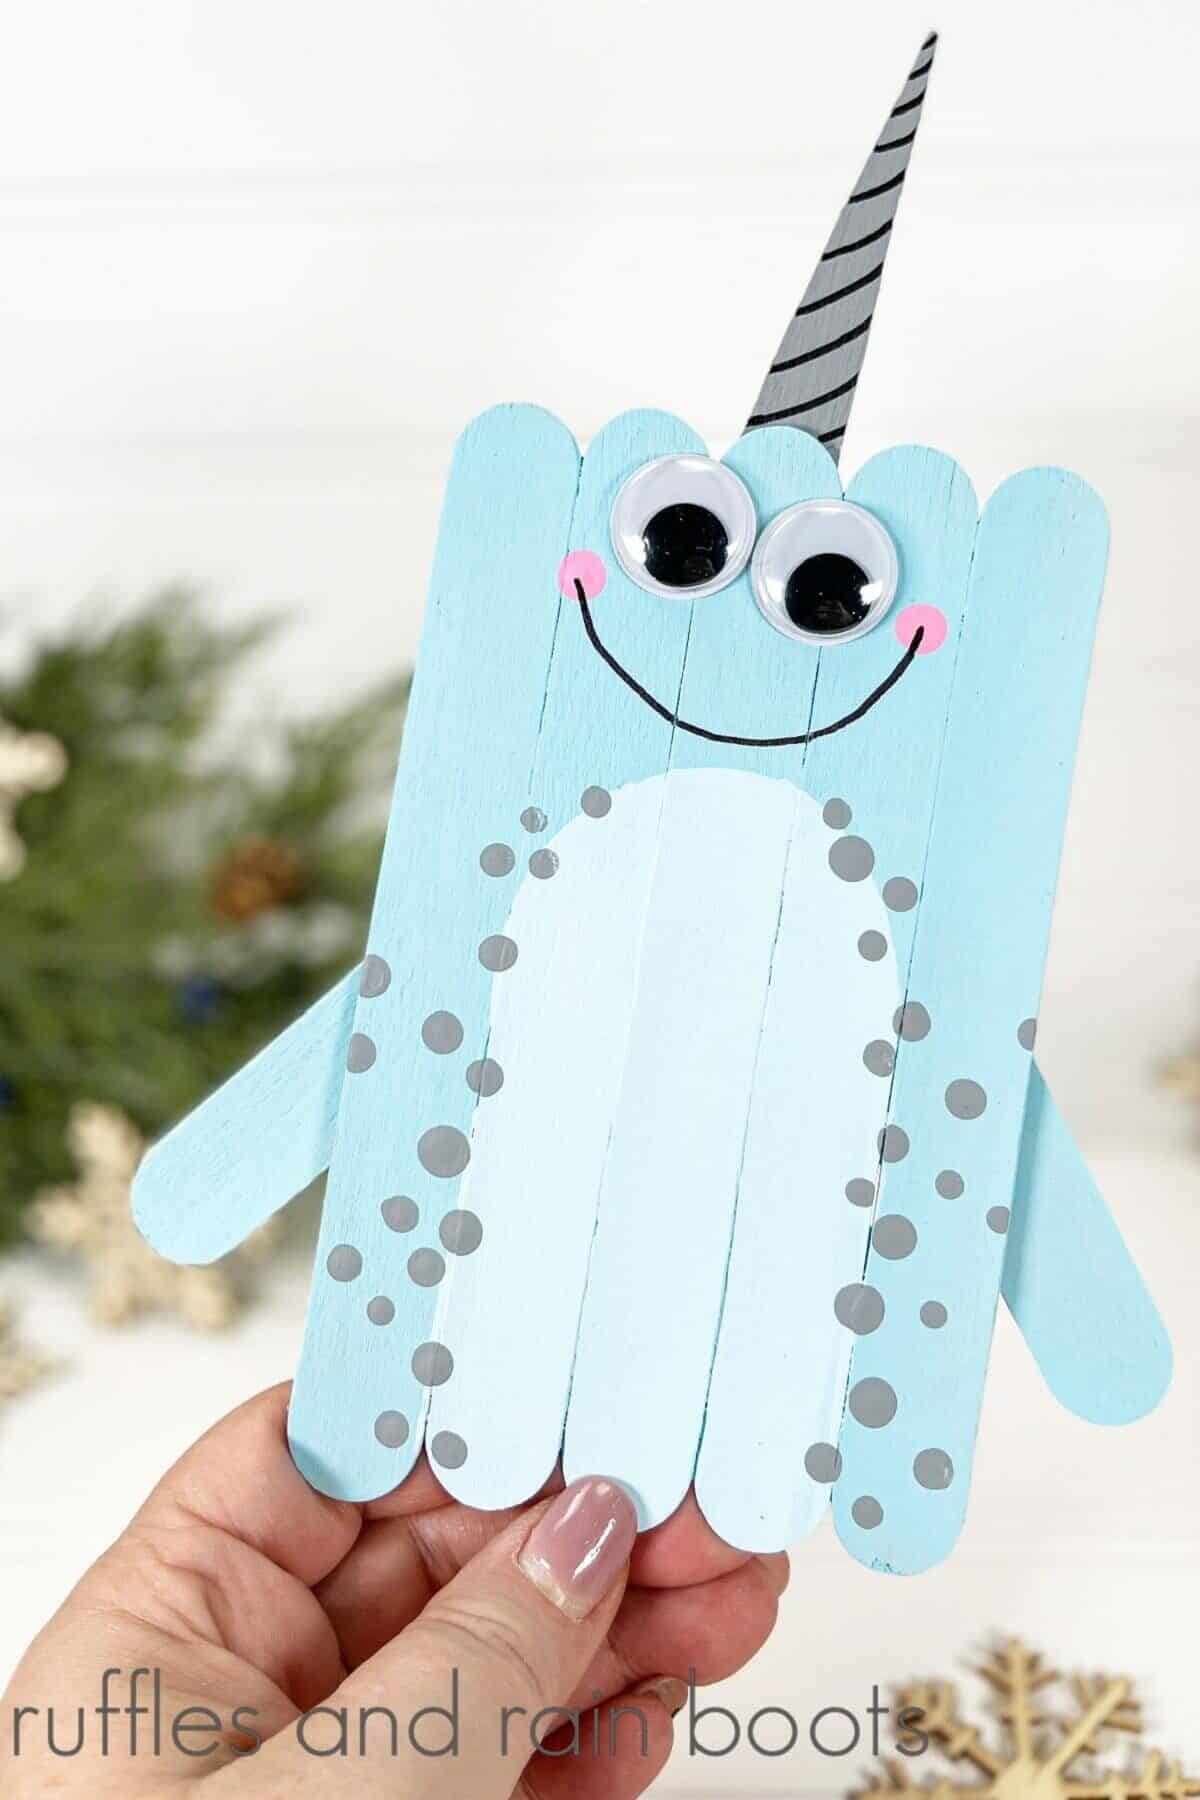
You can make the most adorable Dollar Tree craft stick narwhal DIY with a few simple jumbo craft sticks, paint, a marker, scissors, and a glue gun. This fun Arctic animal craft will entertain them and hone those motor skills. The younger kids can use crayons or markers instead of paint and an adult can help with gluing. You can make this wooden craft stick Narwhal in just about 30 minutes for less than $2. For the complete tutorial, follow Sarah at Ruffles and Rain Boots.
Materials
- Wooden Craft Sticks, Jumbo – Dollar Tree
- Wiggle Eyes – Dollar Tree
- Craft Paint – White, Light Blue, Grey, Pink
Tools
- Paintbrush
- Glue Gun and Glue Sticks
- Scissors
- Marker
- Ruler
- Pencil
Instructions
- Line up five craft sticks and glue them with the hot glue gun. Using scissors, cut one craft stick in half and attach one at the top and one at the bottom of the five craft sticks.
- Cut two craft sticks lengthwise in half with scissors. Trim one into a pointed cone shape for the tusk and put the other two to the side for the fins.
- Paint the Narwhal body and fins with light blue acrylic craft paint. Set aside to dry. If needed, apply a second coat.
- Paint the Narwhal’s tusk with grey acrylic craft paint. Set aside to dry. If needed, apply a second coat.
- Mix white and light blue acrylic craft paint together and paint a large arch to create the Narwhal’s belly.
- Using the glue gun and attach the tusk to the top and the fins to the sides of the back of the Narwhal.
- Using the glue gun, attach two wiggle eyes to the Narwhal. Using pink paint, dip a new pencil eraser and stamp it on either side of the face, making the cheeks.
- Dip a new pencil eraser into grey acrylic craft paint and stamp circles randomly around the belly area.
- Using a permanent black marker, from cheek to cheek, draw a smile on the Narwhal’s face. Using the same marker, draw lines on the tusk.
Meet the Creator
Hi there, I’m Sarah Nenni-Daher. I’m a crafty gal and always have at least 14 projects going at once. I am a crafter, designer, DIYer, and pattern maker. I share my creations here and in the Ruffles and Rain Boots® Shop.
Here at Ruffles and Rain Boots®, you’ll find DIY gnomes, crafts, gifts, cupcakes, laser crafts, and so much more. I love sharing video tutorials over on YouTube and chatting with other crafters in my Facebook groups. We’d love to have you!