
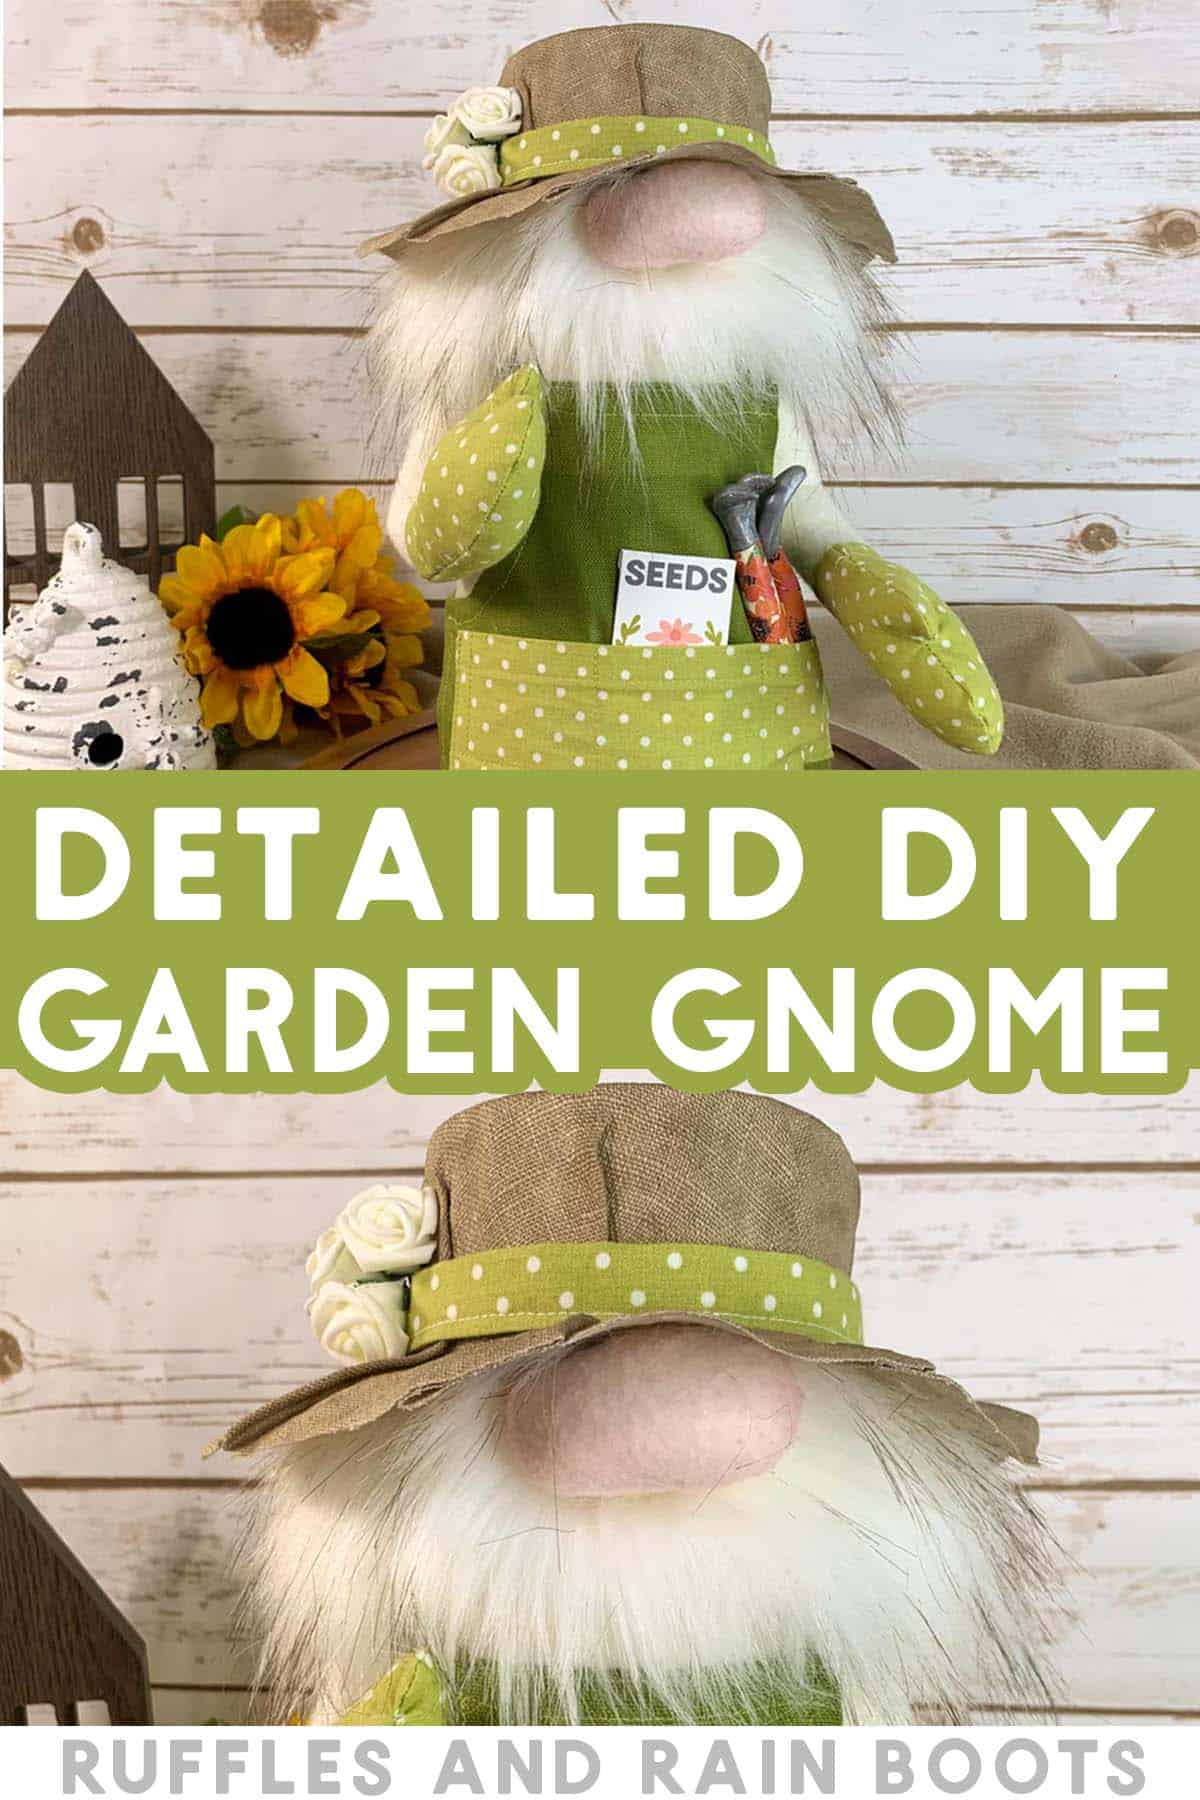
DIY Gardening Gnome: Heirloom Quality Spring Gnome
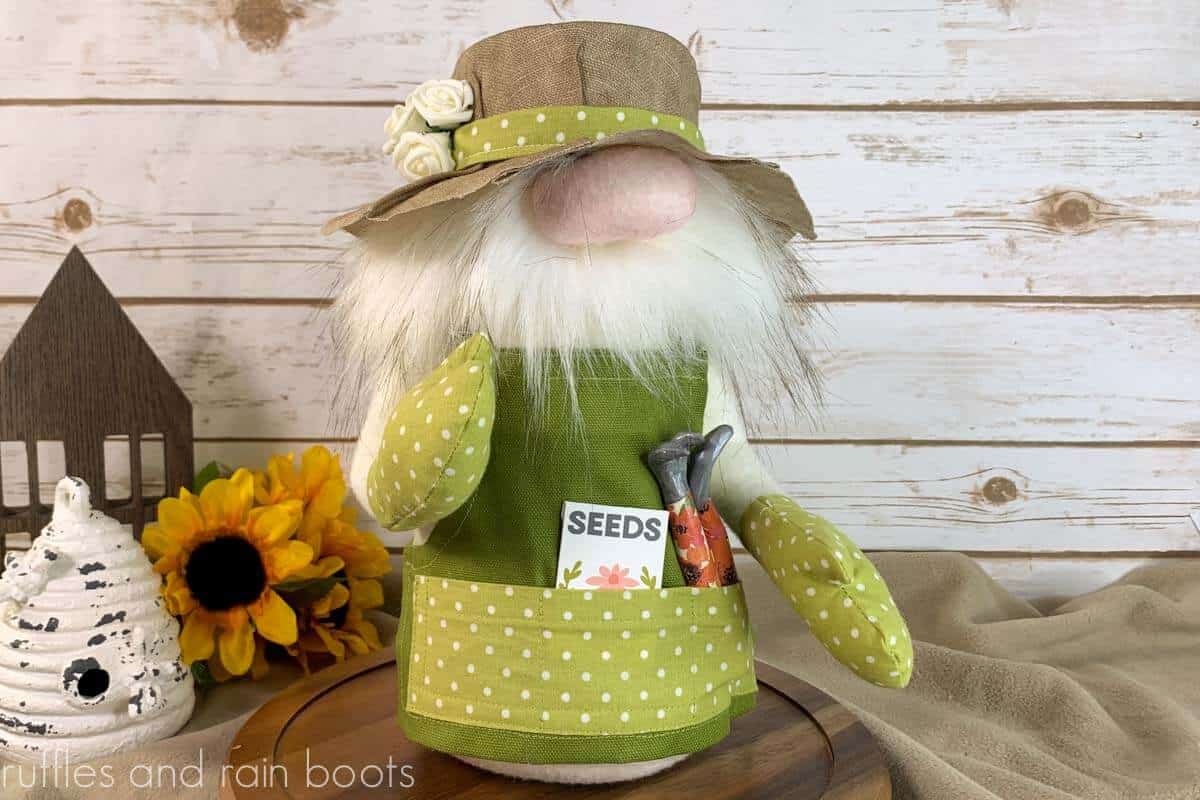
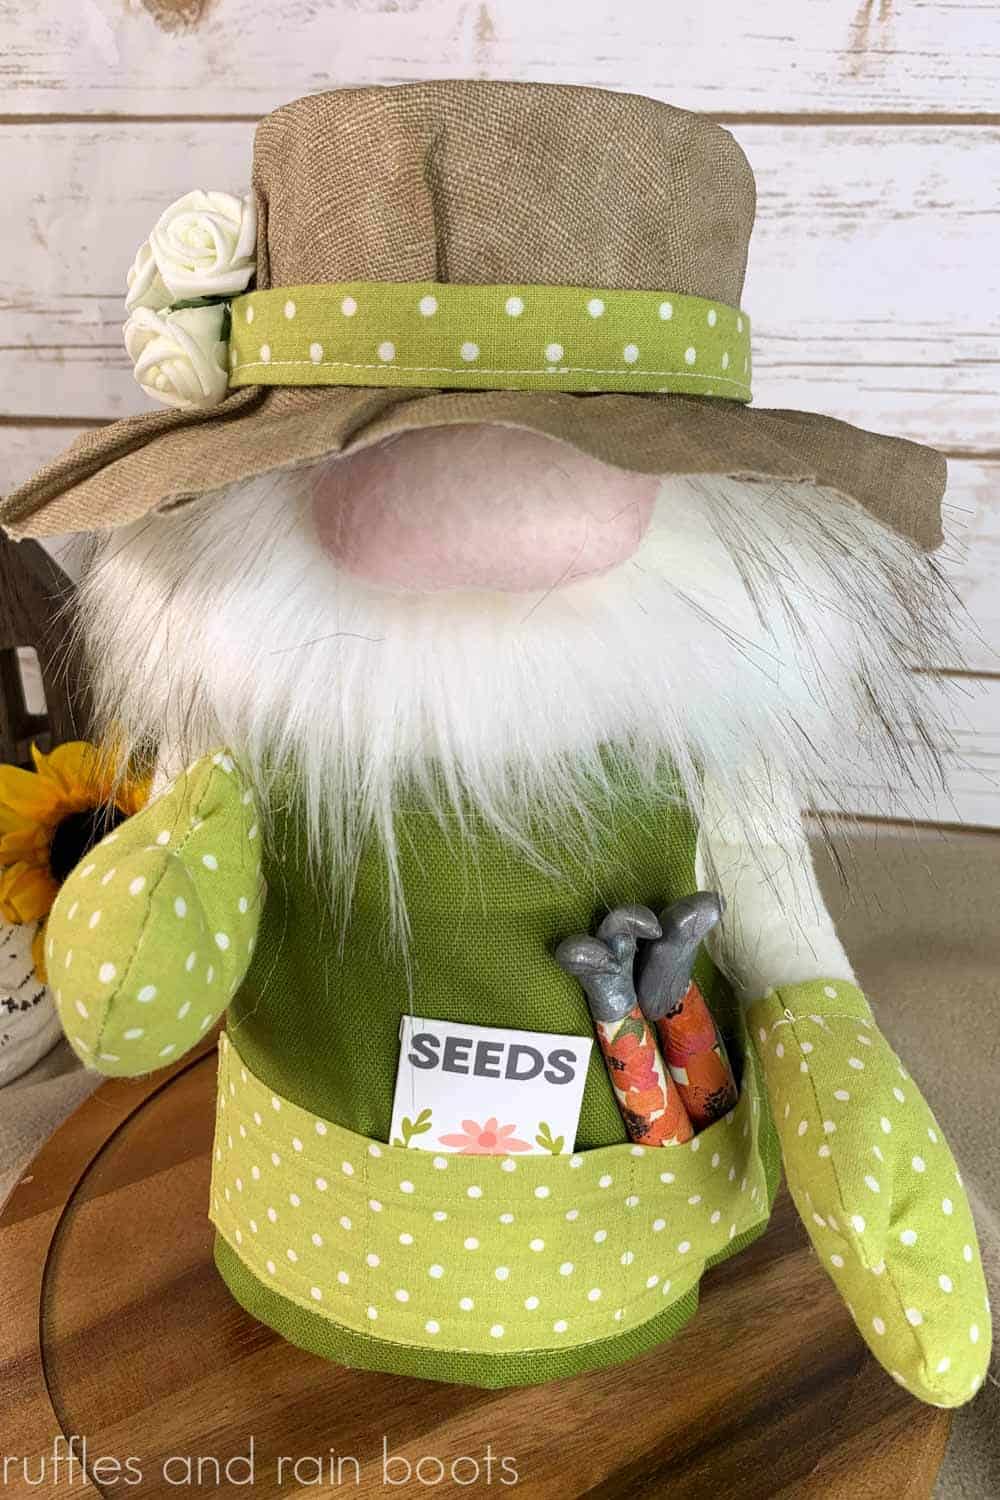
This gardening gnome is ready for Spring with his gardening gloves, apron, seeds, and so many fun details and accessories. Learn how to make this fun Spring gnome pattern and an heirloom quality piece.
What You'll Find On This Page
DIY Spring Gnome
Here at Ruffles and Rain Boots, I love Spring and the promise it brings. It’s fun getting into the dirt, planting, and hoping that the garden will bloom because, well, I’m not the best at it.
We have some amazing self-watering planters that make it look like I know what I’m doing but honestly, after years of doing this, I can’t grow a carrot longer than my pinky finger. But, do you know what I can do? Make gnomes.
Wow, what a smooth segue that was… But in all seriousness, I worked on this gardening gnome pattern for more than a year and I’m excited to share it with you. Let’s get started.
Please Save or Share
If you need to gather supplies or just want to tell others about this fun gnome, please save it to a DIY pin board or share it into a crafty Facebook group. Speaking of Facebook groups, please join us here. We’re a helpful bunch of crafters.
As an Amazon Associate, I could earn from qualifying purchases. There could be affiliate links within this article.
RELATED READING: DIY These Miniature Gnome Ornaments from Scraps
How to Make a Large Gnome
Friends, this fella is a solid guy (between 14 and 16 inches tall) and takes about an hour to complete. It’s a very different gnome from a Dollar Tree or a sock gnome – this is an heirloom quality piece and will require a sewing machine. I do not recommend this pattern to be made with hot glue.
Aside from that, here are a few tips when making this Spring gardening gnome:
- Decide if you want a gnome with a belly or a gnome with a sizable booty. :) The Chonky gnome pattern can be built both ways and really changes the personality.
- Make the apron first. The Chonky gnome pattern comes with many options for both full and half aprons, so you can decide what is going to be best for your garden gnome.
- If you want to make a gnome with flowers on his hat, it would look so cute but I’d stick with blooms less then 2 inches or it will overpower the hat.
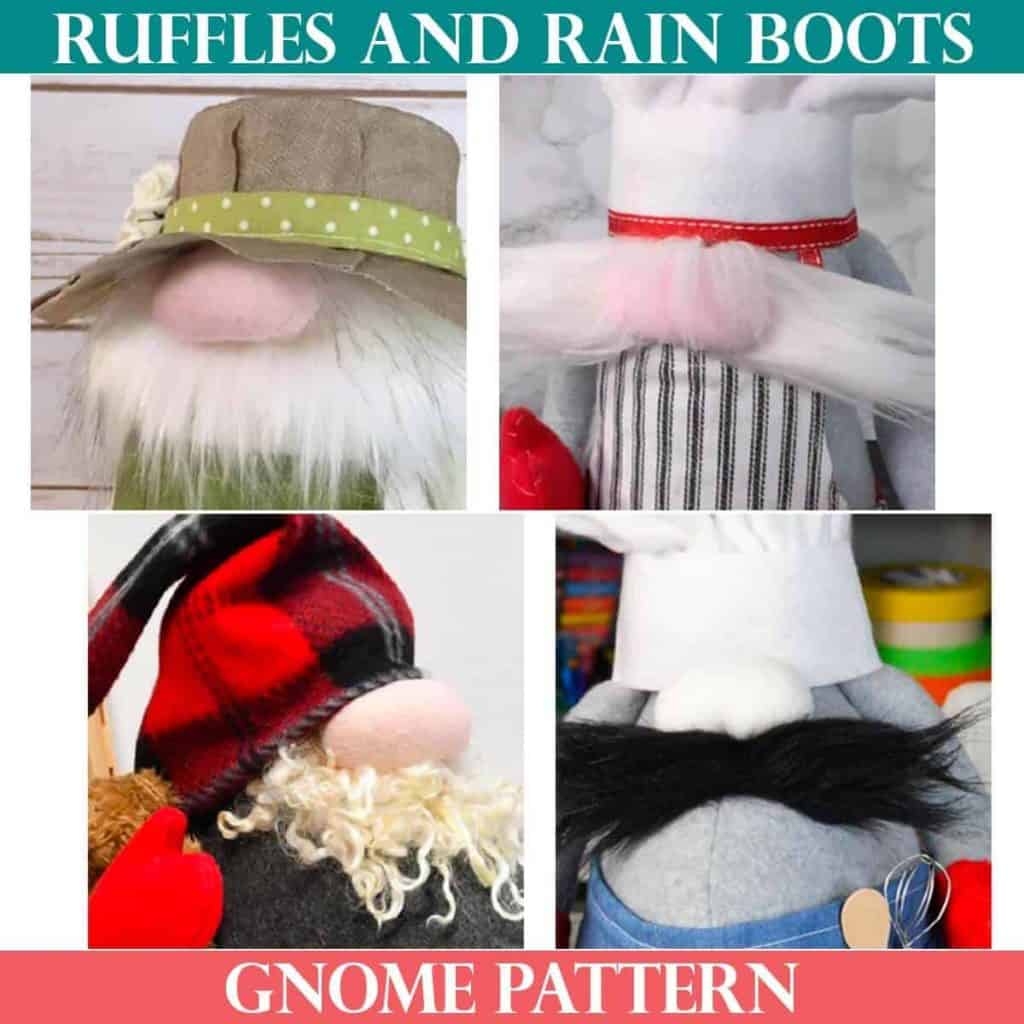
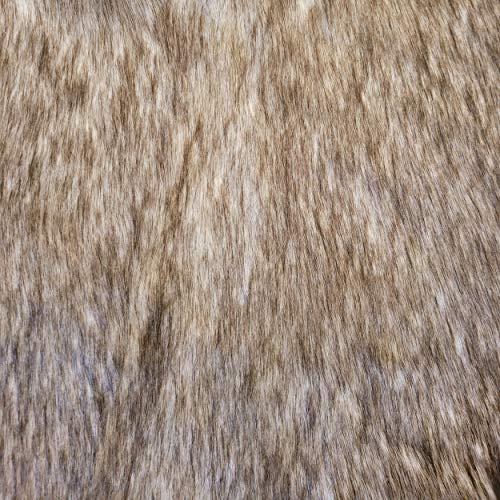
- I made a wrap around gnome beard using this Husky fur I got here. That said, you can choose to only make a mustache, as I did with this Chonky chef gnome pattern here or make a triangle-shaped beard for a more traditional look.
- If you want to make this more of a farmhouse decoration, use a ticking stripe fabric in a neutral or navy. It would be so cute with the gnome holding a wooden spoon, too.
- When you’re making the hat, use more ModPodge than you think and be sure to get it into the folds of the fabric. Learn to make a gardening gnome hat with this quick video tutorial. And use a bit of the same ribbon or fabric you used on the apron or mittens to make a cohesive look.
- Have fun – this is honestly one of my favorite modern gnome patterns because it produces such a high-end gnome.

Download the Chonky Gnome Pattern
This is a premium pattern which includes 2 body styles, 2 body sizes, 5 hat styles, and 2 apron styles. It’s chockfull of gnome fun and you can get it here. Just click the add to cart button and it will automatically be added to your cart.
Chonky Gnome Pattern
This premium pattern is full of inspiration, alternatives, and will be so useful in making a wide variety of gnomes for any decor, holiday, occasion, of gift recipient.
How to Make a Spring Gardening Gnome
Below is the written tutorial for this large gnome to make for Spring decor or gifts. I recommend watching the full length gardening gnome video tutorial here on YouTube before starting this project.
If you want the free seed packet, download it here. It’s a PDF, so size it to 100% and it should print at the perfect size for this garden gnome. You have three options to choose from: decorated, titled to put your own design on it, or blank.
Garden Gnome with Posable Arms DIY
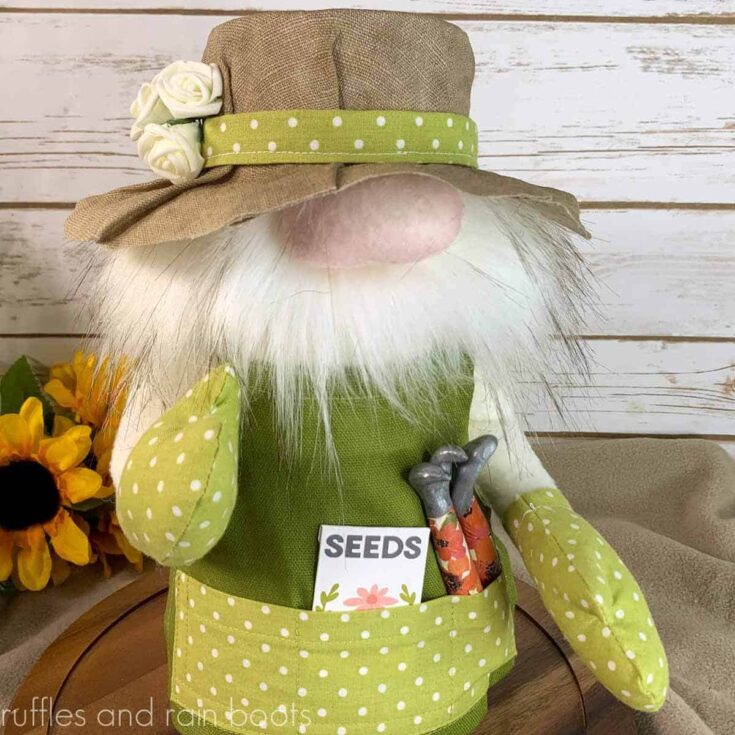
This adorable gardening gnome features fun details like an apron, seed packet, and even a cute sun hat! Get the Chonky gnome pattern and create your own heirloom quality gnome.
Materials
- Chonky Gnome Pattern
- Fleece for Body and Nose
- Cotton for Apron and Mittens
- Alaskan Husky Faux Fur
- Poly Pellets
- Poly Fill
- 14 Gauge Wire
- Embroidery Thread
- Optional, blush to color nose
- Optional, garden tools made from clay
- Completed Apron (see video tutorial)
- Completed Garden Hat (see video tutorial)
- Free Seed Packet Printable (3 styles)
Tools
- Sewing Machine and Pins
- Glue Gun and Glue Sticks
- Embroidery Needle
- Razor, Scissors, Wire Cutter
Instructions
- Per the Chonky gnome pattern, cut body, base, arms, and mittens. Put right sides together and sew the body and arms. Attach the base to the body and step-assemble the mittens. Follow all seam allowances called out in the pattern and turn everything right-sides out.
- Add 3 cups of Poly Pellets to the base, followed by enough Poly Fill that the gnome body bounces back to its original shape.
- Create the nose by using embroidery thread and a running stitch and use the length of thread called out in the pattern. Pull tight, stuff with fill, and tie off but do NOT cut the thread. Set aside.
- Cut 2” high by 11” long of fur and set aside. Place the apron onto the gnome body and tie into place leaving room for the arms to be attached ABOVE.

- Assemble the arms. Cut a length of wire to measure the full length of the arm plus into the mitten with enough extra to fold down one end. Stuff the mittens and the arms and then slip the wire into both (folded wire end goes into the mittens). Attach mitten to arm with hot glue. Repeat.
- Pin the arms to the body and use the embroidery thread and needle to securely fasten the arms to the body. Be sure to position the arms so that there is one inch higher than the body.
- Glue on the fur, only securing along the top inch of the fur. Attach the nose by splitting the fur horizontally and using the thread and needle to go through the body. Cut a new length and secure the bottom of the nose, as well.
- Slip on the hat, securing it to the one inch of the arms left out. Print off the seed packet (or create your own). You can choose to make garden tools with polymer clay (or buy them) to stick in the pocket.

Notes
Chonky Gnome Pattern: https://shop.rufflesandrainboots.com/product/chonky-gnome-pattern/
Garden Hat Tutorial (video): https://youtu.be/rJCVeFCncl8
Full Apron Tutorial (video): https://youtu.be/JMwMVSNbvgo
Recommended Products
As an Amazon Associate and member of other affiliate programs, I earn from qualifying purchases.


More Gnomes to Make
I would never leave you hanging with just ONE idea for a gnome, so here are a few more:
Get Secret Gnomes, Tips, & Freebies Delivered!
What is the best pattern to use when you don’t want to sew? Do you know the secrets to a properly-proportioned gnome? Do you know where to get the best-priced fur?
Get all of this (and exclusive content just for you) delivered right to your inbox with the gnome-making series, free of charge. Sign up to get the once-weekly newsletter (and a jaw-dropping special offer)!

- Large Chef Gnome with Different Chef Hat Styles – The guy that started it all, this big chef gnome is a crowd-pleaser using the same pattern (Chonky). He looks great with a whisk or tray of cookies, too.
- Armless Large Gnome – Using only part of the Chonky gnome sewing pattern, you can drastically change the look of your gnome and give him a very elegant and sleek look.
- Slouchy Hat Gnome – This gorgeous guy is perfectly posable and can hold whatever you give him. The Chonky gnome pattern comes with three sizes for slouchy hats, so you’re sure to find your favorite.
- Spring Wood Gnomes – Grab some Dollar Tree vinyl (such pretty patterns) and you can whip up these widely popular Spring gnomes.
Please Save or Share
Your shares are how this site grows and I am sincerely grateful. Please save this to a DIY pin board or share it to a crafting group on Facebook.

Hi Sarah, once again, great job. I have a question about the fur – yours looks more white, and link looks more brown. Do you remember what color you got? TY
Carol,
They could have sold out of what I bought – it’s either Alaskan Husky or Russian Husky but it’s definitely mostly cream, not brown.