
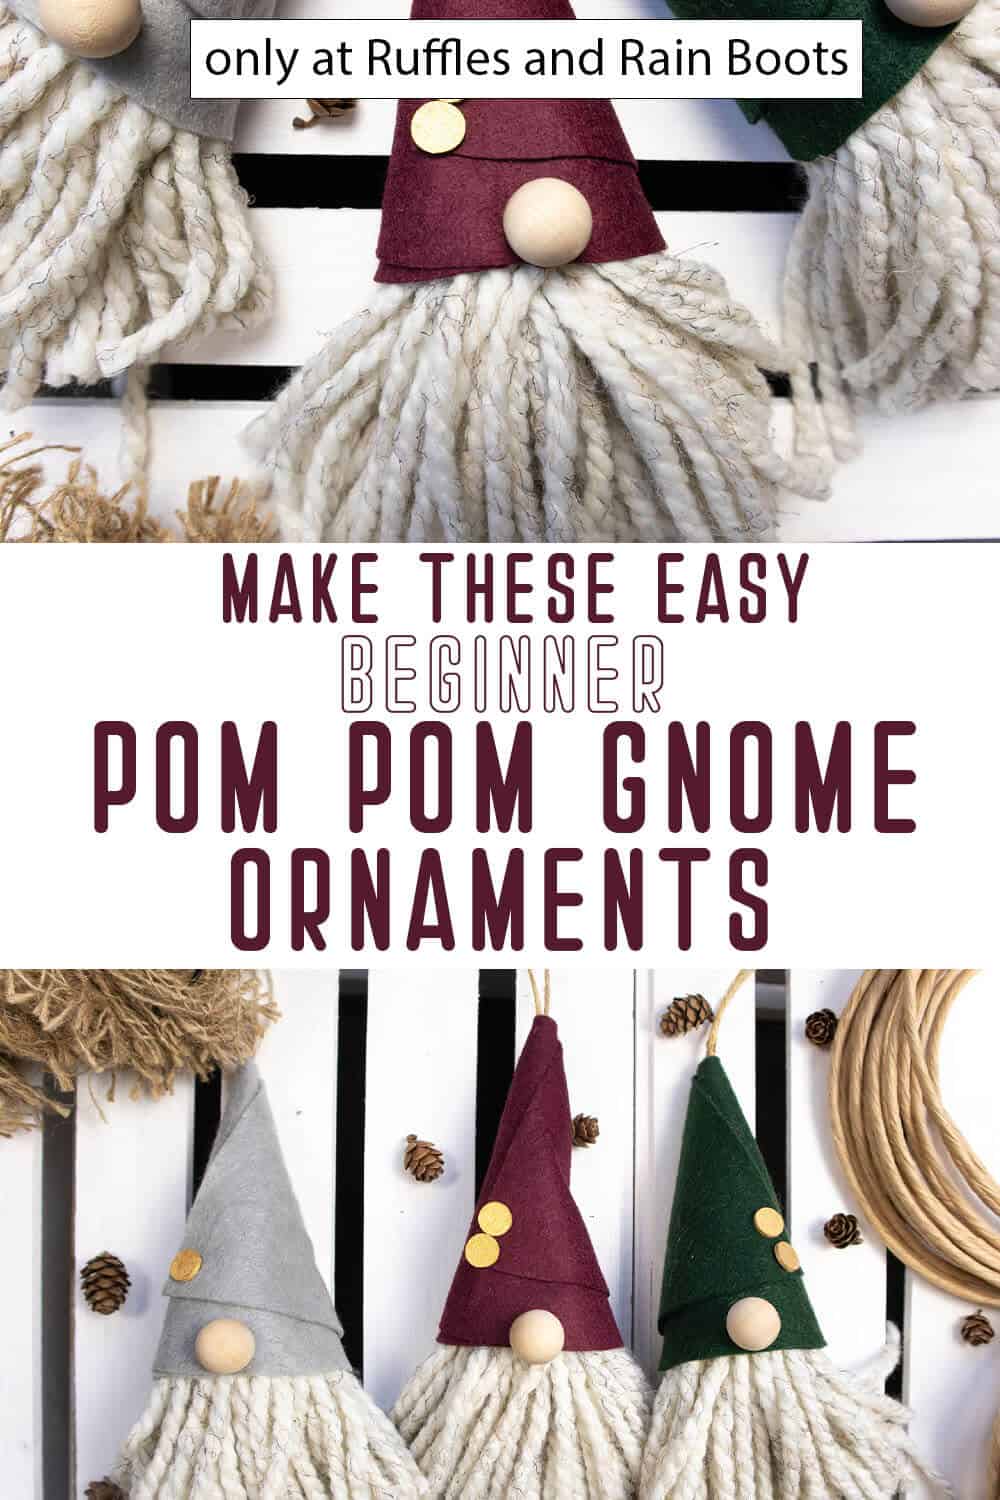
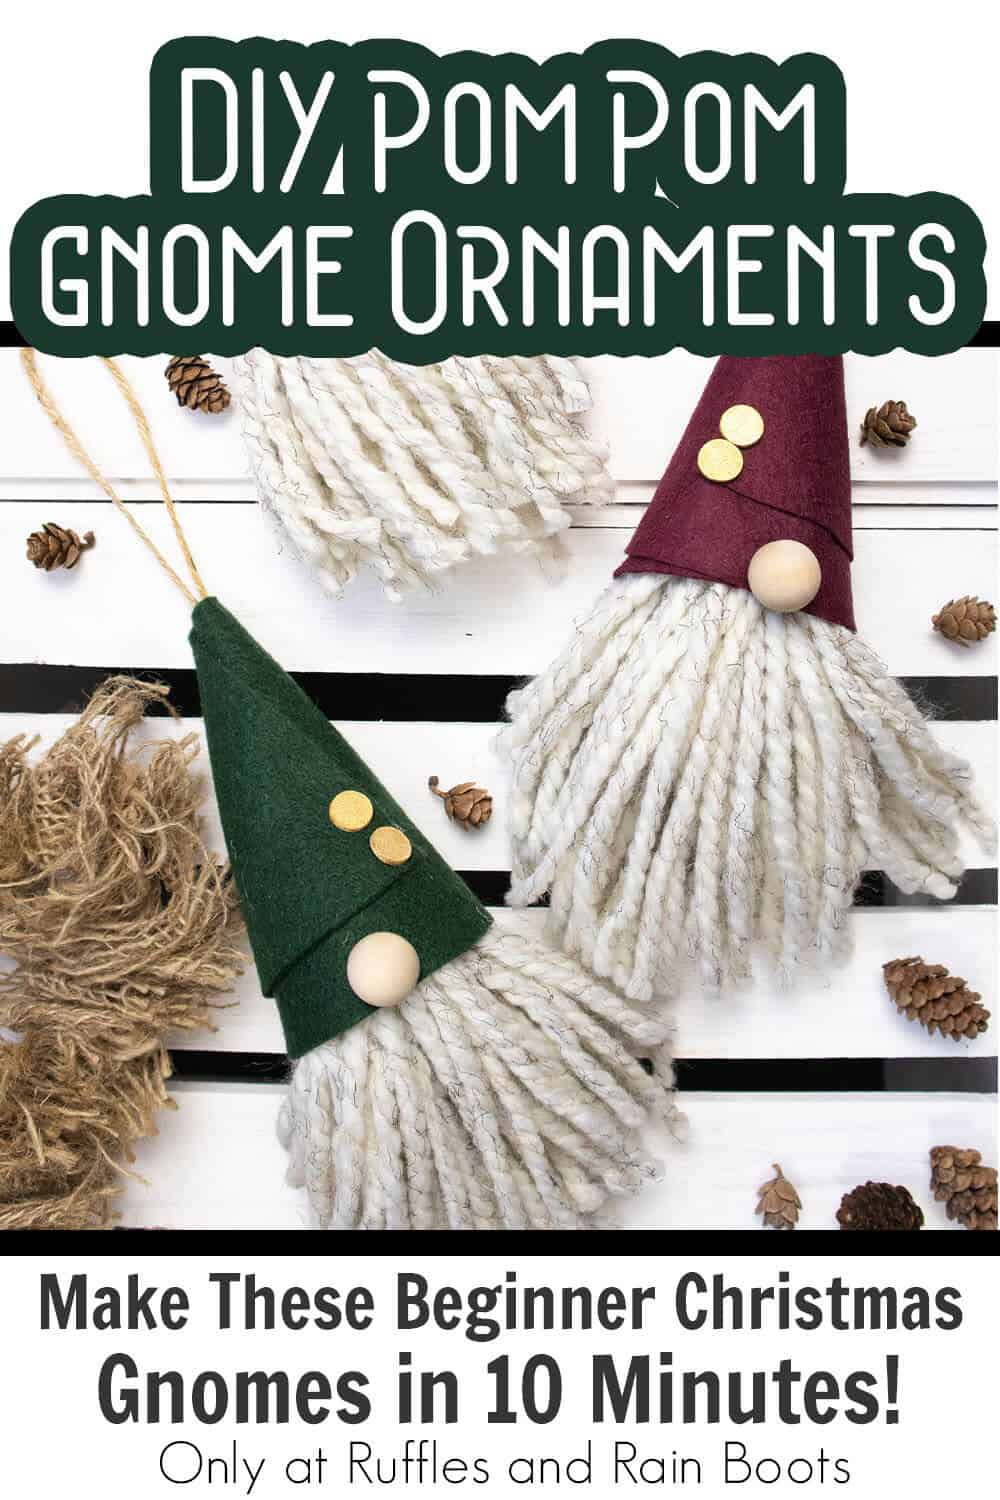
DIY Pom Pom Gnomes – A Beginner Gnome Ornament That Only Takes Minutes!
I love making simple gnome patterns and these DIY pom pom gnomes are such a fun beginner gnome ornament I’m proud to add to my collection!
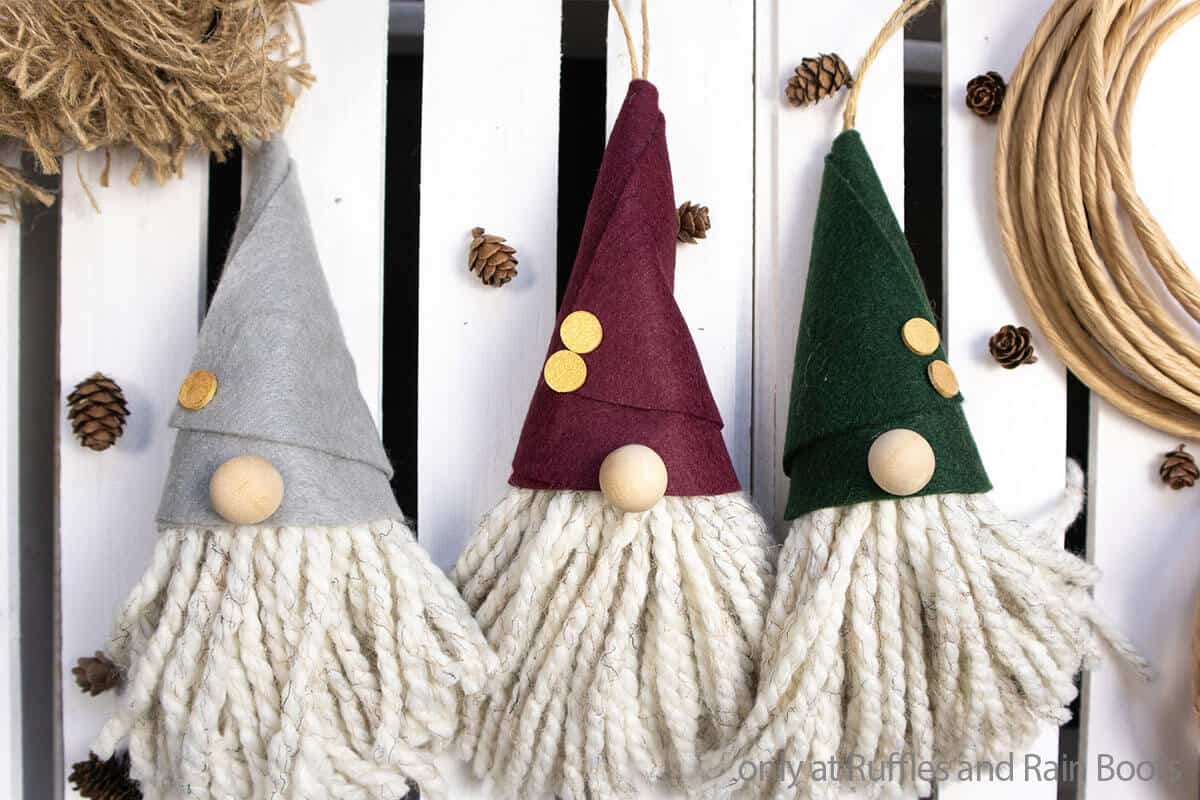
DIY Pom Pom Gnomes
Here at Ruffles and Rain Boots, we have made a few gnome ornaments. And they are varied from super easy to, well, a bit more complex. But the best beginner gnome ornaments are the simplest, in my opinion. There’s a balance between super simple, though, and just plain. So, walking that thin line, I made this fun beginner gnome pattern that has the cutest details, but is sneakily one of the most basic gnomes!
RELATED READING: EASY SCANDINAVIAN GNOME ORNAMENTS
And the best part is, if you’re in love with your tomte, you can make a ton more and use them as gifts, put them on your presents under the tree as decoration or make some for other seasons to put on wreaths. So, if you’re ready to make a fun set of DIY pom pom gnomes, grab your scissors and let’s get started.
No Time to Make This Now? Pin it for Later
You’re busy, I get it. Pin this to your favorite holiday DIYs board on Pinterest and it’ll be here for when you’re ready.
As an Amazon Associate, I can earn from qualifying purchases.
Tips to Make this Beginner Gnome Ornament
- Grab the free printable gnome hat pattern here. It’s super simple, one page and it’s going to make putting this easy gnome ornament together so much simpler.
- Since I feel like this is a really fantastic beginner gnome pattern, I’m going to share with you the biggest gnome-making secret I wish I’d known at the very beginning of my gnome-making journey: Don’t worry about making your gnomes “perfect.” Each gnome is unique, each gnome is special. And there’s no “right way” to make your gnome look, so don’t sweat the small stuff.
- When you wrap your yarn around your palm, take care not to wrap it too tightly. The gnome’s beard is going to be shorter, the tighter you wrap it. So, if you wrap it around your palm loosely (not hanging down, but not tight on your palm, either), you’ll end up with just enough yarn to make a nice, plush beard.
How Do I Make DIY Pom Pom Gnomes?
I’m so glad you asked. Below is our written tutorial.
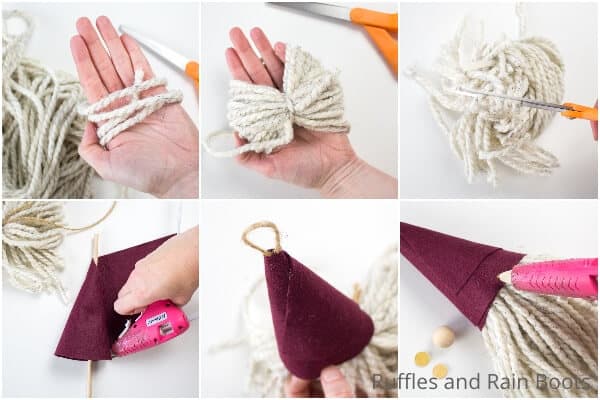
First, hold one end of the yarn and start wrapping the yarn around the palm of your hand loosely between 40 and 50 times.
Cut the yarn free of the skein then cut a 5-6 inch long piece and thread that through the yarn wrapped around your palm, wrapping it around the yarn and tying it in a knot tightly to hold the wrapped together. Then remove the yarn from your hand. You should now have a bundle of yarn loops.
Cut the bottom of all of the yarn loops to create a long, dangly pom pom. Set aside.
Paint the little wood circles with gold acrylic paint. Allow the paint to dry completely.
Print out the gnome hat pattern and cut it out. Position the pattern on one of the felt sheets and cut the hat shape from the felt following the pattern edges.
Curl the cut felt hat shape into a cone shape, using a wooden dowel or pencil to help wrap the felt, if desired. I recommend leaving a small opening at the tip of the cone, which will kind of happen naturally, but take the time to check and make sure it’s there.
With the hot glue gun, attach the overlapping edges of the felt cone and hold it in place until the glue cools completely.
Cut a 20-inch long piece of twine and fold it in half.
Tie the loose ends of the twine around the pom pom’s center, looping it around the yarn and tying it into a knot on top, securing it snugly.
Pull the loop end of the twine through the hole in the top of the felt cone hat, pulling the pom pom up into the cone snugly.
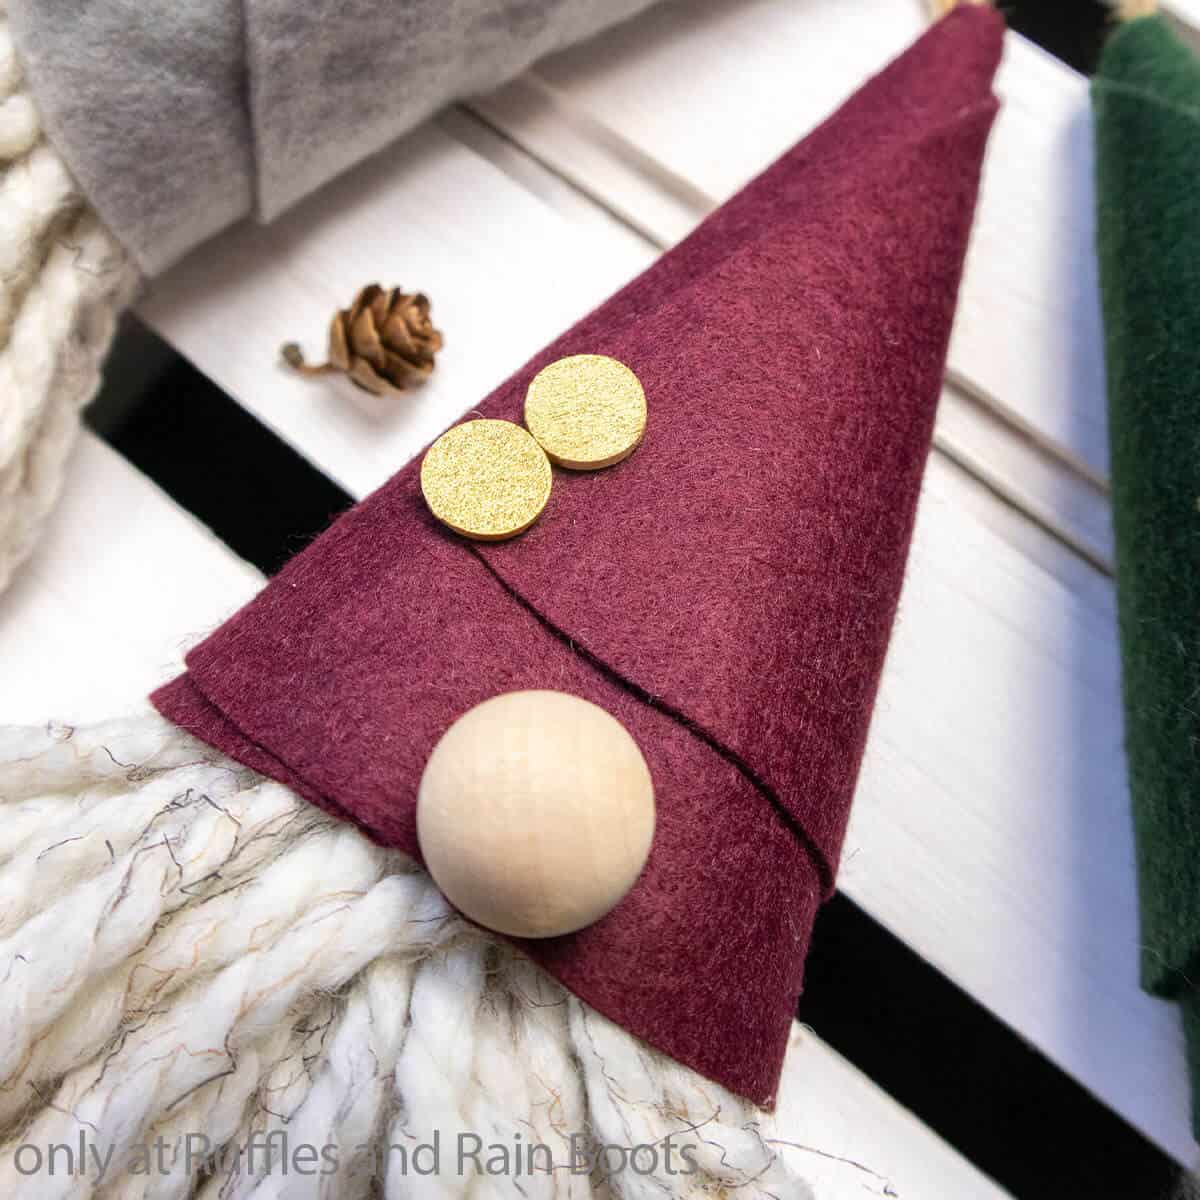
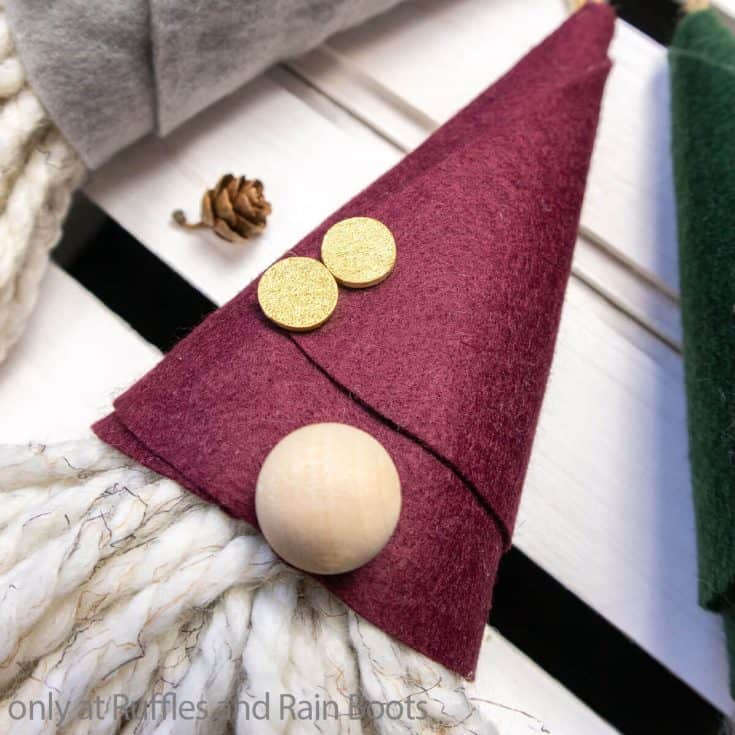
Glue the wooden bead to the bottom brim of the hat. Be sure to hold it in place until the glue cools completely.
Glue the two painted wood circles to the front of the hat off to one side along an edge of the wrapped felt to look fun.
Trim up any long or uneven ends on the beard, then hang on the tree and enjoy!
More Beginner Gnome Ornaments You Might Like
- Mini Sock Gnome Ornaments – One of my favorite ornament sets I’ve ever made, these simple sock gnomes turned ornaments are so cute, I want to boop all their noses!
- Mitten Gnome Ornament – If you’ve ever wondered what a gnome looks like when hiding in a mitten, this ornament gives you a peek into that mischievous little life they live.
- Mini Gnome Ornaments from Gloves – With a kid’s glove and a little acorn hat or felt, these mini gnome ornaments are so fun to make and even more fun to hang on the tree!
Please Save This to Pinterest
Your shares are how this site grows and I am sincerely grateful. Know a friend who’d like this? Please share it on Facebook or save it to your favorite DIY ornaments board on Pinterest.
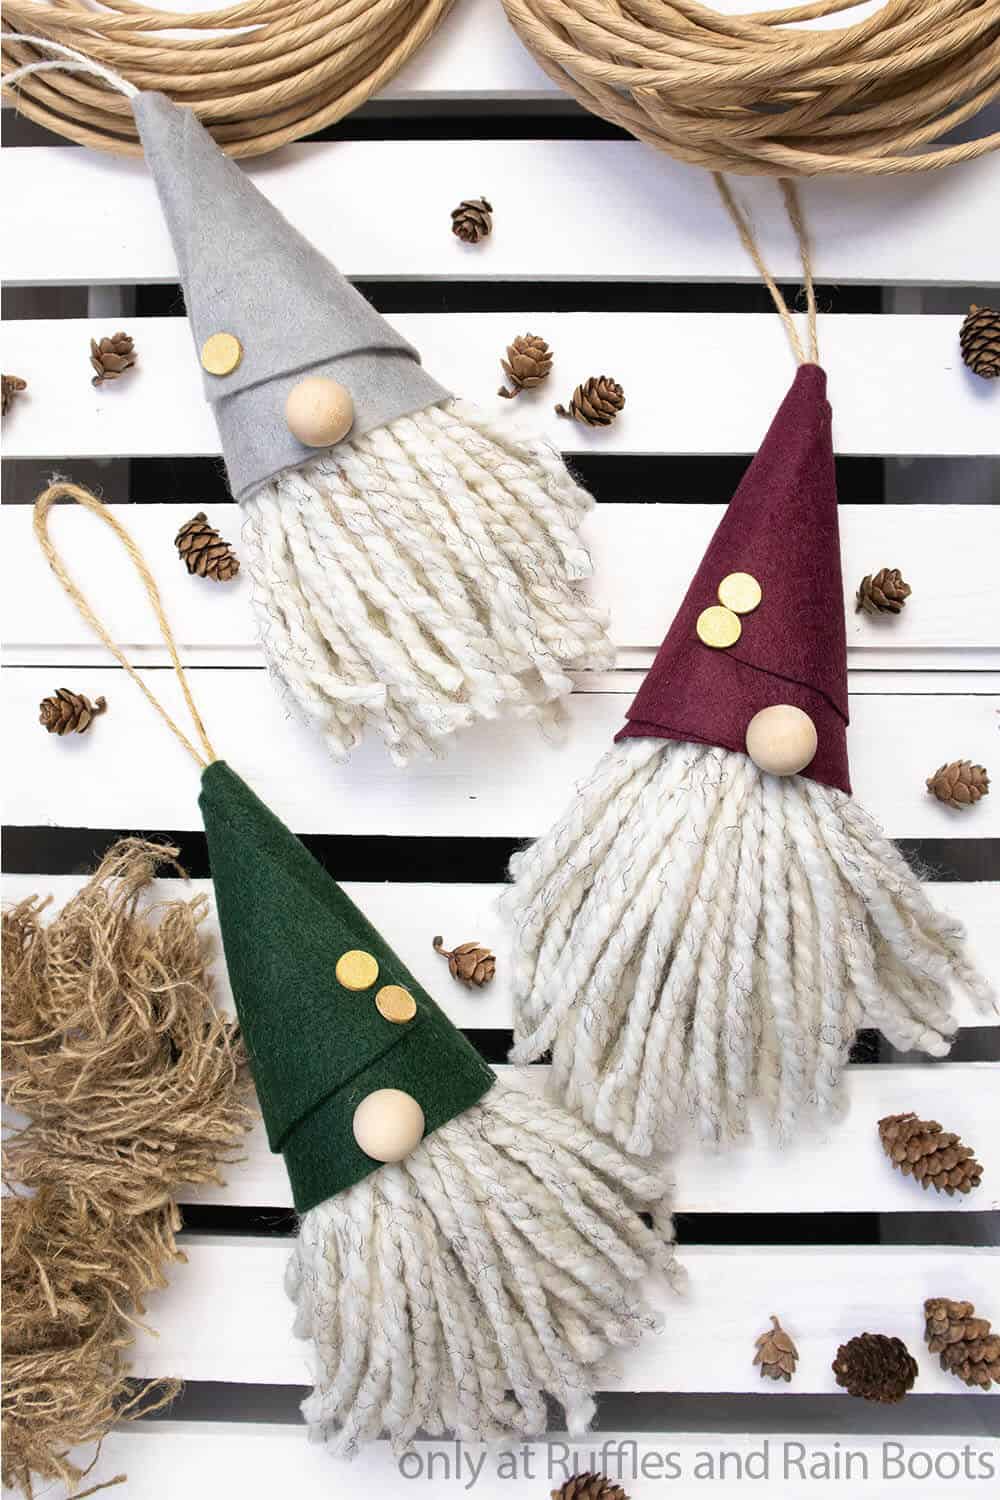
DIY Pom Pom Gnomes
You're not going to believe how easy these beginner gnome ornaments are to make! So simple, but super cute, these DIY pom pom gnomes are quick and fun.
Materials
- Wool-Ease Thick & Quick Yarn by Lion Brand, Wheat
- Craft Felt in Maroon, Deep Green and Grey
- Twine
- ¾-inch Wooden Bead
- 2 - 1/4-inch wood circles (or buttons, I just had these circles handy)
- Printable Gnome Hat pattern
- Gold Acrylic Paint
Tools
- Fabric Scissors
- Hot Glue Gun & Glue
- Paintbrush
- Wooden Dowel or Pencil, optional
Instructions
- Hold one end of the yarn and start wrapping the yarn around the palm of your hand loosely between 40 and 50 times.
- Cut the yarn free of the skein then cut a 5-6 -inch long piece and thread that through the yarn wrapped around your palm, wrapping it around the yarn and tying it in a knot tightly to hold the wrapped together. Then remove the yarn from your hand. You should now have a bundle of yarn loops.
- Cut the bottom of all of the yarn loops to create a long, dangly pom pom. Set aside.
- Paint the little wood circles with the gold acrylic paint. Allow paint to dry completely.
- Print out the gnome hat pattern and cut it out. Position the pattern on one of the felt sheets and cut the hat shape from the felt following the pattern edges.
- Curl the cut felt hat shape into a cone-shape, using a wooden dowel or pencil to help wrap the felt, if desired. I recommend leaving a small opening at the tip of the cone, which will kind of happen naturally, but take the time to check and make sure it's there.
- With the hot glue gun, attach the overlapping edges of the felt cone and hold it in place until the glue cools completely.
- Cut a 20-inch long piece of twine and fold it in half.
- Tie the loose ends of the twine around the pom pom's center, looping it around the yarn and tying it into a knot on top, securing it snugly.
- Pull the loop end of the twine through the hole in the top of the felt cone hat, pulling the pom pom up into the cone snugly.
- Glue the wooden bead to the bottom brim of the hat. Be sure to hold it in place until the glue cools completely.
- Glue the two painted wood circles to the front of the hat off to one side along an edge of the wrapped felt to look fun.
- Trim up any long or uneven ends on the beard, then hang on the tree and enjoy!
Notes
For more fun beginner gnome ornament tutorials, visit Ruffles and Rain Boots!
Recommended Products
As an Amazon Associate and member of other affiliate programs, I earn from qualifying purchases.


This is adorable! I am not able to print the hat pattern.
It’s opening for me and available for download here: https://drive.google.com/file/d/1TqTfgKkPxDiSidJdLLbfzNGycAP1DxgE/view
Can you not access it?
@Sarah Nenni-Daher, when I open the pdf in my browser it is just a blank sheet.
@Sarah Nenni-Daher, I got it! It was me, very technologically challenged! Thanks so much! Can’t wait to make these!
I am making these for all of my coworkers…they are adorable. Instead of using small wood circles for the trim on the hat, I am using small buttons.