
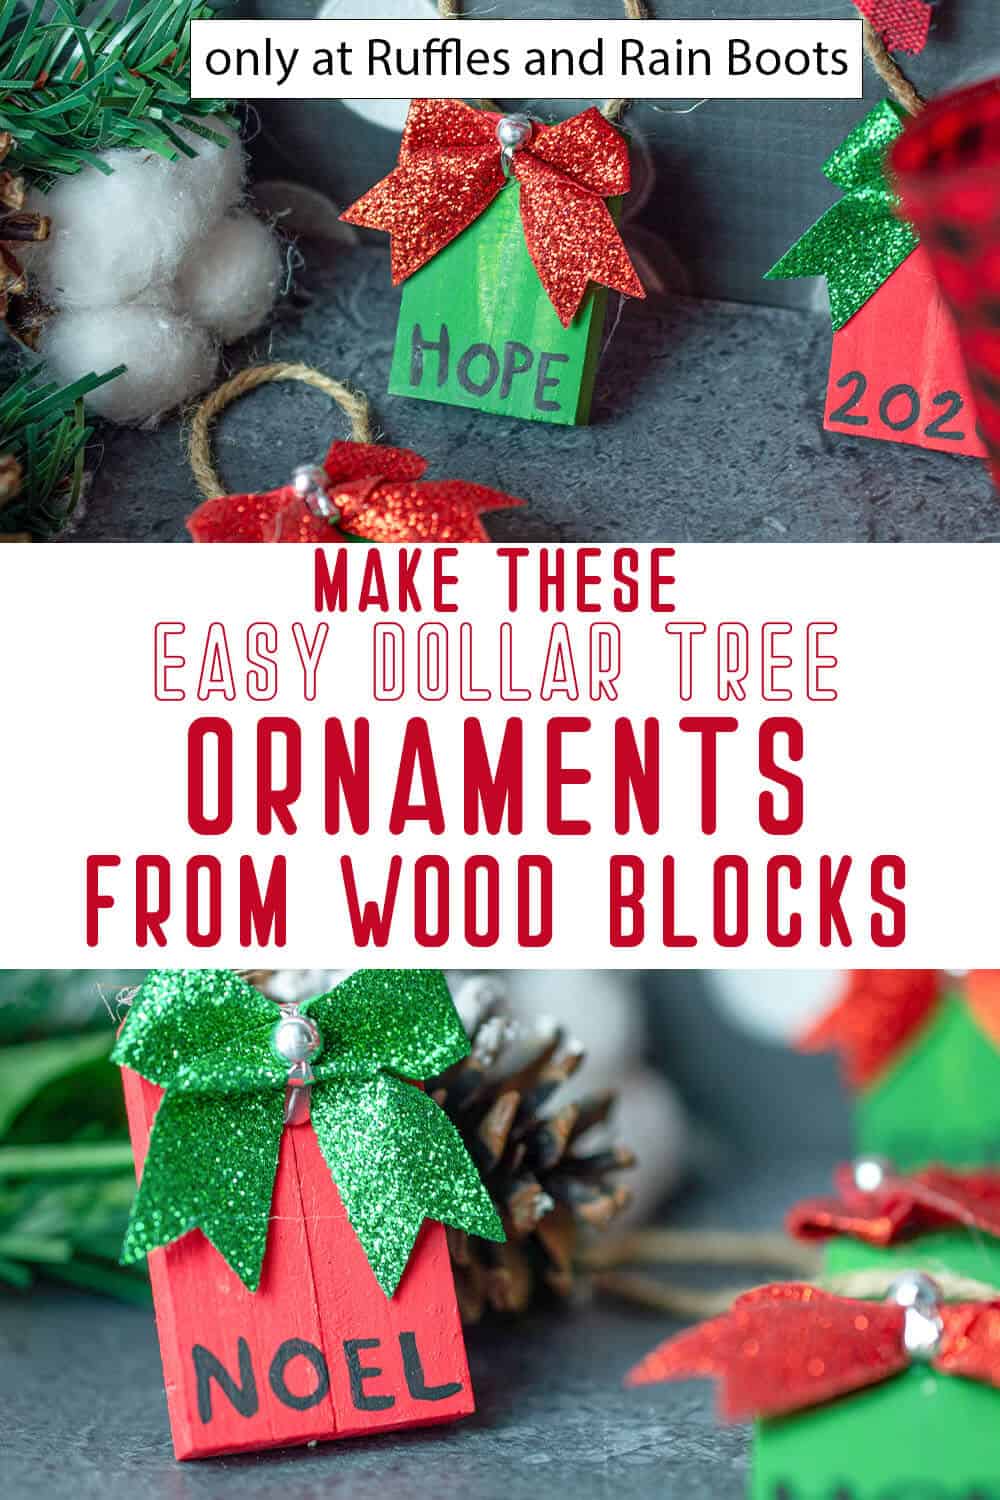
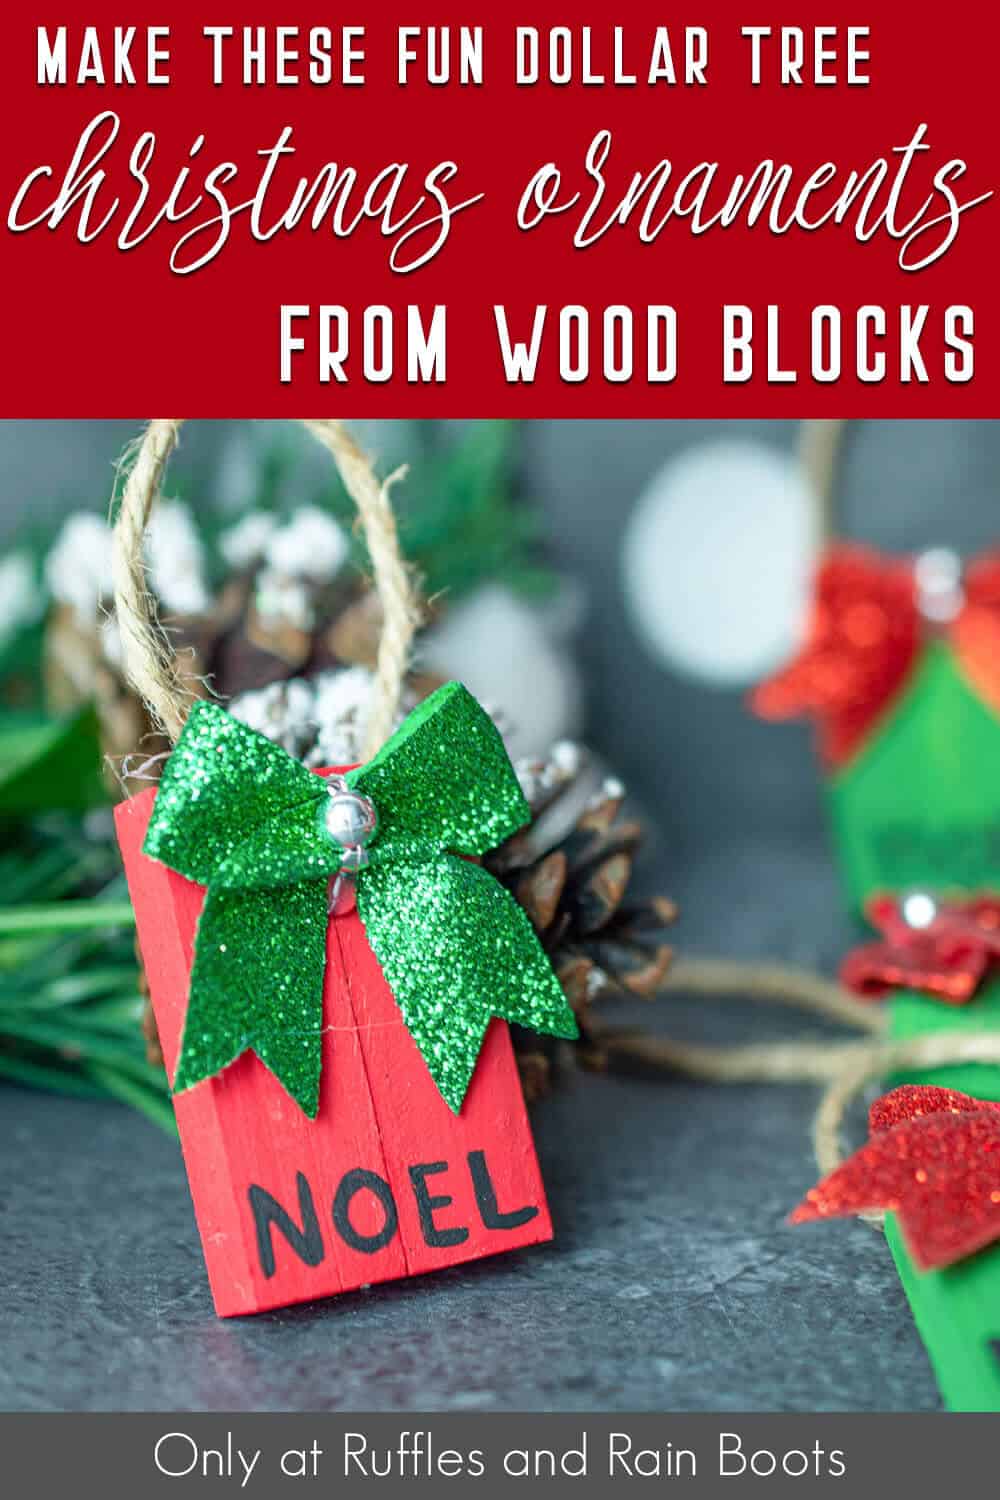
Make Fast Dollar Tree Christmas Ornaments from Jenga Blocks!
Making these simple Dollar Tree Christmas ornaments from wood blocks was a great Christmas craft with the kiddo!
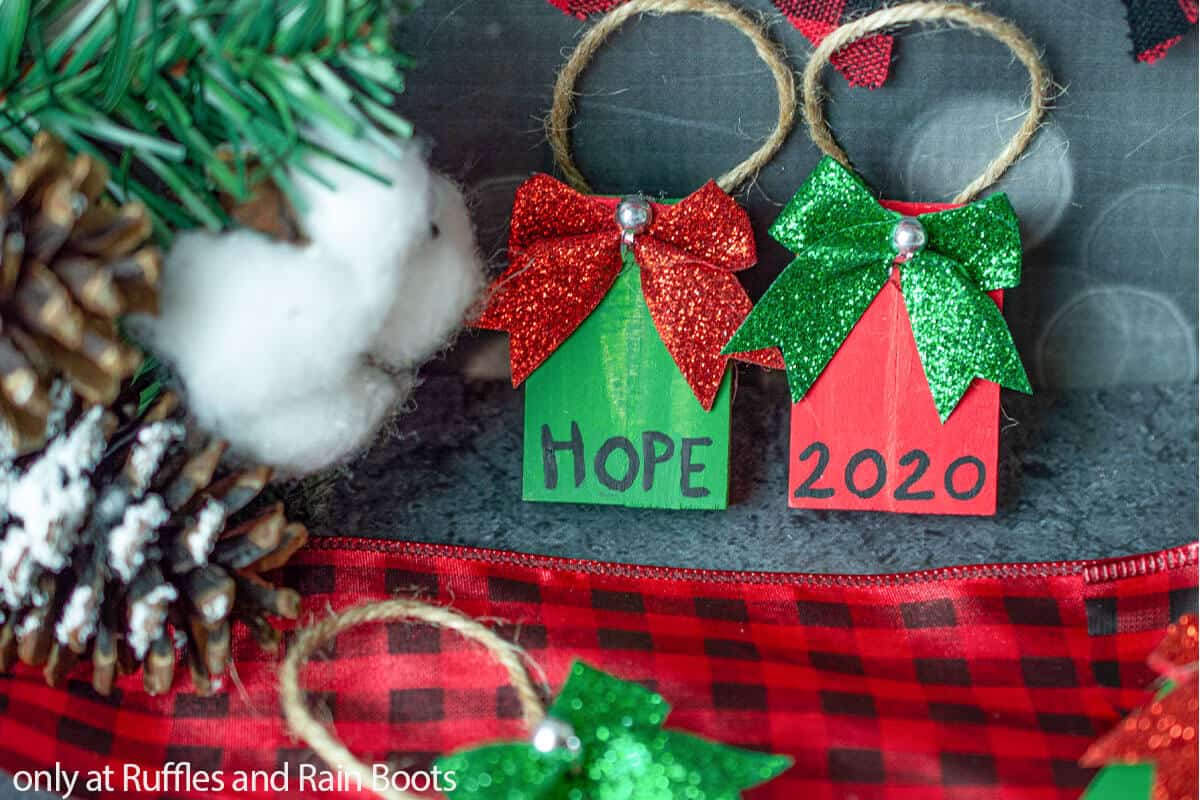
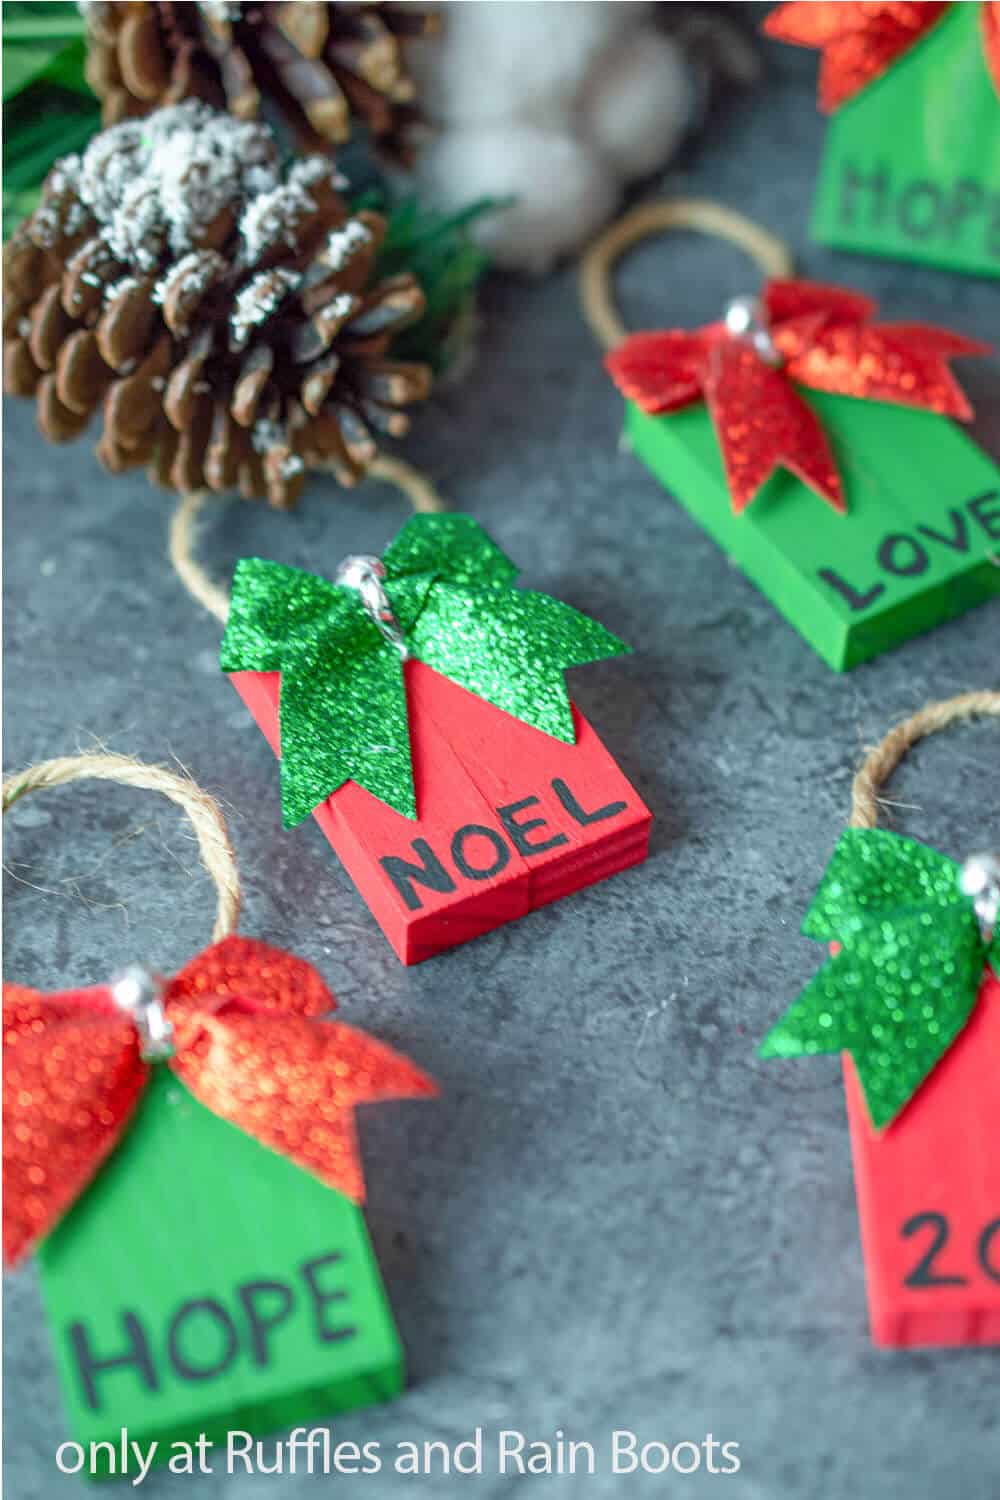
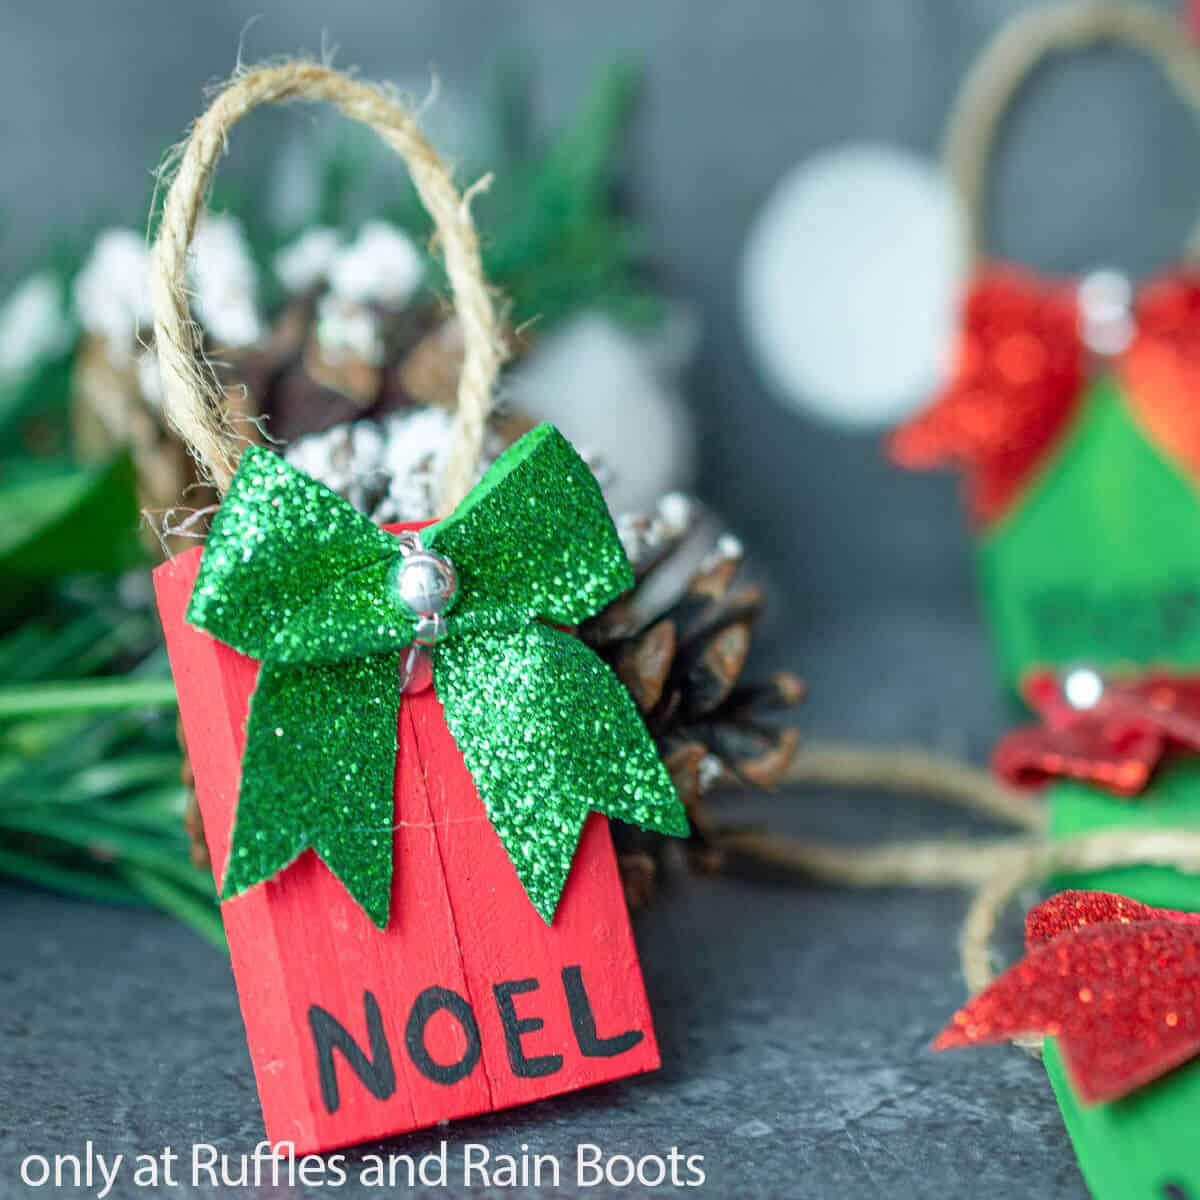
Dollar Tree Christmas Ornaments from Wood Blocks
Here at Ruffles and Rain Boots, I do a lot of really adult-level crafting. But sometimes the kiddo wants to get involved and make something with me. So we decided to make these simple Dollar Tree Christmas ornaments from wood blocks.
RELATED READING: THE BEST GNOME ORNAMENTS FOR CHRISTMAS
A super easy craft, I could have let the kiddo do it all on her own, even, but she wanted the “together time” so we crafted as a team. Between us, I think we made a dozen of these in about 30 minutes. So, grab a paintbrush and let’s get started.
No Time to Make This Now? Pin it for Later
You’re busy, I get it. Pin this to your favorite Dollar Tree crafts board on Pinterest and it’ll be here when you’re ready.
As an Amazon Associate, I can earn from qualifying purchases.
Tips to Make This DIY Christmas Ornament
- Don’t feel constrained by the words I chose to paint on the ornaments. I mean, anything works – the year, Santa, Joy, whatever.
- If you can’t find the little blocks at your Dollar Tree (they’re in the kids/toys section), you can grab some here. They’re just little blocks, which you can easily cut from a 2×4 if you wanted to even.
- As far as decorations, I found these adorable little bows with bells already on them, but you could use ribbon to make your own bows, add a tiny poinsettia flower, or anything – these would look adorable even without an embellishment.
How Do I Make Dollar Tree Christmas Ornaments from Wood Blocks?
I’m so glad you asked. Below is our written tutorial.
Dollar Tree Christmas Ornaments from Wood Blocks
A super fast project, making these Dollar Tree Christmas ornaments from wood blocks is a simple way to make a Christmas craft with the kiddo!
Materials
- Wood Block Game Set
- 12 Pack of Mini Bows
- Jute Cord/Twine
- Green Acrylic Paint
- Red Acrylic Paint
- Black Acrylic Paint
Tools
- Scissors
- Wood Glue
- Hot Glue Gun with Glue Sticks
- Small foam paint brush (or any small paint brush you may have)
- Small detail brush (for writing letters)
Instructions
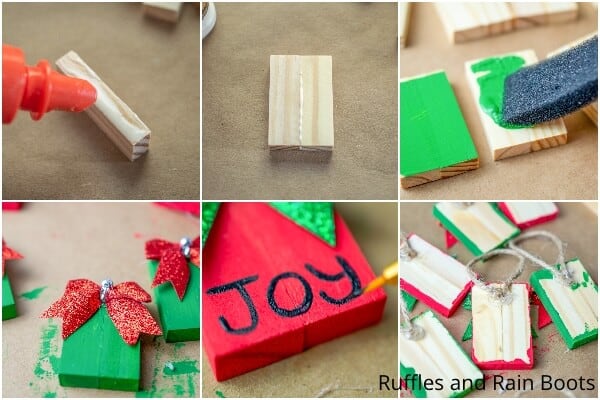
- Using wood glue, affix 2 blocks together, side by side. Take care to press the wood blocks together firmly and wipe away excess glue with a paper towel. Allow the glue to set for 2-3 hours (it will fully cure in 24 hours, but should be solid enough to handle in just 2-3 hours).
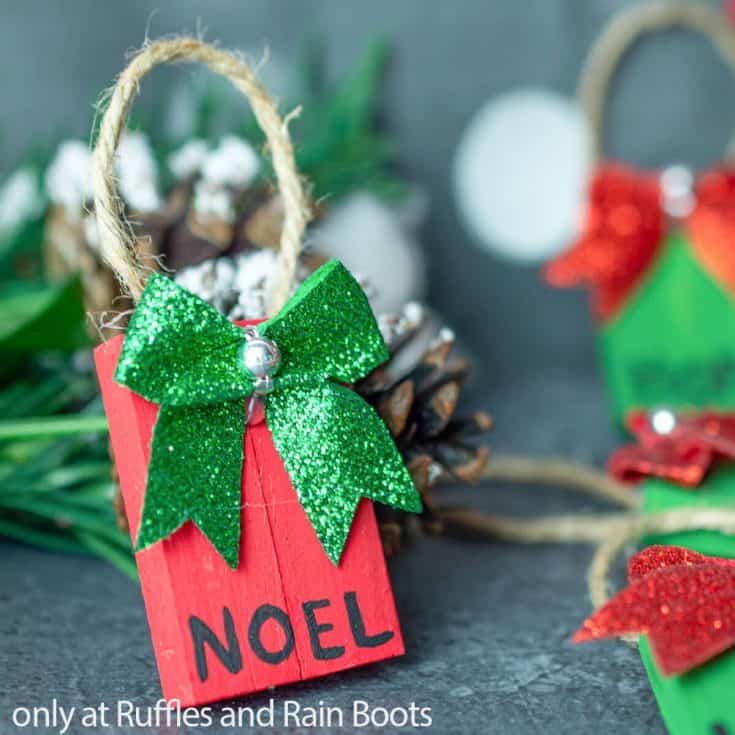
- Using a foam brush, all sides of the joined blocks. We painted 6 blocks green and 6 red. Allow the paint to dry completely.
- Hot glue a contrasting bow to the top of each block set.
- Use a small detail brush with black paint to paint words such as “Joy”, “Noel”, “Love”, “Hope”, and “2020” on the bottom of each wood block ornament. Allow the paint to dry.
- Cut one 3-inch long piece of twine for each ornament.
- Hot glue both ends of the twine to the top of an ornament on the back side, creating a loop from the twine from which to hang your ornament. Allow the hot glue to dry completely then you're ready to hang your ornaments on the tree!

Notes
For more fun Dollar Tree Christmas crafts, visit Ruffles and Rain Boots!
More DIY Christmas Ornaments You Might Like
- Hot Cocoa Felt Ornament – So easy and an adorable ornament for anyone that loves hot cocoa and unique Christmas crafts!
- No-Sew Mitten Ornament – Mittens are a fun little winter addition to the tree and this no-sew craft is fun.
- Letter to Santa Ornament – Let your kiddo write a letter to Santa and hang it on the tree to remember forever!
Please Save This to Pinterest
Your shares are how this site grows and I am sincerely grateful. Know a friend who’d like this? Please share it on Facebook or save it to your favorite Christmas crafts board on Pinterest.

These crafts look really cute