
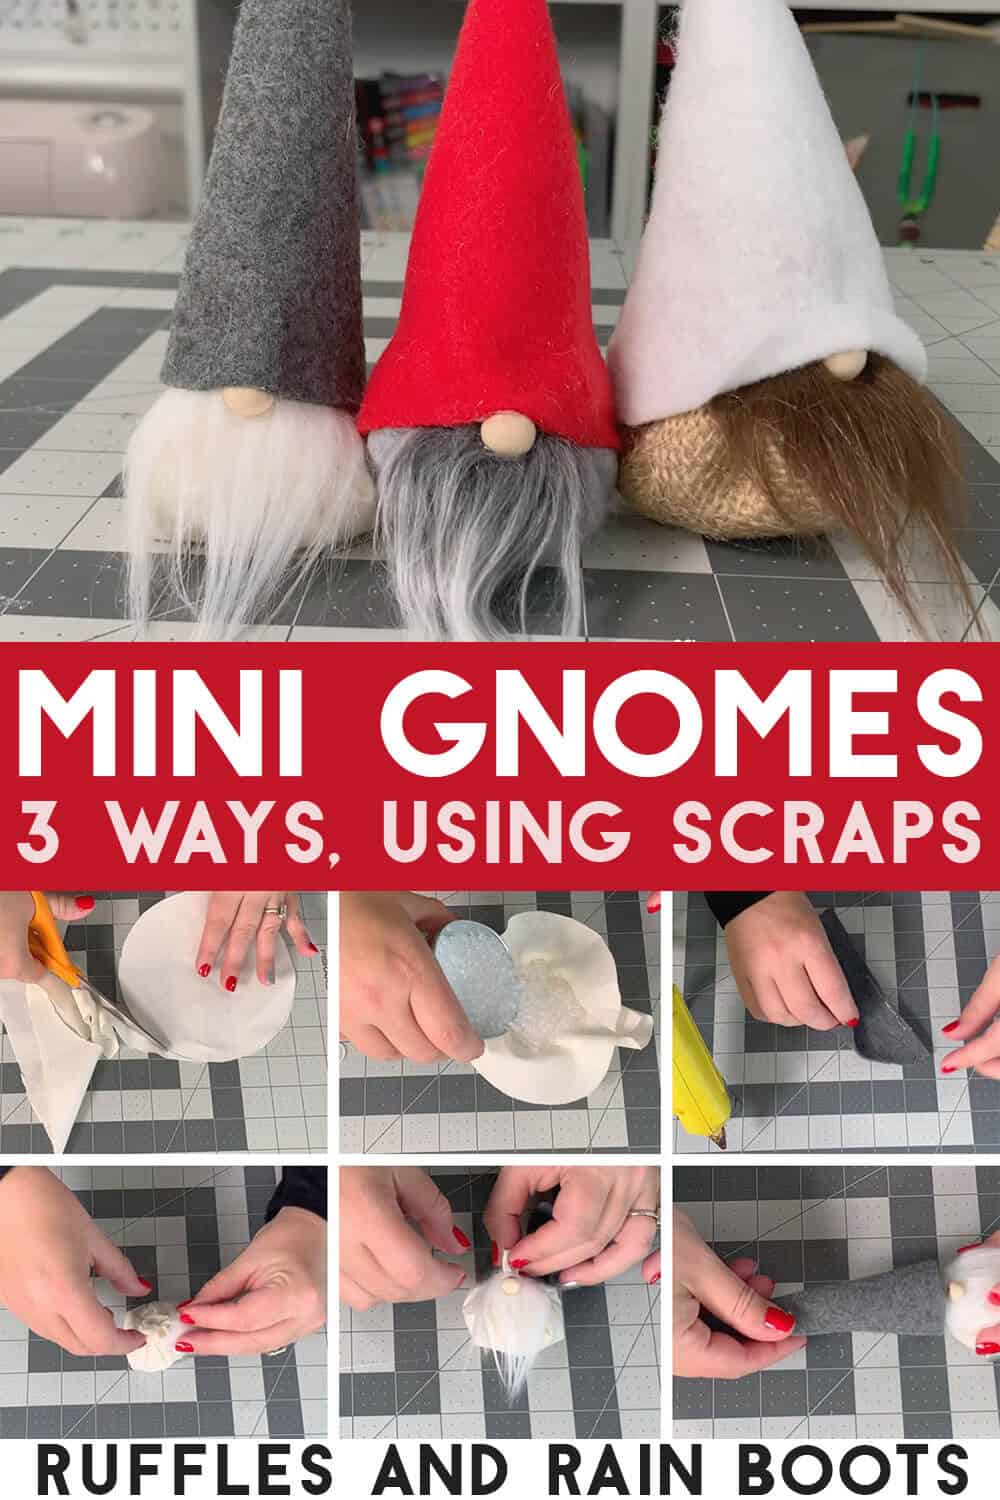
DIY Mini Gnomes Tutorial: 3 Ways to Make Tiny Gnomes
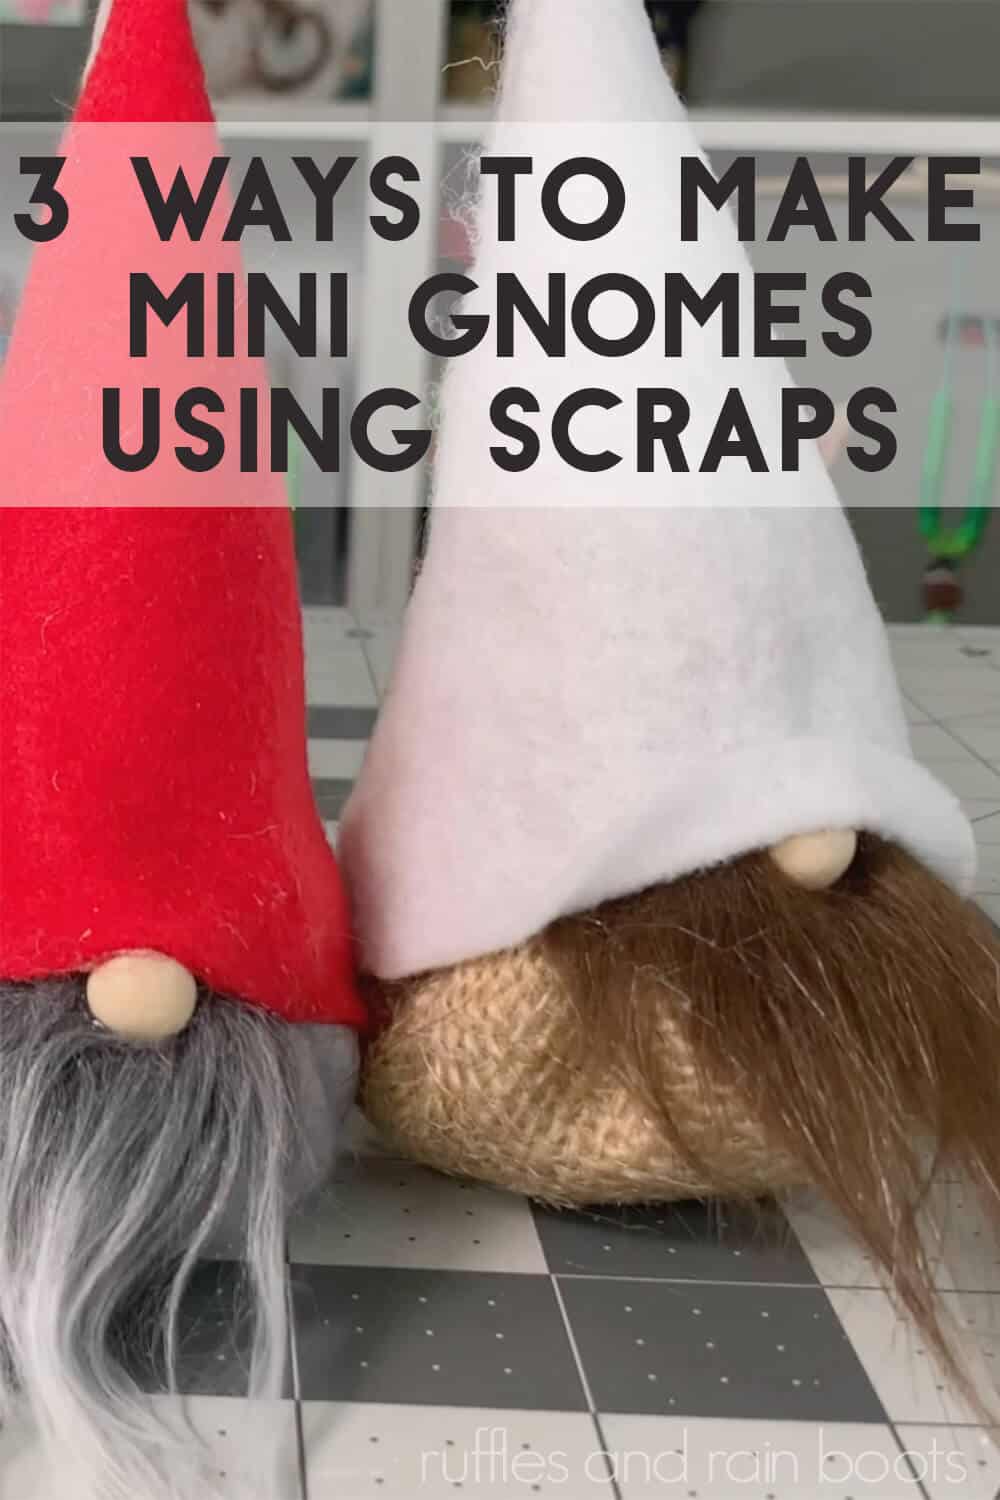
Learn how to make three different scrap busters using this mini gnome tutorial. You’ll make a shelf sitter, tiered tray gnome, a gnome ornament, and even a gnome sachet using your scrap pile.
What You'll Find On This Page
How to Make DIY Tiny Gnomes
Here at Ruffles and Rain Boots, I love making gnomes and have shared many ways to make a cute little gnome. Whether you’re making a miniature gnome to pin on your lapel or making tiny gnome ornaments like these, I wanted to share a few ways I work through some extra scraps of faux fur and felt I accumulate through the year.
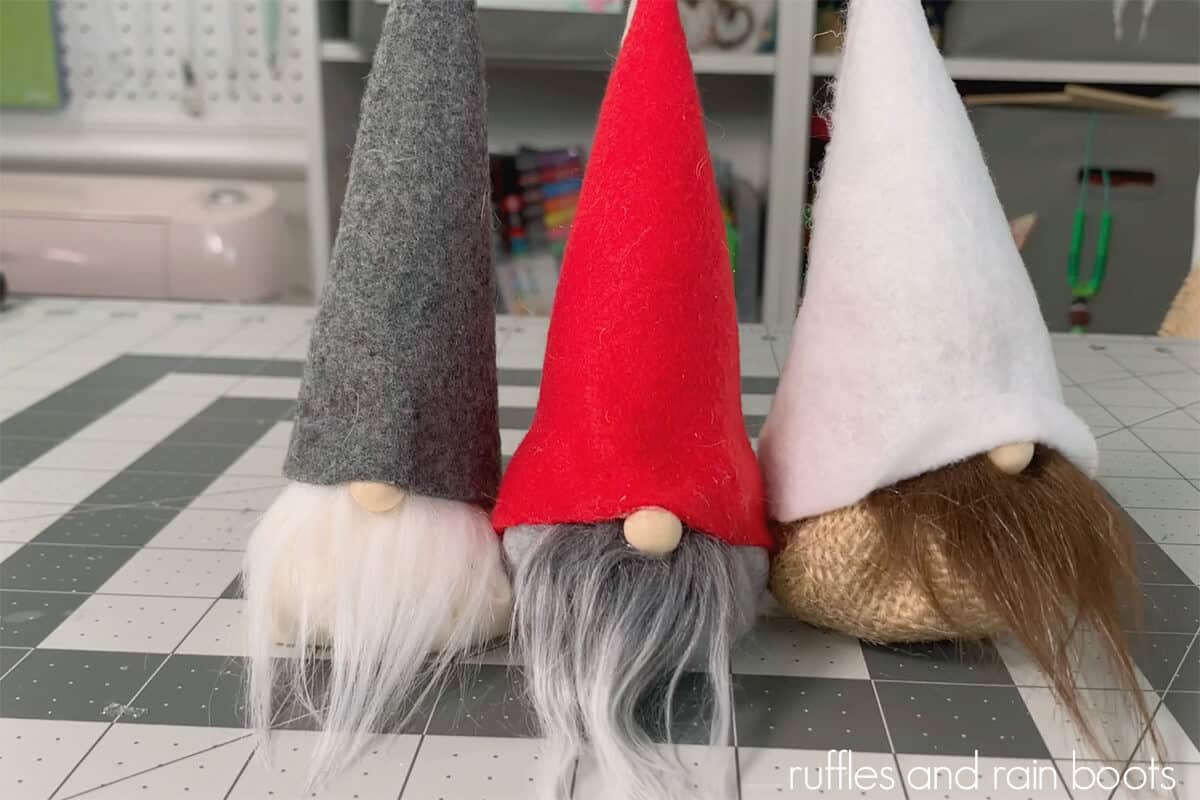
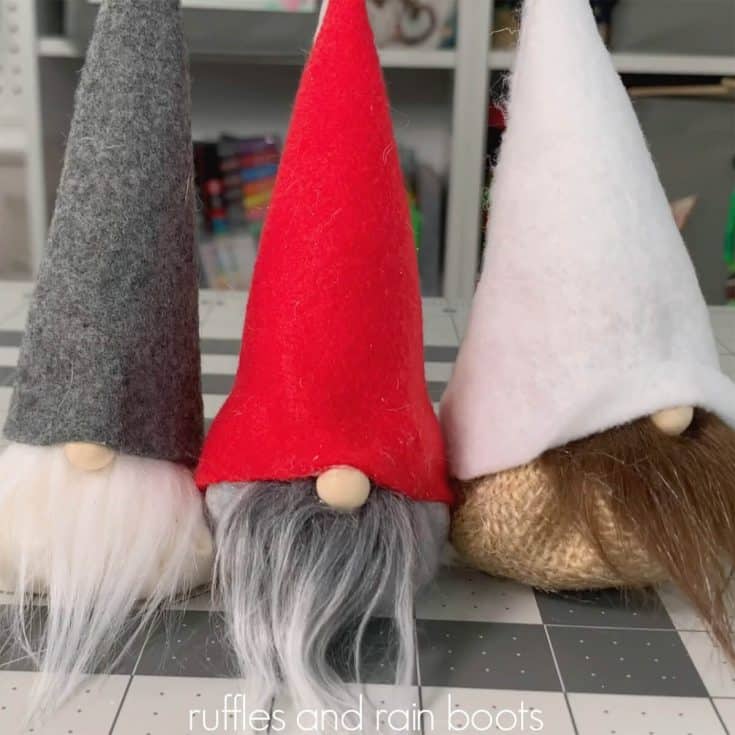
There are three gnomes in this tutorial all made with nearly the same basic craft supplies and materials. Here, you’ll learn how to make a tiny tiered tray gnome, a small gnome ornament, and a gnome sachet. Let’s get started.
RELATED READING: Icelandic Lovey Gnome Pattern for Small Gnomes
No Time to Make These Now? Share for Later
If you need to go do a quick check on your scrap stash inventory, save this to a crafty pin board or share it to a Facebook group. Speaking of Facebook groups, be sure to join the Ruffles and Rain Boots Facebook group here.
Tips for Making Mini Gnomes from Scraps
Over the years, I have found that there are really easy ways to make a gnome hat without a pattern. I know it might seem like you NEED a pattern when you’re new, but trust me: you absolutely don’t.
- Scrap felt isn’t all the same. If you notice, I use premium felt (a thicker craft store felt); it’s my choice for these and other tiny gnome hats. Premium felt holds its shape much better than the felt sheets.
- Never throw away faux fur. It’s one of the most expensive items we purchase for gnome making and even the smallest scraps and cut offs can be used for beards, eyebrows, and even clothing accents.
- Mix up your scraps for the beards by using moss, yarn or loop yarn, or even fabric cut into thin strips.
- Be sure to add a little bit of weight to your ornament. I know it seems counter-intuitive, but adding a small amount of poly beads will allow the gnome ornament to fall better on the tree or when tied onto a gift.
- When making tiny gnomes, use any size nose you’d like made out of any material. A few ideas: wood beads and rounds (I like the 1/4″ size), pony beads, polymer clay rounds you roll, pompoms, and even small felted wool balls.
- If you’re a visual learner, check out the full tutorial walking you through each of these tiny gnome patterns.

How to Make Mini Gnomes with Scraps
Below is the written tutorial for all three of the mini gnomes shared here. If you’re a visual learner, click here for the full mini gnome tutorial on YouTube. Be sure to subscribe!
Mini Gnome Tutorials
Make a tiered tray gnome, a gnome ornament, and a gnome sachet using the same supplies and scraps from your craft room.
Materials
- Muslin, Cotton, Knit, or Fleece Fabric for Bodies
- Elastic or Twine
- Poly Fill and Poly Beads
- Faux Fur Scraps
- Felt Scraps (I use premium felt) for Hats
- 3 x 1/4” Wood Bead (or other nose)
- 1.5 yards Embroidery Thread
- 20 inches Twine, String, or Ribbon
- 1/8-1/4 cup Lavender Buds (dried)
- Burlap or Other Porous Fabric
Tools
- Pen or Marker
- Scissors
- Hot Glue and Glue Gun
- Needle
Instructions
Tiered Tray Mini Gnome
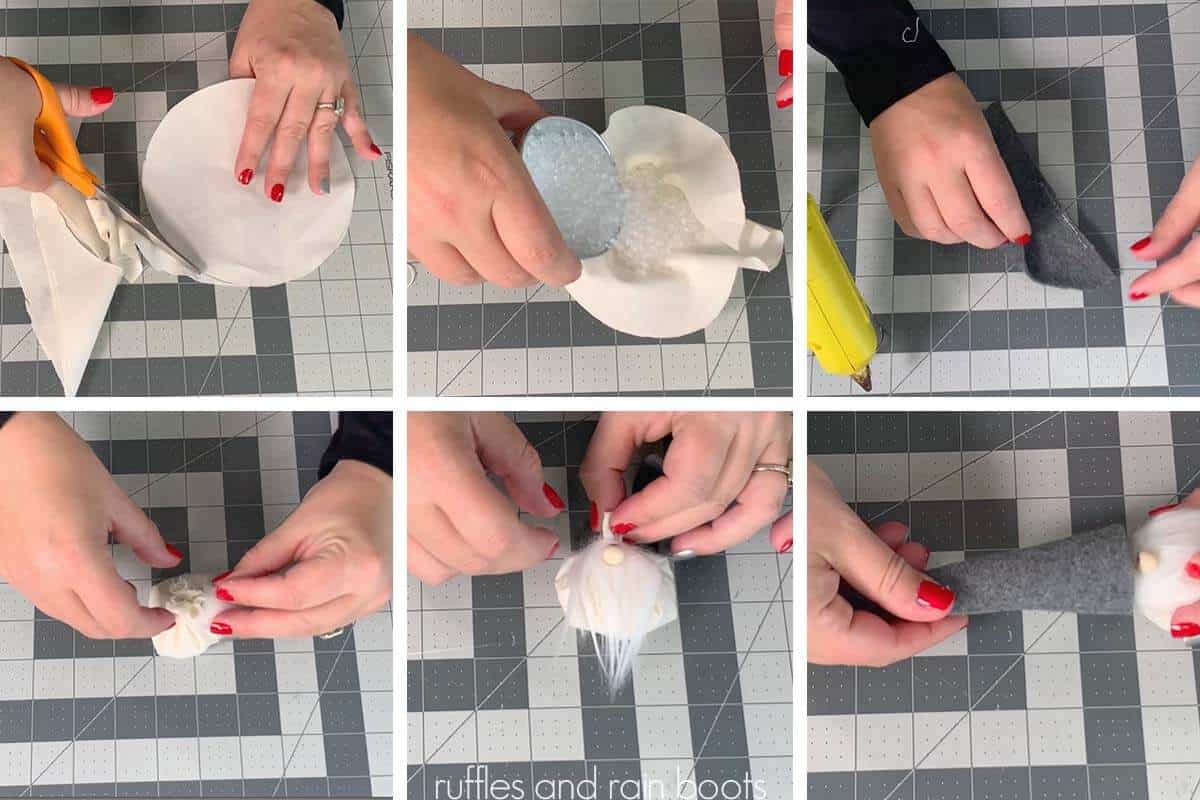
- Trace a 6 inch round onto a piece of muslin, cotton, thin knit, or fleece fabric. Cut out.
- Fill the center with poly beads (for weight). Fill it but make sure you can bring all edges to the center and secure with an elastic or string.
- For the hat, wrap a piece of felt around the widest portion of the body and add 1/4 to 1/2 inch for the join. Make a mark to indicate the width.
- Fold the felt (left edge to that mark you just made) and cut a triangle starting from the outside open edge to the desired height (use between 4 and 6 inches).
- Secure the long edge of the triangle of felt for the hat by rolling one edge under into a cone. Trim off any excess at the bottom of the hat to even it out.
- Attach a scrap of fur to the body of the gnome for the beard. Slip on the hat to determine where the nose should be, add the nose to the beard with hot glue, and then add glue along the inside of the hat to secure it all the way around to the body. Decorate and display.

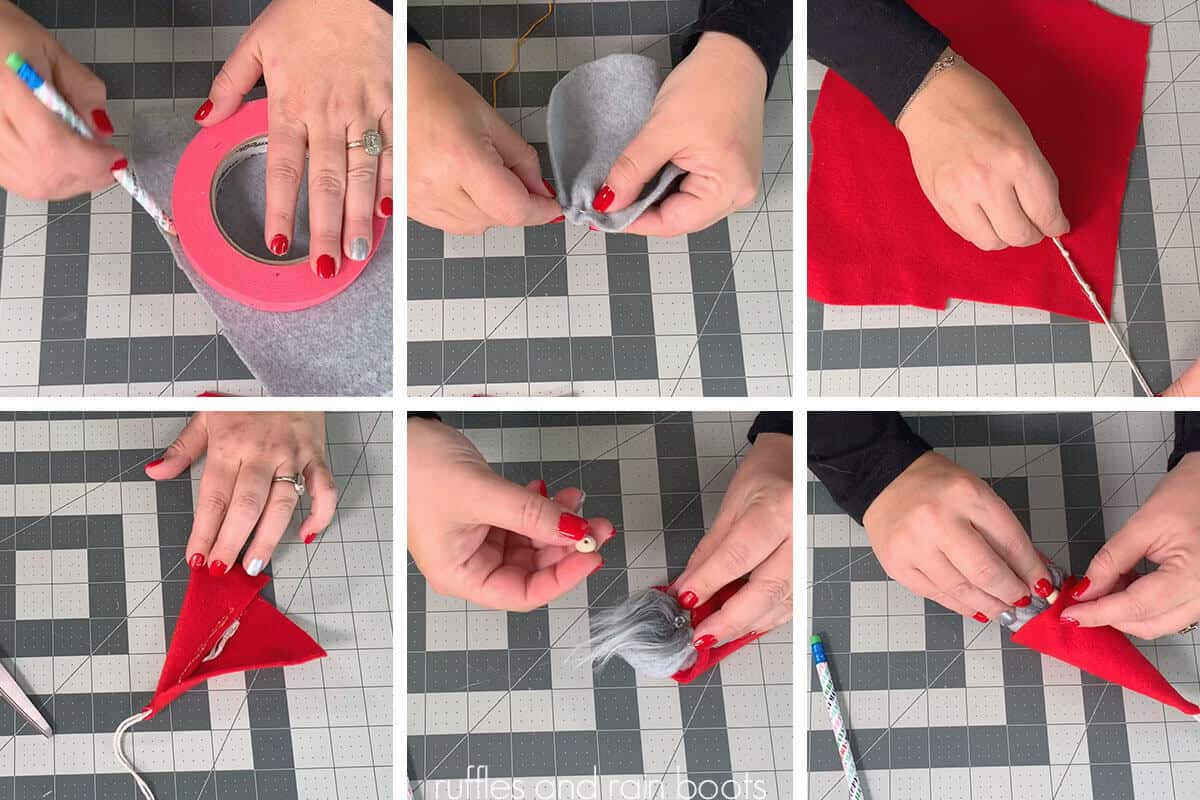
Gnome Ornament
- Trace a 5 inch round onto a scrap of fleece. Use 15” of embroidery thread and, starting from the outside edge, sew a running stitch all the way around the circle about 1/2 inch away from the edge. Remember to end on the outside next to where you started. Gently pull the strings to tighten the pouch.
- Add both poly beads and poly fill to the body pouch. Pull the strings to close the pouch, double knot the thread, and cut the excess strings from the body.
- Cut 20 inches of string, twine, or ribbon for the ornament hanger. Fold in half and tie the top knot (with the desired length for the ornament holder) and a safety knot about 1.5 inches lower.
- On a piece of felt, make sure to create an edge with a point. This doesn’t have to be 90 degrees, but it needs to be wide enough to fit around the gnome when rolled into a cone, just as we measured the body above.
- Glue the ornament hanging string so that it comes out at the point of the felt, making sure the top knot it about 1/2 inch from the point.
- Fold the felt into a triangle and measure down 5 inches. Cut a rounded off bottom to the triangle - do not worry, this doesn’t have to be exact!
- Make the side with the ornament string facing up (you can see it) and grab the right side of the triangle, fold it into itself and create a cone. Secure the top point down and then glue down the rest of the hat (you can trim any excess felt off). Fill the tip of the hat with poly fill.
- Place a scrap of fur on the body, add the nose, and then secure down the hat (hot glue directly to the body and the top of the nose). Decorate and display.
Gnome Sachet
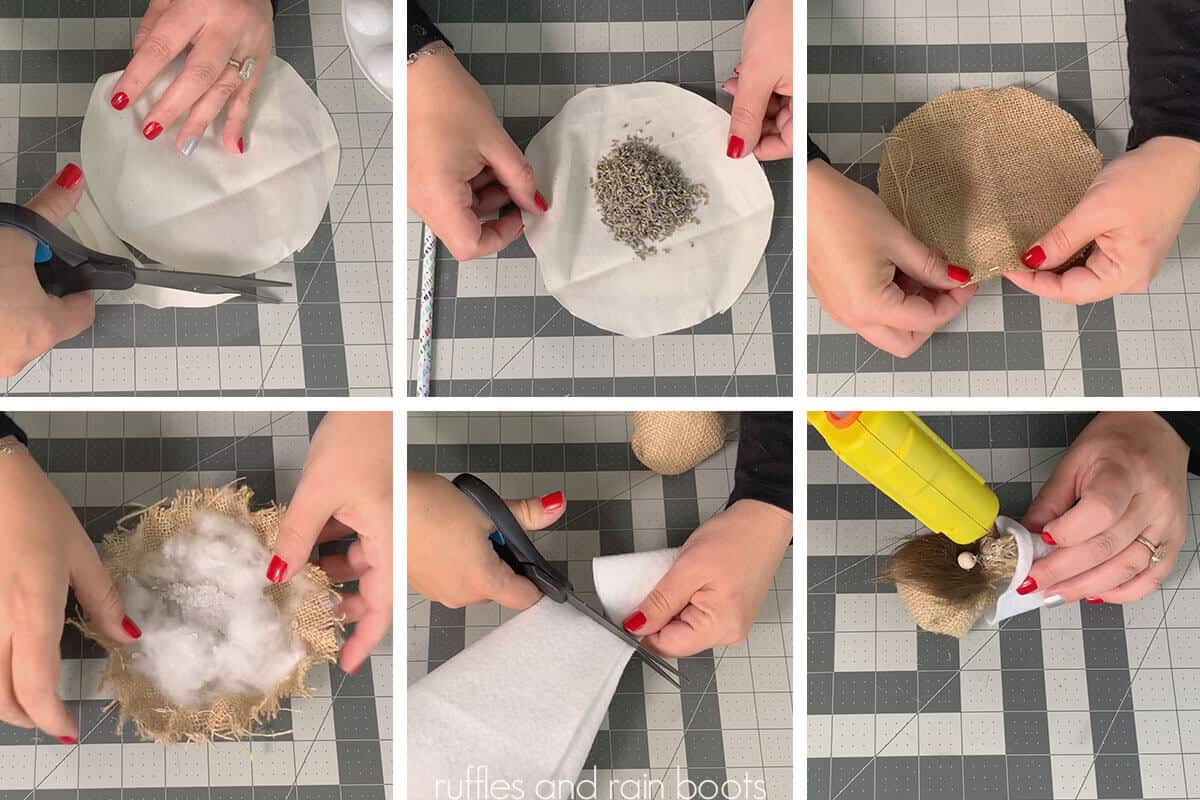
- Trace a 7 inch round onto a piece of muslin or very thin fabric. Cut out.
- Add about 1/8th of a cup of lavender buds (or other dried flowers or herbs) to the center and secure the edges with an elastic to create a pouch.
- Trace a 7 inch round onto a piece of burlap and cut out. Cut a piece of 24 inch thread and create the running stitch on the outside edge. Gently pull in the edge to create a pouch.
- Add poly fill on the outside edge of the pouch. Add poly beads to the center and place the scented pouch on top. Pull tightly and secure threads.
- On any right angle of felt (any edge), fold over a cone shape as wide as the body of the gnome for the height desired (not wrapped around it, just measured as it is laid on top). Flatten the felt cone and cut off a rounded bottom to make the hat. Note: this is best shown in the video tutorial.
- Open the shape and secure the long edges together as we’ve done with the other gnomes. Flip up the very front of the hat (opposite side of the back seam) and glue in place.
- Glue a scrap or shaped piece of fur to the body and add a nose to the beard. Slip on the hat and secure all around. Decorate and display.
Notes
For gnome patterns, gnome tutorials, and gnome crafts for all seasons, visit ruffles and rain boots.
More Small Gnomes You Might Like
- Tiny Gnome Ornaments from Glove Fingers – Yep, you read that right and yes, use the gloves from the Dollar Tree!
- 5-Inch Reversible Hat Gnome – If you want to make a tiered tray gnome that packs a big design punch, make this reversible hat gnome to fit any decor or season.
- One Sock Sock Gnome – I know the name is a mouthful, but you can make a gorgeous gnome from a single sock with this tutorial.
Please Save or Share
Your shares are how this site grows and I am sincerely grateful. Please save this to a crafty pin board or share it to your favorite Facebook group.
Meet the Creator
Hi there, I’m Sarah Nenni-Daher. I’m a crafty gal and always have at least 14 projects going at once. I am a crafter, designer, DIYer, and pattern maker. I share my creations here and in the Ruffles and Rain Boots® Shop.
Here at Ruffles and Rain Boots®, you’ll find DIY gnomes, crafts, gifts, cupcakes, laser crafts, and so much more. I love sharing video tutorials over on YouTube and chatting with other crafters in my Facebook groups. We’d love to have you!