
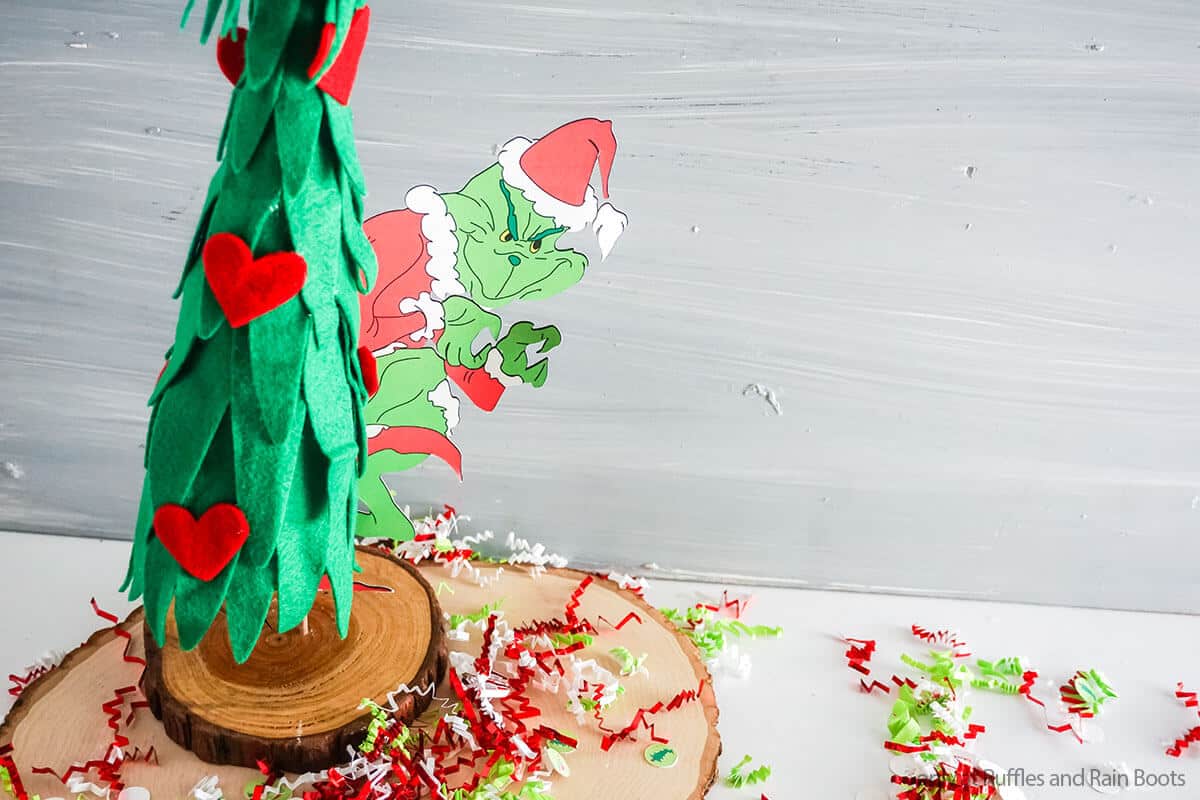
This DIY Grinch Tree is a Who-Tastic Grinch Craft!
This fun DIY Grinch tree craft is one of the most fun Grinch crafts you can make for the holidays. Perfect for your mantle or a centerpiece on the table, it is one of those projects you’ll love making as much as you love displaying it!
And be sure to check out these awesome 20+ Grinch crafts for kids–you’ll have so many awesome ideas, you’ll never run out of fun!
DIY Grinch Tree
My name is Kelli and I am visiting from 3Boysandadog.com. You can usually find me blogging about homeschooling and yummy recipes, but I also have a huge love for crafting!
RELATED READING: FUN GRINCH STUCK IN THE CHIMNEY WREATH
Today I am sharing a fun Cricut project to make this awesome DIY Grinch tree. I love working with my Cricut because it makes projects so much faster and less stressful, but because I’m also a little bit of a perfectionist and having nice clean cuts makes my crafts look more professional.
The fact is, though, that this craft–does not look perfect and it’s not supposed to. The complete embodiment of a Whoville Christmas tree, this is one of those projects that is whimsical because it’s not perfect. If you’re ready to make a fun centerpiece or Grinch holiday decoration, let’s get started.

No Time to Make This Now? Pin it for Later
You’re busy, I get it. Pin this to your favorite easy holiday crafts board on Pinterest and it’ll be here for when you’re ready.
Tips to Make This Grinch Craft
- Grab the free Grinch SVG set here to use your Cricut or Silhouette to make this fun Grinch craft.
- Definitely start with a green cardstock paper to make your cone. You don’t want your tree to show any brown if the branches leave a little gap. I used a bright green, but a dark green would work too–just not brown.
- Use a thicker “premium” felt to make the branches for the tree. If you use the typical craft felt, it won’t have any body and will flop over. But with the thicker felt, you’ll be able to almost sculpt the tree.
- If you’d like to have a fun little addition poking his head around the tree with the Grinch, you can check out my Grinch popsicle stick puppets here and print Max’s head to put just peeking around the tree, too!

How Do I Make this DIY Grinch Tree?
I’m so glad you asked. Below is our written tutorial.
DIY Grinch Tree

This is such a fun Grinch craft that you can make in minutes. And this DIY Grinch tree is the perfect Grinch centerpiece or decor for a fun holiday entryway or table.
Materials
- 2 Sheets Dark Green Craft Felt
- 1 Sheet Red Craft Felt
- 3 Sheets Green Card Stock Paper
- 1 Sheet White Card Stock Paper
- 1 4-inch Wood Round
- Grinch Tree Cut Files
Tools
- Cricut Explore Air 2 or Cricut Maker
- Light Grip Mat
- Fabric Grip Mat
- Rotary Blade for Cricut
- Fine Point Blade for Cricut
- Scissors
- Hot Glue Gun & Glue
- Desktop Printer
Instructions
- Download the free Grinch SVG set and upload it into Cricut Design Space.
- Cut the hearts from the red craft felt sheet using the Cricut.
- Cut the branches from the green craft felt sheets using the Cricut
- Print out the Grinch shape on the desktop printer through Cricut Design Space, then cut it using the Cricut.
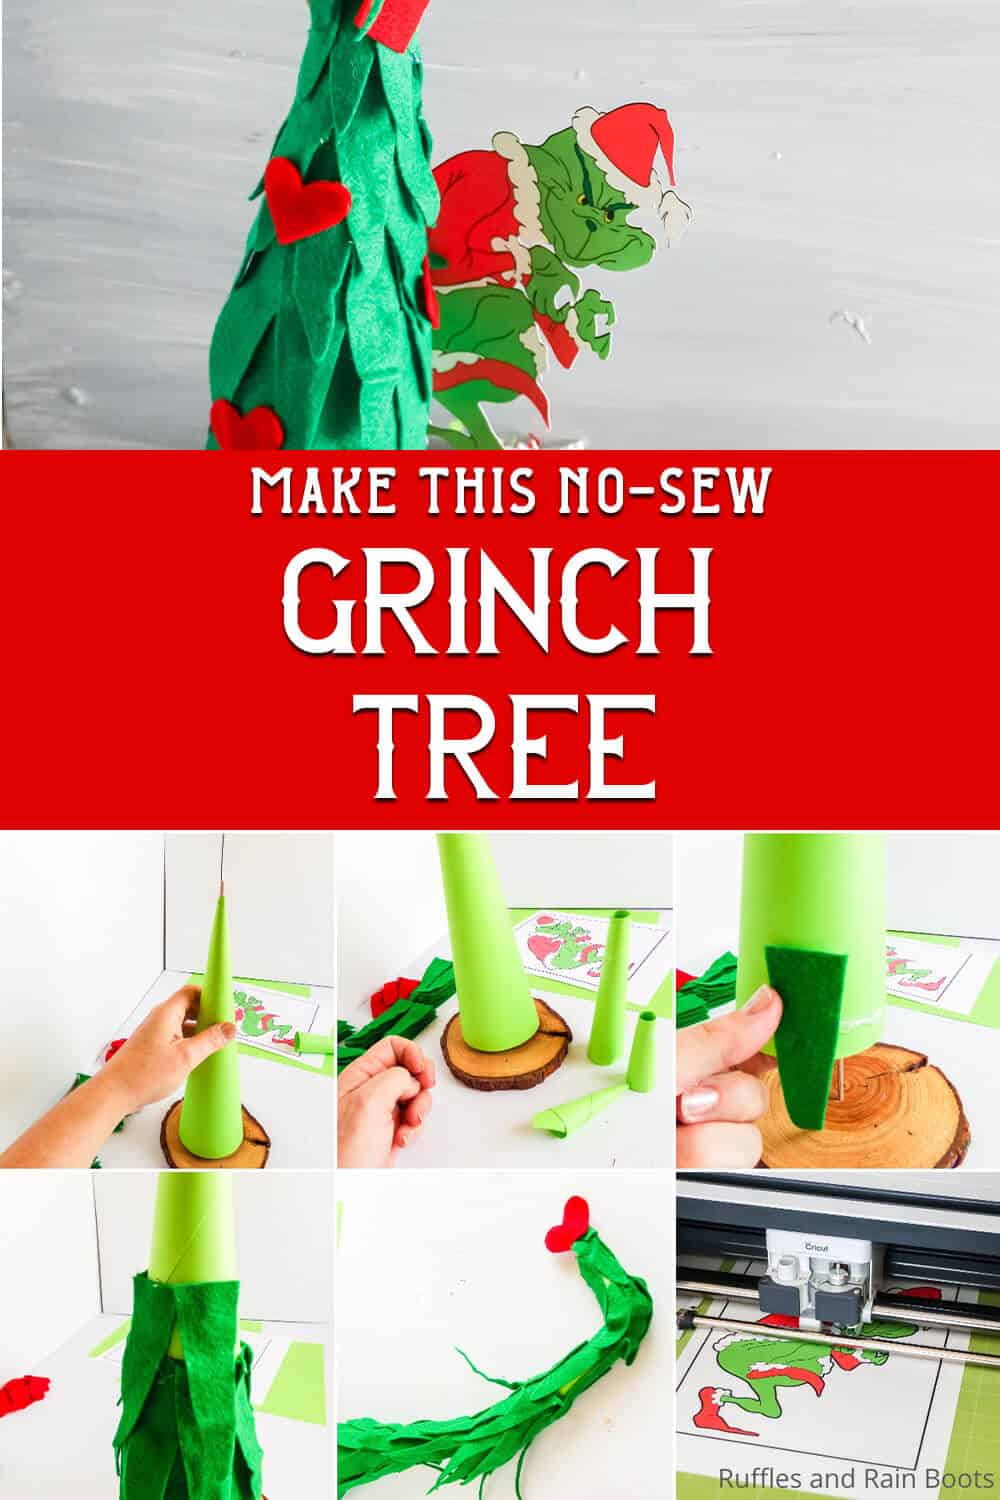
- Curl one of the green card stock sheets into a cone, tight on one end and wide on the other.
- Hot glue the cone in the cone shape.
- Trim the cone to have a mostly flat bottom--it does not have to be perfect because you are going to cover it and hide any imperfection. Then hot glue this cone to the center of the wood round.
- Make a second, much thinner cone with the second sheet of card stock, hot gluing it in the round shape. Tuck this thinner cone on the top of the larger cone on the wood round. Tip the smaller cone over a bit, making the shape lean and hot glue it in place.
- Make a third, very much thinner cone with the third sheet of card stock, hot glueing it in the round shape. Tuck this thinner cone on top of the middle-sized cone on top of the other cone. then hot glue it in place in a leaned-over state.
- Starting on the bottom row of the branches, using alternating sizes of the largest size branches, hot glue a row of branches all the way around the base of the cone.
- Moving upward, working in rows of descending size branches, cover the entire tree shape in branches.
- Hot glue the hearts onto the tree randomly, taking two of the hearts and gluing them on either side of the tip of the tree.
- Place the Grinch cutout behind the tree and hot glue it in place on the tree and enjoy!


Notes
For more fun Grinch craft ideas, visit Ruffles and Rain Boots!
More Grinch Crafts You Might Like
- Grinch Sock Gnome – This easy sock gnome DIY is quick to work up and that hat is WOW! I love the little cup of coffee, too. I think my heart just swelled two sizes.
- Grinch Farmhouse Beads – Making DIY farmhouse beads is fun–but making GRINCH farmhouse beads? That is just epic and turns any display into a Grinch display.
- Grinch Gnome Ornament – You’re not going to find a more adorable gnome ornament that really puts the Grinch on your tree.
Please Save This to Pinterest
Your shares are how this site grows and I am sincerely grateful. Know a friend who’d like this? Please share it on Facebook or save it to your favorite easy Grinch ideas board on Pinterest.

Meet the Creator
Hi there, I’m Sarah Nenni-Daher. I’m a crafty gal and always have at least 14 projects going at once. I am a crafter, designer, DIYer, and pattern maker. I share my creations here and in the Ruffles and Rain Boots® Shop.
Here at Ruffles and Rain Boots®, you’ll find DIY gnomes, crafts, gifts, cupcakes, laser crafts, and so much more. I love sharing video tutorials over on YouTube and chatting with other crafters in my Facebook groups. We’d love to have you!