
How to Make Clay Chocolate Chip Cookies
These clay chocolate chip cookies are a fun craft project you can complete in about 15 minutes. If you want to make an adorable gnome with cookies, a faux cookie display for a kitchen tiered tray, or anything else, this is an easy tutorial.
The best part is that you only need a few supplies for this quick polymer clay project. It’s a great way to get creative.
RELATED READING: How to Make Clay Fruit – So Many Included!
Chocolate Chip Cookies Made from Clay
Here at Ruffles and Rain Boots, I love working with clay and believe polymer clay is the easiest and most versatile. Over the years, I’ve shared a ton of clay tutorials – everything from how to make Kawaii fruits from clay, clay mushrooms with smiles. clay backpack tags and charms for the little ones, and even how to make clay gnomes with BIG feet.
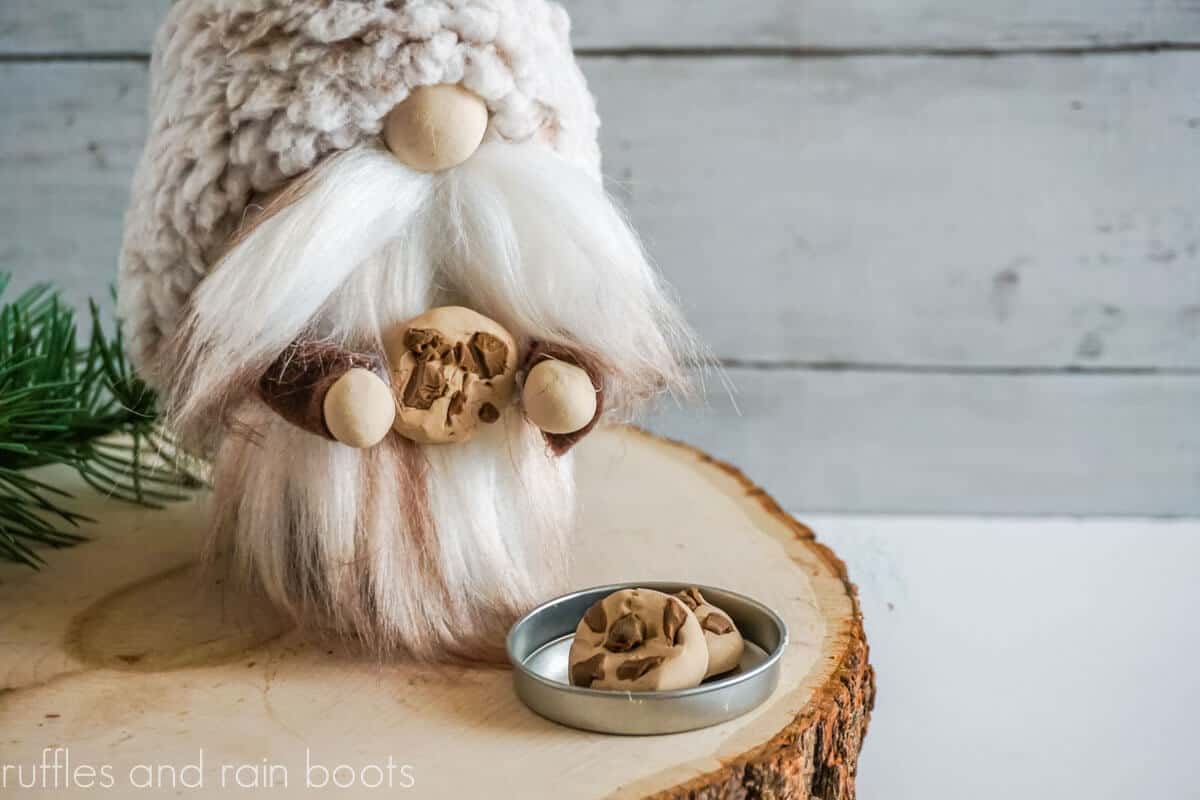
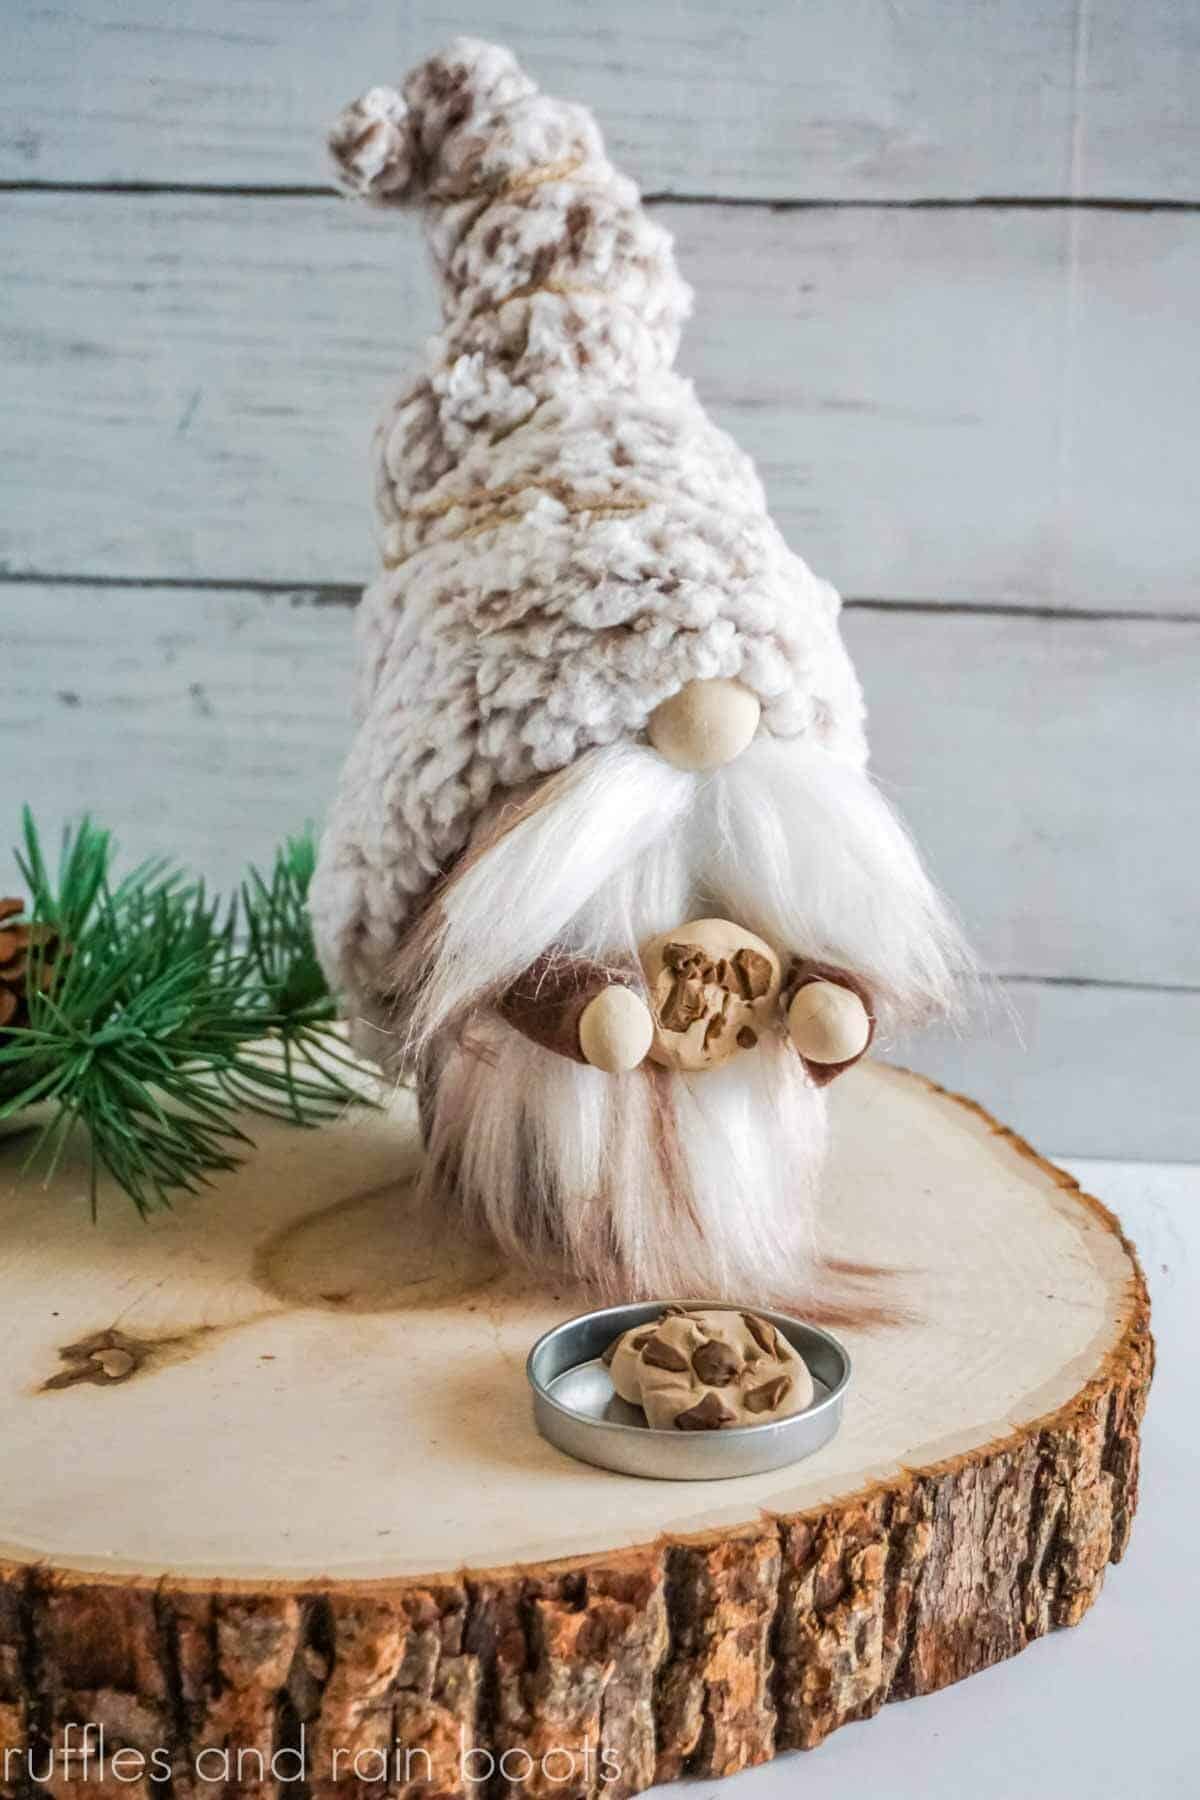
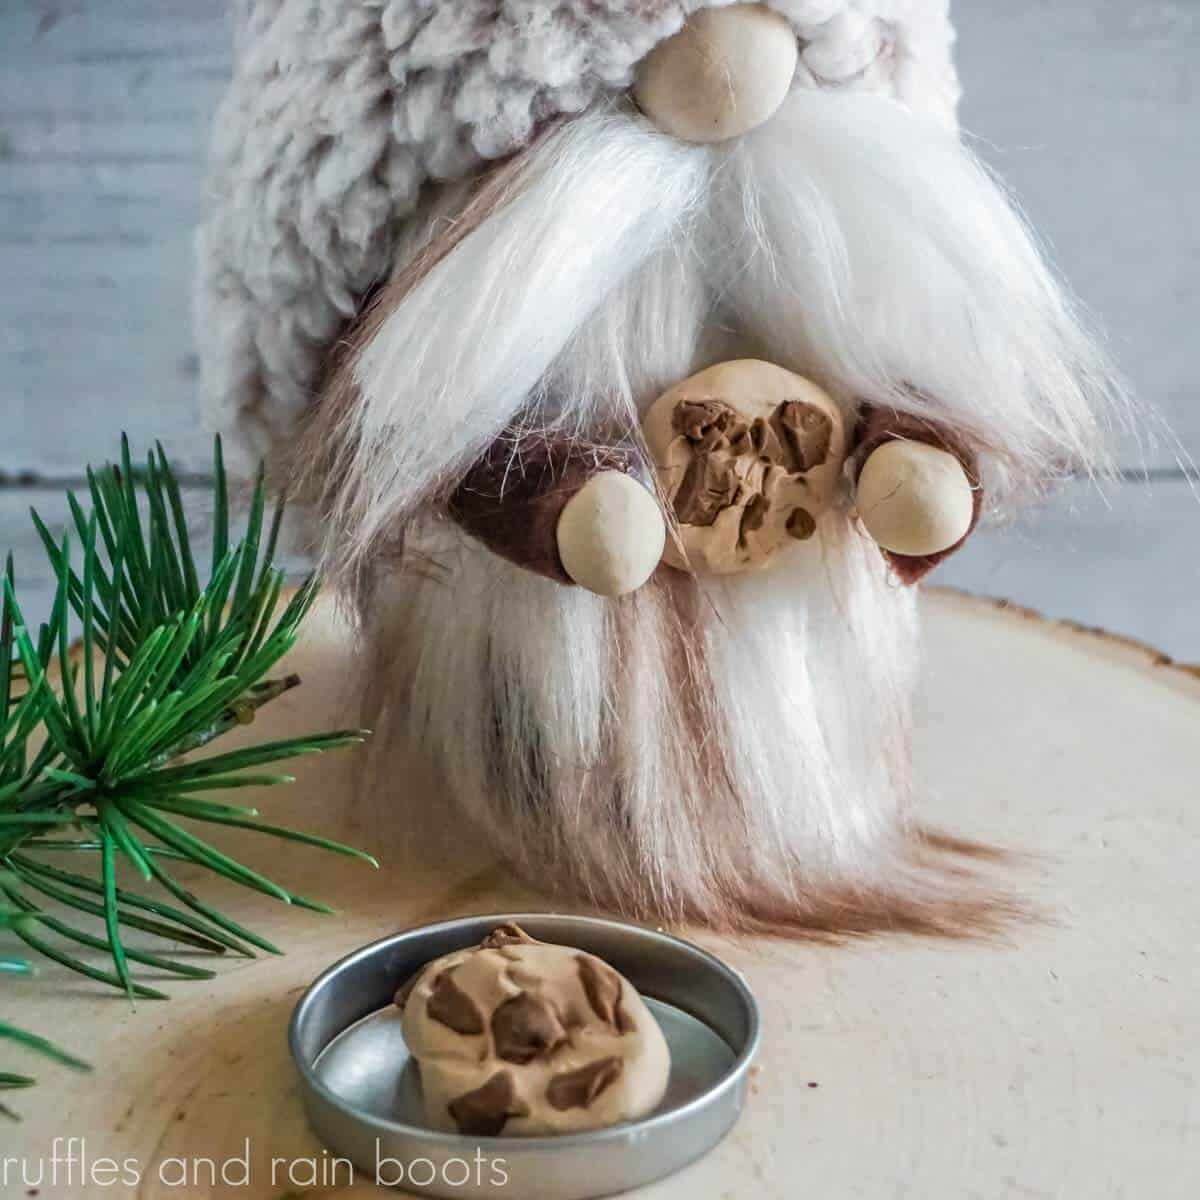
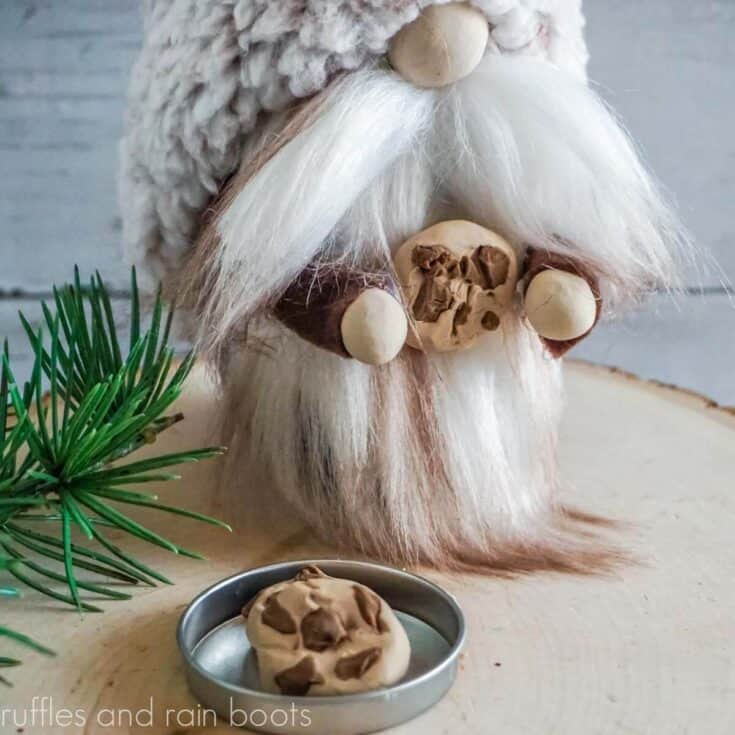
Recently I’ve been asked to make faux food accessories for gnomes using clay and well, I’m always up for a challenge! Up first, I’m sharing these adorable chocolate chunk cookies made from polymer clay.
No Time to Make These Now? Save or Share for Later
If you need to gather up supplies, save this to an easy crafts pin board or share it to Facebook. It will be easy to find when you’re ready to begin.
As an Amazon Associate, I could earn from qualifying purchases. There could be affiliate links within this article.
RELATED READING: Make This Cute No Sew Gnome with a Hot Cocoa
Tips for Making Polymer Clay Cookies
- For the most cost effective option, get a large white block of polymer clay like this or a small pack like this and a single pack of dark brown. Mix a chunk of the dark brown with the white until you get the desired color.
- The cookies shouldn’t be even and perfect so be sure to add texture with a few presses into the clay, pokes with the tools, and even an old toothbrush to add dimension and detail.
- Don’t make the clay cookies too thin as it can lead to cracking and breaking.
- If you would like to make faux cookies with chocolate chips (similar to the Nestle Toll House chip style), make the chocolate chips first and bake them. Once they have cooled, press them into the raw cookie (I recommend also adding liquid clay when assembling). Then, bake the cookie with the chips.
- Polymer clay doesn’t need to be sealed but if you would like to do so, you can. I use this for a matte finish or this in the glossy finish, depending on the look I want.
- These cookies can also be made with air dry clay (this is the brand I use) and painted once dry (I wait a couple of days).
DIY Chocolate Chunk Cookies Using Polymer Clay
Below is the written and printable tutorial for these fake bake cookies. If you’re a visual learner, you can watch the DIY clay chocolate chunk cookies video tutorial here on the YouTube channel. It’s only a couple of minutes long, but the texture and dimension tips are great for the faux cookie look.
Clay Chocolate Chunk Cookies
These easy clay chocolate chunk cookies are a perfect afternoon DIY using polymer clay. Make them as large as you would like to fit any doll, gnome, or tiered tray display.
Materials
- Light Brown Clay
- Dark Brown Clay
Tools
- Chopstick, Toothpick, or Clay Tool
- Box Cutter or Craft Knife
- Oven
- Baking Sheet
- Parchment Paper or Foil
Instructions
- Preheat the oven to the temperature noted on the polymer clay packaging. Take note of the advice on thickness.
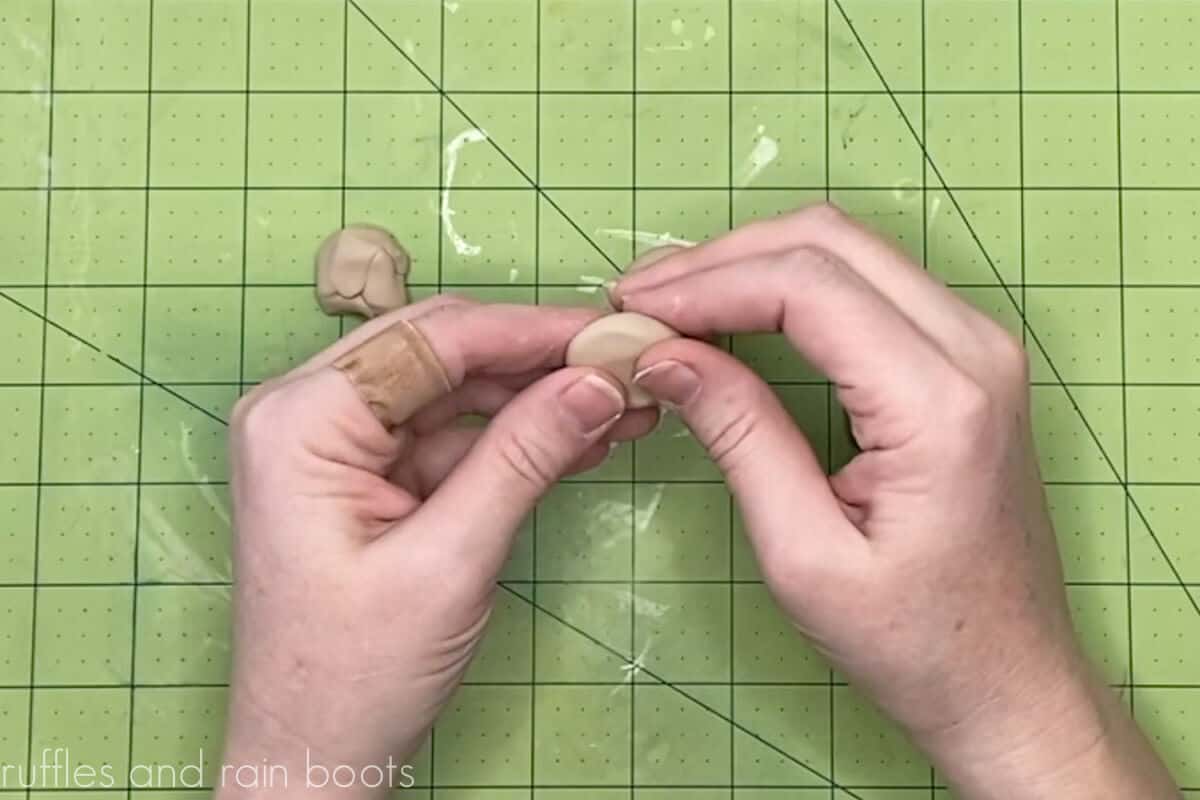
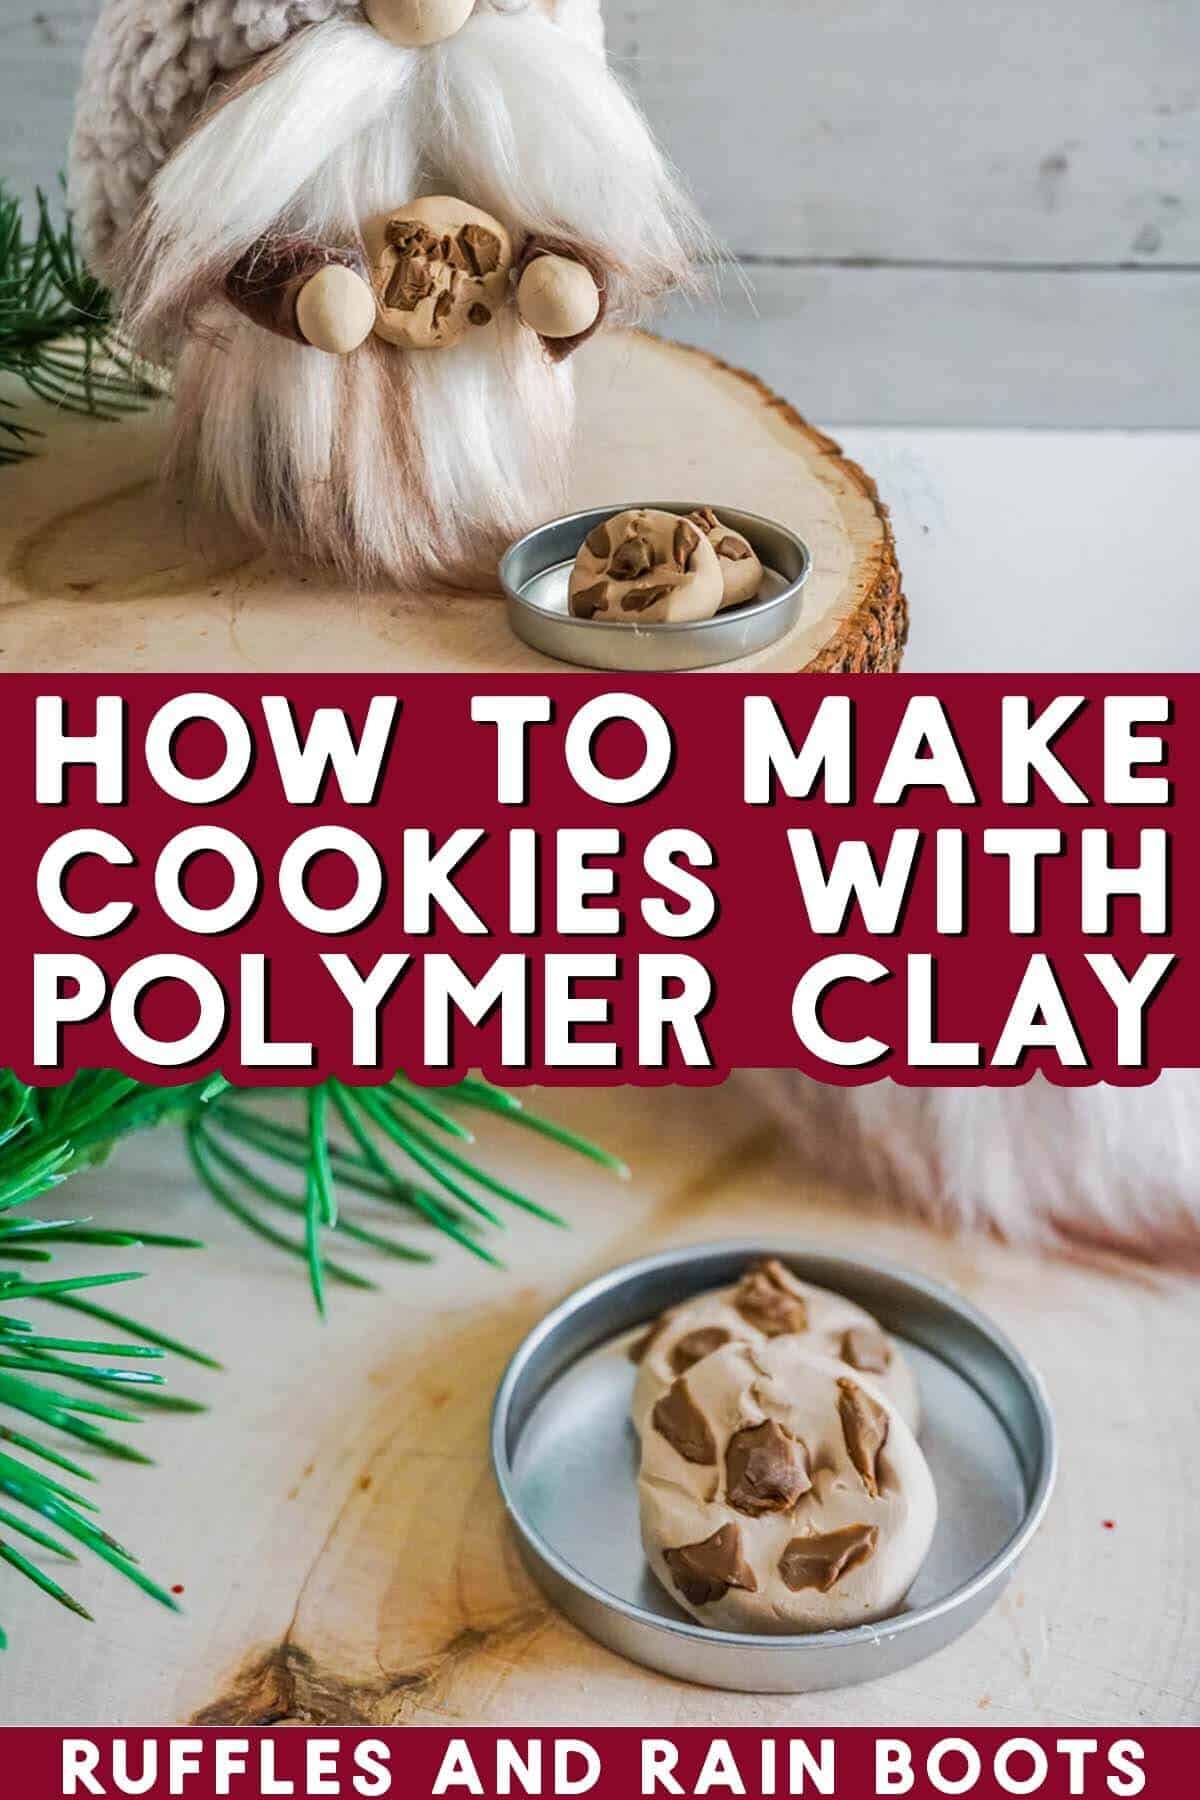
- Break the light brown polymer clay into 3 equal sized balls, about 3/4 to one inch in diameter (about 19-25 mm). Gently work each ball into a sphere and press them into flat disks. They should be about 1/4 inch thick (about 6 mm).

- Break off or use the craft knife to slice the dark brown polymer clay into several random, jagged pieces no larger than one 1/8 inch thick (about 3 mm). The more rough looking, the more like chocolate chips these pieces will seem.
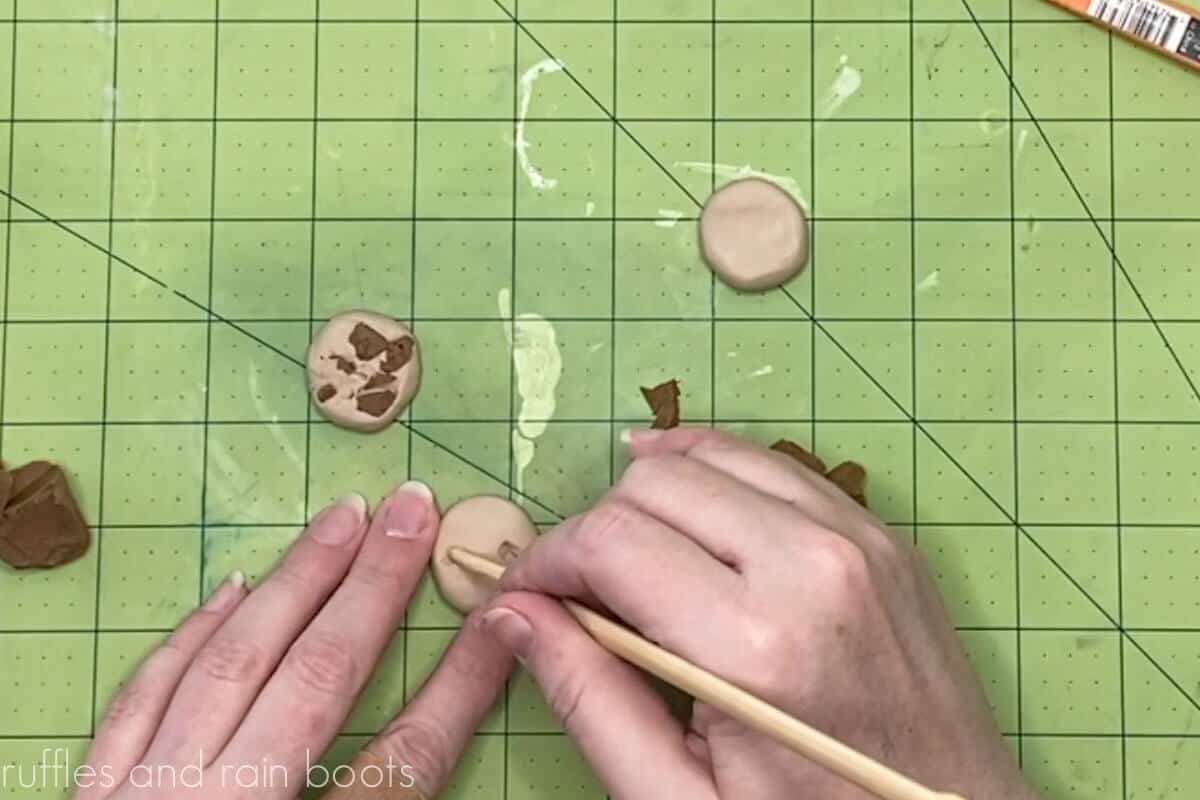
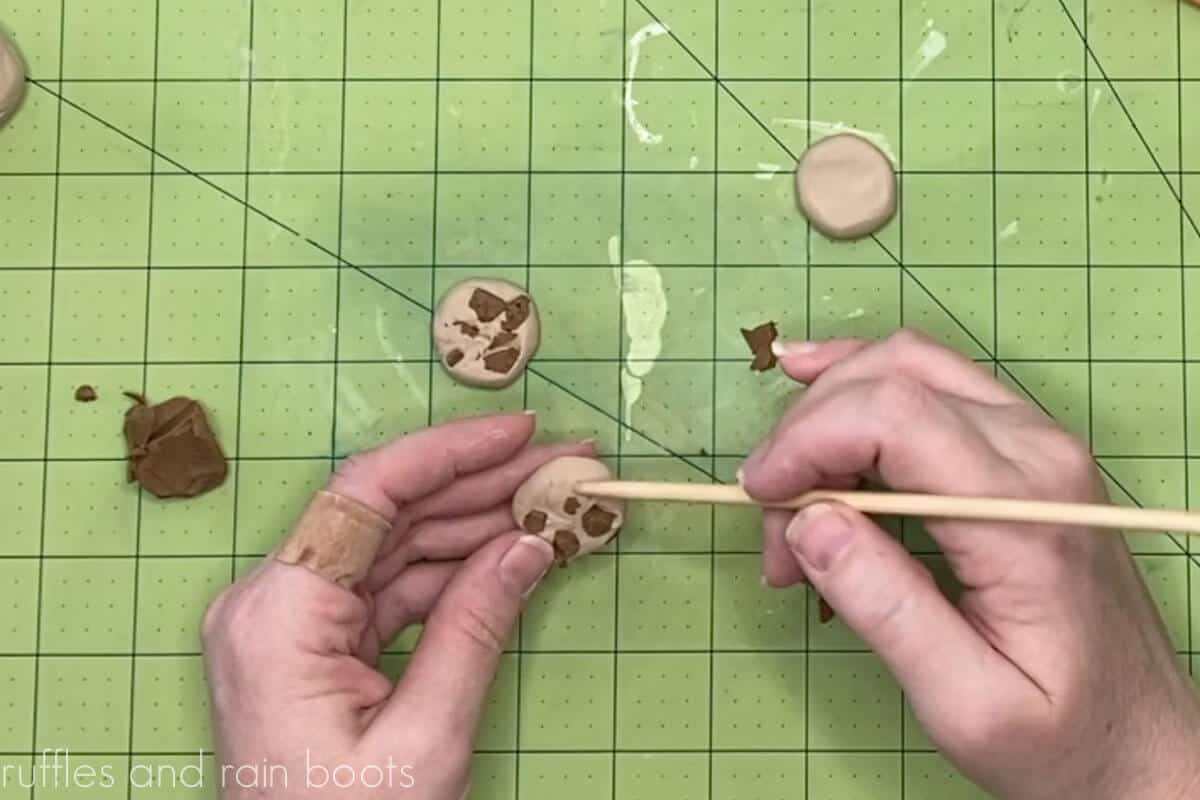
- Use the chopstick or toothpick to gently press in the top of the cookie shapes in 3 to 4 places. These cuts do not need to be deep, just shoot for about 1/3rd of the way through the cookie at most.
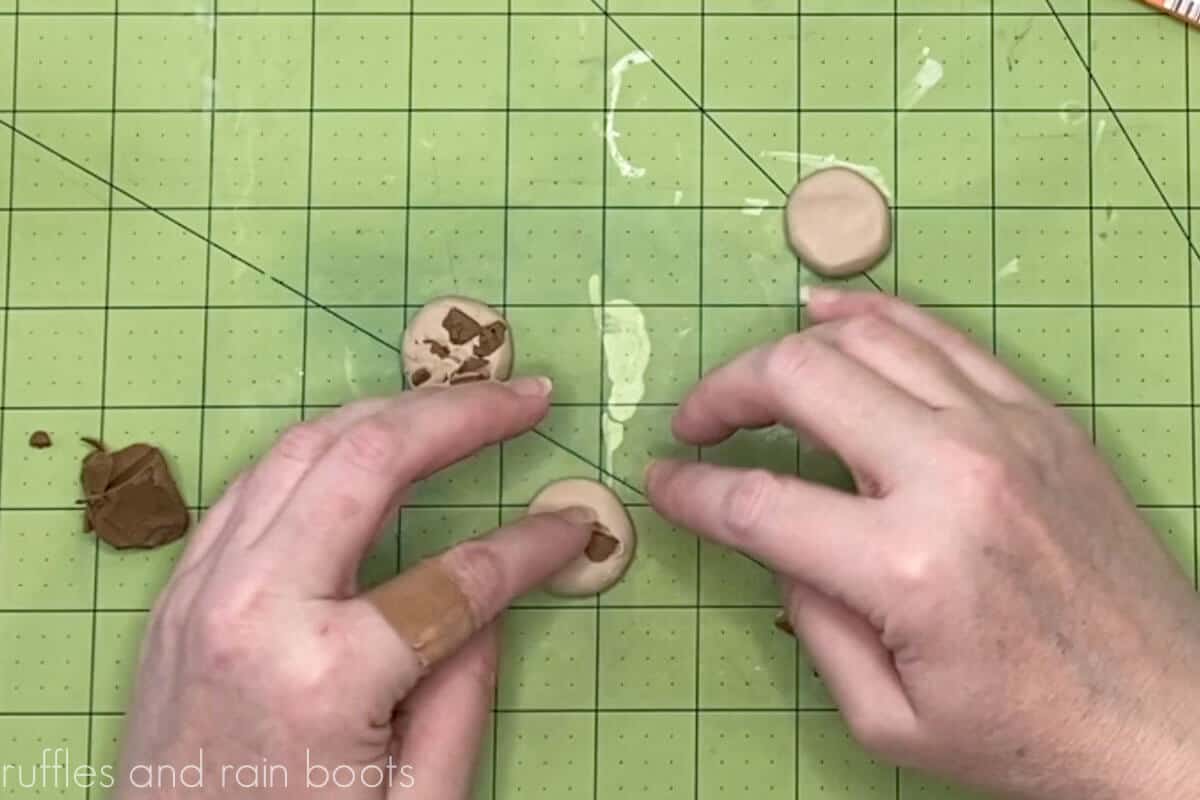
- Tuck a piece of dark brown polymer clay into each of the cuts made in each cookie, working the cookie gently so as not to reshape it too much.
- Add texture to the tops and sides of the cookies using the chopstick, your fingers, and additional items like old toothbrushes.
- Bake the cookies per the instructions on your clay packaging and let them cool in the oven before sealing or using as decoration.

Notes
The cookies shouldn't be even and perfect, so be sure to add texture with a few presses into the clay, pokes with the tools, and even an old toothbrush to add dimension and detail.
If you would like to use chocolate chips (similar to the Nestle Toll House chips), make them first and bake them. Once they have cooled, press them into the cookie (I recommend also adding liquid clay when assembling). Then, bake the cookie with the chips.
Recommended Products
As an Amazon Associate and member of other affiliate programs, I earn from qualifying purchases.


More Clay Crafts You Might Like
- How to Make Clay Mushrooms – These are surprisingly easy to make once you know the tricks. You can leave off the faces to include them in a display or as an accessory.
- DIY Clay Fruit (with or without faces) – Again, these can be made without the faces and would look great stacked in a little clay bowl!
- How to Make Clay Gnomes with Big Feet – These gnomes are too cute and they come together pretty quickly. The full video tutorial for the clay gnomes is such a big help.
Please Save or Share This
Your shares are how this site grows and I am sincerely grateful. Please save this to a DIY pin board or share it with a crafty group on Facebook.
Meet the Creator
Hi there, I’m Sarah Nenni-Daher. I’m a crafty gal and always have at least 14 projects going at once. I am a crafter, designer, DIYer, and pattern maker. I share my creations here and in the Ruffles and Rain Boots® Shop.
Here at Ruffles and Rain Boots®, you’ll find DIY gnomes, crafts, gifts, cupcakes, laser crafts, and so much more. I love sharing video tutorials over on YouTube and chatting with other crafters in my Facebook groups. We’d love to have you!