
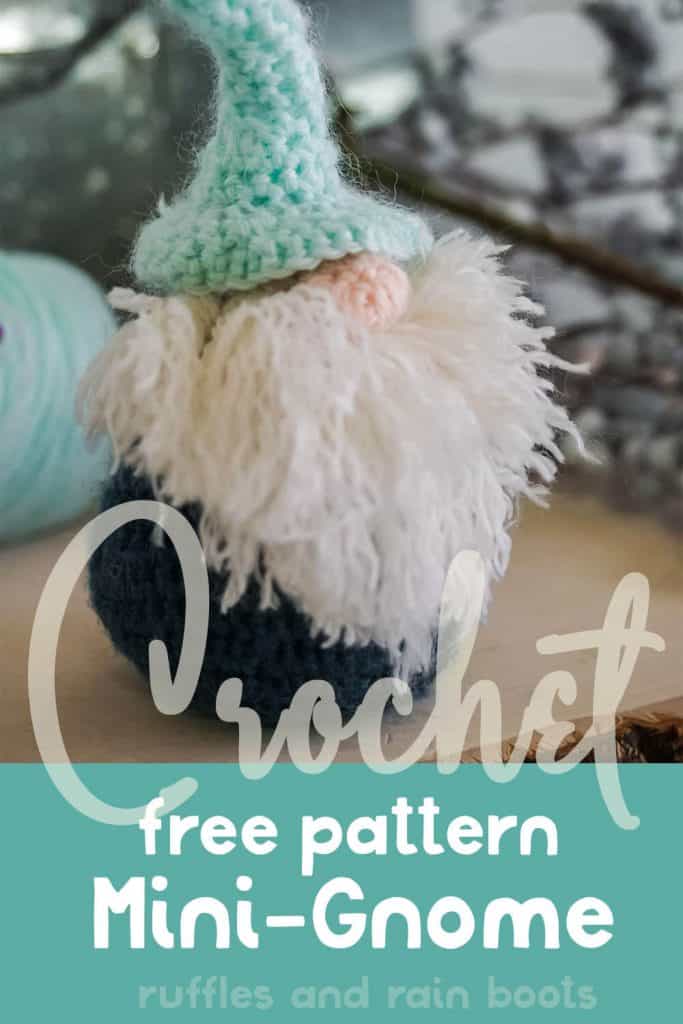
This Easy & Free Crochet Gnome Pattern Makes the Most Adorable Mini-Gnome!
Let’s talk about all the cuteness you can make in a few hours with this free crochet gnome pattern. This easy pattern will work up to be an adorable mini gnome or a gnome ornament.
Free Crochet Gnome Pattern
Here at Ruffles and Rain Boots, I have an admitted gnome obsession (stick around, it will become quite obvious). If there’s one thing I know about myself, it’s that if there’s a gnome to be made, I’ll figure out how to make it. Nothing is going to stop me and the latest experiment was attempting to make my own crochet gnome pattern.
RELATED READING: EASY GNOME KNITTING PATTERN
And can I just say, this easy gnome crochet pattern is so much fun! One piece, which is nice, fun to make and basically the bee’s knees of a simple crochet pattern. If you’re ready to crochet a gnome, let’s get started.
No Time to Make This Now? Pin it for Later
You’re busy, I get it. Pin this to your favorite easy gnome patterns board on Pinterest and it’ll be here for when you’re ready.
As an Amazon Associate, I can earn from qualifying purchases.
Tips to Make This Free Gnome Crochet Pattern
- Confession: the yarn I used, Yarn Bee Goodness Grapefruit set of mini-skeins, is out of stock. You can use any fingering or fine weight yarn to make this little mini-gnome, though. And if you want a set of mini-skeins like I used, there are a lot out there, like this set that has some great color combination options.
- Make sure you have one of the teeny-tiny size E crochet hook like this one. You are not going to find that size in a normal set of hooks that you might have lying around. Trust me, this one is in the “tiny size hooks” sets only.
- Get ready to have some fun. Making this gnome is so fun and just a little silly. They’re really basic, normal beginner stitches for the most part but the pattern includes fun things like making the brim and the beard that are totally unique.
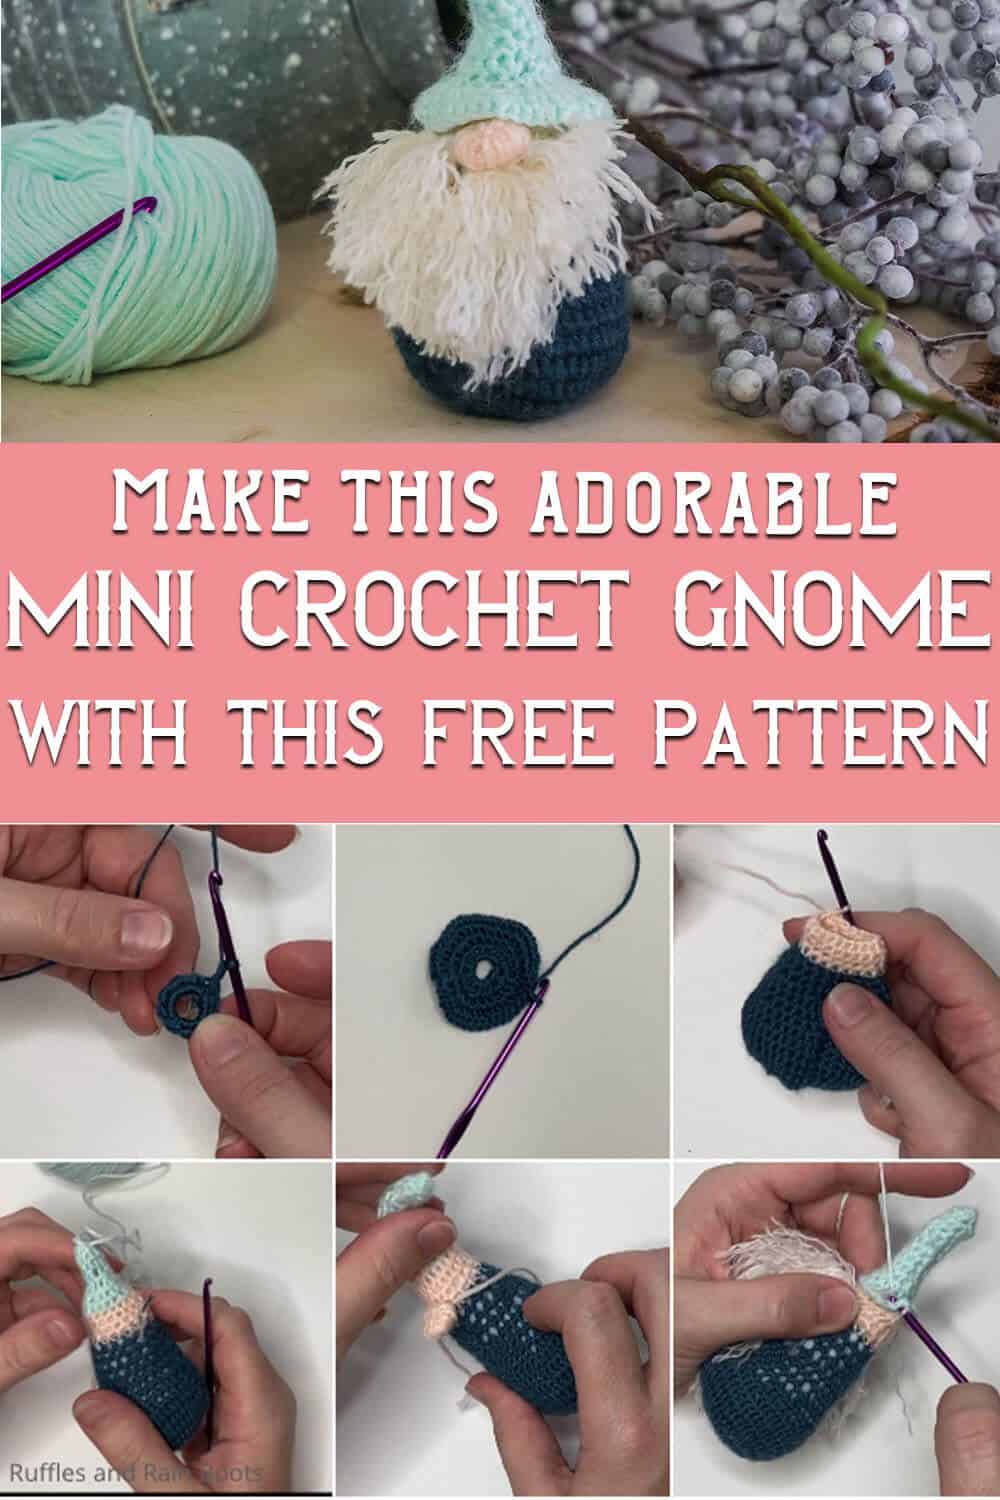
How Do I Make this Free Crochet Gnome Pattern?
I’m so glad you asked. Below is our written tutorial. You can read below or print off the pattern (read the tips above first). Just add this free crochet gnome pattern to your cart.
Crochet Gnome Pattern

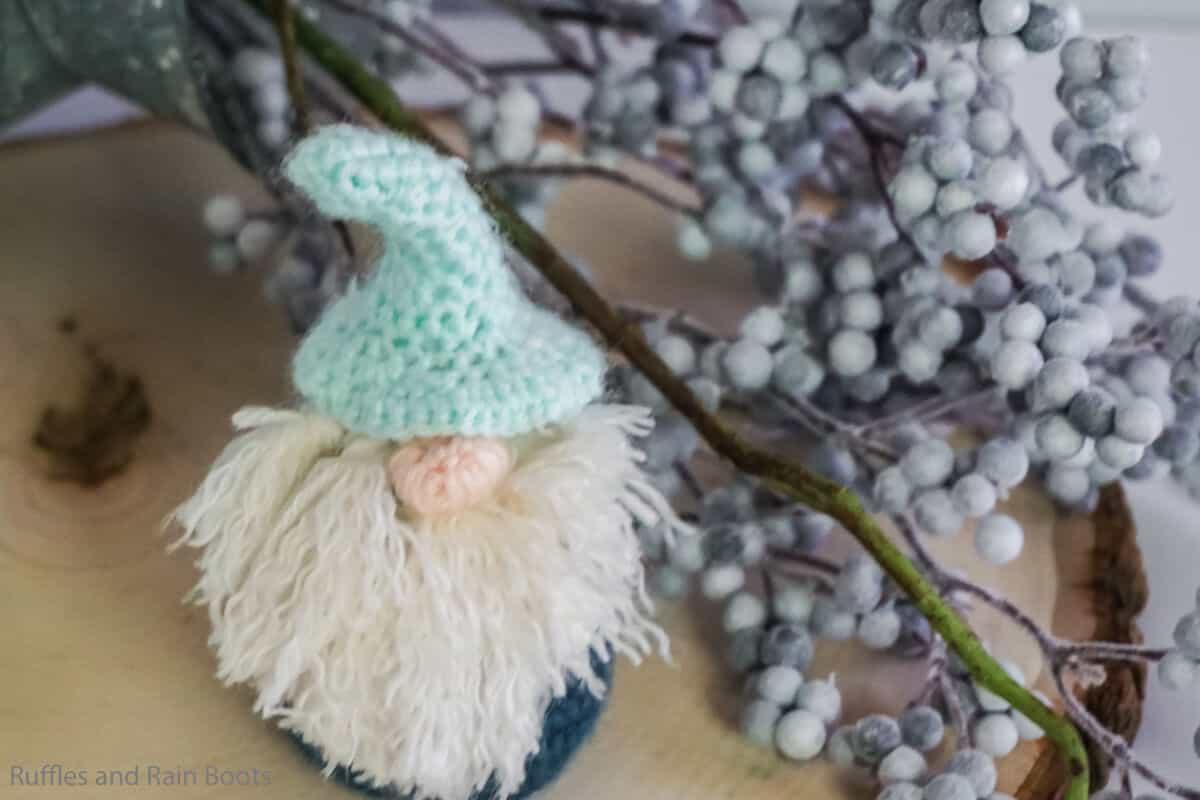
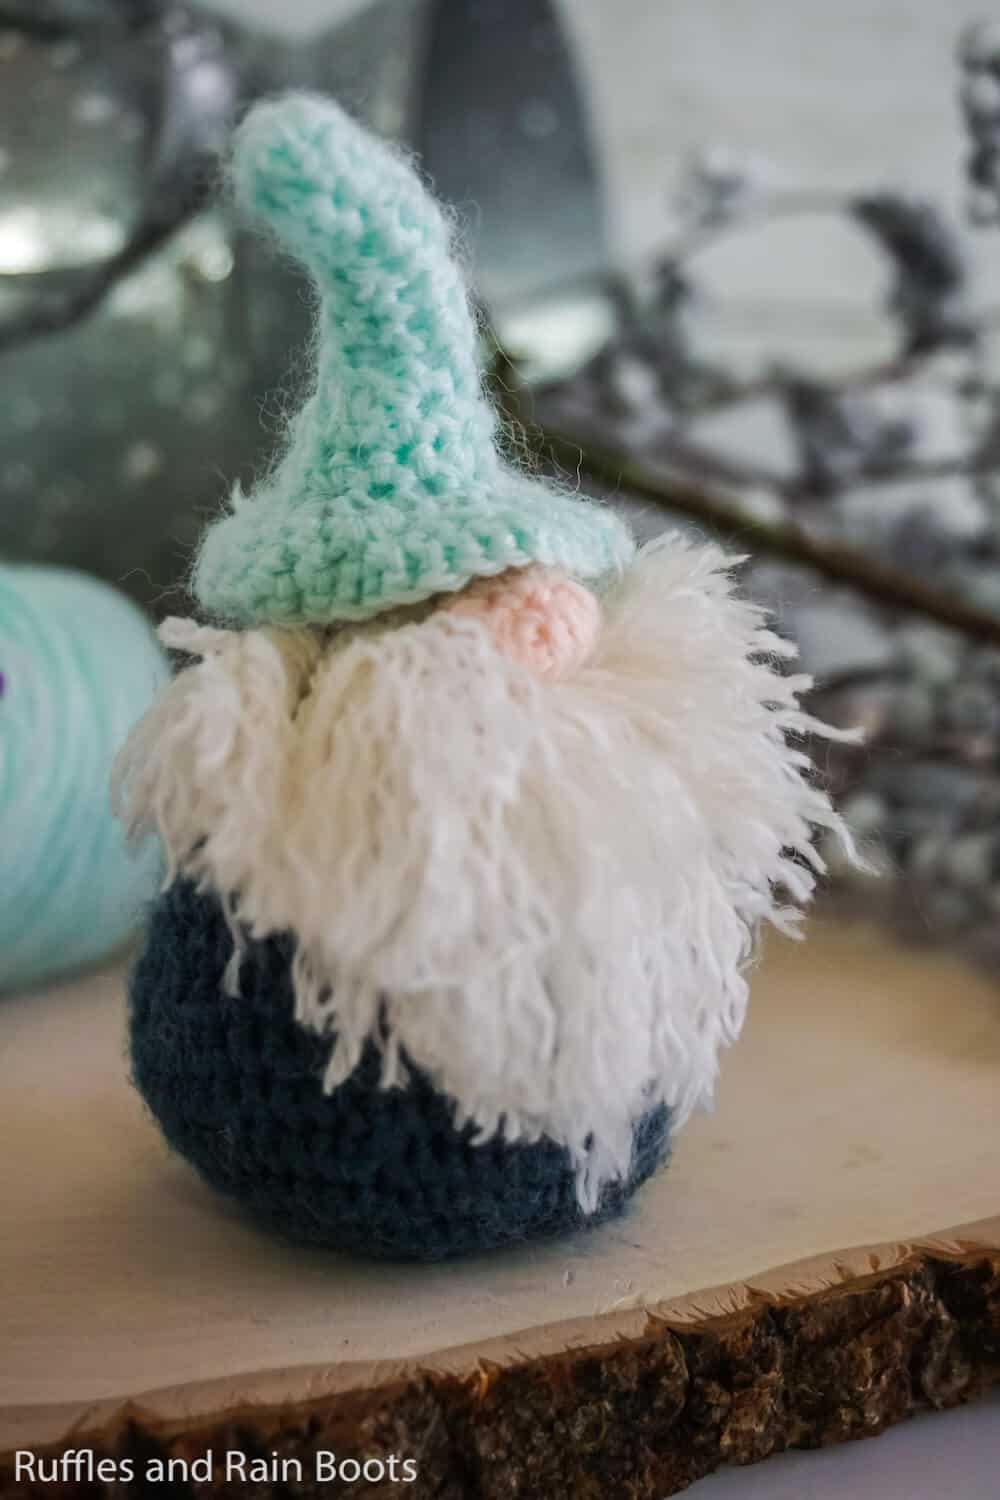
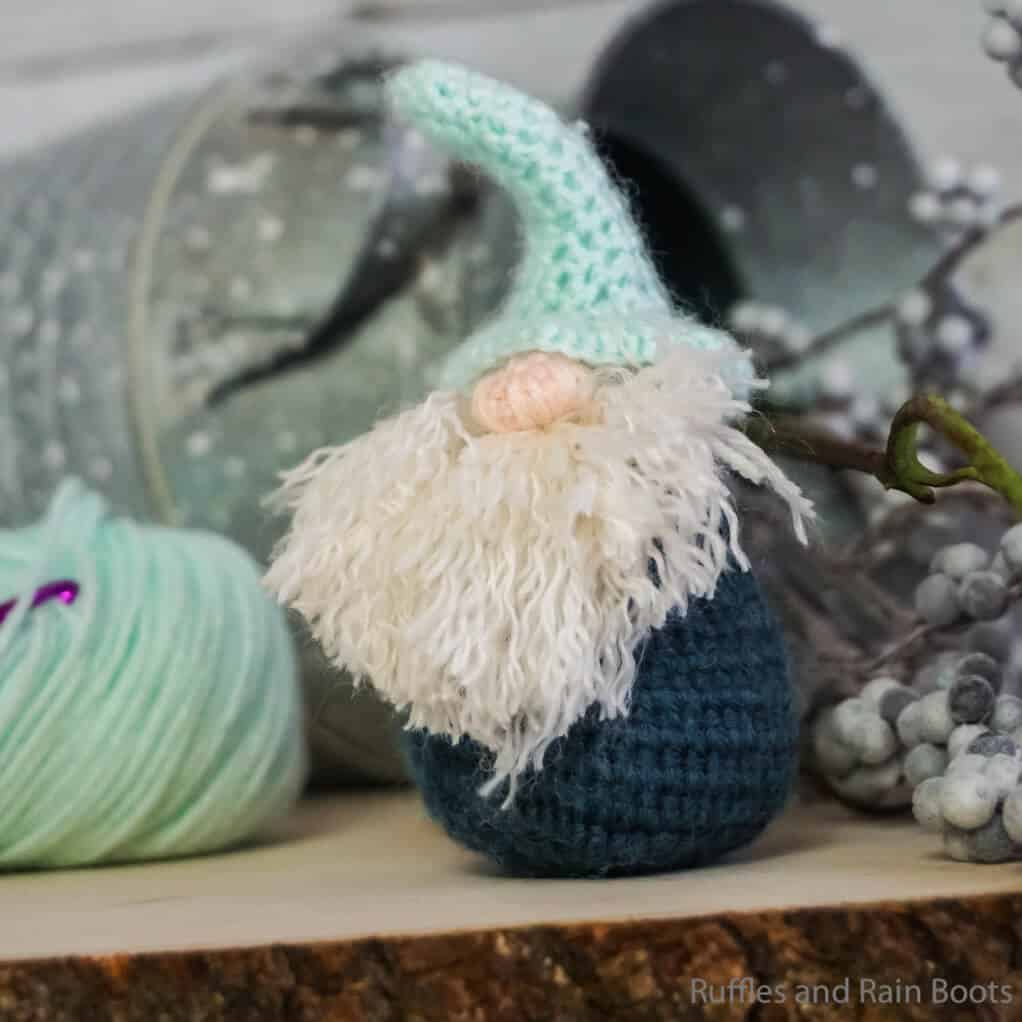
I adore this super easy crochet gnome pattern. It works up super quick and is the perfect rainy-day free gnome pattern you can crochet for an ornament or just for fun. It would even make a great gnome magnet!
Materials
- Yarn Bee Goodness Grapefruit Set, Dark Blue (Color A), Light Blue (Color B), Peach (Color C) and White Skeins (Color D)
- Scrap felt pieces for stuffing
Tools
- E/4 3.5mm Crochet Hook
Instructions
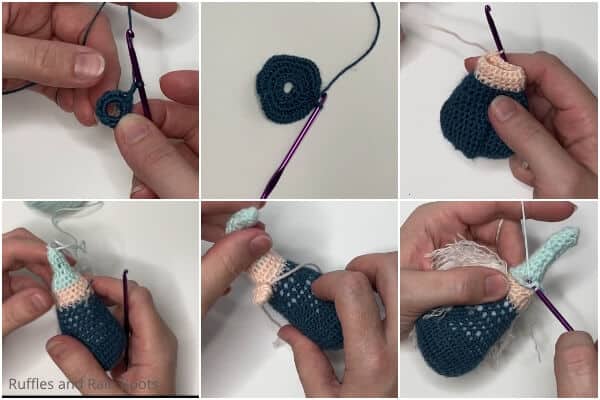
- Body: With A, Ch 6, sl st to make loop and pul gently to tighten snugly.
- RND 1: Ch 1, sc in loop 10 times, sl st to join.
- RND 2: Ch 1, sc in each sc twice, sl st to join. (20 stitches)
- RND 3-RND 4: Repeat RND 2
- RND 5: Ch 1, 1 sc in each st, sl st to join.
- RND 6 to RND 7: Repeat RND 5
- RND 8: Ch 1 [Reduce: (insert hook, yarn over, pull through, insert hook in next stitch, yarn over, pull through, yarn over and pull through all three loops on the hook), sc in next five stitches] repeat to end of round, sl st to join.
- RND 9 to RND 16: Repeat RND 8, change to Color B.
- RND 17: With B, ch 1, sc in each st, sl st to join.
- RND 18 to RND 20: Repeat RND 17, change to Color C. Stuff the bottom portion of your gnome with scrap felt pieces.
- RND 21: With C, ch 1, [Reduce: (insert hook, yarn over, pull through, insert hook in next stitch, yarn over, pull through, yarn over and pull through all three loops on the hook), sc in next three stitches] repeat to end of round, sl st to join.
- RND 22 to RND 23: Repeat RND 21.
- RND 24: Sc in each st, sl st to join. (6 stitches)
- RND 25 to RND 31: Repeat RND 24. Stuff more felt into the hat as best you can. I recommend overstuffing a little so you can work some of it up into the hat tip.
- RND 32: Sc, [Reduce: (insert hook, yarn over, pull through, insert hook in next stitch, yarn over, pull through, yarn over and pull through all three loops on the hook)], sc in next st, [Reduce], sc in next st, [Reduce], sl st to join.
- RND 33: Sc, [Reduce: (insert hook, yarn over, pull through, insert hook in next stitch, yarn over, pull through, yarn over and pull through all three loops on the hook), sc, sl st to join. Tie off. Weave in ends.
- Nose: With Color B, ch 2, sc, ch 1, sc, sc, sl st to join. Sc in round 8 times. Sc in round 16 times. Tighten, turn sideways and stitch onto front of gnome.
- Hat Brim: With Color C, sl st to join at join line of Color B and C on Body. Sc through the gnome body, following the join line of Color B and C on Body, sl st to join. [Ch 1, sc in each st around, sl st to join.] Repeat [ to ] 4 times. Tie off. Weave in ends.
- Beard: With Color D, wrap 10 loops of yarn around four of your fingers, cut free of the yarn skein. Pull hook through the gnome body where you want the beard to start, pull one side of the looped threads through the body with the hook. Slide the other end of the looped threads through the looped threads that are threaded through the body. Pull tight. Repeat with 6 to 8 sets of looped threads. Trim bottom loops open. Comb.

Notes
For more fun gnome patterns, visit Ruffles and Rain Boots!
More Gnome Patterns You Might Like
- Cozy Gnome Pattern – If you sew, you’re going to love this easy gnome pattern. It’s simple, fast and super cuddly. Basically a gnome with squish.
- The Best No-Sew Gnome Pattern – So quick to come together, this no-sew gnome pattern makes a little gnome with a cute tush and a “face” everyone will love!
- Gnome Knitting Pattern – This easy gnome knitting pattern might be of interest to you. It works up easily and produces a bold 7 inch or 9 inch gnome!
Please Save This to Pinterest
Your shares are how this site grows and I am sincerely grateful. Know a friend who’d like this? Please share it on Facebook or save it to your favorite free crochet patterns board on Pinterest.

Hi Sarah, I fell in love with your sweet crocheted gnome. Rushed out to Hobby Lobby this morning and picked up the yarn.
I have been trying for hours to get it right.
It doesn’t come out the shape of yours – kind of teardrop looking.. mine comes out like a fat wavy pumpkin.
pulled it out and started over 3 times.
read and reread the pattern and still the same results.
I have crocheted a lot through the years, maybe I have lost my touch.
tried a smaller hook but the same result.
I feel sad that I can’t get it right.
I am sure your pattern is right – just me :)
Not sure you can help me :)
Off to try again. Then almost time to start dinner.
Thanks for all your fun ideas.
Judy
You know, I am no expert crocheter–and to be honest, I did have to back up a couple of times. But I bet the biggest difference is that I hold tension pretty tight on my thread. Also, part of his shape is really not apparent until you stuff ’em. I really thought mine was ruined until I got it stuffed (I thought it looked horrid in my hand, all floppy and weird). And I used felt to stuff it, so maybe that has a little more stiffness to it than typical stuffing, so that might have helped kind of press and stretch a little. Try again. I promise the pattern is right.