
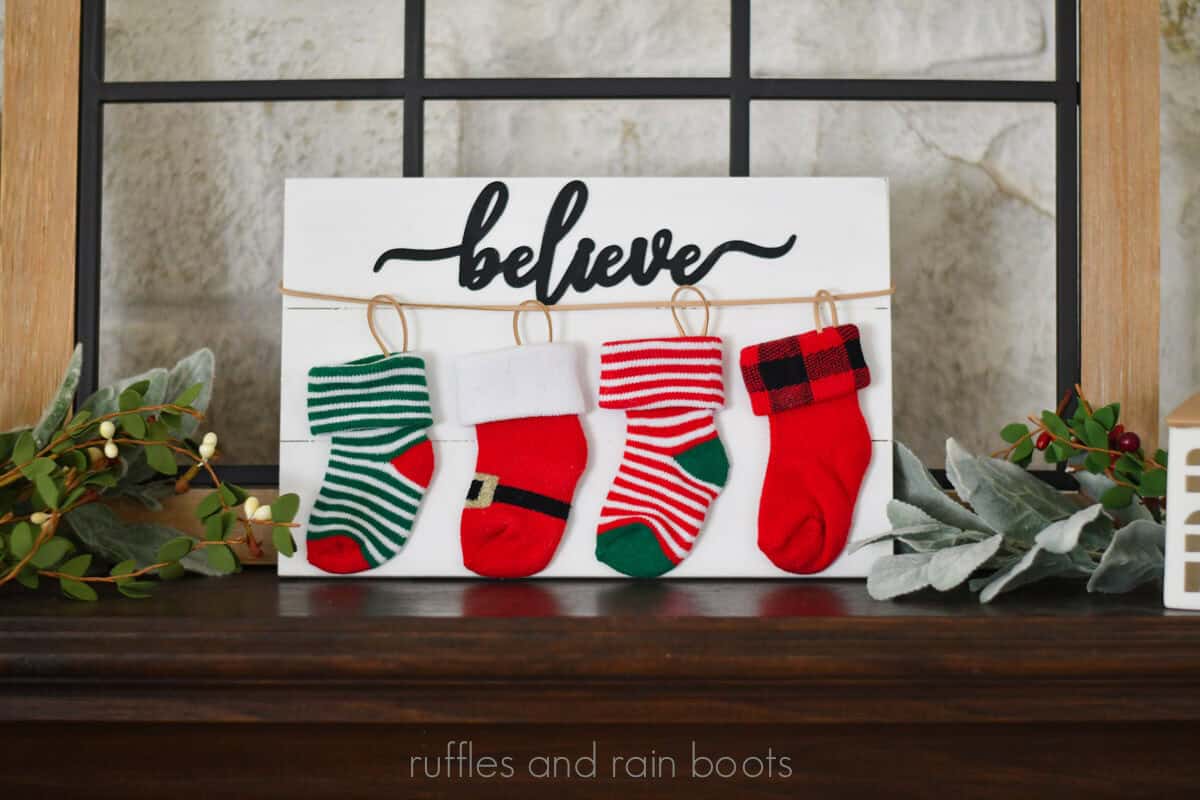
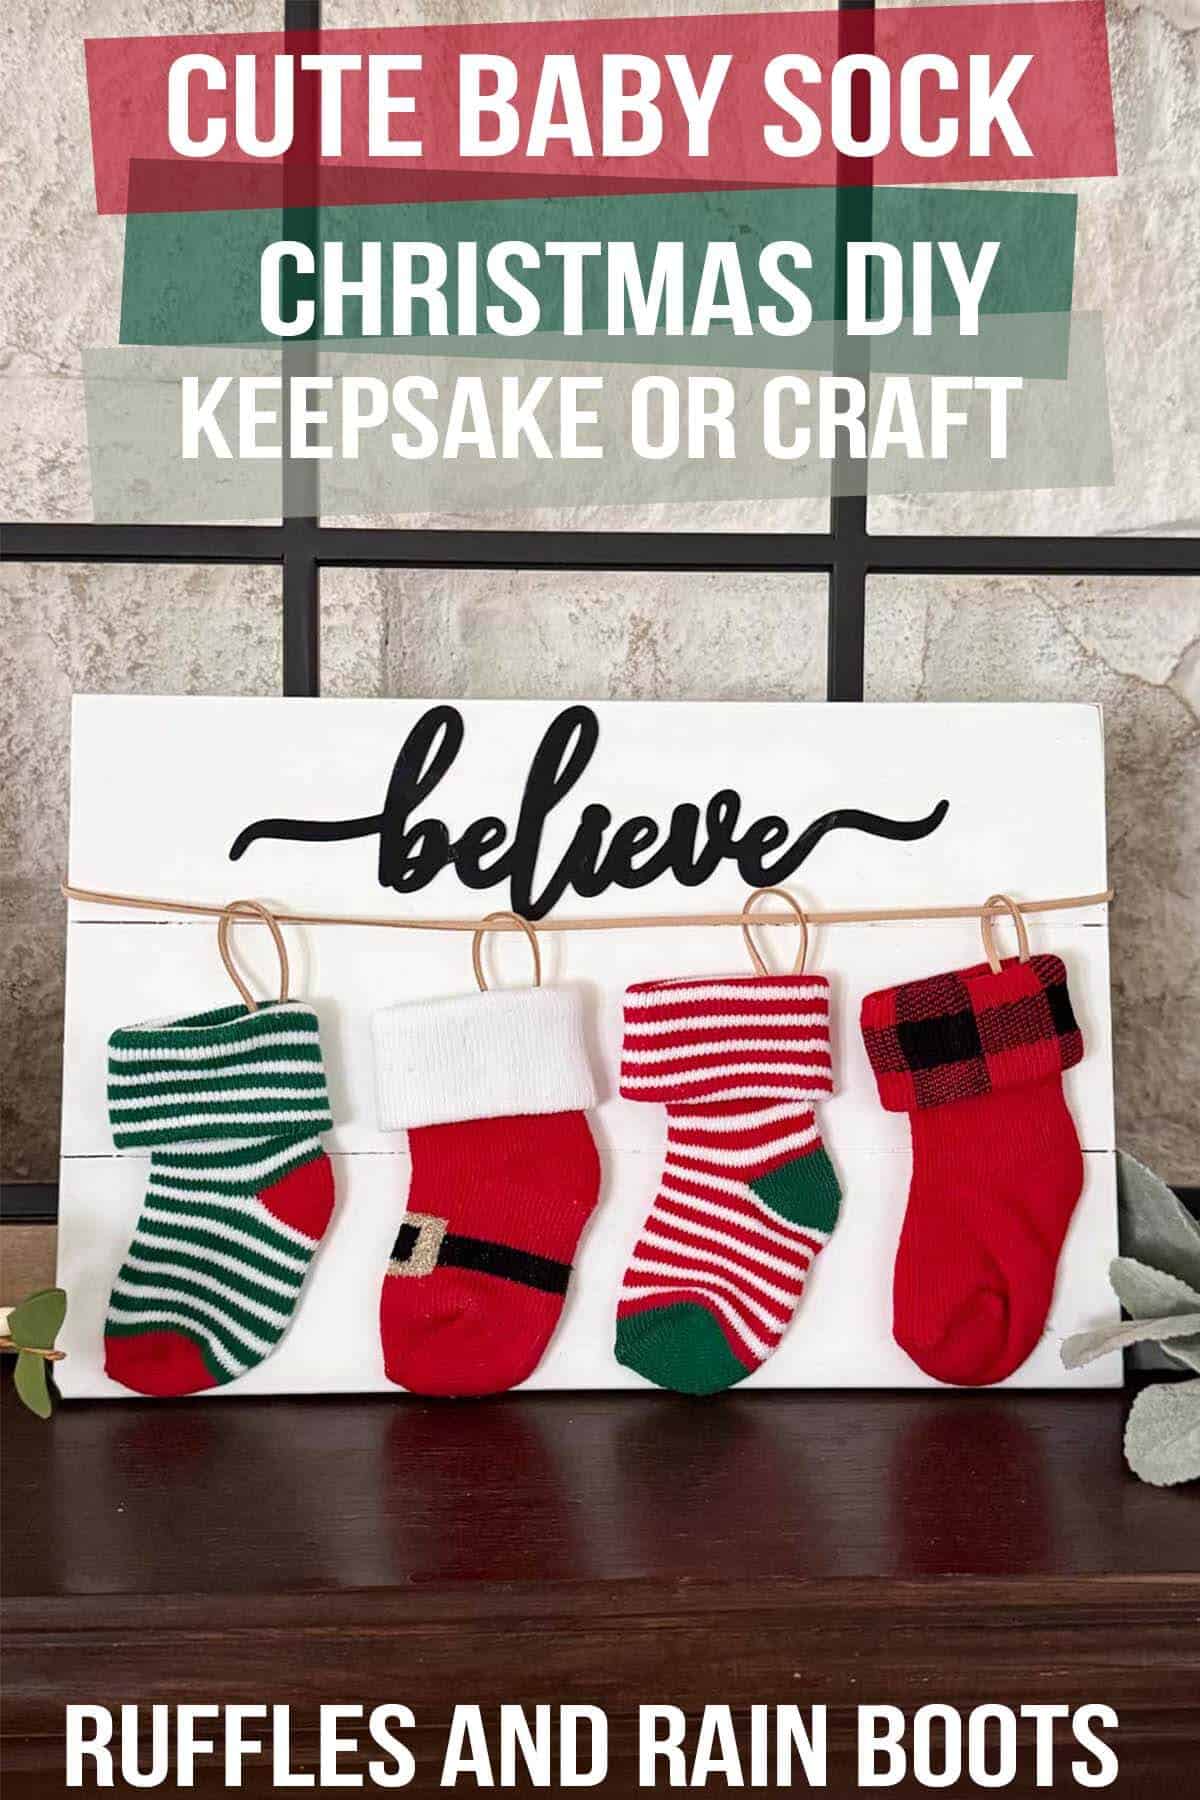
Christmas Baby Sock Stocking Craft
Make this Christmas baby sock craft for an absolutely adorable holiday DIY idea. There is something too cute about tiny things, and making Christmas stockings from baby socks will make your heart skip a beat!
RELATED READING: DIY Christmas Tree Shower Fizzies (Inexpensive Gift Idea)
As an Amazon Associate, I could earn from qualifying purchases. There could be affiliate links within this article.
What You'll Find On This Page
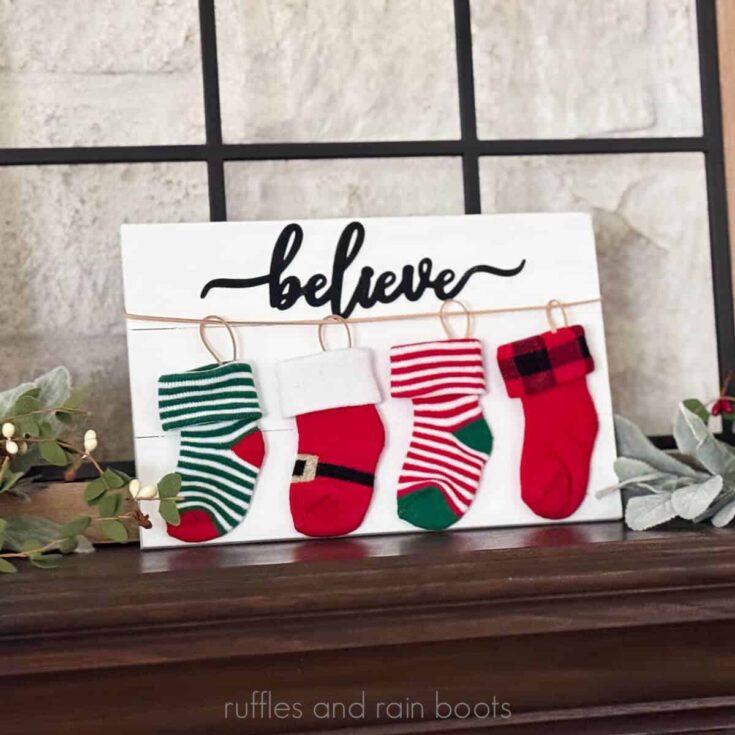
Adorable Christmas Craft Idea
Here at Ruffles and Rain Boots, I have been attempting to clean my craft room for 3 years. Like many, I get distracted when I find stuff, put everything on hold, and just start making.
Apparently, I bought two (yes, TWO) of these packages of the cutest Christmas baby socks and this idea came to me when I found them. One pack is going for donation, but that still leaves me with so many to craft with!
Below, I’m sharing two ways to make this: as a decor piece or as a baby’s first Christmas craft idea. Be sure to read through before you begin.
Material You Will Need for This Christmas Baby Craft Idea
Below are the materials I used, but check your stash (and clearance sections) to see what you can come up with. I’d love to see what you used – join the DIY Crafts with Friends Facebook group here.
- 4 baby socks, I used 4, 6-12 month sized socks
- suede cord (this suede cord is my favorite find)
- plate greeting (or use a wood sentiment from the dollar store)
- plaque or wood board
- hot glue gun, scissors, E6000 (optional)*
*Note: if you are giving this for the socks to be USED as a Baby’s First Christmas craft idea, pick up some hook and loop closure dots from the dollar store. You will want something low tack like this to easily pull away from the socks.
Baby Sock Stocking Video Tutorial
This is a fun craft to put together and one pack of socks will make so many shelf sitters. Watch the quick baby sock stocking video tutorial and be sure to subscribe (we have a lot of fun on the channel).

RELATED READING: Cute Gnome Brownie Bites (Easy Holiday Treat Recipe)
Notes for Crafters Who Are Selling This Christmas Craft Idea
- Affix the hang line with a staple gun on the back to ensure it is secure.
- Add a felt backer the size of your board and secure with hot glue and staples to present a clean product. It would be nice to add your branding to this (I use the xTool M1 Ultra to add branding to felt).
- Newborn socks can be used, however, I like the 6-12 months to use on these larger shelf sitters and signs. The newborn socks are great for cards or 6 x 6 inch shelf sitters but look small on larger items.
- It would be so cute to wrap the cord in mini garland and add brightly colored beads or other accents.
RELATED READING: Free Printable Christmas Gift Tags
How to Make This Cute Stocking Craft for Christmas
Gently pull the socks from their packaging, cutting any plastic ties in place. They can snag easily.
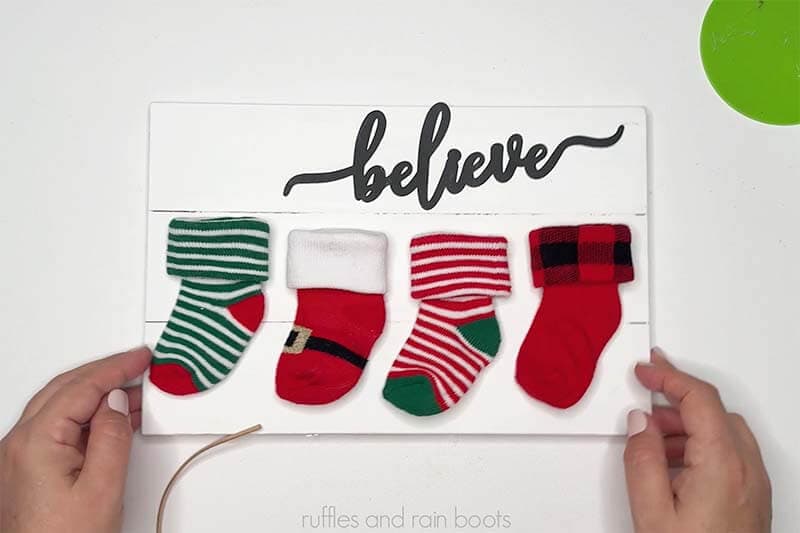
Align the socks onto the board, evenly spaced. You might have to roll up or down the cuffs to get them to match up and each can be glued in place.
Lay out a piece of the cord, cutting a generous overhang on either side. These aren’t going to hold weight, but the wrap around look is nice for the sides of the piece.
Glue down the sentiment at the top. I was working with a light metal piece, so I used E6000 but hot glue will work if you are using wood.
Cut small loops of the same cord to use as stocking hangers. Fold over the cord, aligning the cut ends, and glue them into the socks at one side. Try and match each of the loops for all of the socks. *Note: if you’re making this for the socks to be used, tie a knot and tuck it in the cuff without the glue.
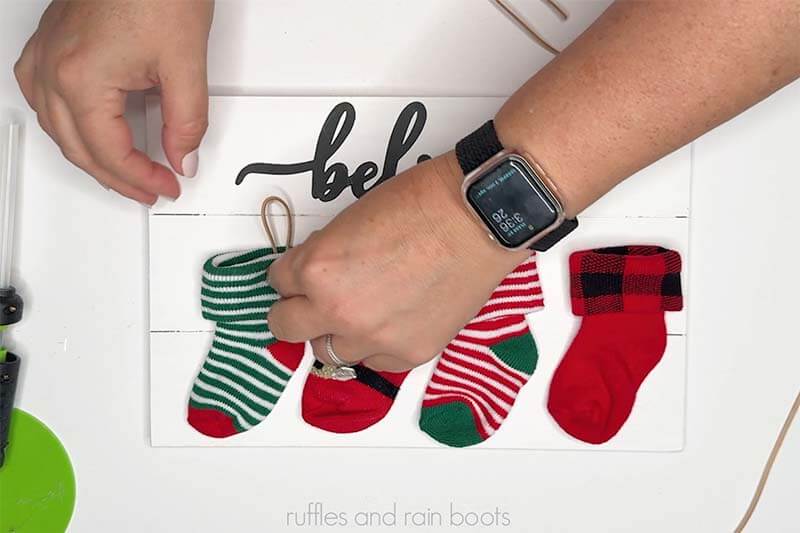
String the cord through each of the loops. I made sure to match up the layering of the loops so it looked consistent.
Glue down the bottom of the socks and then the portion under the cuff. This will ensure that the socks don’t move at all.
*Note: if you’re making this for the socks to be used, add a hook and loop closure dot to the bottom of the sock and the cuff. Affix the matching dot to them and press them onto the board in place.

Glue down the suede cord to the back of the sign. To clean up the back, you can add a felt backer, if desired.
More Christmas Crafts You Might Like
- Rustic Snowman Wreath – Hit up the dollar store to find what you need for this easy decoration.
- Wine Bottle Gnomes Crafts – Have any bottle? Make it into an adorable Christmas cutie.
- Free Christmas Printable – You’ve Been Jingled – If you want to give an inexpensive gift to your neighbors or friends, use this free printable.
Please Save or Share This Fun Holiday Craft Idea
Your shares are how this site grows and I am sincerely grateful. Please share this to social media or save it to a DIY Christmas crafts pin board.
Christmas Baby Sock Keepsake Craft
You will have a ton of fun making this easy baby sock stocking craft for the holidays. It comes together in about 15 minutes and is just the cutest way to add a little whimsy to your decor.
Materials
- 4 baby socks, I used 4, 6-12 month sized socks
- suede cord (this suede cord is my favorite find)
- plate greeting (or use a wood sentiment from the dollar store)
- plaque or wood board
Tools
- scissors
- hot glue gun and glue sticks
- E6000, optional
Instructions
- Gently pull the socks from their packaging, cutting any plastic ties in place. They can snag easily.
- Align the socks onto the board, evenly spaced. You might have to roll up or down the cuffs to get them to match up and each can be glued in place.
- Lay out a piece of the cord, cutting a generous overhang on either side. These aren't going to hold weight, but the wrap around look is nice for the sides of the piece.
- Glue down the sentiment at the top. I was working with a light metal piece, so I used E6000 but hot glue will work if you are using wood.
- Cut small loops of the same cord to use as stocking hangers. Fold over the cord, aligning the cut ends, and glue them into the socks at one side. Try and match each of the loops for all of the socks. *Note: if you're making this for the socks to be used, tie a knot and tuck it in the cuff without the glue.
- String the cord through each of the loops. I made sure to match up the layering of the loops so it looked consistent.
- Glue down the bottom of the socks and then the portion under the cuff. This will ensure that the socks don't move at all.
*Note: if you're making this for the socks to be used, add a hook and loop closure dot to the bottom of the sock and the cuff. Affix the matching dot to them and press them onto the board in place. - Glue down the suede cord to the back of the sign. To clean up the back, you can add a felt backer, if desired.
Meet the Creator
Hi there, I’m Sarah Nenni-Daher. I’m a crafty gal and always have at least 14 projects going at once. I am a crafter, designer, DIYer, and pattern maker. I share my creations here and in the Ruffles and Rain Boots® Shop.
Here at Ruffles and Rain Boots®, you’ll find DIY gnomes, crafts, gifts, cupcakes, laser crafts, and so much more. I love sharing video tutorials over on YouTube and chatting with other crafters in my Facebook groups. We’d love to have you!