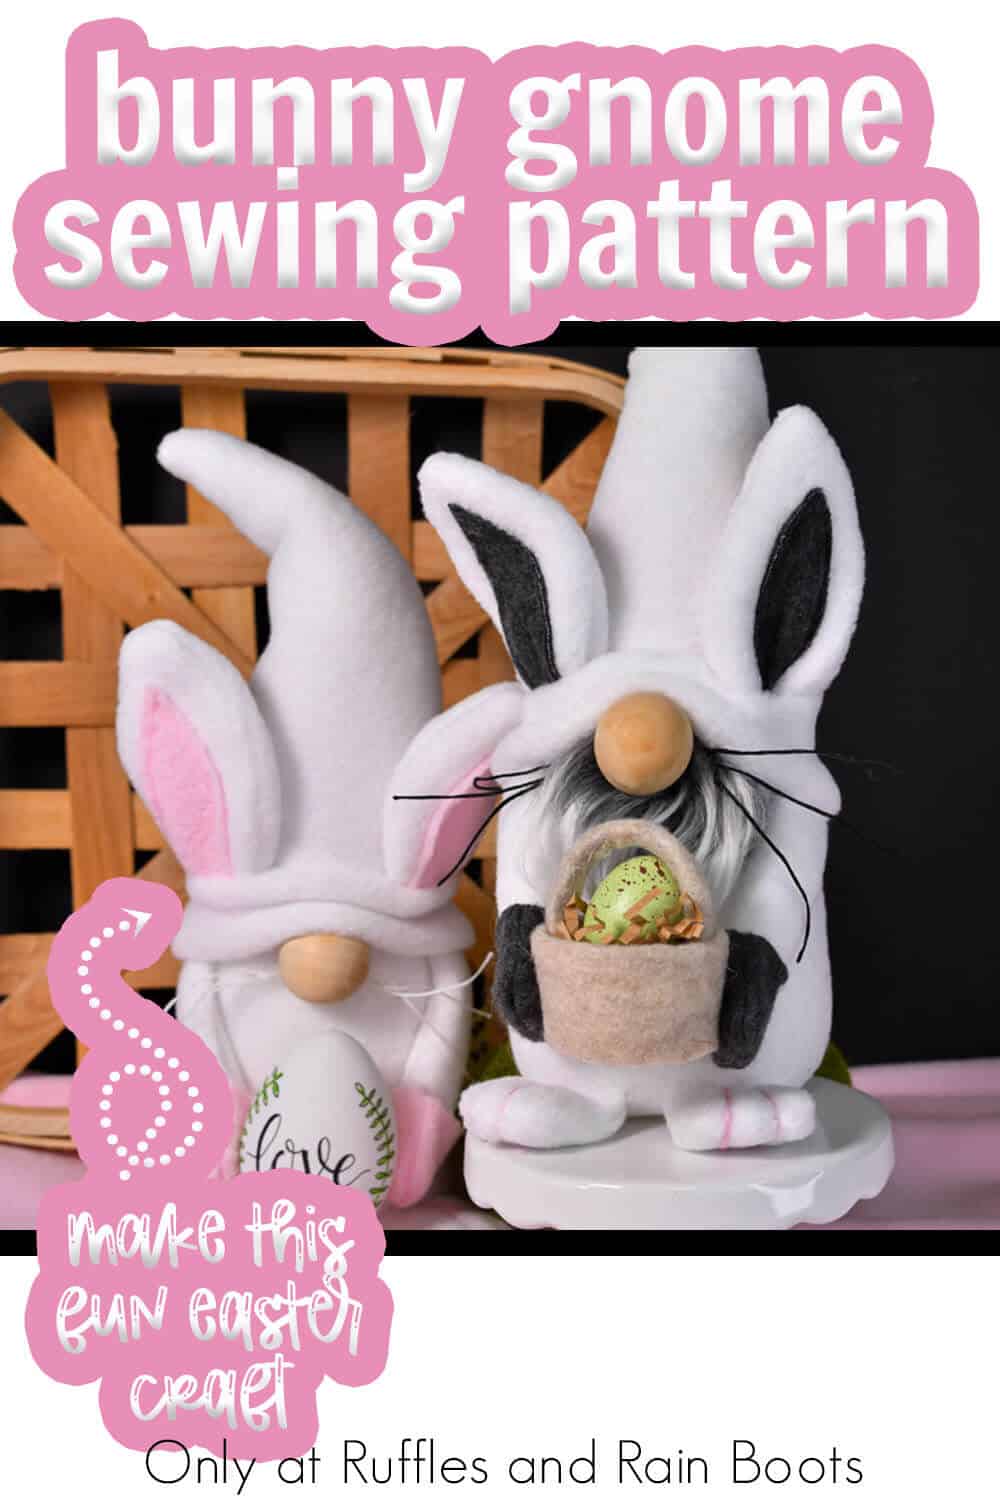
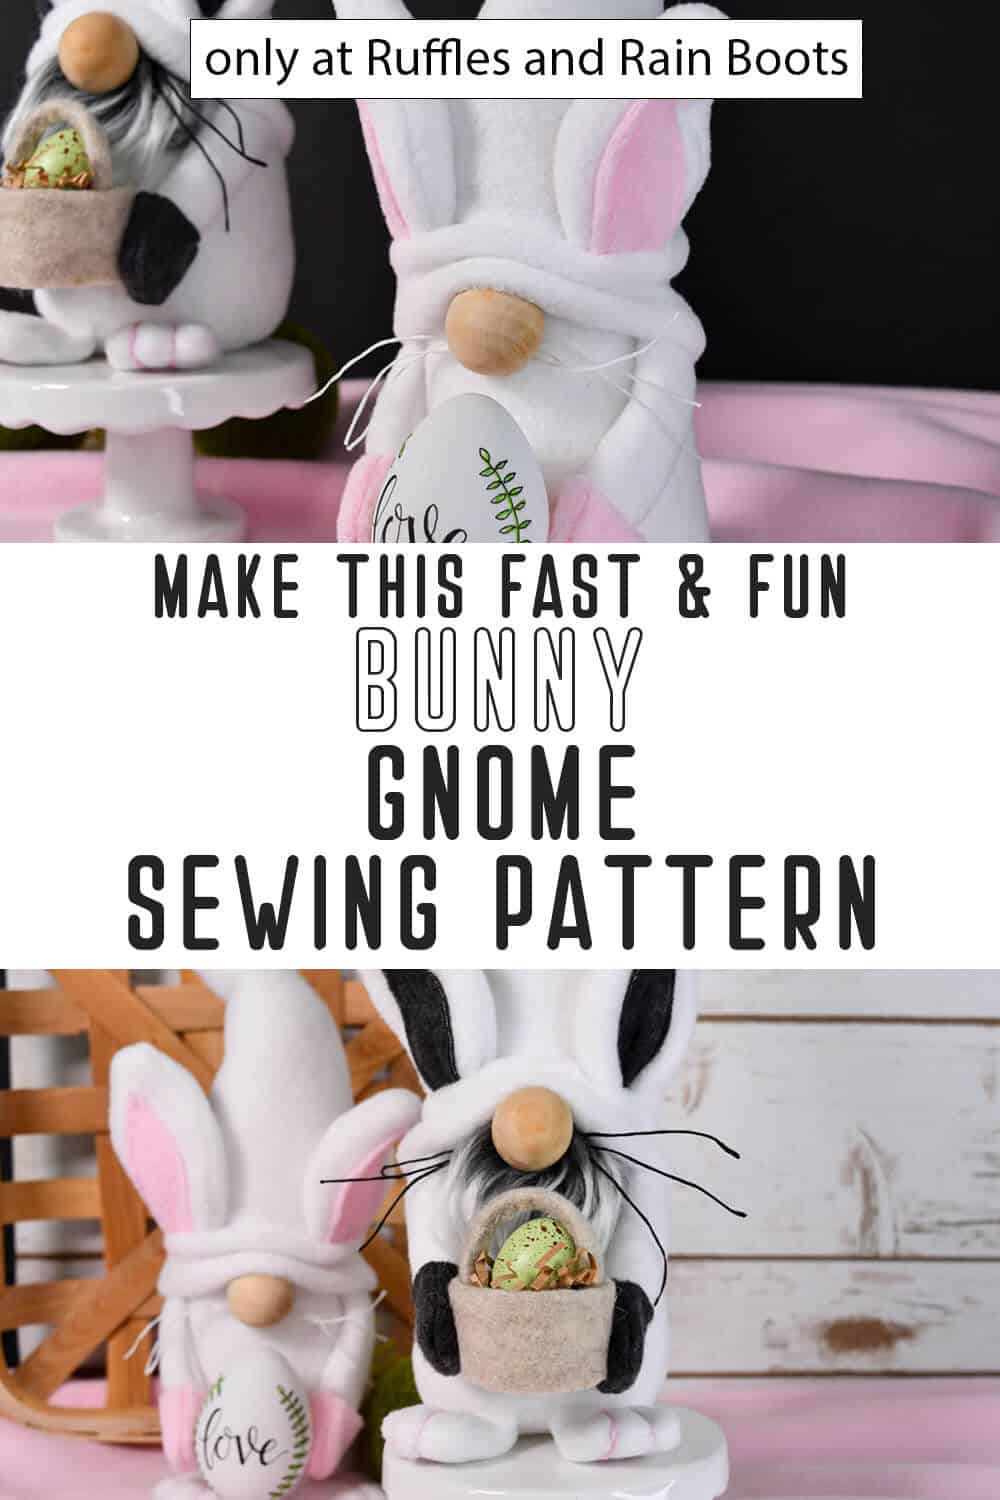
Easy Bunny Gnome Pattern – DIY Easter Gnome
I’m loving this fun and easy bunny gnome pattern but what’s more is the super fun Scandinavian gnome sewing pattern it’s based on! Learn how to make this DIY Easter gnome as I walk you through each adorable step.
This pattern is the most popular gnome pattern on the market! It can be sewn or hot glued and I have provided TONS of ways to use the same pattern.
What You'll Find On This Page
Bunny Gnome Pattern
Here at Ruffles and Rain Boots, I adore – ADORE – making gnomes. And when I say this is one of the most requested gnome patterns EVER, well that would be an understatement.
When I started down the path of making a new gnome pattern, a bunny gnome was a priority but I didn’t want it to JUST be a bunny gnome. I do not like picking up a pattern to only make one thing – one variation is just boring… I guess that gives you some insight into me, but I feel you should get more bang.
Get Secret Gnomes, Tips, & Freebies Delivered!
What is the best pattern to use when you don’t want to sew? Do you know the secrets to a properly-proportioned gnome? Do you know where to get the best-priced fur?
Get all of this (and exclusive content just for you) delivered right to your inbox with the gnome-making series, free of charge. Sign up to get the once-weekly newsletter (and a jaw-dropping special offer)!

RELATED READING: MINI MAGNETIC KISSING GNOMES
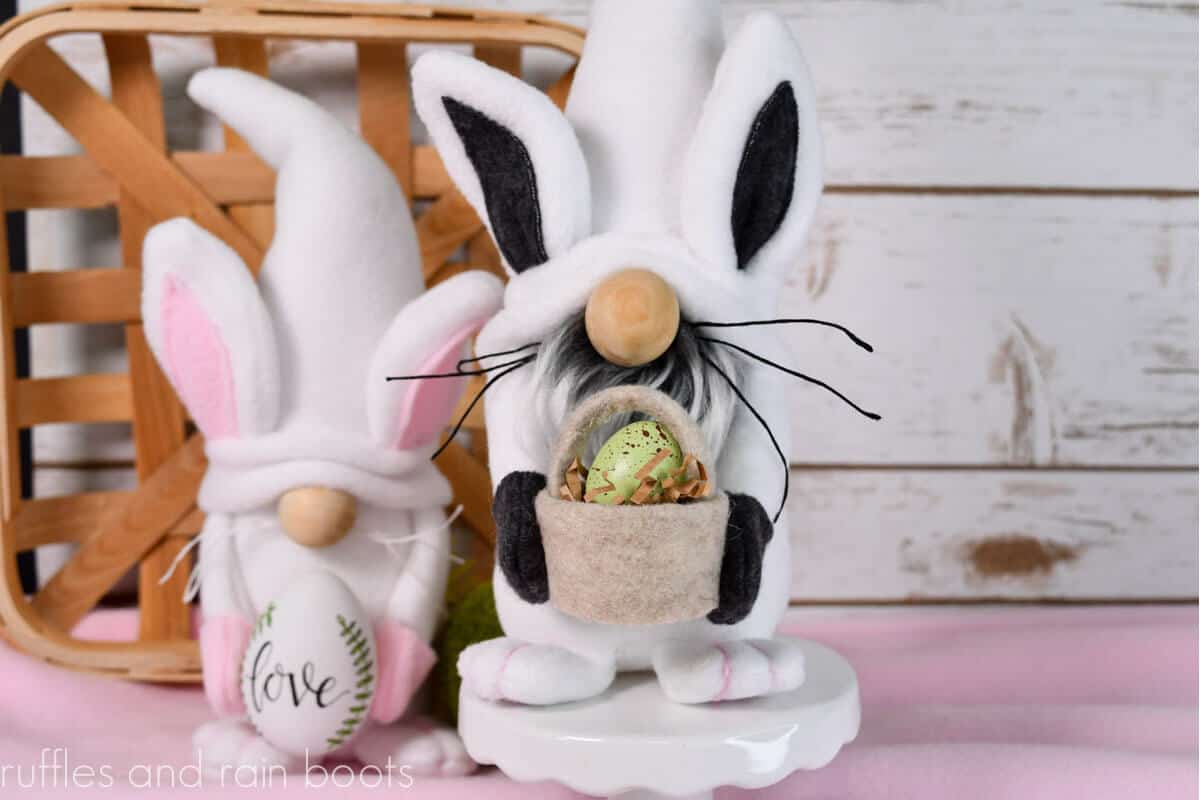
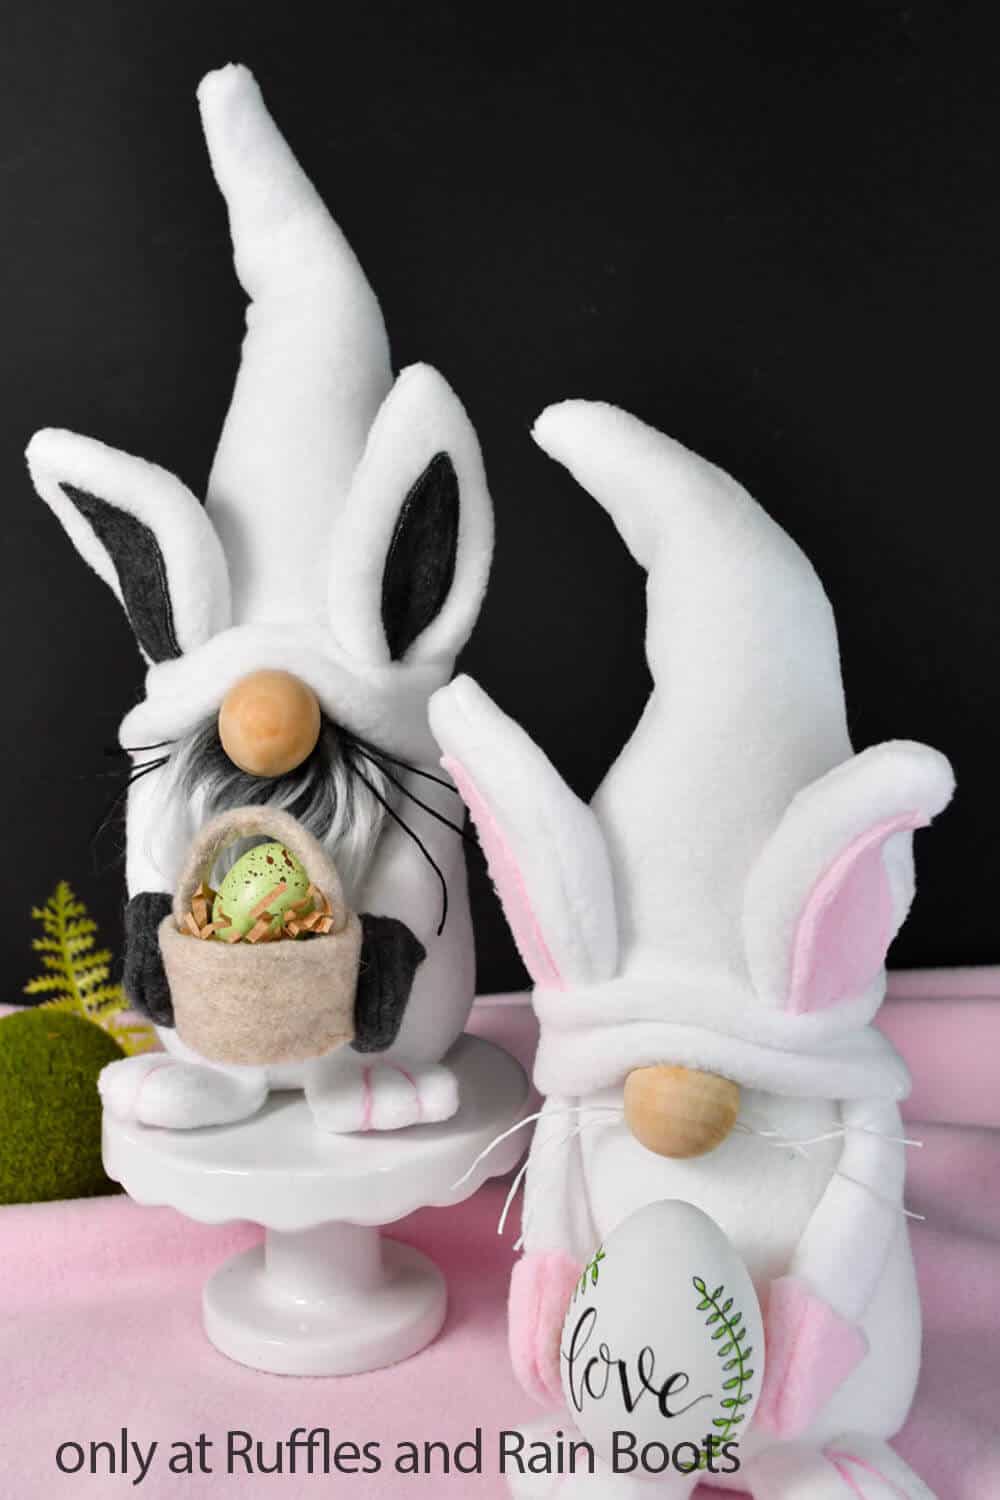
All the little things that I love most about bunnies was incorporated into this fun rabbit gnome. I made it a fully adaptable pattern, however, and have created TONS of inspiration. This pattern has its own playlist on my YouTube channel: check out the Scandinavian Sweeties gnome playlist here.
Or, if you’re ready to make a carrot-munching, egg delivering Easter gnome everyone will love, let’s get started.
RELATED READING: DIY Easter Gnomes – Get Inspired by Free Projects and Patterns
No Time to Make This Now? Save or Share It for Later
Need to gather supplies or buy the pattern? Save this to an Easter projects pin board or share it on Facebook. It will be easy to find when you’re ready to begin.
As an Amazon Associate, I can earn from qualifying purchases. There could be affiliate links within this article.
Tips to Make a DIY Easter Gnome
- First, start by grabbing the easy pattern for this adorable bunny gnome here. Now, I will point out that this pattern for the Scandinavian Sweeties gnomes is for a “normal” gnome, but the steps to make the bunny adaptation as shown in my photos is included in the pattern. So you will be able to not only make this bunny gnome, but you can make other gnomes with this sewing pattern too!
- If you would rather not cut all the pieces to make your bunny gnome with scissors, but you have a cutting machine, grab the pattern with cut files for Cricut or Silhouette here. You can save so much time if you’re batching out the cutting for making several gnomes at once!
- One of the “tricks” I like most about this gnome is the easy way I worked-out how to attach the ears. It’s a super-duper secret, but when you get it, you’re going to love it. But, I do have to share a tip about that: try positioning your ears outside your hat in several places before you put them in permanently. The placement of the ears makes the bunny look so unique depending on where you put them, so consider before affixing them permanently.
- I wanted something really pretty for my DIY Easter gnome to be holding that wasn’t overbearing. So I decided to make a quick hand lettered Easter egg like I’d made a couple of years ago. I am SO HAPPY that I did, because it’s so pretty!

Get the Bunny Gnome Pattern
Click below to add this gnome pattern to your cart. One pattern can make different gnomes!

How to Make an Easter Bunny Gnome
Below is the written and printable tutorial. If you have questions, please ask them in the comments below. Watch the full length Easter Bunny Gnome Tutorial here on YouTube – be sure to subscribe.
Bunny Gnome Pattern
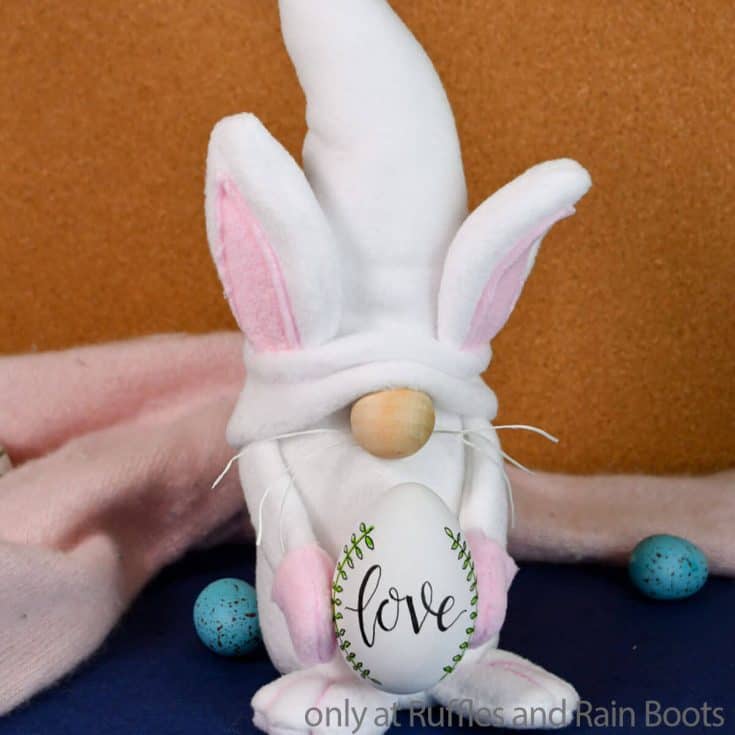
I love how easy it was to make my spring gnome with this bunny gnome pattern. And now I have a great gnome sewing pattern that's going to be perfect for so many fun tomten!
Materials
- 1/4 yard Fleece Fabric, Color 1
- 1/4 yard Fleece Fabric, Color 2
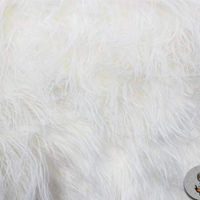
- Mongolian Faux Fur (or other beard material)
- 12-inch length 12-Gauge Wire
- Poly-Fill
- 1 cup Poly-Beads (per gnome)
- 1 or 1 1/2-inch Wood Round (or other nose)
- Embroidery Thread (1 or 2 colors, depending)
- ModPodge and Embroidery Thread
- Pom Pom
Tools
- Hot Glue Gun & Glue
- Scissors
- Razor Blade or Craft Knife
- Sewing Machine or Needle & Thread
- Funnel
- Darning Needle
- Pencil or Fabric Marker, optional
- Ruler
- Pins
Instructions
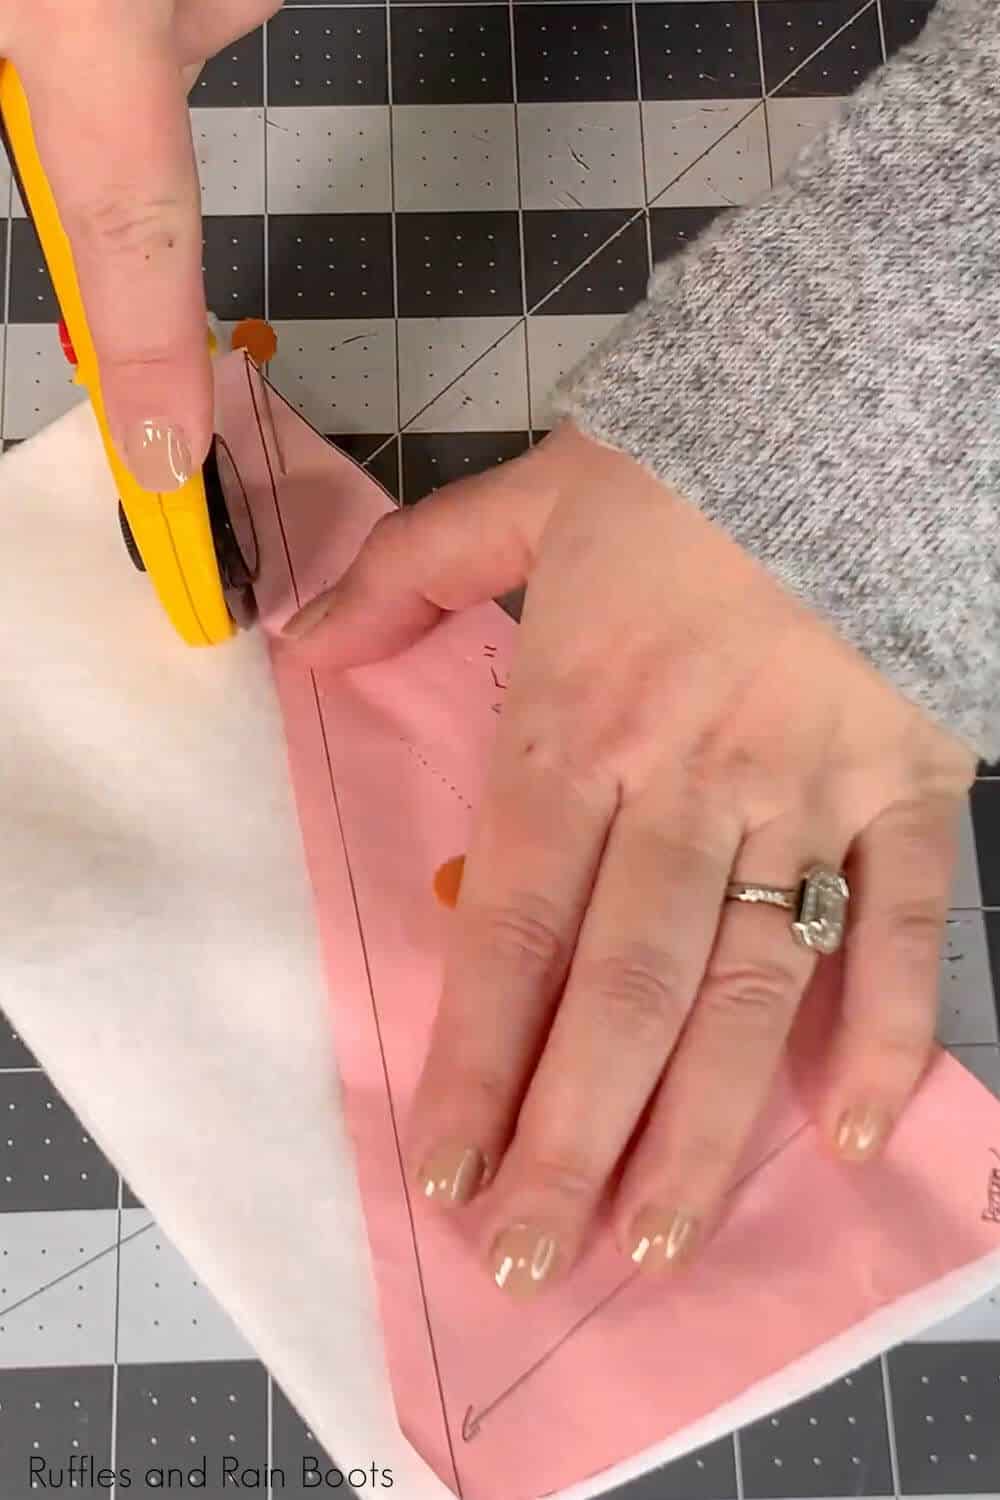
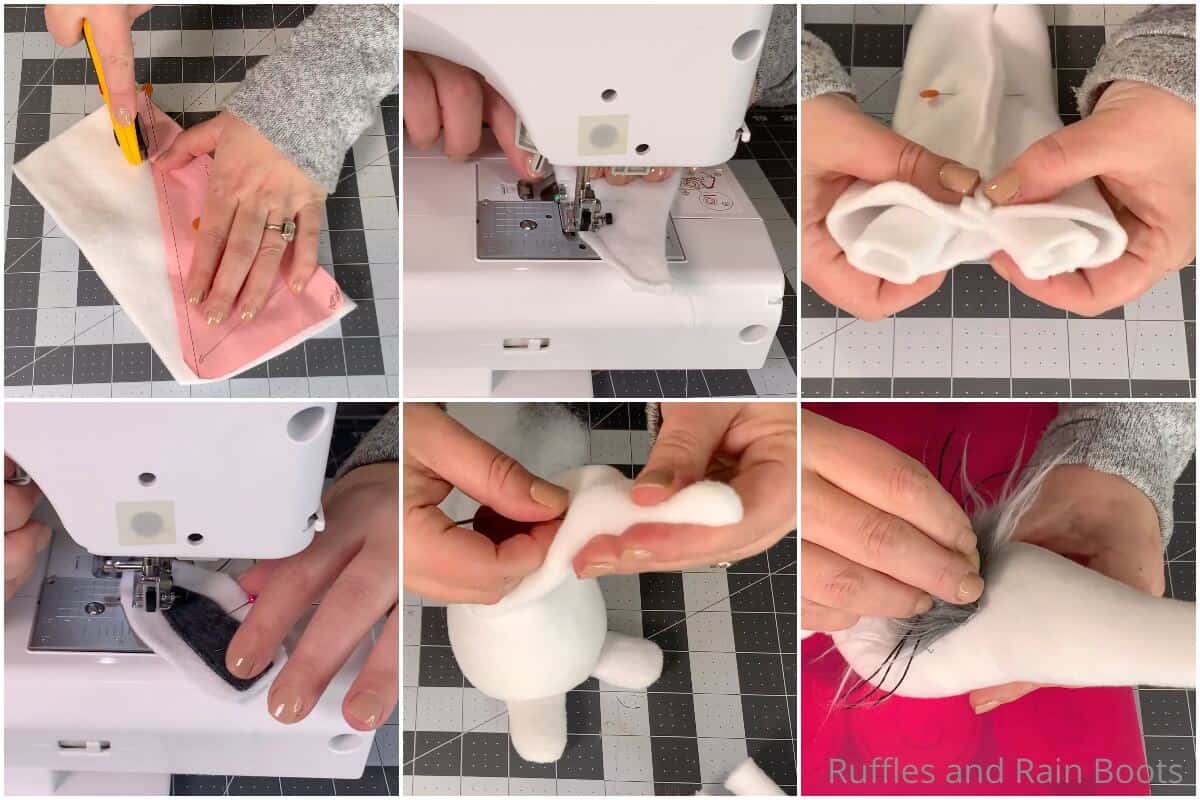
- Cut the body shape, two arm shapes, and a base shape from fleece color 1. Note the fold lines. Cut one hat shape, four foot shapes, and four mitten shapes from the contrasting fleece, if using. Take care to flip two of the mitten shapes to ensure they match up correctly. Cut two ear shapes (right-sides together) for each ear (4 total) and 2 insert pieces.

- Pin the body together right-side to right-side and sew it closed, taking care to note where it should be left open on the pattern. If you are sewing on feet, do not sew the base of the body on yet.
- To make the feet, pin two of the feet shapes together and sew along the "u" portion of the foot, leaving the flat portion open. Repeat with the second foot. Turn the feet right-side out and tuff some Poly-Fill inside, leaving the last 1/2-inch unstuffed. Tuck the feet inside the bottom of the body piece, toes pointed inside and toward each other. Sew each of the feet onto the front of the body only, going slowly.
- Pin the base onto the body, with the feet pointed inside the body, with the right side of the base facing inside (the right side) of the body. Sew the base onto the bottom of the body, taking care to go slow where the feet are already attached. Set the body aside.
- Pin the hat and sew along the long side, leaving the brim un-hemmed. Set aside. Fold the arms in half and sew along the long side. Set aside. Pin two mittens right-sides together and sew along the “U” shape, leaving the wrist open. Repeat.
- Line up the bottoms of one ear insert (wrong side) to the right side of a bunny ear then top stitch the insert all the way around. Pin a second outer ear piece (no ear insert sewn onto this one) to the first with the right-sides together. Hem the two ear pieces together LEAVING THE BOTTOM 1/2” OPEN. Repeat for the other ear.
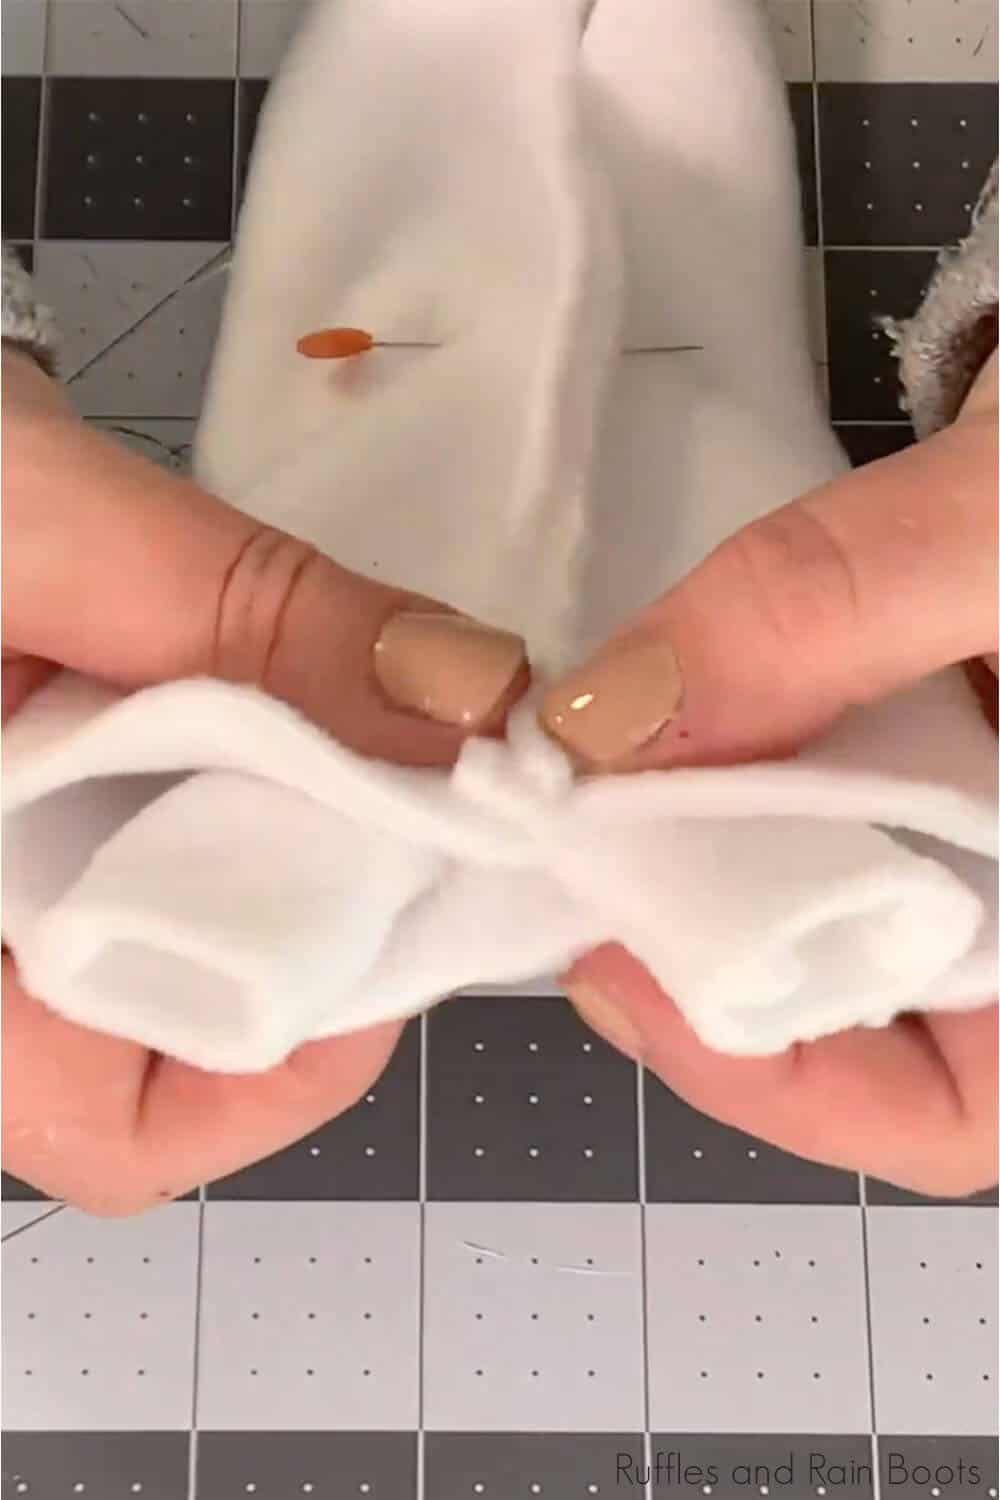
- Turn the body shape, hat and other pieces right-side-out.
- Add Poly-Beads to the body, then stuff with Poly-Fill. Add the floral wire to the inside of the body and hot glue in place. Finish stuffing the body with Poly-Fill and sew the body closed.
- Using the embroidery thread and darning needle, thread the needle through the center back of a foot, then wrap the thread around the front of the foot and back through at least two times to make bunny toes. Repeat with the second foot.
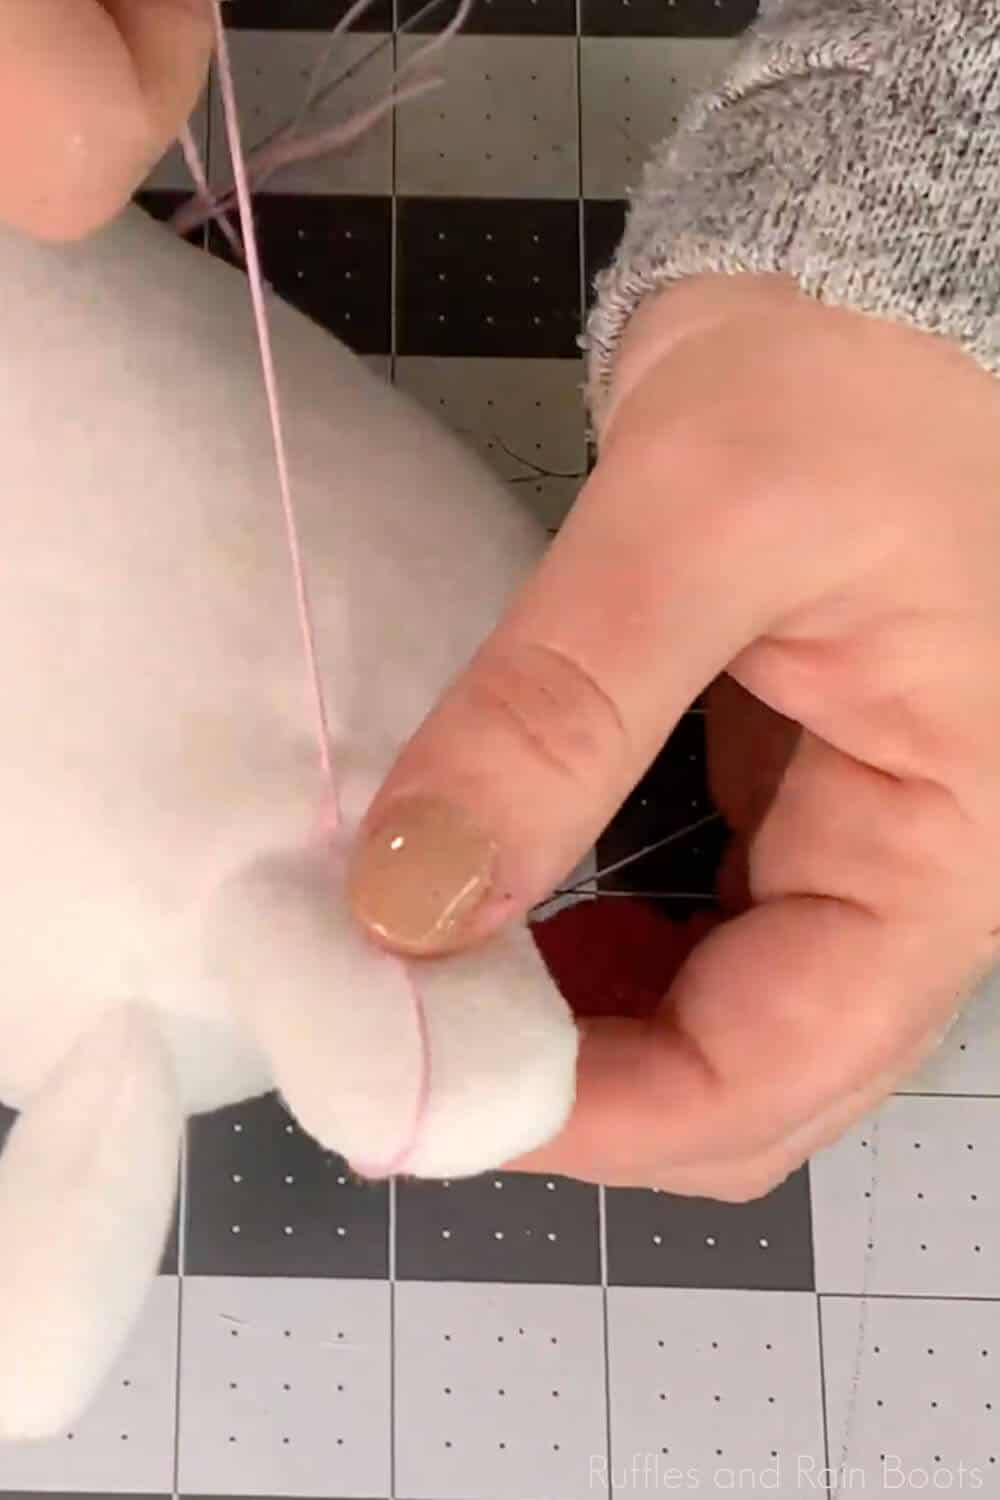
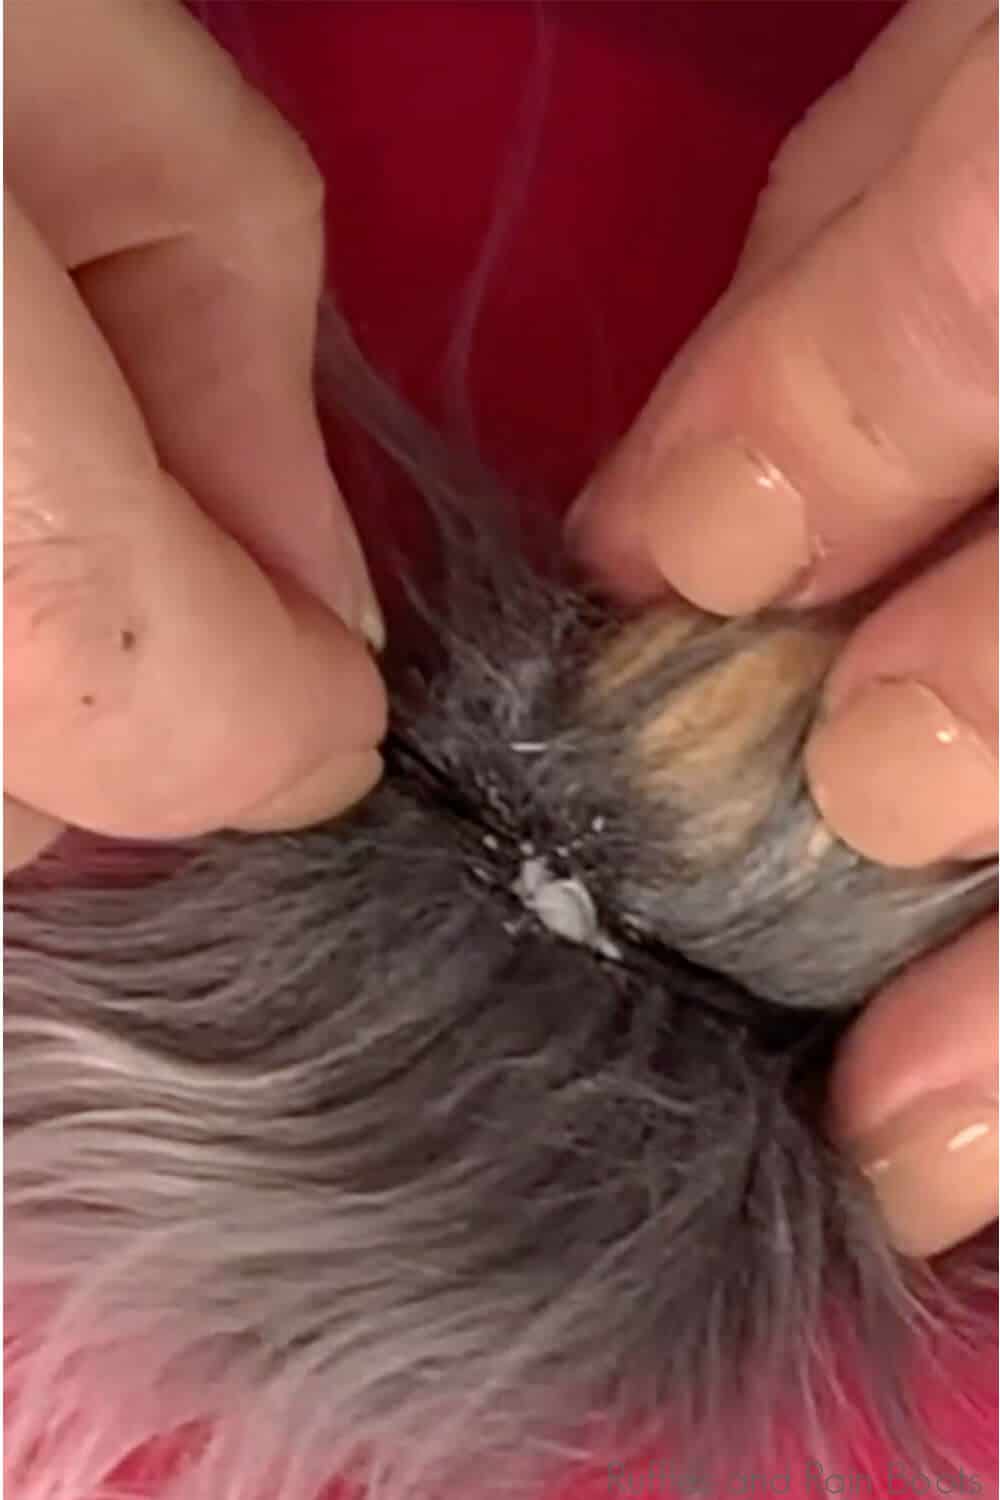
- Cut your beard and mark the location of where you want the nose. Hot glue the nose to the top of the beard.
- Make the whiskers by cutting strands of embroidery thread then coating them with ModPodge. Allow them to dry completely, then align them in the center and hot glue them together. Lift the beard fur just under the nose and hot glue the whiskers to the fabric of the faux fur.
- Mark slits in the hat where you want the bunny ears to sit, then cut the slits. Set the hat aside.
- Hot glue the nose (with the beard attached) to the body, then pull the hat down in place and pin it in place in the back.

- Secure the mittens onto the ends of the arms, then pin the arms in place. Tuck the ears into the slits you cut, lining the tips of the ears up. Once you are happy with the arm and ear placement, hot glue the ears to the body, then hot glue the hat down onto the ears. Remove the pins for the arms and hot glue the arms to the body, then hot glue the bat down onto the arms. Follow by hot gluing the hat down to the rest of the body, securing it well.
- Hot glue or sew on the pom pom onto your gnome bunny's bottom and enjoy!


Notes
For more fun gnome patterns, visit Ruffles and Rain Boots!
Recommended Products
As an Amazon Associate and member of other affiliate programs, I earn from qualifying purchases.


More Easy Gnome Patterns for Spring You Might Like
- Easter Gnomes to Make – These popular gnomes for Easter will get you creating with inspiration, techniques, and gnome patterns.
- Easter Gnome Bottle Topper – Done in just 10 minutes, this adorable Easter bunny gnome is going to make everyone say oooh and ahh.
- Epically Easy No-Sew Gnome Pattern – Literally my favorite no-sew gnome pattern I’ve ever made, this one is quick, easy and makes for the sweetest little tomten.
- Cozy Gnome Pattern for Cuddly Gnomes – Have I told you I love making gnomes? I do. So, this gnome pattern is squishy, cute, and has the classic Scandinavian gnome shape that I just love.
- Egg Easter Gnome – Listen, I know it sounds odd but watch these two lumberjacks make a gnome from a paper maché egg.
Please Save or Share This
Your shares are how this site grows and I am sincerely grateful. Know a friend who’d like this? Please save this to an Easter crafts idea pin board or share it with a crafty Facebook group.