
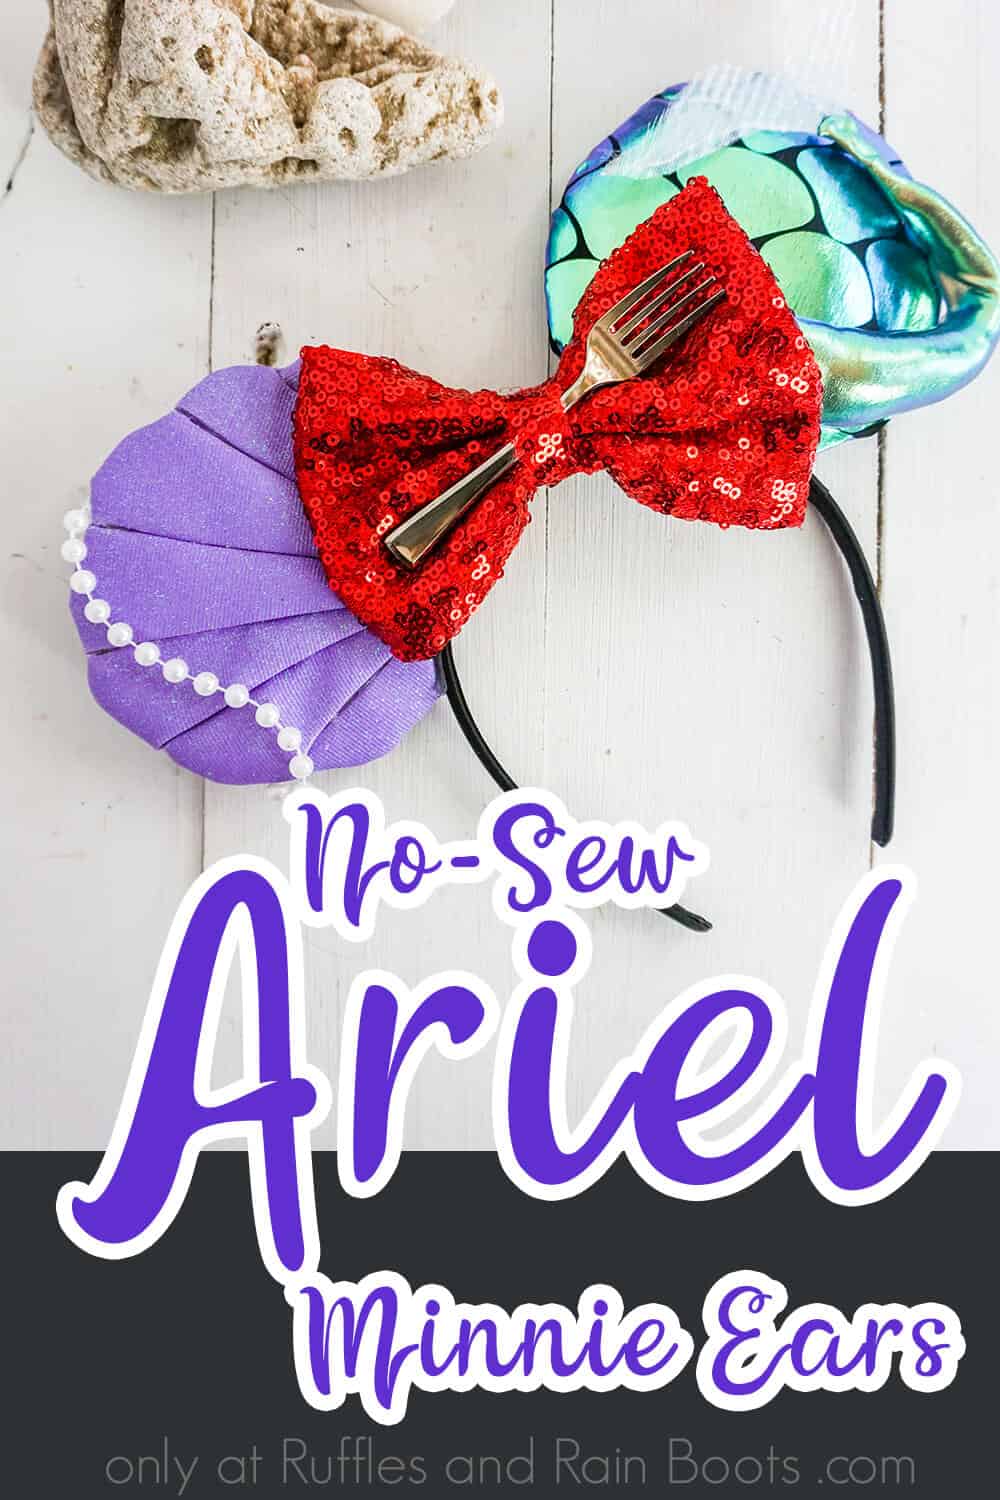
These The Little Mermaid Ariel Mickey Ears are So Easy!
When I started working on Disney Princess Mickey ears, I knew that I would be making some Ariel Mickey Ears. Little did I know these whatsits would be the prettiest The Little Mermaid Mickey ears ever.
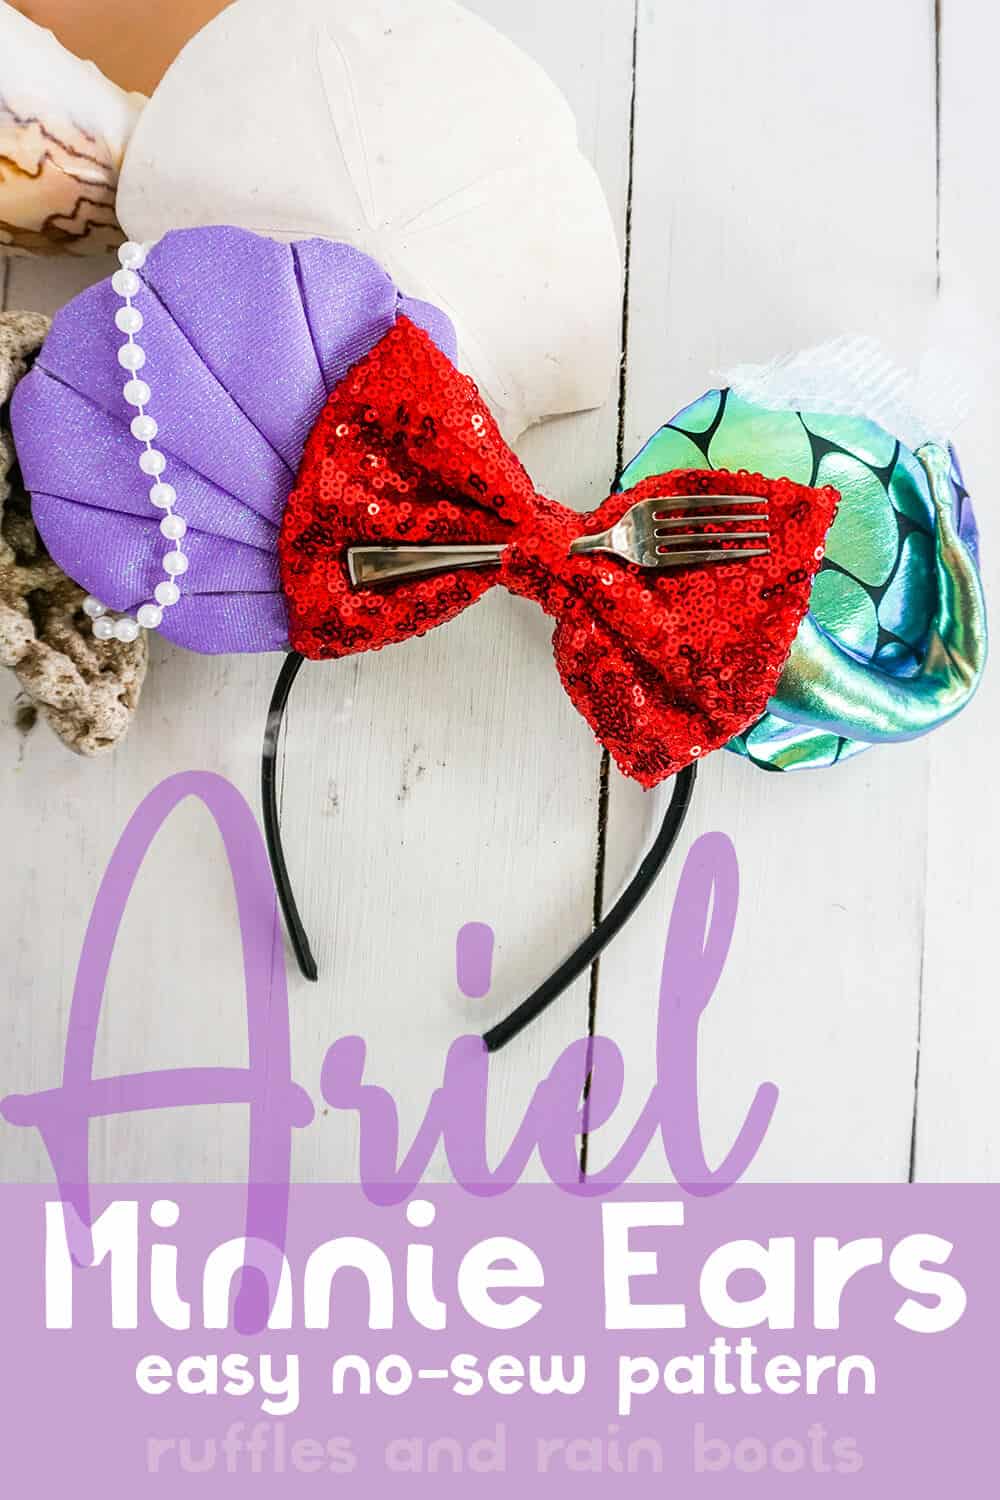
Ariel Mickey Ears
Here at Ruffles and Rain Boots, we want to be where the people are. Which is Disney. I mean, let’s be honest, it’s the happiest place on earth for so many reasons–but one of my favorite is getting to celebrate my favorite characters. That’s why I’ve been making these awesome Disney Princess Mickey ears. To celebrate some of the best characters Disney has ever come up with.
RELATED READING: ULTIMATE LIST OF DIY NO-SEW MICKEY AND MINNIE EARS FOR DISNEY
One of my favorites, obviously, is The Little Mermaid. Everything about Disney’s The Little Mermaid is fun and bright and full of energy. So, these Ariel Mickey ears are my way of echoing that fun. If you’re ready to splash into your own pair of The Little Mermaid Mickey ears, well, let’s get started.
No Time to Make This Now? Pin it for Later
You’re busy, I get it. Pin this to your favorite DIY Mickey ears board on Pinterest and it’ll be here for when you’re ready.
Tips to Make The Little Mermaid Mickey Ears
- Allow the hot glue to dry completely between steps. These The Little Mermaid Mickey ears are a fast DIY project, but you can easily ruin your work by moving too fast. So, for example, when making the clam shells, allow each line of hot glue to dry before moving on. If you don’t and it pulls, it will remove not only the section you’re working on, but the last one, too, because the hot glue lines are so close.
- If you feel like your mermaid body is too long or too noodley (yes, I know it’s not a word, but we’re in the heart of Ariel-land here where we make up words), just use the shape on the printable pattern, but go bigger or shorter. Because the holographic lame fabric is stretchy, when you cut it, stuff it and hot glue it, you can end up with random shapes that you weren’t intending. You want to be happy with your Ariel Mickey ears, so be sure you really are before you glue it down.
- Click here to get the free printable pattern. That clam shell is tricky if you’re just trying to do it from a photo, so use the pattern, it’ll save you time and energy.
How Do I Make these Ariel Mickey ears?
I’m so glad you asked. Below is our written tutorial. If you’re making a no-sew Mickey ears playlist on YouTube, here is our Ariel Mickey ears video tutorial Ariel Mickey ears video tutorial.
Ariel Mickey Ears

When I started working on Disney Princess Mickey ears, I knew that I would be making some Ariel Mickey Ears. Little did I know these whatsits would be the prettiest The Little Mermaid Mickey ears ever.
Materials
- 3 Cardboard or Foam Core Board Circles 4-inches in Diameter
- 1 Black Headband
- Small Amount of Polyfill
- Large Sequin Red Bow
- Free Printable Pattern
- Dark Green & Purple Shimmer Fabric
- Light Purple Glitter Ribbon (3-4 inch)
- 6-8 inch String of Faux Pearl “Ribbon”
- Teal Glitter Canvas
- Holographic Teal Fabric Scrap
- Transparent Shimmer Fabric
- Ariel Minnie Ears Pattern
Tools
- Hot Glue Gun and Glue
- Scissors
- Exacto Knife
Instructions
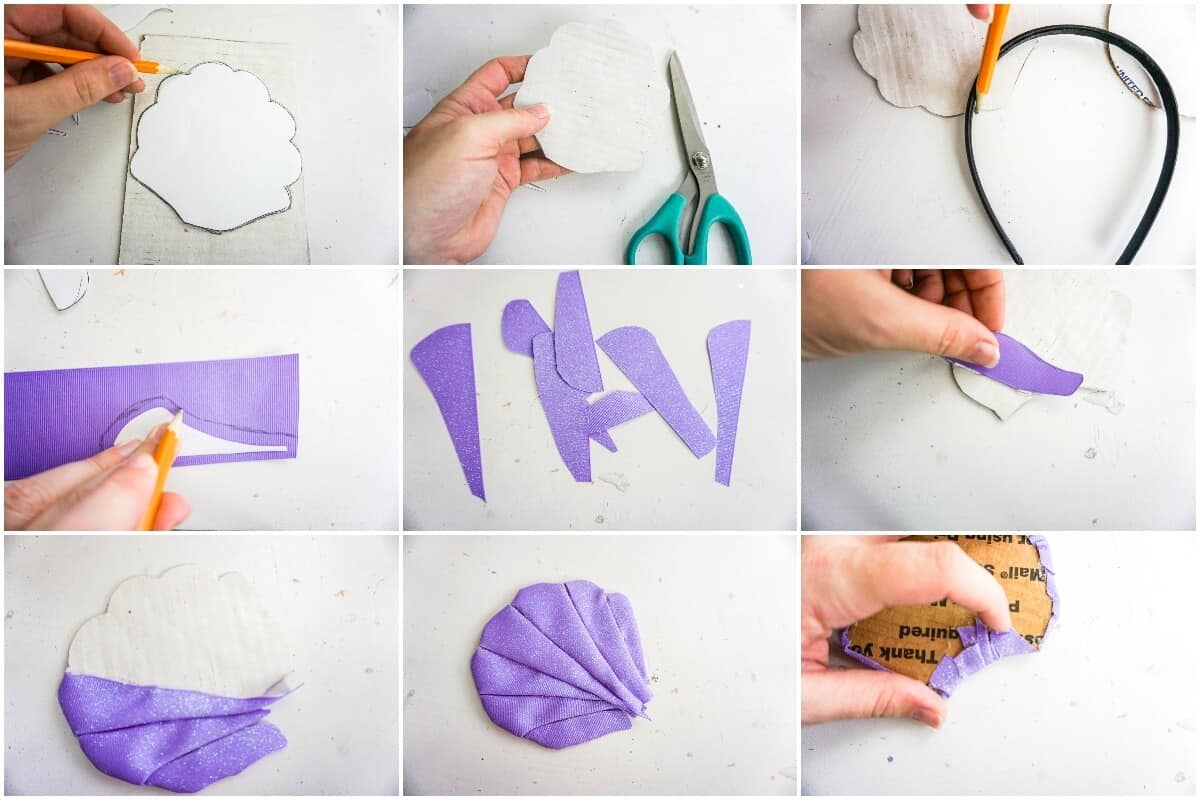
- Cut out all template pieces. Trace the clamshell shape from the pattern and trim it to fit the headband (see the pictures or video). Trace that and cut out another one. Repeat for the other ear (not using the clamshell - for this one you want a bitten cookie shape).
- Using the clam sections on the printable pattern, cut out two of each clam section from the light purple glitter ribbon.
- Using one set of the clam section cutouts of light purple glitter ribbon and a single cardboard clam shape, hot glue the clam sections onto the cardboard clam shape. I made the ribbon look sewn by gluing them down on one side upside down, then flipping the ribbon and gluing down the other side. I then tucked the ends over the edge of the cardboard and hot glued those in place. Reference the photos. Repeat with the other half of the clamshell.
- Hot glue the two clamshell shapes together, but do not go all the way to the edge--you will need some space to add the pearl string later.

- With the non-shell cardboard ear shapes, trace the shape of the ear onto the back of the dark green & purple shimmer fabric, adding about ½ inch all the way around the outside edge of the ear in extra fabric.
- Lay the cardboard ear shape face down onto the back of the shimmer fabric. Affix the fabric to the cardboard by wrapping the extra around to the back and gluing the edge down on the upper part of the ear only, leaving the bottom of the ear open and leaving the excess fabric on the front of the ear. Do not pull the fabric tight.
- Work a small amount of polyfill into the space between the extra fabric and the cardboard, smoothing it out. Finish affixing the fabric to the cardboard cutout by wrapping the bottom of the loose fabric around to the back and hot gluing it in place. While doing this, you may now pull the fabric taut, not tight.
- Trace the shape of the shimmery scale ear onto the teal glitter canvas and cut this shape out. Affix this teal glitter canvas shape to the back of the shimmery scale ear and trim as needed.
- Hot glue the two ears in place on the headband, taking care to hold them firmly until the hot glue is completely cooled.
- Cut out two shapes from the template for the tail body from the holographic teal fabric scrap. You may want a longer or shorter, fatter or skinnier tail, so you may want to consider this when cutting. My fabric was very stretchy and so I had to re-cut to make it exactly right for me.
- Place the two pieces front-to-front and hot glue the two sides together along the edges. Once the glue has set, carefully turn the tail body right side out.
- Fold the edge of the open end that will hold the tail fin and create a hem by hot gluing the edge, folded over, all the way around the opening.
- Cut out two shapes from the template for the tail fin from the transparent shimmer fabric. Place the two pieces back-to-back and hot glue the two sides together in the center and along the edges.
- Slide the tail fin about ½-inch into the end of the tail body and hot glue in place, closing the opening on the tail body, sealing the base of the fin inside.
- Fill the tail body with polyfill and slide the floral wire inside. Trim the floral wire to end about ¼-inch inside the tail body. Hot glue the tip of the floral wire in place inside the tail body.
- Fold the edges over and inside of the opening of the tail body and hot glue the opening closed. Affix the base of the tail to the scaled ear along the inside edge, laying across the ear, and bend the tail, as desired.
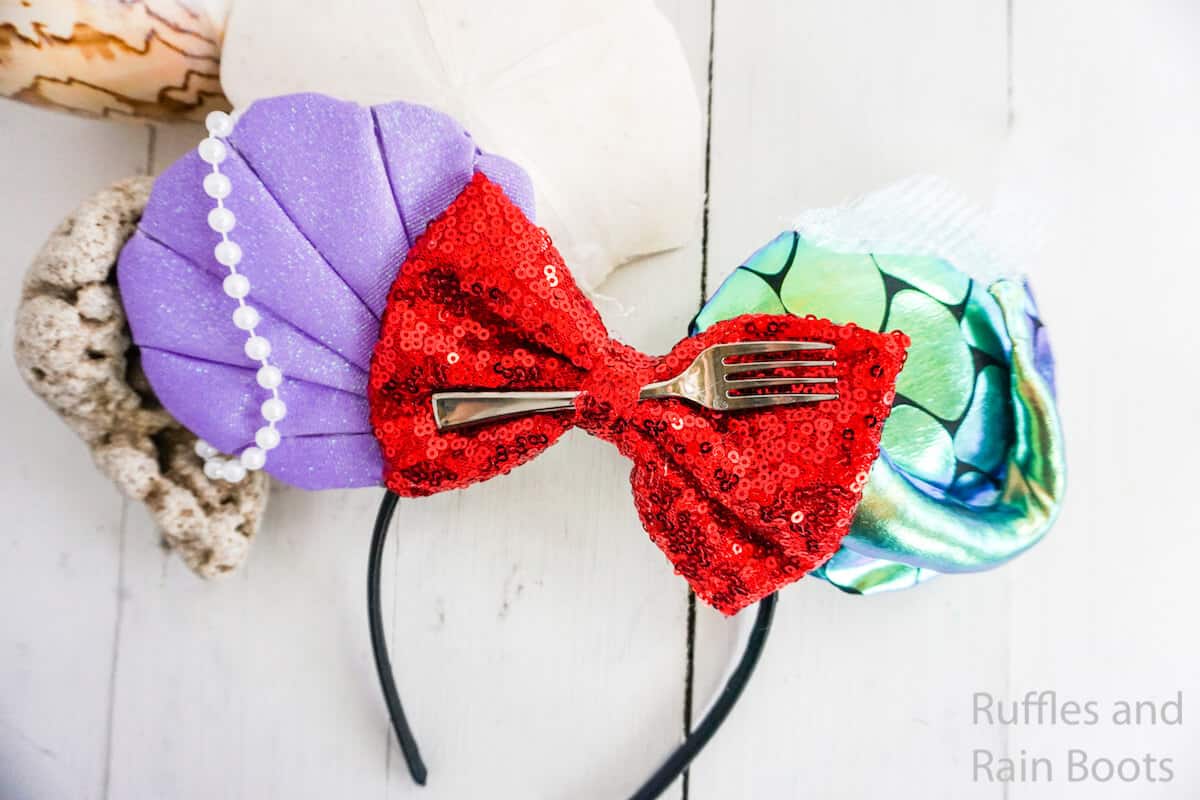
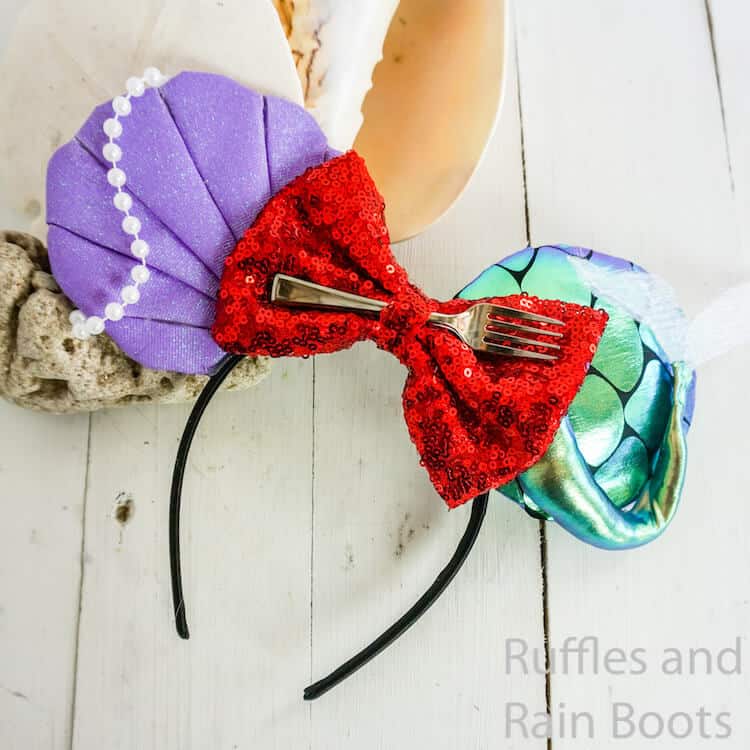
- Tuck a pearl or two from the string of pearls into an open edge of the clam ear and hot glue in place.
- Tuck the other end of the string of pearls into another open edge of the clam ear a few inches away from the first and hot glue in place.
- Slide thingamabob (fork) under the center loop on the bow and tack in place with a dot of hot glue. Hot glue the large sequin red bow in place between the two ears.

Notes
For more fun Disney ear tutorials, visit Ruffles and Rain Boots
More Micky Ears You Might Like
- Ultimate List of DIY No-Sew Mickey and Minnie Ears for Disney – If you need some ideas for making your own Mickey ears for Disney, look no further. Every character is represented–and some more than once.
- Belle Minnie Ears – If you love that classic Disney Princess, well, here’s another stunning DIY Disney Princess Mickey ears tutorial that just can’t be missed!
- The Best Snow White Mickey Ears – Reach back to the original Disney Princess and make (or buy) a stunning set of Snow White Mickey ears for your Disney Princess!
Please Save This to Pinterest
Your shares are how this site grows and I am sincerely grateful. Know a friend who’d like this? Please share it on Facebook or save it to your favorite Mickey ears board on Pinterest.

When i click on the pattern, it brings me to an empty google drive. How do i get the pattern for the shell?
Can you try this link? https://drive.google.com/drive/folders/1f8V_IFFtf6PgNNGYEFY3ZhZlmorErayO?usp=sharing
Do you see them?