
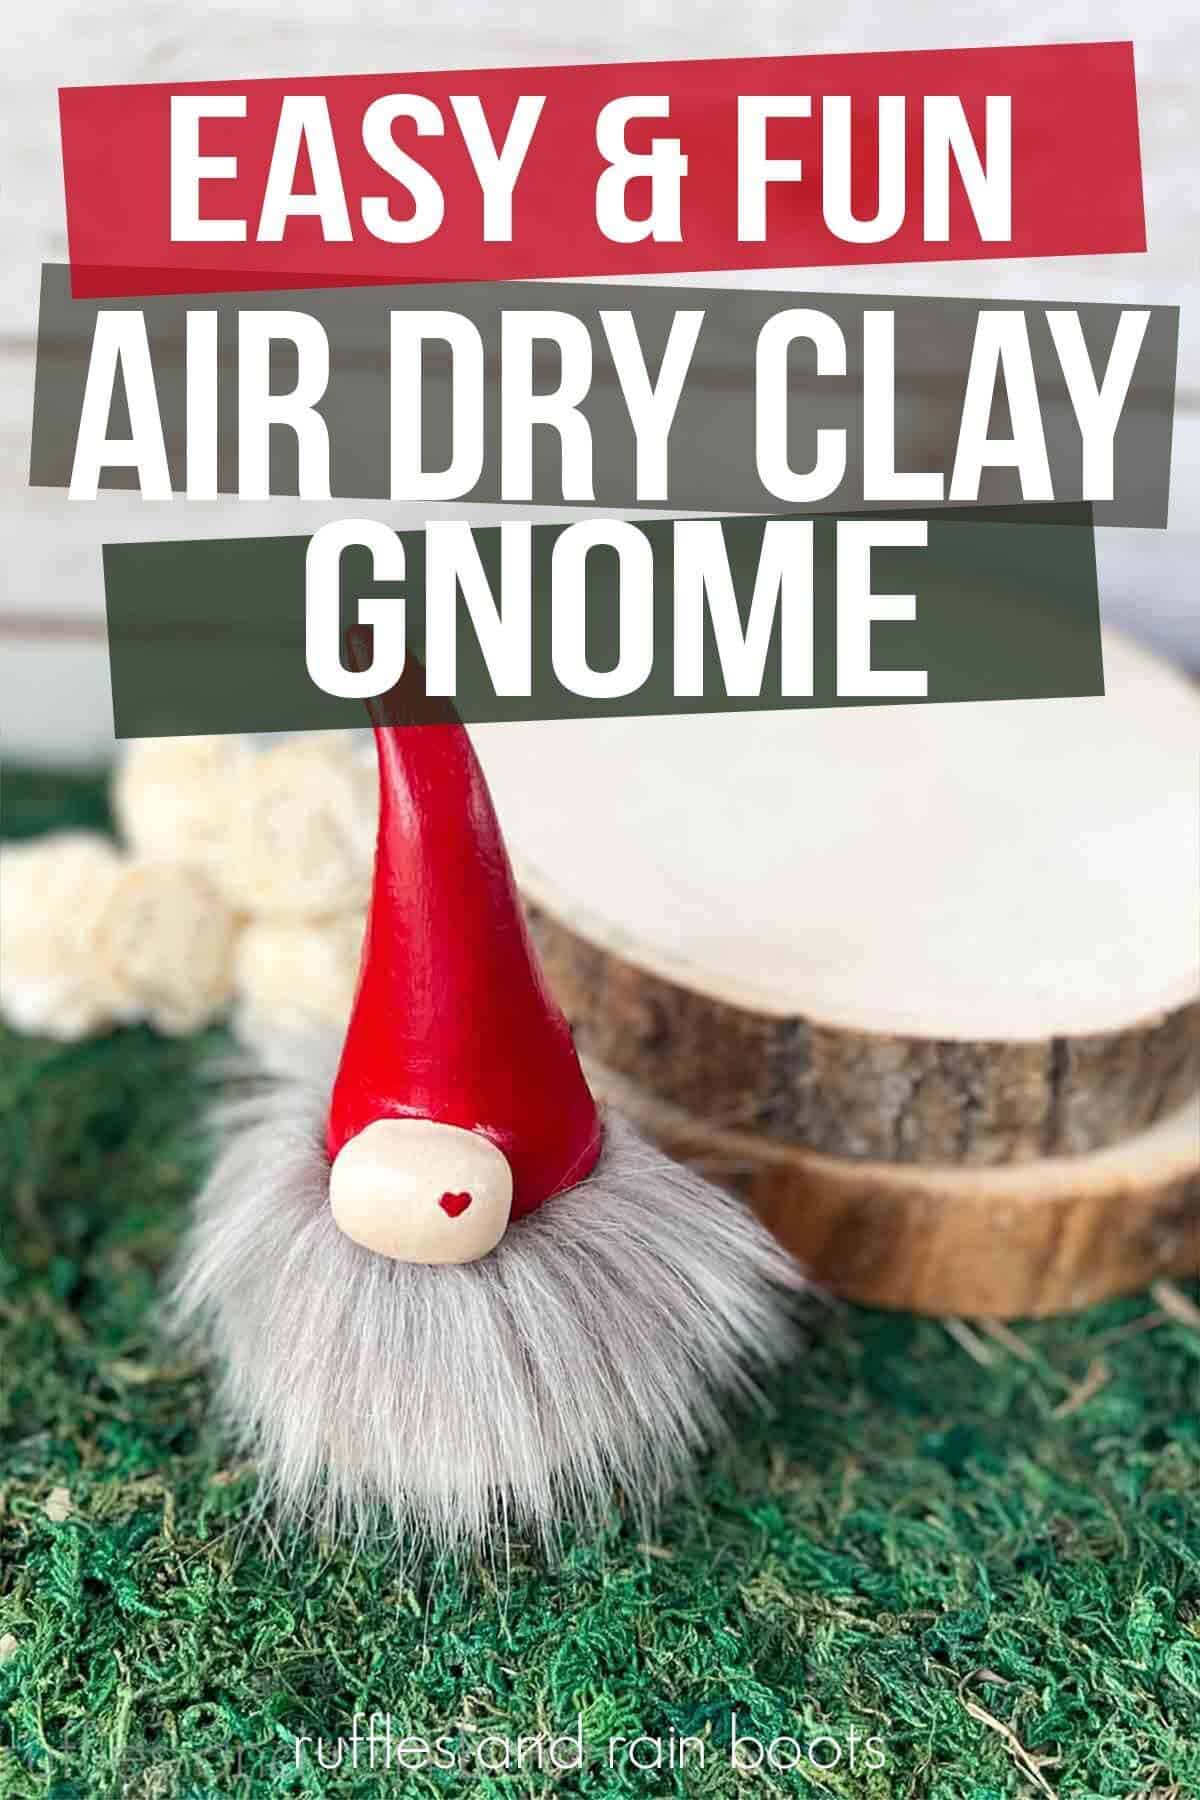
Air Dry Clay Gnome with Fur Beard
This air dry clay gnome is going to be a favorite summer craft. No need to heat up the house with polymer clay because the alternative works up easily.
In this free gnome tutorial, you will learn how to create a sturdy body with a faux fur gnome beard. Combining the two is going to make for a fun afternoon!

RELATED READING: These Clay Gnomes are SO Easy to Make (All Ages)
Clay Gnome Bottle Topper and Decor
Here at Ruffles and Rain Boots, I try to bring new ways to use the myriad of craft supplies we all have at our disposal. For more than 2 years, I’ve wanted to make this but for some reason kept putting it off while designing and publishing other DIY gnomes.
This week, I finally unpacked a box that had been sitting in my new craft room for months and what did I find? I discovered two unopened packages of air dry clay and two, half-used packages of the same stuff! This told me I really needed to make a gnome with air dry clay, so I set myself to the task.
This clay gnome idea takes about 45 minutes of hands-on crafting time. It’s an easy, beginner gnome and it looks great with the combination of clay and fur.
As an Amazon Associate, I could earn from qualifying purchases. There could be affiliate links in this article.
RELATED READING: Cute and Fun Clay Gnomes with Big, Bare Feet (Those Toes!)
Tips for Working with Air Dry Clay
- Work the air dry clay in your hands a bit to get it soft and roll it out using a rolling pin, glass jar, bottle, or your hands for a more handmade look.
- Air dry clay is easy to use because one can create anywhere and anytime (no oven required for baking). It also makes it a perfect craft for the hot days of summer.
- If you live in a humid environment, the clay will need longer to dry than it states on the package.
- Use very small amounts of water when working with the clay. There is no need to use more than your finger lightly coated (no drops).
- Smoothing air dry clay can be done with fingers, smoothing tools, or even a dry paintbrush.
- You do not need clay cutting and piercing tools for this project: a knife, a toothpick, and your hands are perfect.
- Though it looks it, air dry is NOT white clay. It dries with a gray or blue tint, so painting a white base coat is recommended.
RELATED READING: This Wine Bottle Gnome is a Fun Warm Weather DIY
How to Make a DIY Clay Gnome with a Faux Fur Beard
The detailed instructions to put together this gnome wine bottle topper and decor piece are below. For a printable clay gnome tutorial with a list of supplies, scroll down.
If you are a visual learner, watch the full air dry clay gnome with fur beard video tutorial. While you’re there, subscribe to the YouTube channel – we have a lot of fun over there.
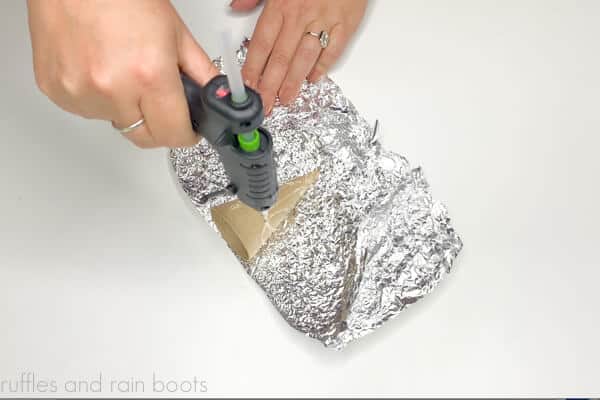
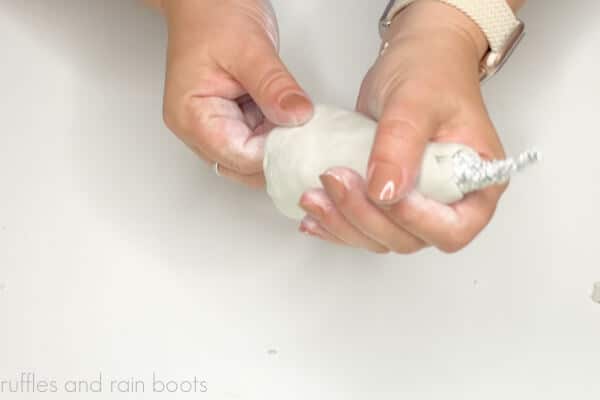
First, crumple the foil, spread it out, and hot glue it to the cone. Be sure to create a point for the hat with a thick, pressed bit of foil so nothing breaks off.
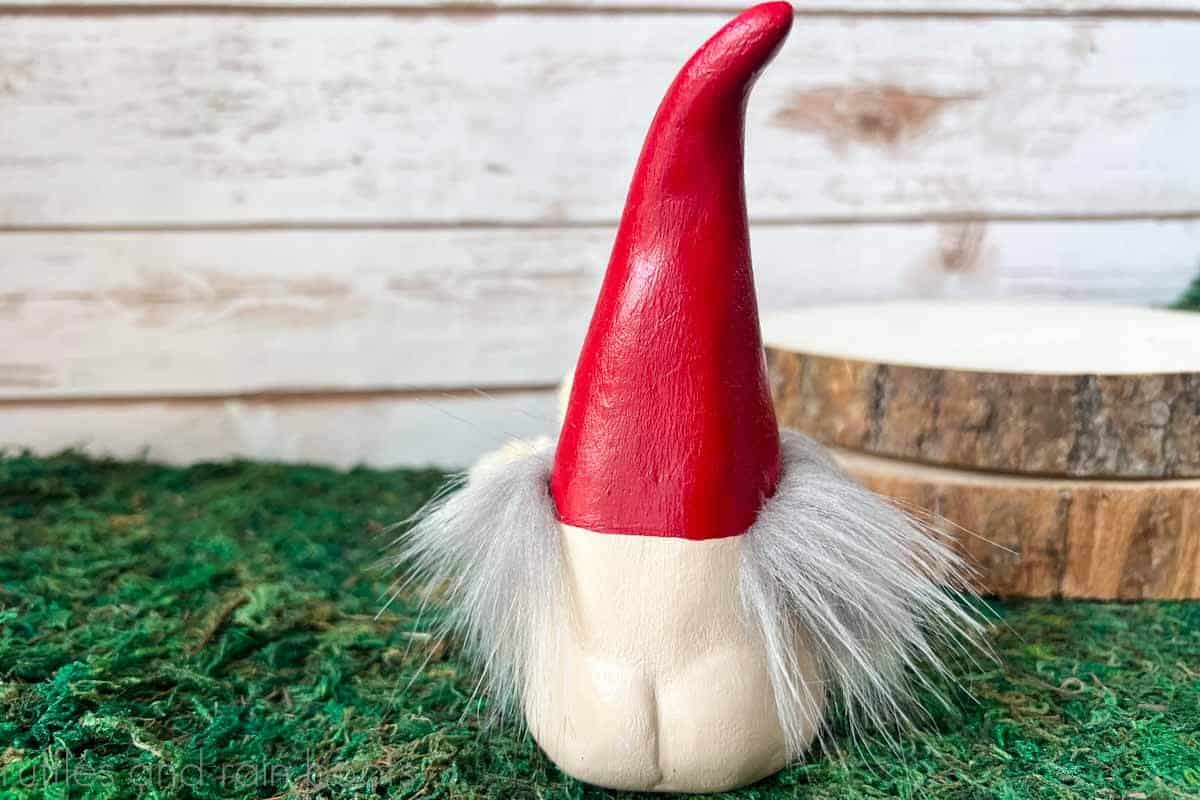
Next, roll out the air dry clay to no thinner than 1/8th inch thick (1/4 inch recommended) and fully wrap the piece in it. Be sure to add clay to the bottom to widen the base for stability.
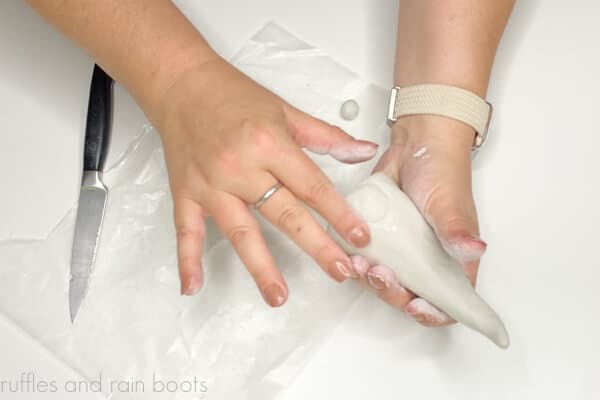
Pinch off an inch sphere of clay, roll it into a sphere and then a log. Split it in half to create the ‘cheeks’ for the back of our gnome. First, score the clay in the back of the gnome to form a split. Affix each cheek by scoring the small piece add on and the body and blend until solidly attached.
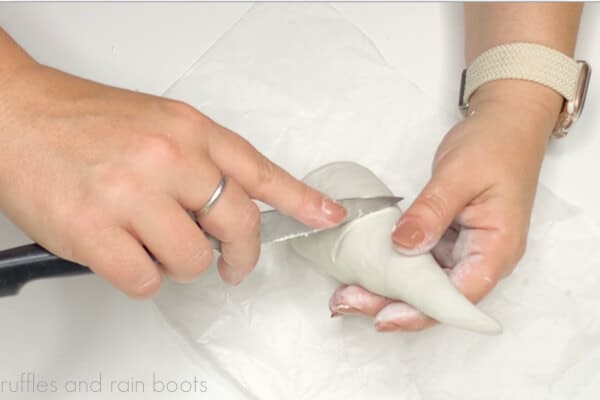
Create a channel under the nose by using the knife to create two cuts 1/8th of an inch wide. Dig out the layer of clay between the two cuts. The channel should go at least halfway around the gnome.
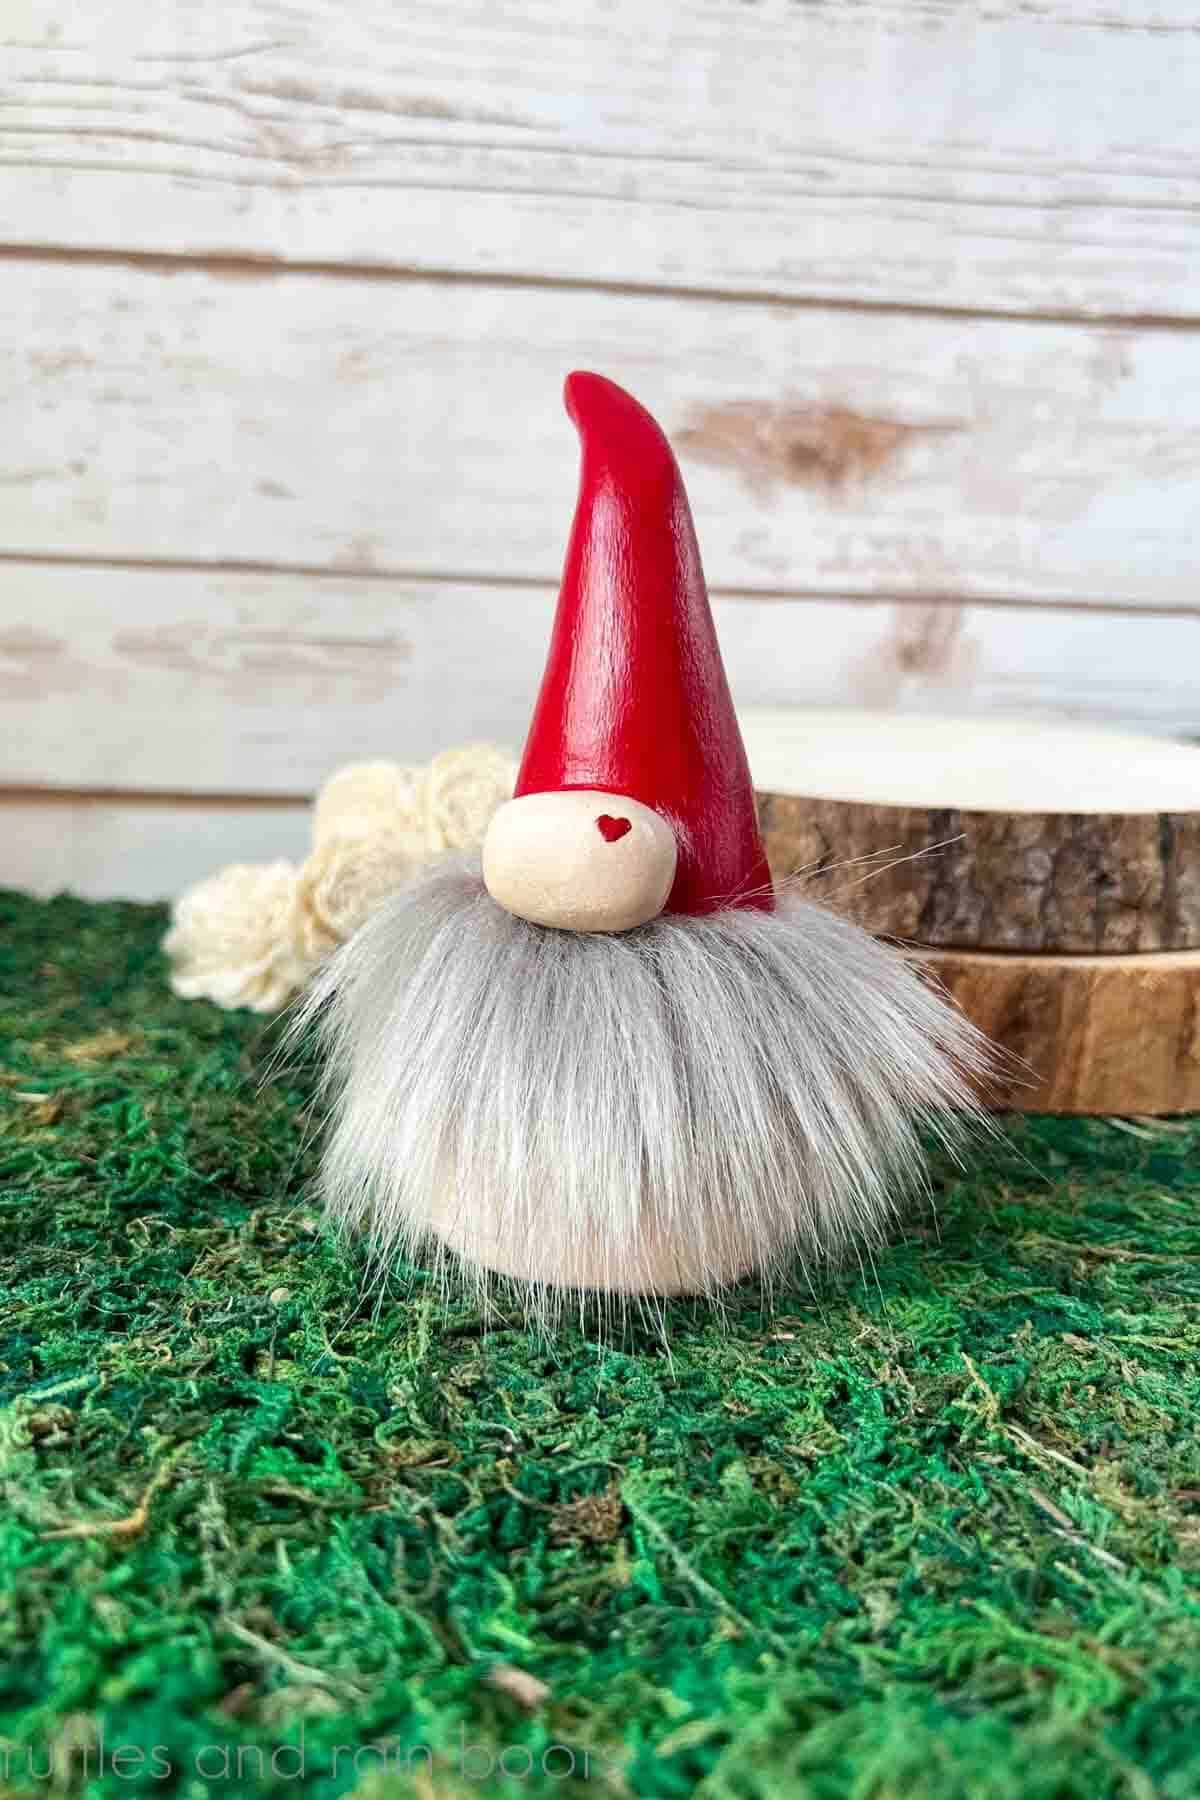
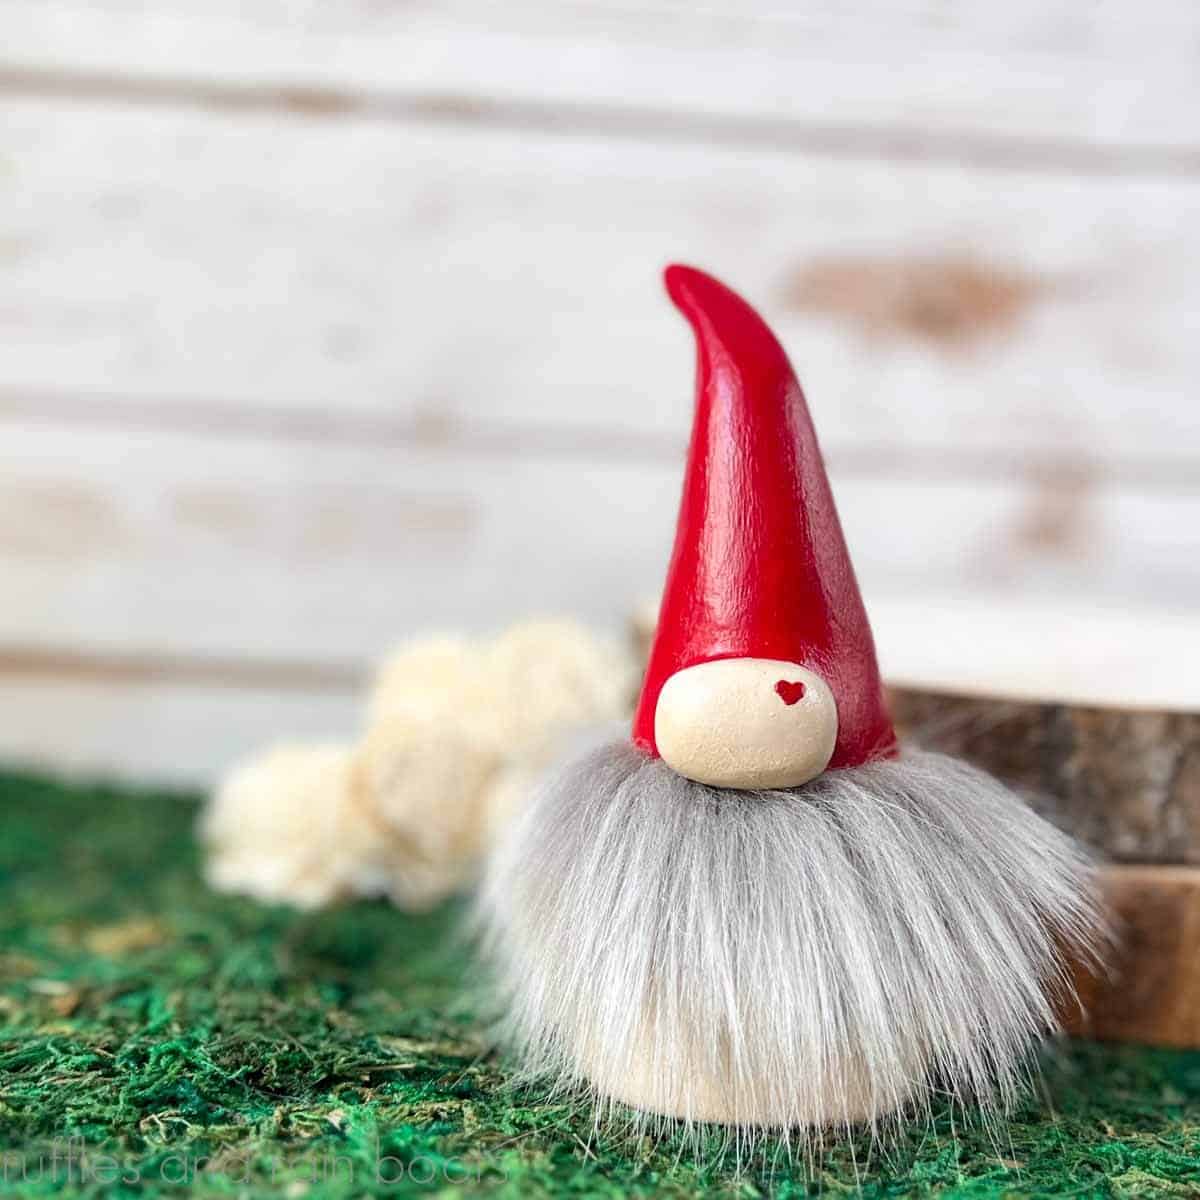
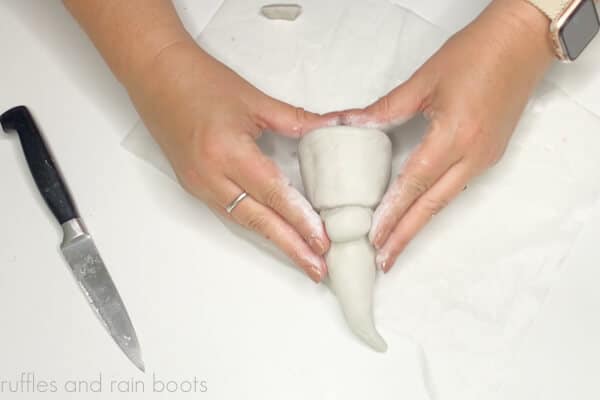
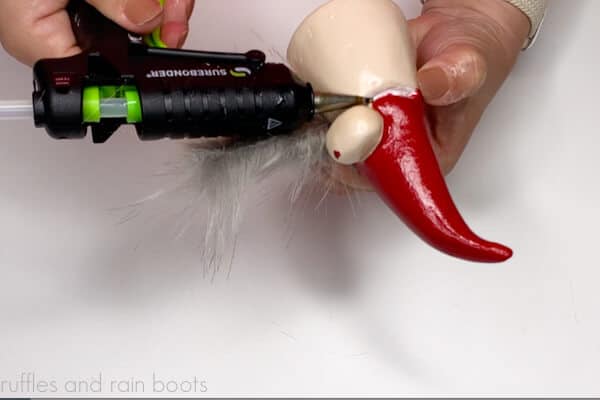
Make a 1 inch sphere of clay, press it into an oval, and attach it just above the channel. Be sure to get it even and exactly opposite of the cheeks on the back. Smooth out the clay all over the body and let the piece dry.
NOTE: Drying time will vary. I live in a high humidity area, so I let my piece dry for two days to be sure it was ready.
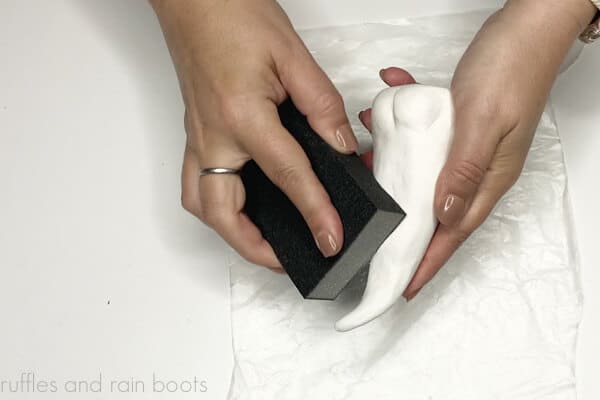
Protect yourself with a dust mask and your work surface (or go outside). Use the sanding sponge to even out the body texture. Wipe away any dust with a lightly damp cloth.
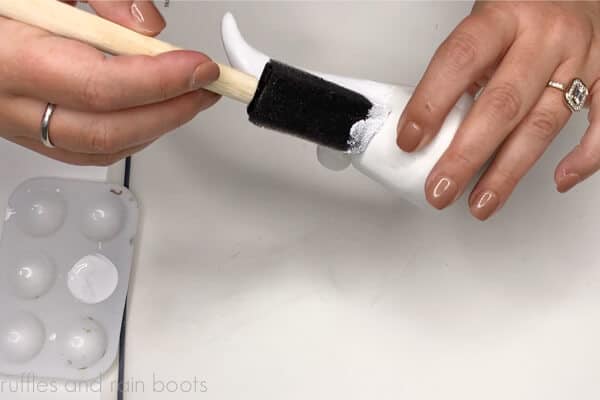
Paint the entire gnome with white acrylic paint and let dry. This trick will make the painted colors more vibrant.
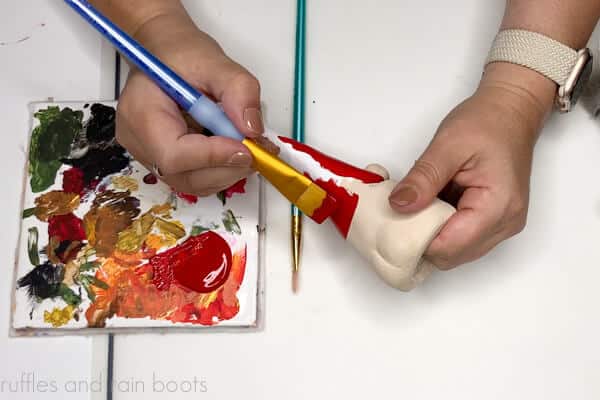
Paint the lower half of the body and nose with beige paint and the gnome hat with red acrylic paint. Dry and repeat for a second coat.
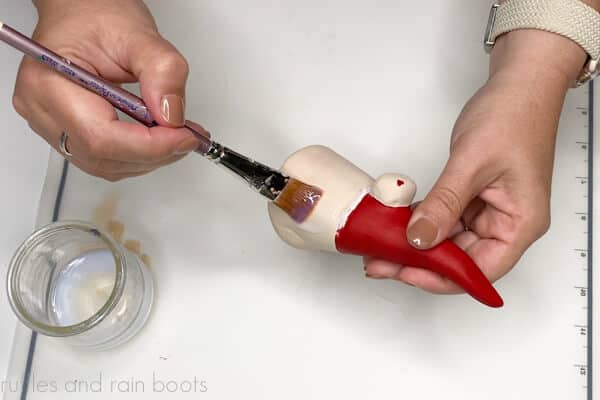
Seal with varnish or a spray sealant.
Measure and cut the faux fur beard as wide as the channel we cut PLUS an additional 1/8th inch on either side. Fold in the sides and top of the faux fur and secure with glue to hide the fabric backing.
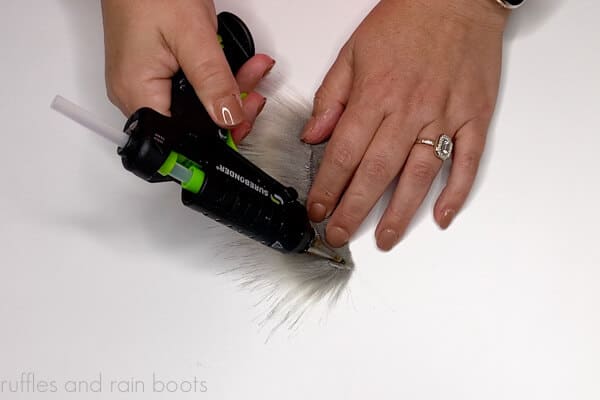
Glue the top of the faux fur (the rolled over portion) into the channel. Glue down the edges to cover the sides and display your air dry clay gnome!
More DIY Clay Gnome Crafts You Might Like
- Colorful Polymer Clay Gnomes – These easy – and I mean EASY – gnomes work up so quickly.
- Clay Gnomes with BIG Feet – These are too cute not to see and make a family.
- Gnome Jar Topper with Clay and Paint – Create any size of these gnome toppers using this simple tutorial (they’re fun to paint).
Please Save or Share This Clay Project Idea
Your shares are how this site grows and I am sincerely grateful. Please use the sharing buttons to save this to a fun DIY pin board or share it with a crafty group on Facebook.
How To
Meet the Creator
Hi there, I’m Sarah Nenni-Daher. I’m a crafty gal and always have at least 14 projects going at once. I am a crafter, designer, DIYer, and pattern maker. I share my creations here and in the Ruffles and Rain Boots® Shop.
Here at Ruffles and Rain Boots®, you’ll find DIY gnomes, crafts, gifts, cupcakes, laser crafts, and so much more. I love sharing video tutorials over on YouTube and chatting with other crafters in my Facebook groups. We’d love to have you!