
Whipped Peppermint Sugar Scrub Recipe
This peppermint whipped sugar scrub recipe is PERFECT for a gift basket or for you to pamper yourself. It looks like you paid a specialty shop but you made it yourself in only 10 minutes!
RELATED READING: Easy Peppermint Bath Bombs to Make This a Holiday Set!
What You'll Find On This Page
Whipped Peppermint Sugar Scrub Recipe
Here at Ruffles and Rain Boots, I’ve been making my own bath products for nearly 15 years. With some of the most popular sugar scrub recipes AND solid sugar scrub recipes on the Internet, I decided to try something I saw in a boutique: whipped scrubs.
Today, I perfected my method and created a handmade Christmas gift idea you can make in just a few minutes. You’ll need some pantry staples, air-tight containers, and you can be dropping off gifts before your steaming cup of coffee gets cold.
Supplies You Will Need
Below I’ve detailed what I used for this, but let me know if you have questions on substitutions. Remember, never sub out food coloring for any kind of soap colorant – it can stain body and tubs / showers.
- granulated sugar
- coconut oil
- peppermint essential oil
- red (or pink) mica powder or soap colorant
- air tight jar or container
As far as tools, you should use medium-sized bowls with a hand mixer OR a stand mixer. Remember, we can make big batches of these and jar them up all at once.
How to Make This Christmas Bath Recipe
Below are the step by step instructions to put this easy scrub together. Keep this page open and follow along or scroll down for a free printable version without images.
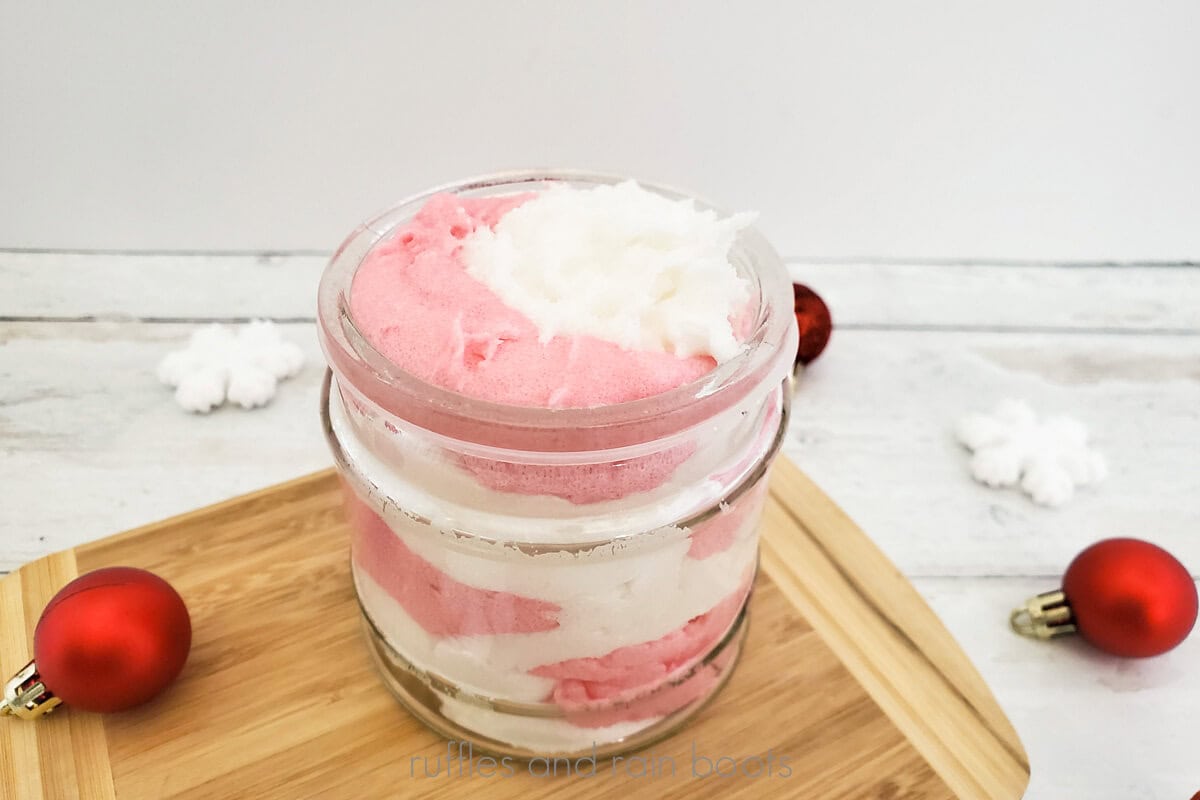
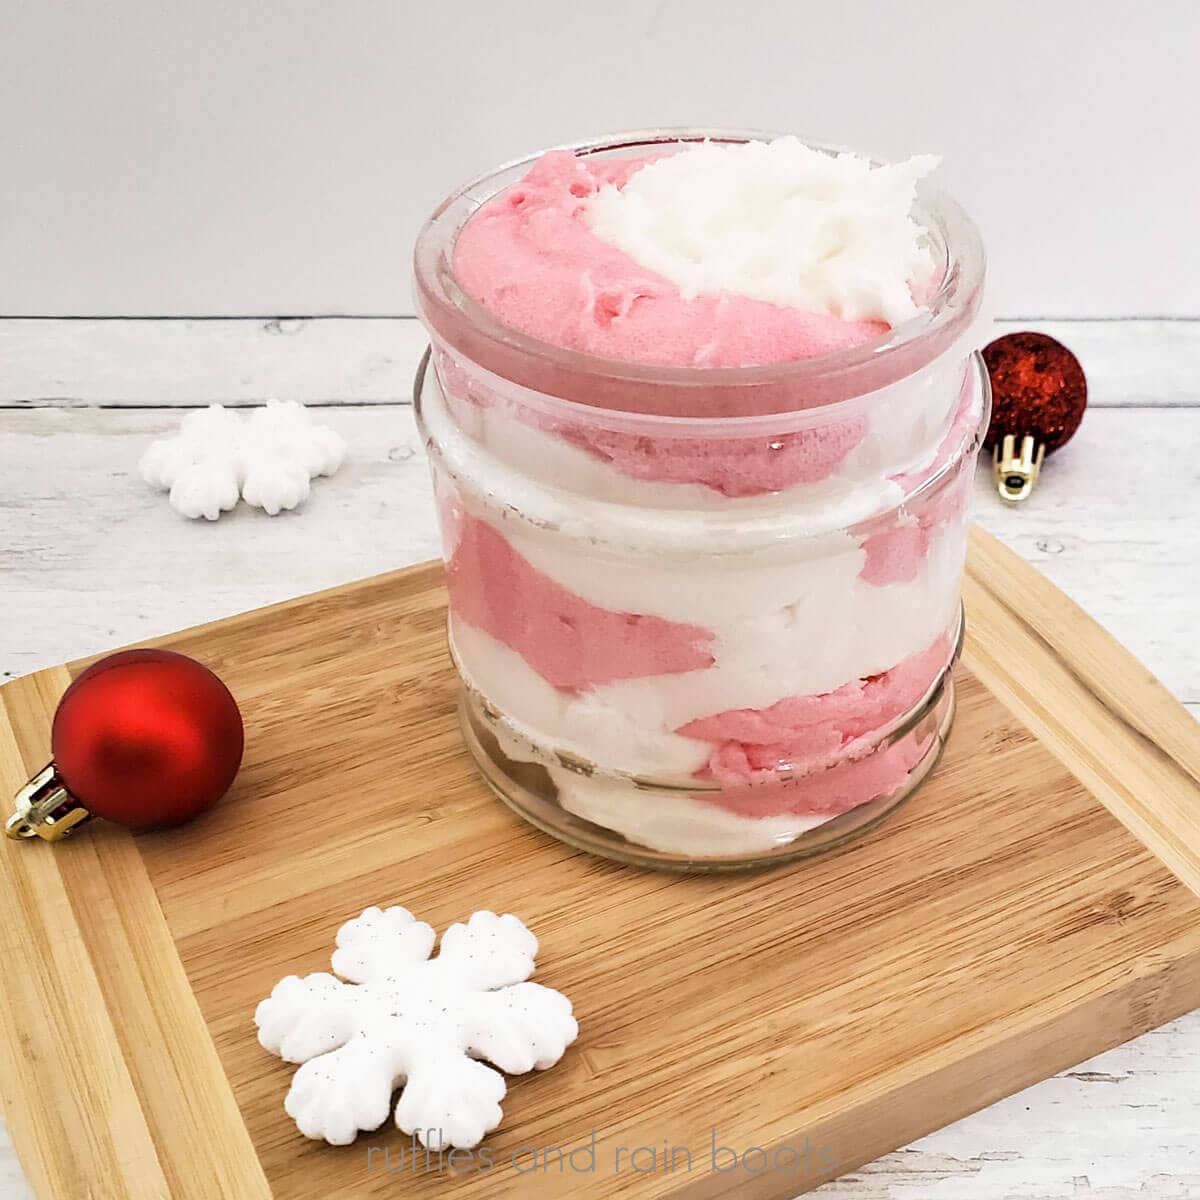
First, add 1 cup of sugar and 1 cup of solid coconut oil to a bowl or stand mixer. Beat with a wire whisk attachment for about 1 minute until a paste forms (it will be grainy).
Add 15-25 drops of essential oil. If you’ve never done this before, start with 15 and only add if you feel the scent isn’t as strong as you would like.
Whip the mixture for 3 minutes. At the end, you should have a fluffy, whipped scrub.
Add half of the mixture to another bowl and add 1/4 teaspoon of the mica powder or 10-12 drops of liquid soap colorant. Stir well with a spoon until the color is fully incorporated.
Layer the colors into an air-tight container and seal closed. NOTE: if you want a swirl, you will to put the scrub into piping bags (no frosting tip, just cut off the end of the bag), and add layers. Swirl the layers with a bamboo skewer, testing stick, or scribe tool.
How Long Does This Scrub Last and Other Questions
I get the same questions a lot, so I have started to add a bit of an FAQ about homemade sugar scrubs. If you have more questions, leave a comment below or ask on social media.
- Sugar scrubs made this way will last for as long as the carrier oil is good for.
- These scrubs must be stored in an air-tight container in a dry place.
- Scrubs made with these ingredients do NOT need to be refrigerated.
- Homemade sugar scrubs are safe to be used on the body (face is not recommended), to safely smooth rough spots (elbows, knees), and make amazing foot scrubs for homemade pedicures or pampering.
- You can add a cute spoon or scoop tied onto the side of the jar to avoid contamination if more than a single serving size is given. Water should not be introduced to this scrub (scooped in the shower, for example) or it can lead to bacteria growth.
More DIY Beauty Products You Might Like
- DIY Bath and Beauty Products to Make at Home – If you want to get started, we’ve got you covered.
- Peppermint Sugar Scrub Cubes – Turn this easy scrub into a solid that will last longer and is much easier to use.
- Harry Potter House Bath Bomb Recipes – Oh, friends – if you know a Harry Potter fan, this is what you need to do with your afternoon!
Please Save or Share This Handmade Holiday Gift Idea
Your shares are how this site grows and I am sincerely grateful. Please share this page to social or save it to a DIY Christmas gift ideas pin board.
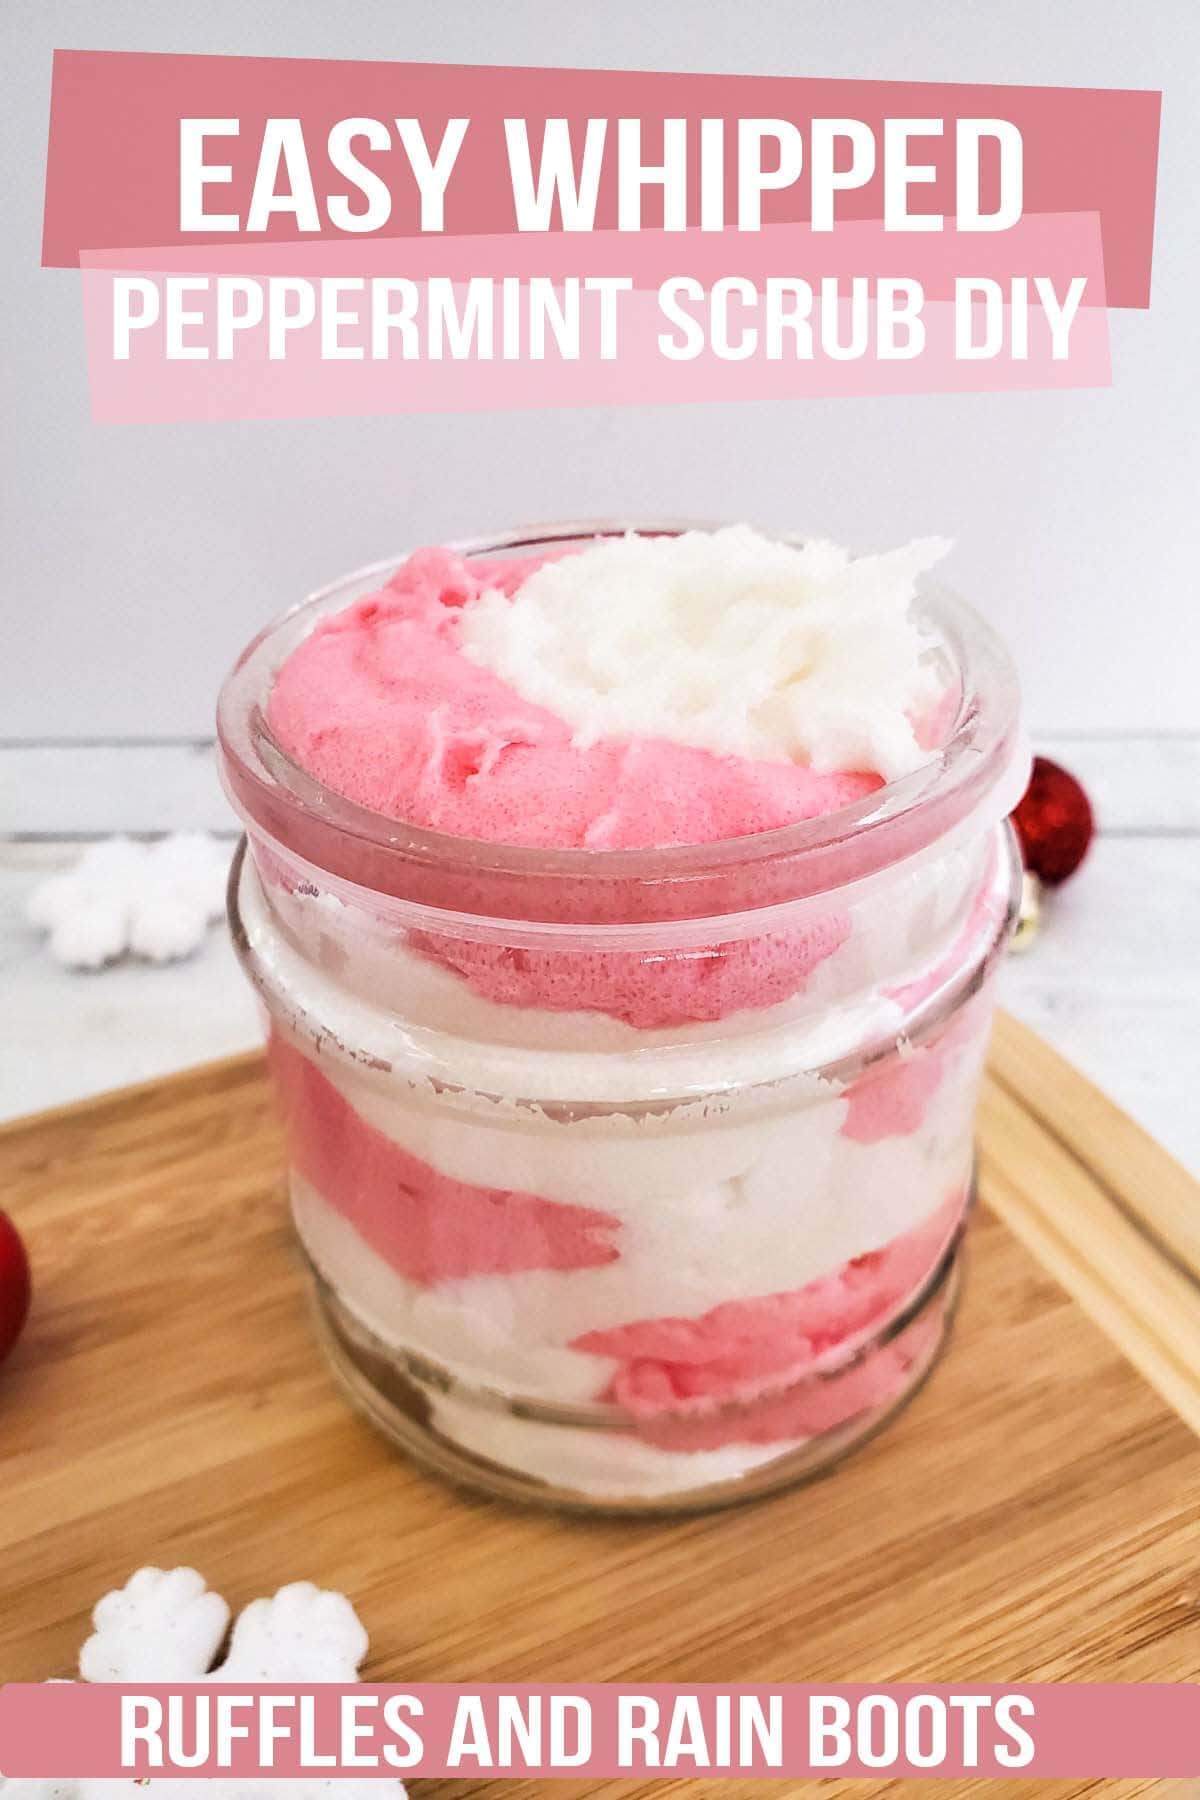
Whipped Peppermint Sugar Scrub

This deliciously pampering whipped peppermint sugar scrub makes a great gift for friends, teachers, or yourself. It only takes about 10 minutes to put together a batch and it looks SO luxurious!
Materials
- 1 cup granulated white sugar
- 1 cup coconut oil (solid, not melted)
- 15-20 drops peppermint essential oil
- 1/4 teaspoon red mica powder (or 10-12 drops liquid soap colorant)
- air tight jar
Tools
- medium bowl, small bowl
- electric hand mixer or stand mixer (can use a whisk)
- spoon
Instructions
- First, add 1 cup of sugar and 1 cup of solid coconut oil to a bowl or stand mixer. Beat with a wire whisk attachment for about 1 minute until a paste forms (it will be grainy).
- Add 15-25 drops of essential oil. If you've never done this before, start with 15 and only add if you feel the scent isn't as strong as you would like.
- Whip the mixture for 3 minutes. At the end, you should have a fluffy, whipped scrub.
- Add half of the mixture to another bowl and add 1/4 teaspoon of the mica powder or 10-12 drops of liquid soap colorant. Stir well with a spoon until the color is fully incorporated.
- Layer the colors into an air-tight container and seal closed. NOTE: if you want a swirl, you will to put the scrub into piping bags (no frosting tip, just cut off the end of the bag), and add layers. Swirl the layers with a bamboo skewer, testing stick, or scribe tool.
Meet the Creator
Hi there, I’m Sarah Nenni-Daher. I’m a crafty gal and always have at least 14 projects going at once. I am a crafter, designer, DIYer, and pattern maker. I share my creations here and in the Ruffles and Rain Boots® Shop.
Here at Ruffles and Rain Boots®, you’ll find DIY gnomes, crafts, gifts, cupcakes, laser crafts, and so much more. I love sharing video tutorials over on YouTube and chatting with other crafters in my Facebook groups. We’d love to have you!