
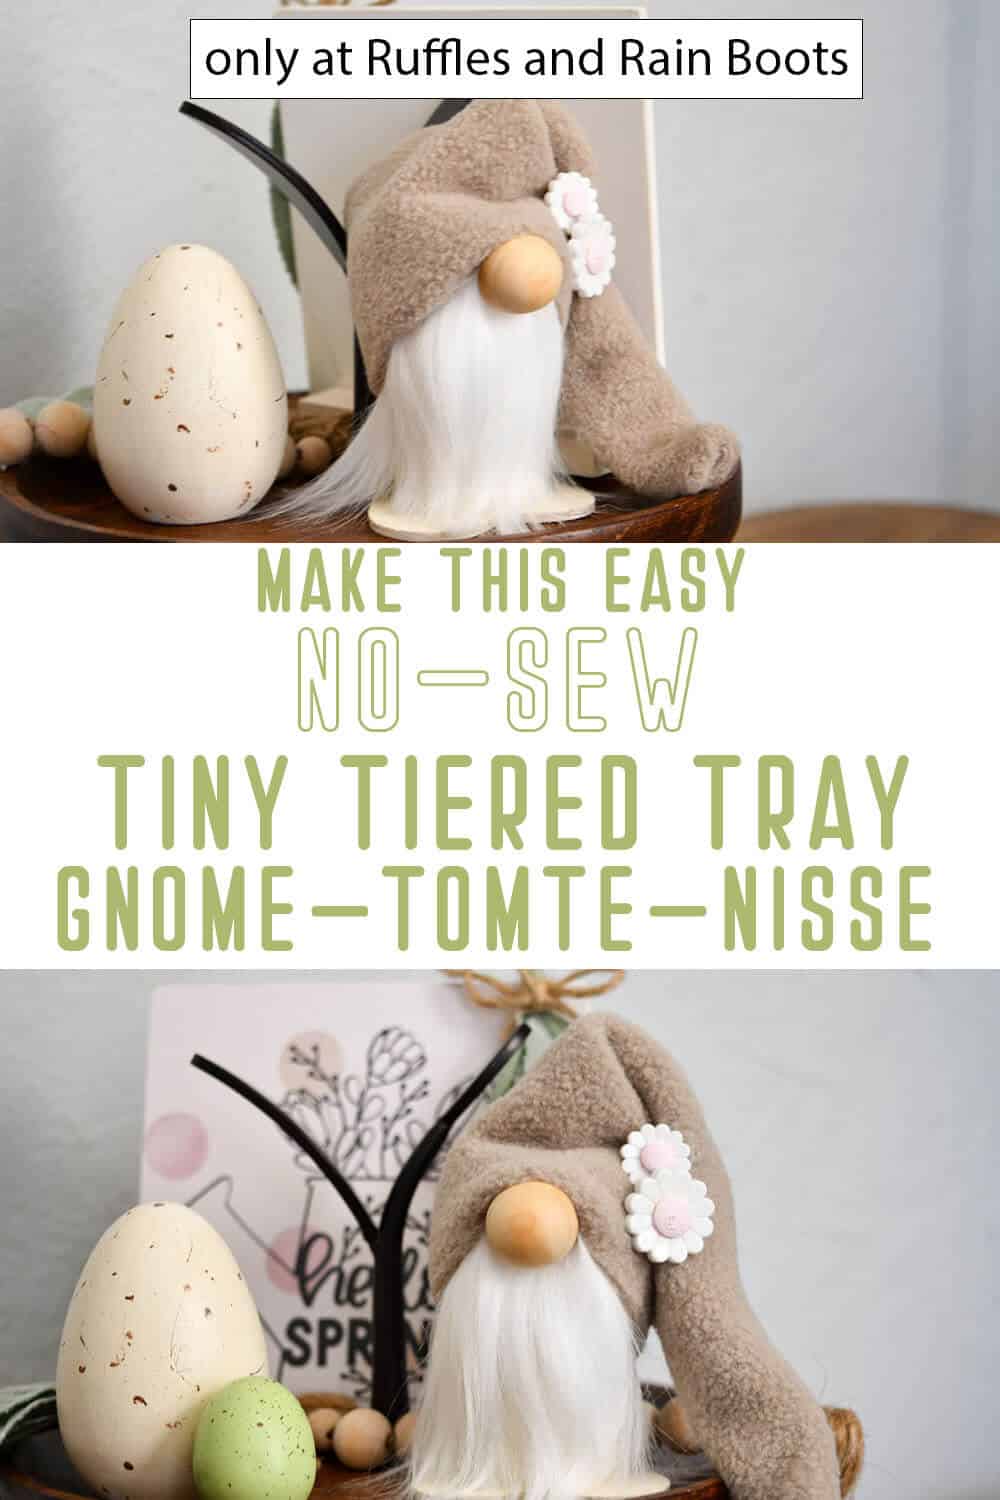
Make a Mini Gnome from Scraps
You can make this adorable tiered tray mini gnome in just a few minutes, to go with your farmhouse decor! Plus it’s an easy gnome made from scraps, so it’s a fun scrap-buster project.
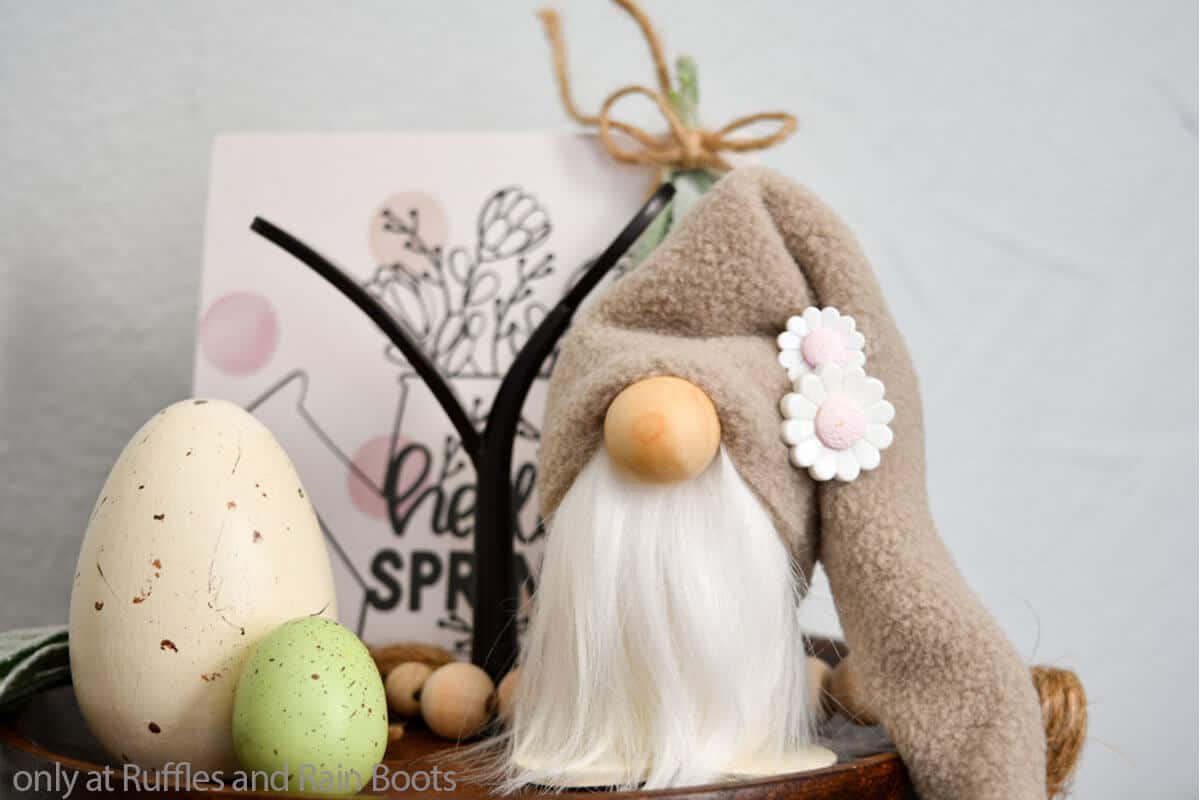
Tiny Tiered Tray Gnome
Here at Ruffles and Rain Boots, we have so much fun in the craft room, coming up with new and different things – but that does leave me with a ton of scraps. A reader asked for smaller items she could put on the top of her smaller, kitchen tiered tray and of course I had to work on a mini gnome.
RELATED READING: THE ORIGINAL NO-SEW FARMHOUSE GNOME TUTORIAL
He’s short, but stable and has a great amount of character. Grab your scrap bin and let’s get started.
No Time to Make This Now? Pin it for Later
Love this but can’t get started right now? Save this to your favorite DIY gnomes pin board or share it to social media and it’ll be easy to find when you’re ready to begin.
As an Amazon Associate, I can earn from qualifying purchases. There could be affiliate links within this article.
Tips to Make a Gnome from Scraps
- This is a great scrap-busting project because you only need a small amount of fabric, can use a scrap of fur, and use up those cute buttons you’ve been hoarding.
- For this gnome, I used a wood bead like these.
- Use your favorite faux fur – short pile, long pile, colored, textured. Any fur scrap will work.

How to Make a Mini Gnome
Below is the written tutorial. The full video tutorial for mini gnome is here on YouTube.
Tiny Tiered Tray Gnome

This adorable tiny tiered tray gnome is a quick-work project AND it's an epic scrap-buster. I love it when a plan comes together to make a great farmhouse gnome!
Materials
- Base Shape (2-inch Wooden Heart Sticker or Wood Round)
- White Chalk Paint
- Body Shape (Wrapping Paper Roll Tube or Wine Cork or Wood Dowel)
- Pebbles or Small Rocks (or Other Filler), optional
- White Mongolian Fur
- Beige Fleece Scraps
- 3/4-inch Wood Ball (or Other Nose Shape)
Tools
- Hot Glue Gun & Glue
- Scissors
- Paintbrush
- Razor Blade or Craft Knife
- Ruler
Instructions
- Start by identifying all of your supplies. Since we're working with scraps, you want to start by finding all your pieces before getting too far down the road.
- Once you've decided on your supplies and removed any unnecessary bits like stickers, etc., paint the base shape (I used a heart sticker) with the white chalk paint and allow it to dry completely. Apply a second coat and allow to dry, if desired.
- Cut your body shape (I used a cardboard tube) to a height of about 4-inches and paint it with the white chalk paint. Allow the paint to dry completely and repeat if desired.
- Hot glue the body shape to the center of the base shape. If you using a cardboard tube like I did, add a fair amount of hot glue to the inside of the cardboard tube followed by a small handful of pebbles. Add more hot glue, then add a second layer of pebbles, repeating until the cardboard tube is filled. Add a bit of hot glue to the top of the topmost layer of pebbles to keep them from falling out.
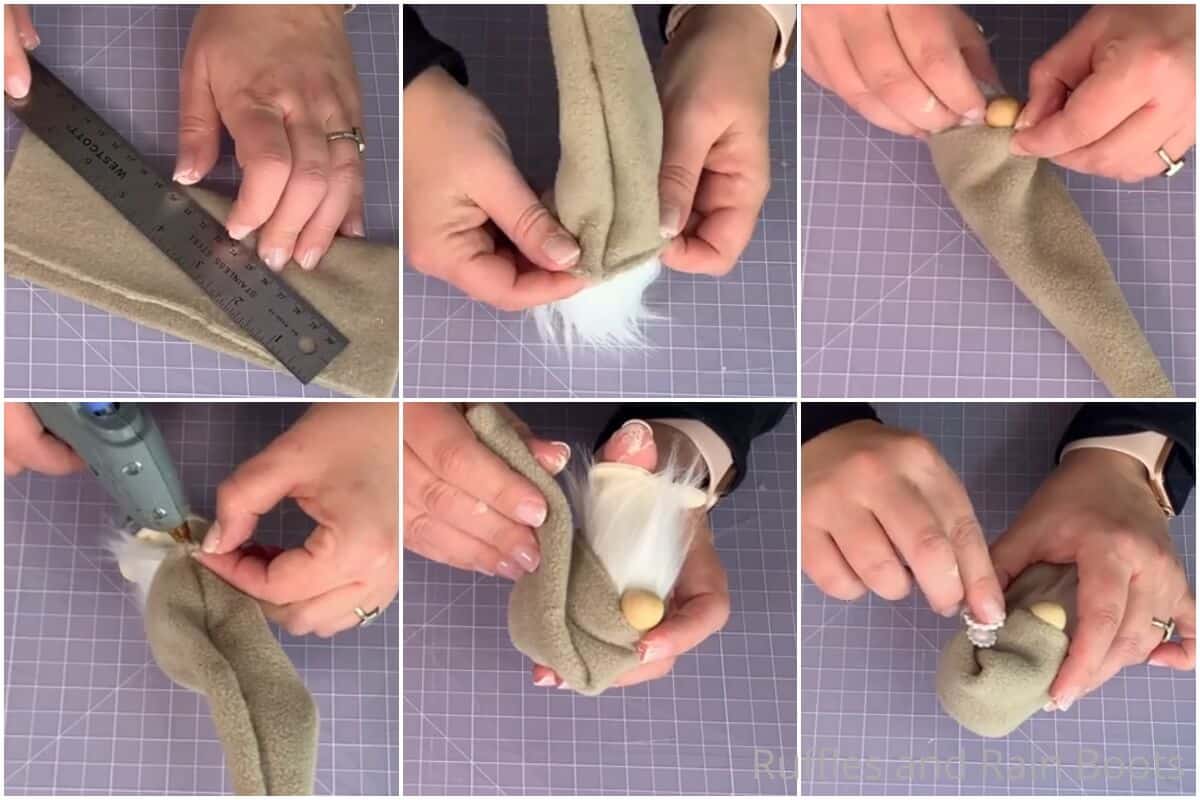
- Measure your beard width and length by wrapping your fur around the body shape. Once you have the shape in mind, cut it out using your razor or craft knife by flipping the faux fur over and cutting only the fabric backing. Wrap the cut beard shape around the body shape and hot glue it in place.
- If you would like to make a mustache, cut a second piece of faux fur about 2-inches long by 1/4-inch wide. Split the faux fur down the center and finger-brush it to either side. Hot glue the fabric backing to the top of the beard.
- Part the faux fur of the mustache, all the way to the fabric backing and hot glue the nose to the fabric backing.
- To make the hat, cut a piece of fleece wide enough to wrap around the body shape, plus at least 1/2-inch (to allow for a 1/4-inch seam allowance on each side) and long enough to allow for a hat that slouches, so about twice the height of your gnome's body shape.
- Make the nose wrinkle by folding up the fabric in the center of your hat fleece piece on the bottom side by 1/4-inch and hot gluing it in place. Fold the fleece fabric piece in half, right-side to right-side, then glue the two sides together on the bottom 2-3 -inches of the hat.

- Position your ruler at the top of this hot glue hem and identify the triangle shape for your hat's peak. Cut along this line. Hot glue hem the two sides of the hat together, then allow the hot glue to cool completely.
- Flip the hat right side out, using a pencil or end of a paintbrush to turn the tip out.
- Tuck the hat over your gnome's head, hot gluing it over the nose to create a little wrinkle. Pull the hat low in the back, to open up the face, and hot glue it in place to the gnome's body (not to the fur, that will just pull away). Position your hat in the slouched position desired and hot glue the slouch in place.
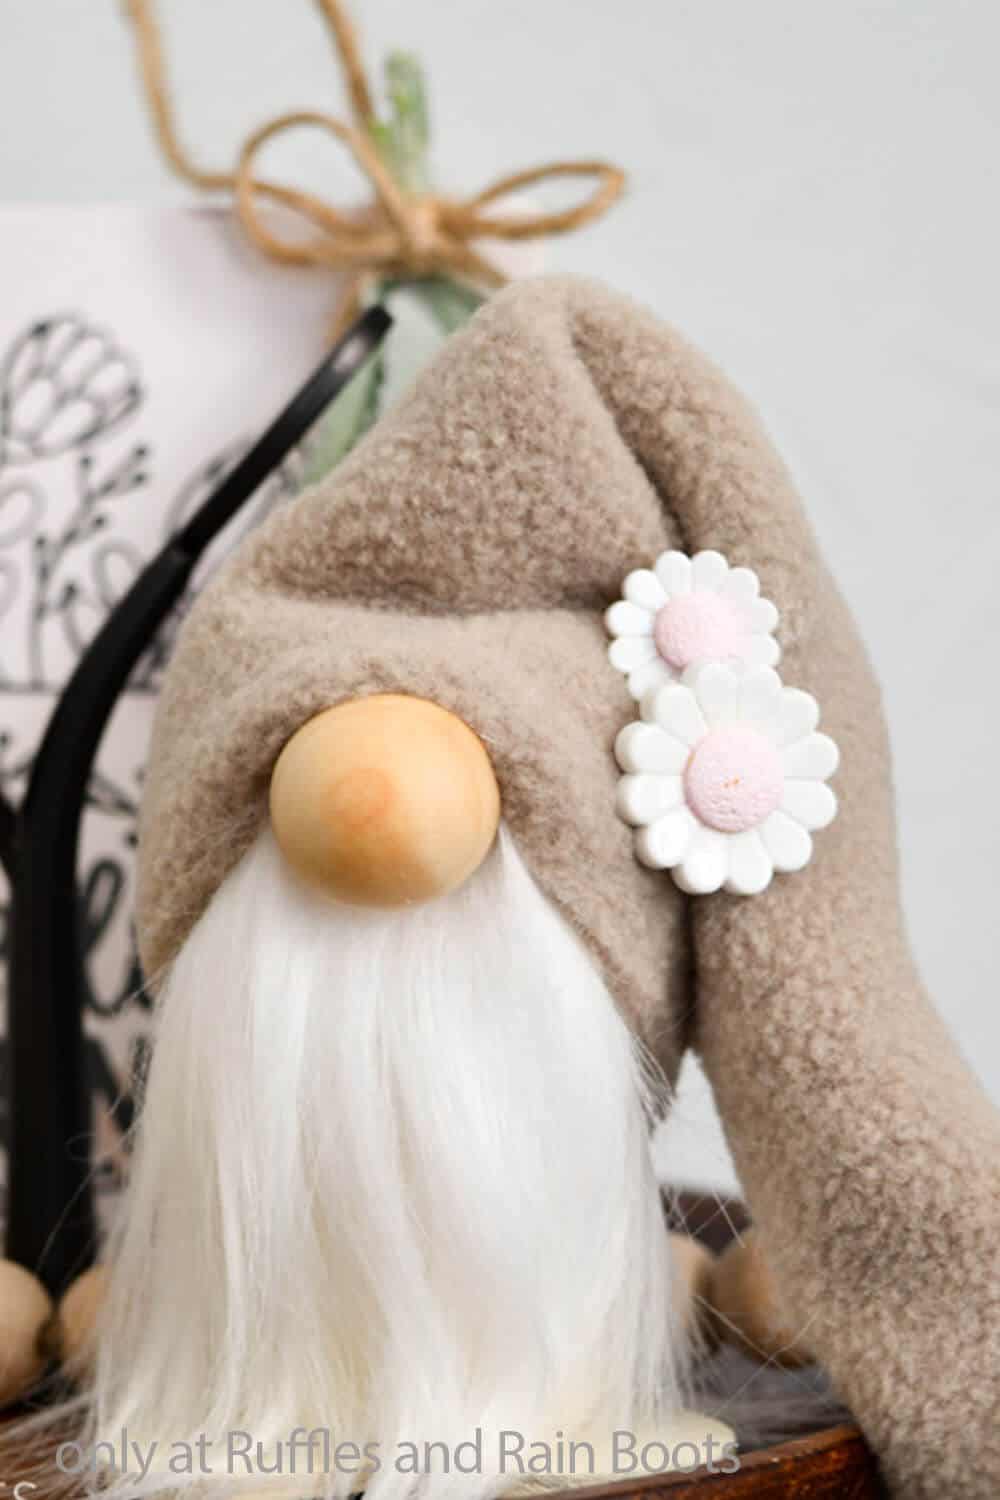
- Add embellishments such as buttons as I did, if desired, then enjoy your little gnome because he's ready!

Notes
For more fun farmhouse gnome tutorials, visit Ruffles and Rain Boots!
Recommended Products
As an Amazon Associate and member of other affiliate programs, I earn from qualifying purchases.


More Farmhouse Gnome Tutorials You Might Like
- Mini Kissing Farmhouse Gnome Pattern – They’re kissing and they’re SO cute!
- Farmhouse Gnomes from Socks (with BOOTS!) – This is one of my favorite sock gnome tutorials.
- Simple Farmhouse Gnome Sewing Pattern – If you’re more interested in a sewing pattern, this one is an easy one.
Please Save This to Pinterest
Your shares are how this site grows and I am sincerely grateful. Please share it on Facebook or save it to your favorite easy crafts pin board.

Meet the Creator
Hi there, I’m Sarah Nenni-Daher. I’m a crafty gal and always have at least 14 projects going at once. I am a crafter, designer, DIYer, and pattern maker. I share my creations here and in the Ruffles and Rain Boots® Shop.
Here at Ruffles and Rain Boots®, you’ll find DIY gnomes, crafts, gifts, cupcakes, laser crafts, and so much more. I love sharing video tutorials over on YouTube and chatting with other crafters in my Facebook groups. We’d love to have you!