
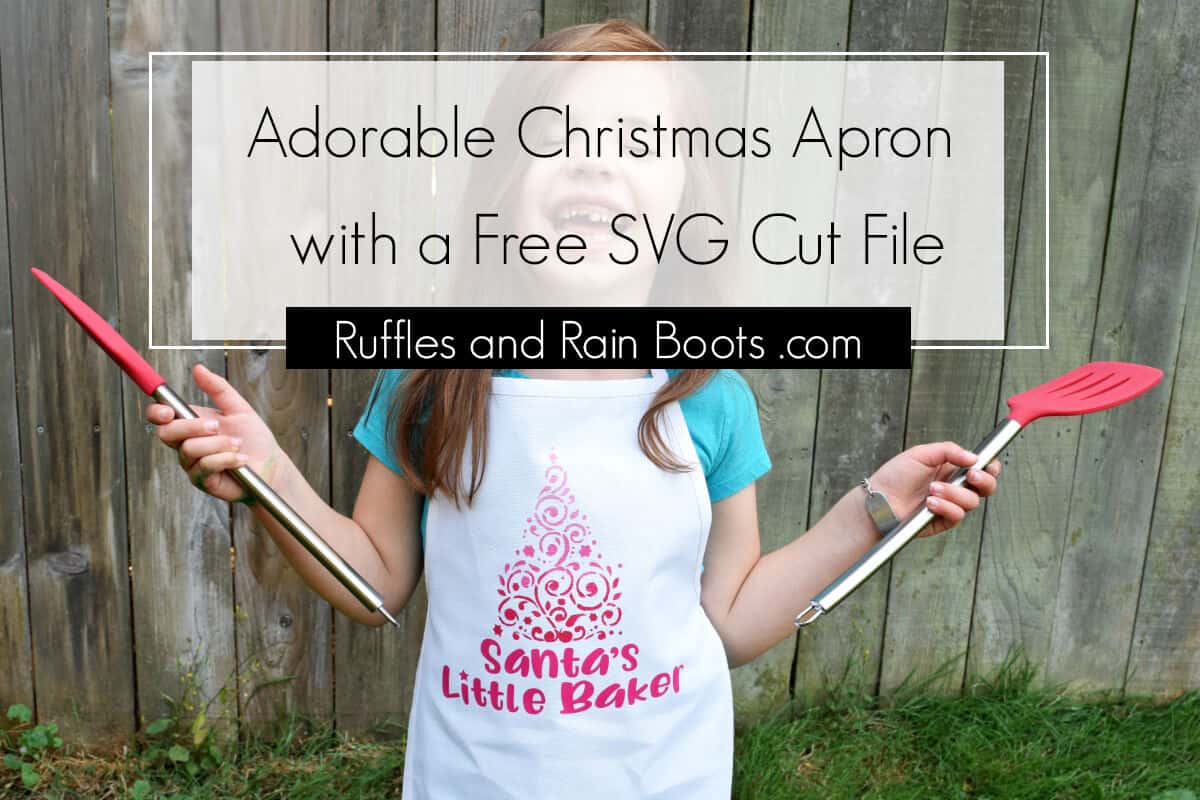
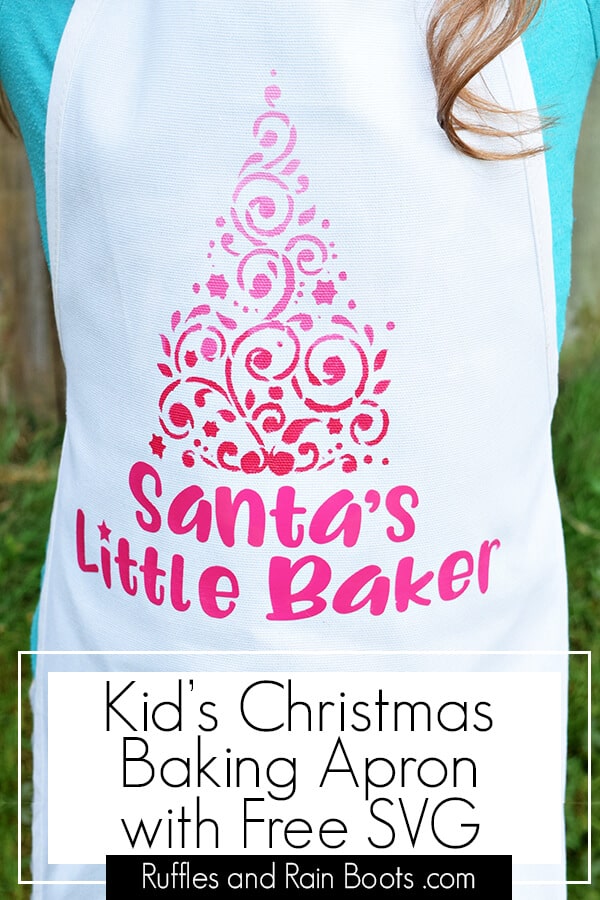
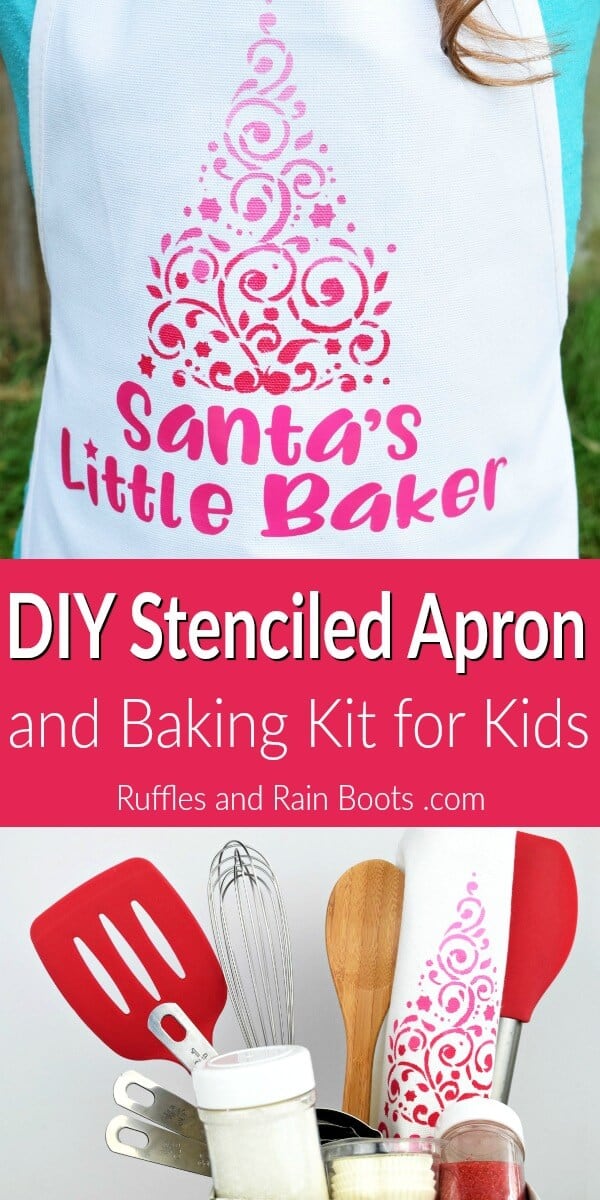
Stenciled Kids Christmas Apron and Santa’s Little Baker Kit
This stenciled kids Christmas apron and Santa’s Little Baker Kit are a great pre-holiday gift. Get the kids in the kitchen and the spirit of the season!
I partnered with Stencil Revolution to bring you a few holiday crafts with their quality stencils. I’ve put a few of them to the test with these projects:
- Nativity Story Stones and Stenciled Gift Bag – Fun, quick, and kids LOVE them!
- Snowflake Stencil Card – This is an elegant watercolor and hand-lettered holiday card (coming soon).
What You'll Find On This Page
DIY Christmas Gifts for Kids
We love making Christmas gifts here on Ruffles and Rain Boots. Just like these out-of-the-box nativity stones, we like to share creative ways to ring in the holiday season.
Today, we’re making a fun Santa’s Little Baker Kit, complete with a stenciled kids Christmas apron that is just adorable! If you’re tired of the same old gift ideas, join us as we share how to make a fun gift for kids.
Supplies for a DIY Christmas Apron
- child-sized apron
- acrylic or fabric paint – I used red and white acrylic
- fabric medium (if using acrylic paint)
- Christmas tree stencil from Stencil Revolution
- small hard-bristled paintbrush or stencil brush
- tape to secure the stencil
RELATED READING: Nativity Story Stones and a Stenciled Bag Gift for Kids
Watch How to Use Stencil Revolution’s Fun Designs
In this short video, I show you how I created the ombre tree for this kids Christmas apron using Stencil Revolution’s beautiful design. And, I teach you how to fix mistakes – it’s such a good tip!
To watch how easily it comes together, just scroll up to see the video (mobile) or look over to the right (desktop). This is really such a fun craft!
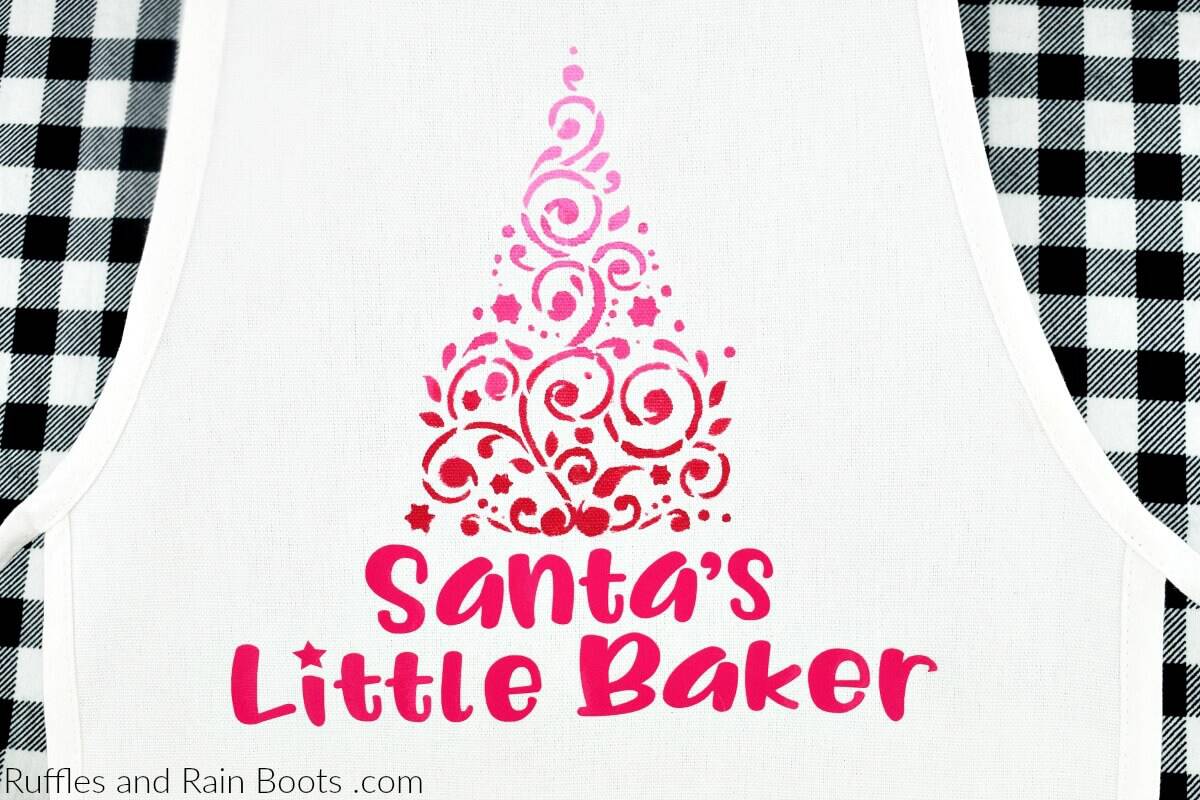
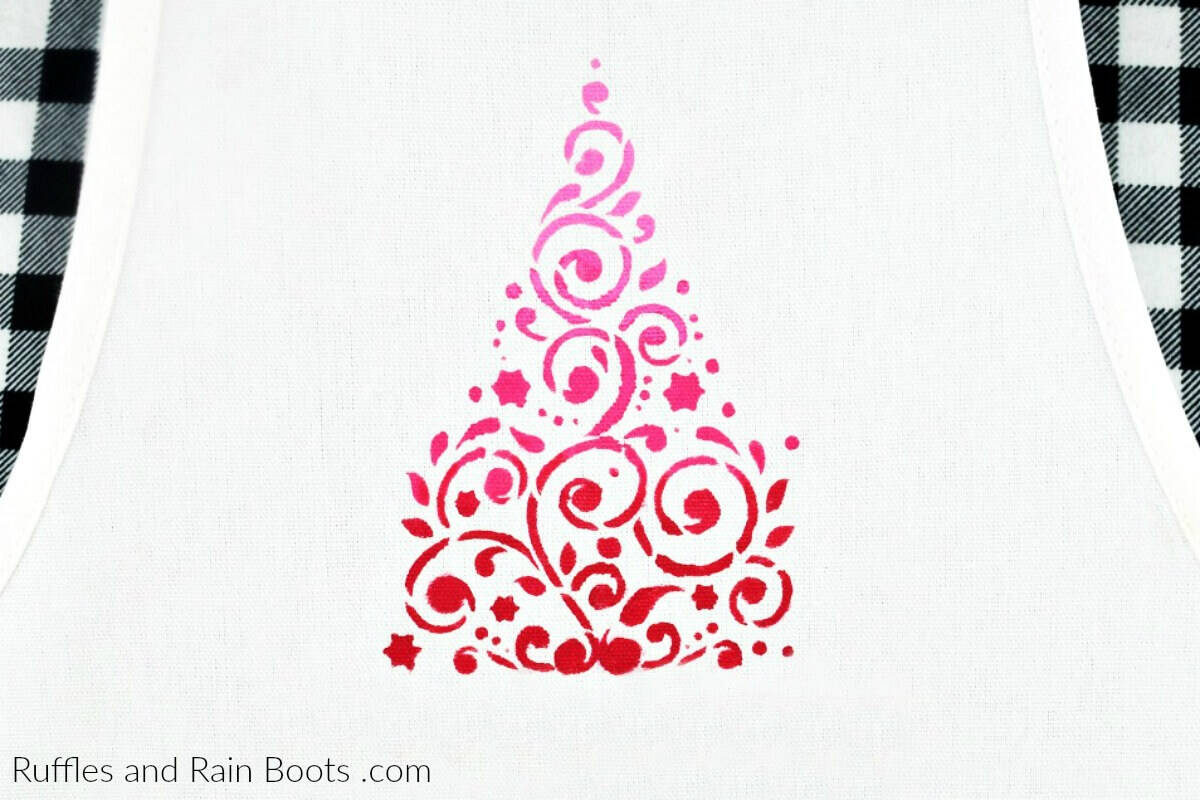
How to Make a Stenciled Kids Christmas Apron
I found it best to attach the stencil to the apron and then put the apron on a clipboard as I show in the video. Another tip when working with stencils: do not overload your brush. ;)
- Mix ombre paints. Place red in all three wells of the palette and add increasing amounts of white to two of them. Add the fabric medium, if using.
- Start with the lightest color at the top of the tree and press down on the stencil while dabbing lightly.
- Once you have finished the lightest color, move onto the medium hue, slightly overlapping the previous section. Finish with the darkest.
- Remove the stencil and allow the apron to dry.
You can stop there and your stenciled apron is complete or…
Stenciled Kids Christmas Apron and Santa's Little Baker Kit
This stenciled kids Christmas apron and Santa's Little Baker Kit are a great pre-holiday gift
Materials
- child-sized apron
- acrylic or fabric paint - I used red and white acrylic
- fabric medium (if using acrylic paint)
- Christmas tree stencil from Stencil Revolution
Tools
- small hard-bristled paintbrush or stencil brush
- tape to secure the stencil
Instructions
I found it best to attach the stencil to the apron and then put the apron on a clipboard as I show in the video. Another tip when working with stencils: do not overload your brush. ;)
- Mix ombre paints. Place red in all three wells of the palette and add increasing amounts of white to two of them. Add the fabric medium, if using.
- Start with the lightest color at the top of the tree and press down on the stencil while dabbing lightly.
- Once you have finished the lightest color, move onto the medium hue, slightly overlapping the previous section. Finish with the darkest.
- Remove the stencil and allow the apron to dry.
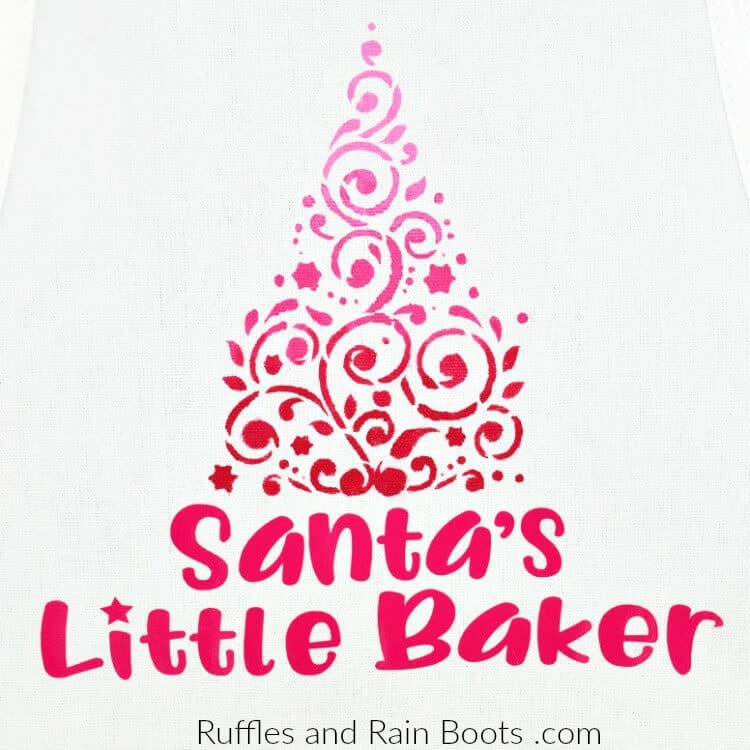
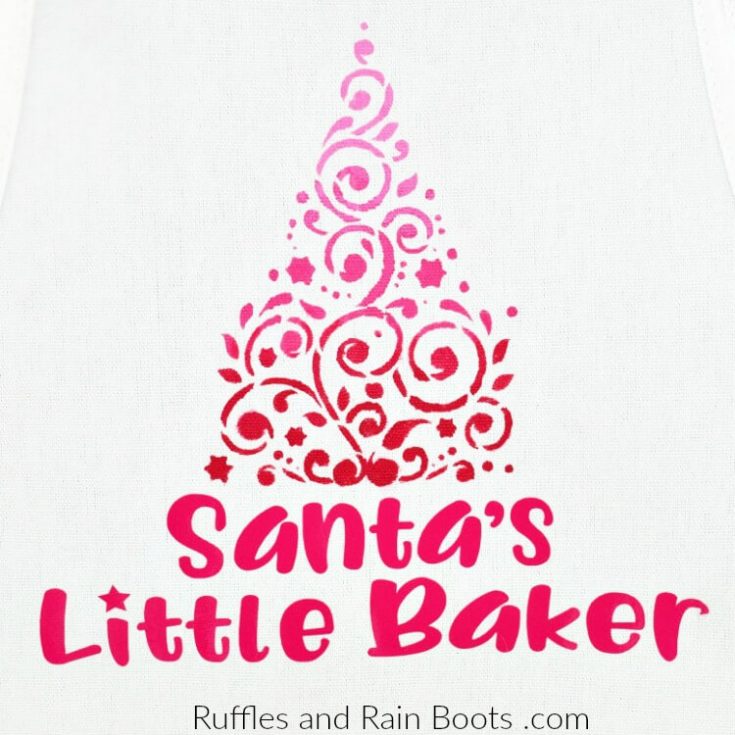
Free Christmas SVG File: “Santa’s Little Baker”
If you have a cutting machine, you can cut the “Santa’s Little Baker” in a heat-transfer vinyl and place it below the design on your stenciled apron. Don’t you just love easy projects?
I created the “Santa’s Little Baker” cut file in Adobe Illustrator and included a little star to accent the letter “i.” This free Christmas cut file can be used with all cutting machines because I’m sharing it in SVG, DXF, EPS, and PNG formats.
Get the free Santa’s Little Baker cut file here.
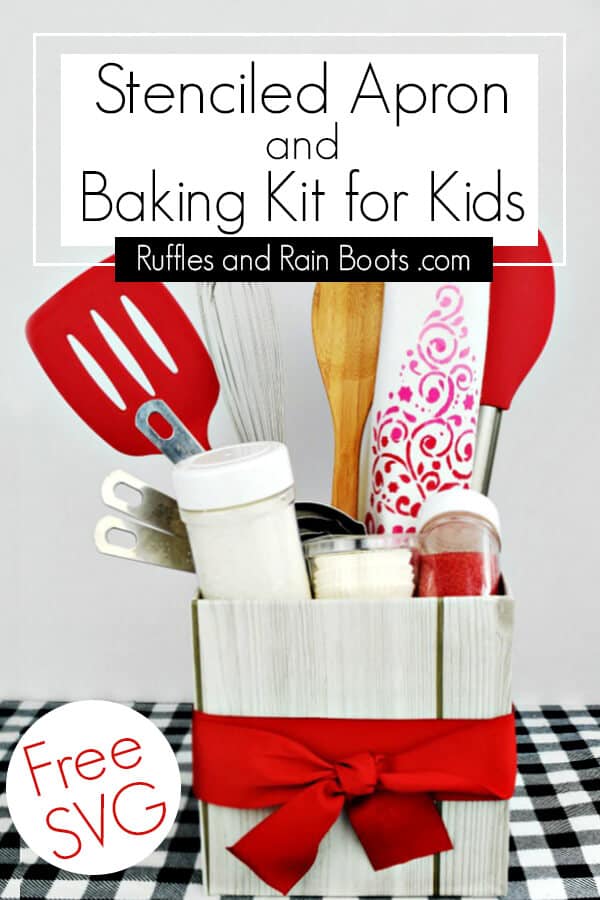
Christmas Baking Kit for Kids
Now that you have your adorable stenciled apron, it’s time to gather a few items for our Christmas Baking Kit for Kids. I gathered:
- the Santa’s Little Baker stenciled apron
- a Christmas dish towel
- cookie and baking utensils (spatula, whisk, a cookie-flipper spatula, and a wooden spoon)
- mini baking cups
- white and red sprinkles
- a silicone baking mat
- measuring cups and spoons
Each of these items went into a 6-inch square kraft box covered in a wood pattern contact paper. I tied it with a red ribbon and it’s ready for gifting!
Please Share This Fun Idea to Facebook or Pinterest
Your shares are how we grow and we are sincerely thankful.
Meet the Creator
Hi there, I’m Sarah Nenni-Daher. I’m a crafty gal and always have at least 14 projects going at once. I am a crafter, designer, DIYer, and pattern maker. I share my creations here and in the Ruffles and Rain Boots® Shop.
Here at Ruffles and Rain Boots®, you’ll find DIY gnomes, crafts, gifts, cupcakes, laser crafts, and so much more. I love sharing video tutorials over on YouTube and chatting with other crafters in my Facebook groups. We’d love to have you!