An Olaf Dress Up Costume to Say “Awwww” Over
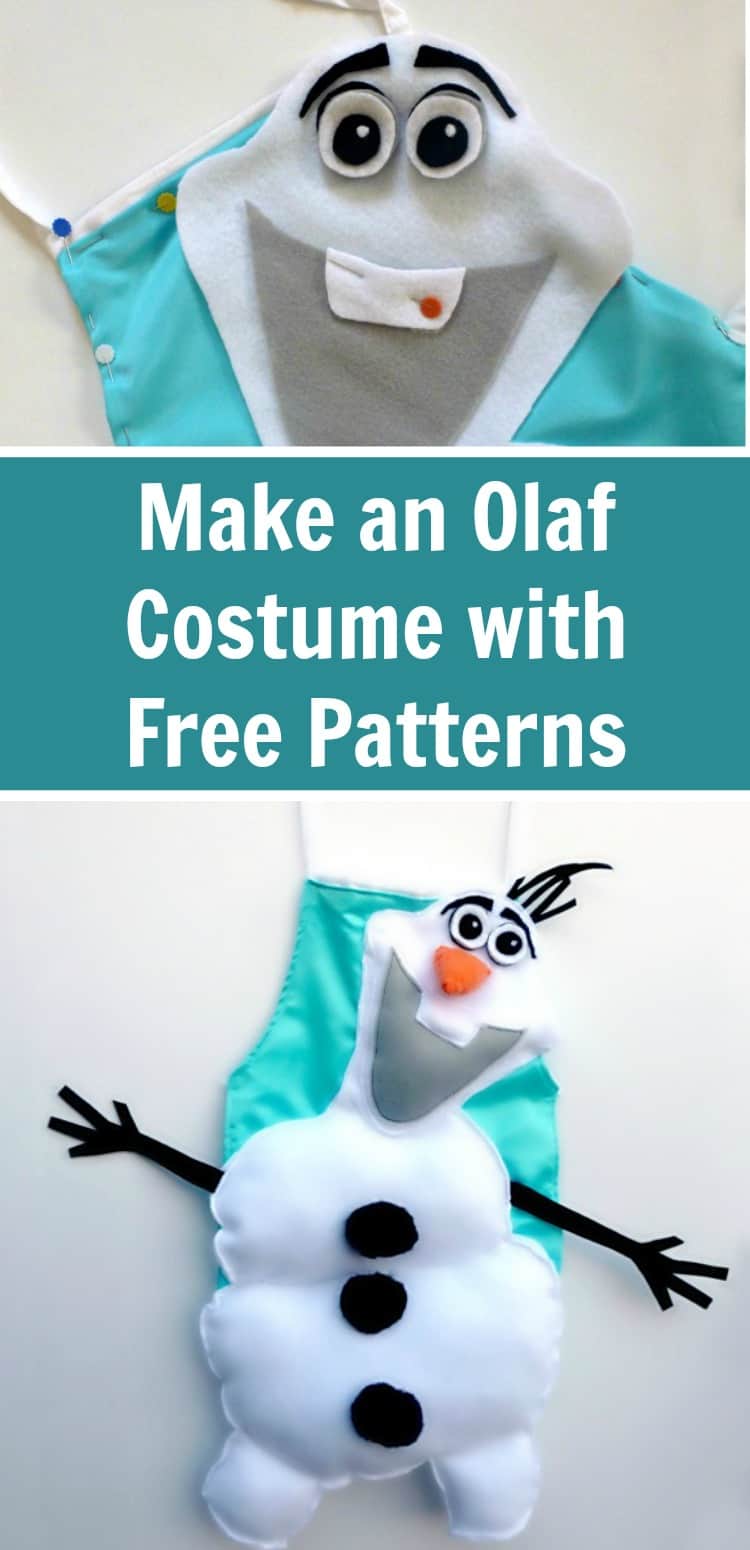
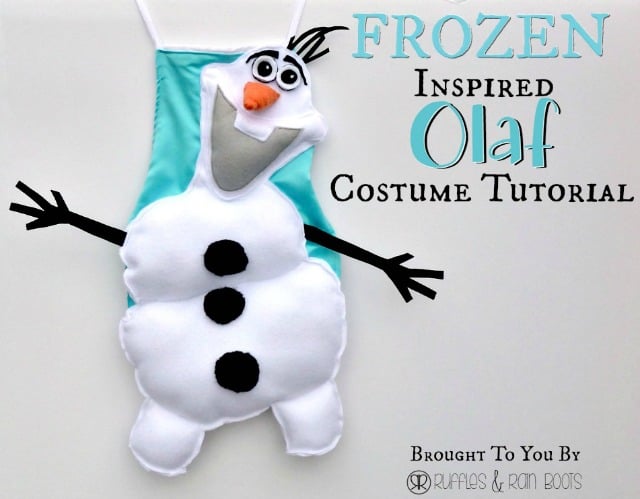
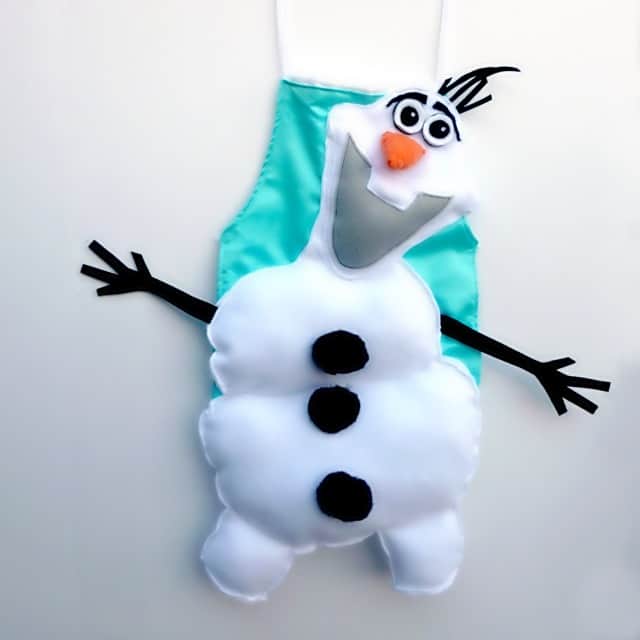
Make this adorable Olaf dress up costume! We’ve made many dress up costumes and share our free patterns and proven beginner sewing tutorials to walk you through it step-by-step.
What You'll Find On This Page
Olaf Dress Up Apron
So many of you loved our Frozen Princess Anna Dress Up Costume and our Frozen Queen Elsa Dress Up Apron but asked for something a bit more ‘boy-friendly.’ Well, here’s Olaf!
Once I had the design, the cutting, sewing and stuffing only took about 1.5 hours. The hand sewing of the eyebrows, eyes, and nose took a big chunk of time because well, I stink at hand sewing. If you want a flat carrot nose as opposed to the 3-D version here, it would take even less time to put Olaf together.
Supplies Needed for Olaf Dress Up Costume
All supplies were purchased at JoAnn’s and because I had most of this on hand, I only spent $5.75 for this costume (using coupons). Please see the notes below for some ideas for substitutions. All prices listed below are without coupons (it’s JoAnn’s people, so there are always coupons available).
- 3/4 of a yard of white anti-pill fleece ($4.99 / yard, so $3.74)
- Small bag of Polyfill ($5.99, but see suggestions below – you really don’t need that much)
- Craft felt: orange, white, black, gray ($0.34 each)
- Stiffened craft felt: one sheet of 12 x 18 inches ($1.99)
- 2 inch pom-poms (4 pack, $0.99)
- Child’s craft apron (available in a single or 3 pack, $3-11)
- Sewing supplies
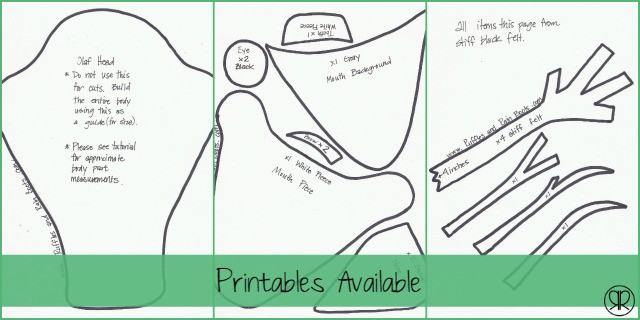
- Olaf Costume Printable Templates are here
Notes: To save on the cost of Polyfill, you can get a pillow at the thrift store for $0.99, throw it in the wash, and cut it up to get the stuffing. For the felt, I would buy the stiffened black and the regular orange and gray, but use whatever scraps of fabric you have that are white and black.
Olaf Dress Up Costume for Kids
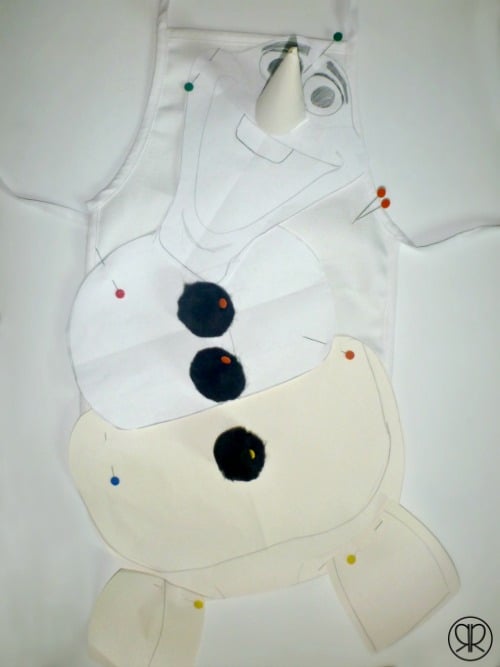
I wrestled with what to provide you as far as a pattern and then I realized there are so many variables that I can provide only part of it. So what I’m providing is Olaf’s head, face design components, hair, and arms. I will provide general guidelines for the body pieces. For reference, my daughter is nearly 3-years-old, wearing 2T and 3T and the Olaf dress up costume fits her down to about the lower part of her shin, but not quite to her ankles. You’ll see guidelines next to the cut instructions for each piece. Here’s my drawing pieced together.
Fabric Cuts
Felt
For all of the felt pieces (and some of the fleece), I have made a printable available to assist you. They can be downloaded by clicking each link in the supplies list.
Eyes – In descending size order: 2 each of a black circle, a slightly smaller gray circle, a slightly smaller white circle, a black circle half the size of the white circle, and a very tiny white circle for the eye’s reflection. For both eyes, you will cut 10 circles in all.
Eyebrows – 2 black
Nose – 2 triangle-ish shapes from the orange
Tooth – 1 rectangle-ish shape from the white
Mouth (background) – gray
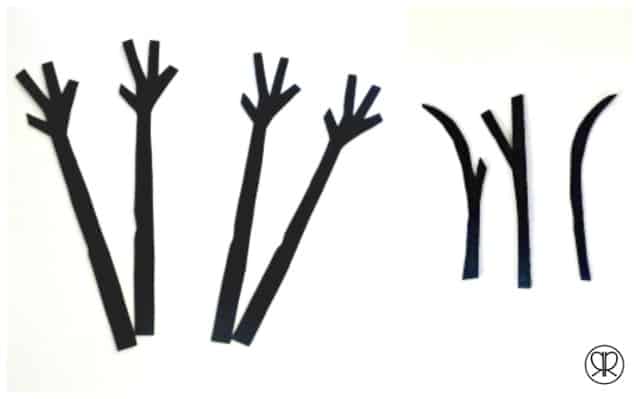
Arms – 4 from the stiffened black
Hair – 3 from the stiffened black
Fleece
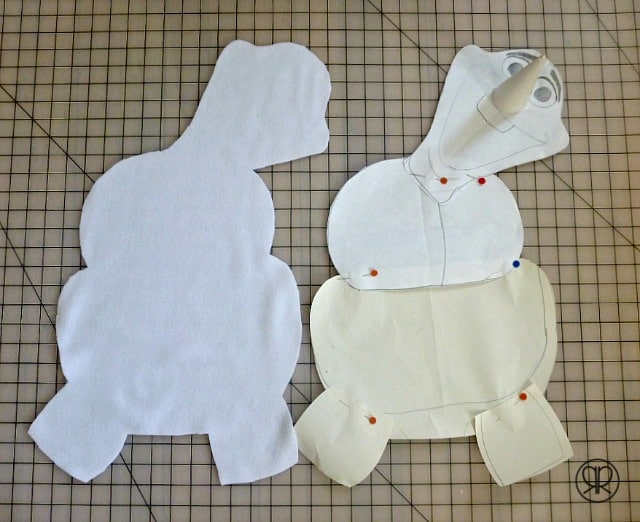
As you can imagine, once you have your Olaf built from pieces, lay your complete Olaf drawing onto your fleece and cut out the outline twice.
Body Outline – 2. The head is included in the pattern and to help you build the body, the following are my measurements for a 12 x 19-inch child’s apron. The midsection is 7 1/8 inches high by 10 1/4 inches wide (at its widest part). The bottom section is 8 3/4 inches high by 12 3/4 inches wide (at its widest part). The feet are 4 inches high by 4 3/8 inches wide (at their widest parts).
Mouth Outline – 1 (included in pattern)
Feet bottoms (to make them 3-D) – 2 marquis shapes
Satin
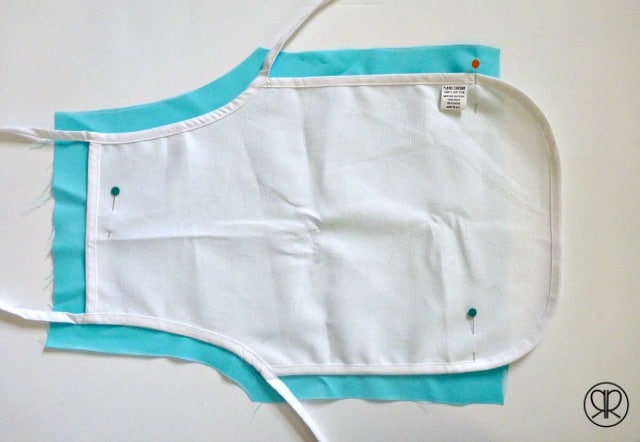
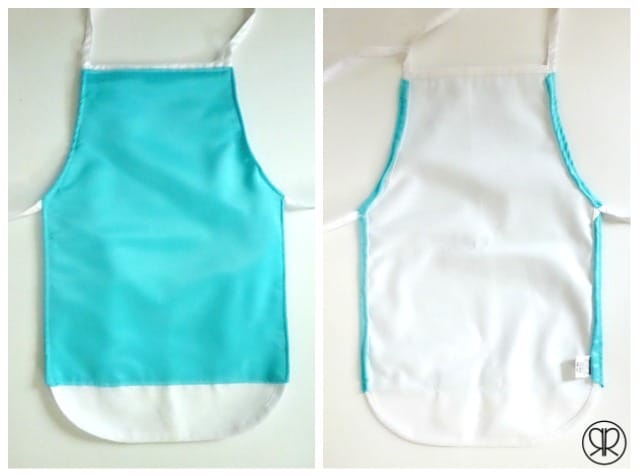
Lay your satin fabric face-down on the floor with the apron face down on top of it. Trace about an inch around the entire apron, save the bottom. After placing my Olaf on my apron, I knew I didn’t need to go all the way to the bottom, so I didn’t. If you’re going to do this for the bottom as well, please make sure you allow for a bit of a seam allowance (1/2 inch should be fine because you’ll only fold it up once).
Assembly Instructions for Olaf Dress Up Costume
All seams for this Olaf dress up costume are sewn with a 1/2 inch allowance except when I attached the head portion – I only had about a 1/4 inch on some areas because I might have overstuffed Olaf’s mouth a little bit. And yes, that might be a warning to ya. Everything is machine sewn unless indicated.
1. Prep the eyes by placing them in this order: black large circle, gray, white, small black circle, and then a tiny white circle off to the side. Set the eyes aside.
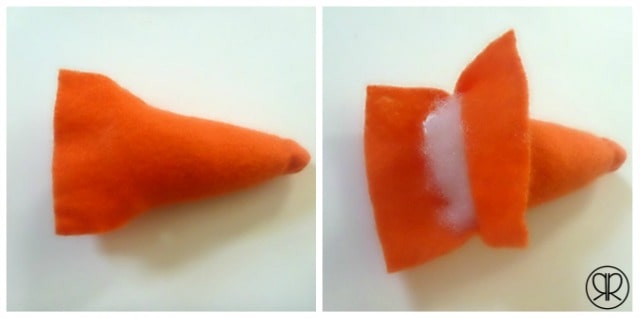
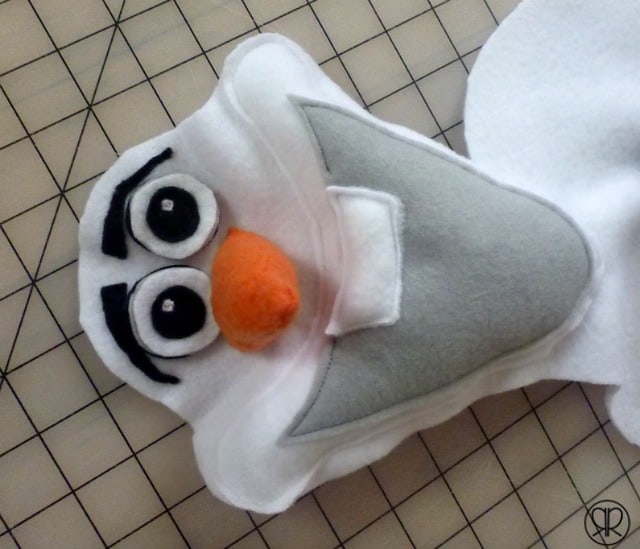
2. Sew the nose. Put right sides of the felt together and sew along the edges, taking care to leave about an inch or so on either side NOT sewn. Flip right side out and stuff, leaving the inch or so without stuffing. Fold down one side of the nose and lay the other on top of it. Hand sew it shut (I just ran a back stitch all along the edges). I had leftover orange thread, so I added some lines along either side of the nose to mimic the indentations in a carrot, but you can skip this part.
3. Position your eyebrows and eyes on the top Olaf outline piece and hand sew them in place. Next, attach the stack of circles for the eyes. I used black thread to sew the small black circle and effectively join all circles together. Once those were done, I added the small white circle with white thread. Note that the photo below is missing the mouthpiece – I was just working on getting the positioning of the eyes correct.
4. Top stitch the tooth to the gray background, leaving an opening to stuff a small amount of Polyfill to give it dimension. Once you’ve sewn the tooth closed, sew the gray mouth to the white fleece mouth outline piece. Set aside.
5. Take the white fleece mouth outline piece and top stitch it to the top Olaf outline piece but leave an opening about 3 inches wide so that you can stuff it. Once stuffed with Polyfill, top stitch the opening closed.
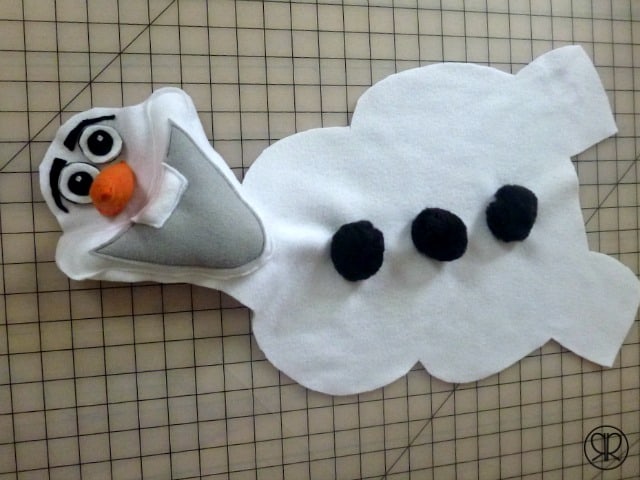
6. Hand sew the nose to the top Olaf outline piece. I sewed all the way around the flat part of the nose twice – that sucker is on there forever.
7. Add the pom poms to the top Olaf outline piece by hand sewing them through their center. Oh my goodness, it’s really starting to look like an Olaf dress-up costume, isn’t it?!
8. Line up 2 of the 4 pieces of stiff black felt arms and topstitch them together. Repeat for the remaining 2 pieces. Set both arms aside.
9. Position the satin on the apron and double fold over the satin so that no exposed raw edges are showing. Note that you will have to notch the satin where the apron strings are. Sew the satin to the apron by topstitching all the way around.
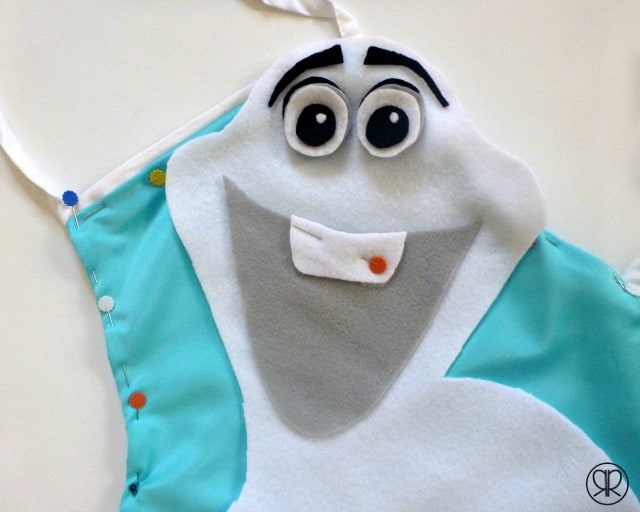
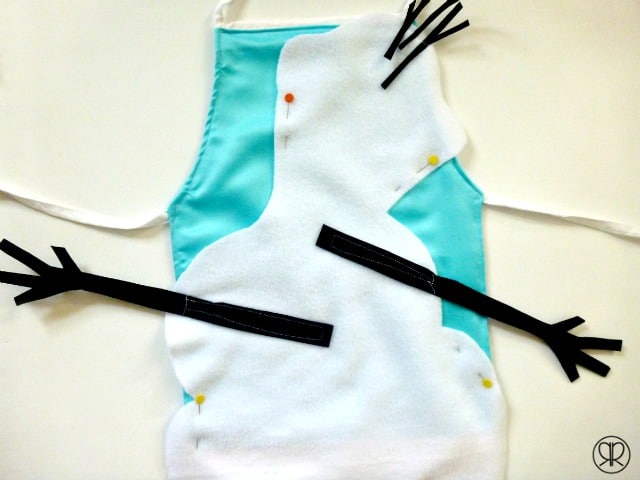
10. Lay the bottom Olaf outline piece onto the apron. Position the arms and hair onto the bottom Olaf outline piece and sew with a top stitch to hold them in place.
11. Position the bottom Olaf outline piece on the apron and hold in place with pins. Secure the bottom portion of the outline piece to the apron (this will be covered and will allow Olaf to remain against the apron instead of having his bottom bouncing around when the kids walk. This still allows for Olaf to be ‘kicking his feet’ while the kids walk around, though.
12. Build Olaf by starting with the head. This works best if you know this ahead of time – you are going to work in sections. DO NOT SEW the outline of the entire thing and then stuff. It is easier to work in sections.
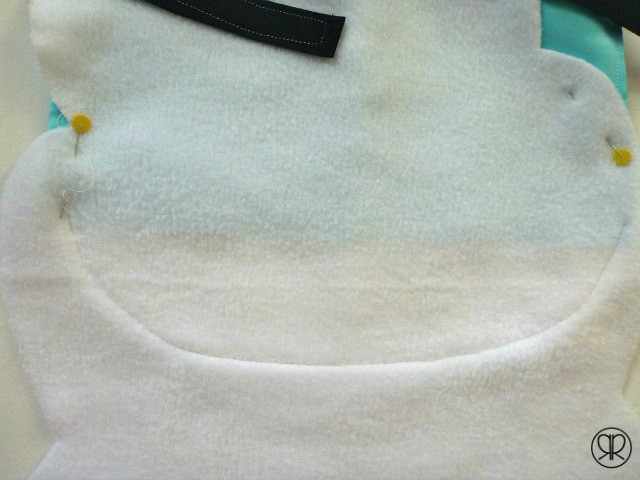
Line up the top Olaf outline piece over the bottom Olaf outline piece and pin only the head. Sew from one cheek to the other. Because we stuffed the mouthpiece already, I chose not to stuff the head. It’s your project though, so stuff if you’d like. Now, from here on out, you might have to stretch the fleece a little to make sure everything lines up after stuffing.
Finish the headpiece by making your way from cheek to cheek, this time going along the bottom – take care that you will be forming Olaf’s neck with this stitching, so you might want to give consideration to what that looks like to you before you sew.
13. Next, sew the middle body piece, leaving about 3 inches open for stuffing. Sew closed. Again, keep in mind that you will essentially be making Olaf’s middle, so give some consideration to the shape you want. Repeat the same steps above for the bottom section of the Olaf dress-up costume. Note that for the bottom, you will also be forming the top part of each foot with your stitch.
14. I chose to make the feet 3-D, but if you don’t feel it is necessary, just sew along all edges of the foot, leaving space to stuff before sewing closed.
If you would like the 3-D feet, sew each side with a top stitch. Then, position one end of the marquis shaped piece in between the edges of the feet, pin, and top stitch. It’s a little weird and you will have to do only one side at a time, but that’s great because you need to stuff those feet with Polyfill anyway.
Repeat for the other foot.
Now, take a step back (and a sip of wine) and congratulate yourself on making an Olaf dress up costume! Would you please pin our tutorial or share it on Facebook so that your friends and followers can be inspired?
Make this adorable Olaf dress up costume!An Olaf Dress Up Costume to Say "Awwww" Over

Materials
Instructions
Fleece
Satin
Assembly Instructions for Olaf Dress Up Costume




This is so great, thanks for the tutorial! Now if I could just talk my son into wearing it!
You’re so welcome, April. Hopefully your son gives it a try because it is absolutely adorable on a little guy.
Sarah,
You are so creative! The idea of putting the Olaf costume on a ready-made child’s apron is brilliant. This was my first exposure to your blog and I am excited to explore and see the other fantastic ideas you have to share. Thank you!
Janye, I’m so glad you found us! Be sure to subscribe to our newsletter so you don’t miss a thing. Thank you for your kind words about our little apron – it’s become a bit of a tea party companion lately. Our little one props it up in her little chairs and serves Olaf his tea.
You are so resourceful! I love the 99cent store pillow tip- you really thought of everything
Such a fun idea, Sarah! I think it’s another hit. I love all of your Frozen aprons.
Thank you so much, Heidi!
It is soooooooooooooo CUTE
Such a great and fun project :)
Thank you so much, Winnie.
This is completely adorable! You really should start selling these in some kind of an online store.
We are still thinking of doing Frozen this year, with my oldest as Elsa, the 6 year old as Anna, my son as Kristoff and the baby as Olaf. The dog would more than likely end up with antlers on… We shall see :)
I hope you share the pictures of all of your cuties in their Halloween attire so we can see all of this Frozen cuteness! Is Elise going to be Anna or Elsa?
Oh. My. Goodness. If the whole fam does FROZEN, there had better be pics, Jen! :)
I am actually thinking about making a couple of the Anna and Elsa aprons for sale on Etsy… My to-do list just keeps on growing.
My son wants to go as Olaf or Capt. America. So thank you for this wonderful DIY costume!
This costume looks amazing! I love the way it came out! Your mention of JoAnn had me giggle, my sister in law works there actually. I think she was even recently made a store manager for one of the stores.
Thank you for the kind words, Ana Lynn. You can be sure to tell your sister in law that we love JoAnn’s around here. Because we have a super store, we have so many crafting options! Our little one gets so excited to go to the store and see her “silly gorilly” friend (the animal print section just cracks her up)!
Oh girl this is stinkin’ AWESOME! You are quite something with these aprons! I swear I wish the aprons had been around when I was little…sure would have saved me a lot of anxiety!!! EEK!
Thanks, Heather. I think that if I ever find out who originally thought of the dress up aprons, I will hug them. How brilliant is the concept?!
Cute! You are so talented Sarah! Wanna make Doran one?
Thanks so much for the kind words, Kristie. What is Doran going to be for Halloween this year?
YAY!!! We LOVE it!!! You are amazing (!) and your tutorial is absolutely fantastic :) Our very lucky little guy will be a cutie for sure ~ Can’t wait!
Thanks, Kris. I’m kind of getting a little too excited about seeing the three of them traipsing about as Elsa, Anna and Olaf. We are going to need LOTS of pictures – like all 4 of us (and any innocent bystanders) clicking and snapping as they walk the neighborhood.
I’m so excited that I’m giddy. Giddy!
What a terrific idea that the three children will all be able to take part in this. I am sure Ang and Kris are relieved that they will have the Halloween theme from Frozen lined up and one less thing to worry about. Beautiful work, as usual, Sarah. I love these updates.
Aw, thanks Mom! And I am really excited about seeing them all dressed up together.
This is absolutely the CUTEST! I just pinned and am in love!