
Three Easy No-Carve Pumpkin Ideas for Kids
I love making Halloween crafts for kids–with my kiddo. And these easy no-carve pumpkin ideas for kids are perfect for adding a little non-carve non-spooky fun to your Halloween pumpkins!
Easy No-Carve Pumpkin Ideas for Kids
Here at Ruffles and Rain Boots, we love doing Halloween crafts with the kiddo. I love how proud that little face is of those creations when we show them off to the trick or treaters in our neighborhood. So, when I saw these cool craft pumpkins at the craft store, well, a whole bunch of crazy mini-pumpkin decorating ideas raced through my mind. I grabbed a bunch and headed home with my preciousssss…
RELATED READING: QUILLLED PUMPKIN CRAFT FOR KIDS
What was most fun was how excited the kiddo got while we made the simple no-carve pumpkins. With no limits on what we could do, we basically cracked open the whole craft room and got wild. If you’re ready to tackle some fun no-carve pumpkins with your kiddo, well let’s get started.
No Time to Make This Now? Pin it for Later
You’re busy, I get it. Pin this to your favorite Halloween crafts for kids board on Pinterest and it’ll be here for when you’re ready.
As an Amazon Associate, I can earn from qualifying purchases.
Tips to Make these No-Carve PUmpkin Ideas
- You’re definitely going to want to start with those fancy-shmansy craft pumpkins they came out with this year (did they have them before? if so, I didn’t see them…). They’re perfect for kids and won’t rot later–so you can save your fun no-carve pumpkin for next year’s decorations, too!
- A little tip when you’re painting these easy no-carve pumpkin ideas–let the paint dry fully before moving on to the next step. Even if the next step is painting more. Because of the weird shape of pumpkins, this is just good practice because it’s hard not to paint or attach eyeballs or whatever if you can’t pick up the pumpkin.
- If you’re doing this with kiddos, I found this truly awesome ultra low-temp hot glue gun (that’s pretty darn cheap, too). It makes it so much safer for kids to help with hot glue projects! I love it.
- To paint these cool easy pumpkin carving ideas for kids, I recommend using either an acrylic paint, like I did, or a spray paint with primer. These painted pumpkins were kind of hard to get covered and I initially tried a paint that didn’t have such great coverage, then was super disappointed. So stick to those two…don’t waste time.
- You can seal your pumpkins with mod podge, if you’re so inclined. That will help keep the paint looking “fresh” despite anything the elements might throw at your pumpkins.
- I’m not going to tell you how to display your own pumpkins, but if you were feeling a little crazy like me, you might put a few of these no-carve jack o’ lanterns on your porch, in the house and on the back porch. All places the kiddo can see and be ridiculously proud of their work.
How Do I Make this Easy pumpkin carving ideas for kids?
I’m so glad you asked. Below is our written tutorial!
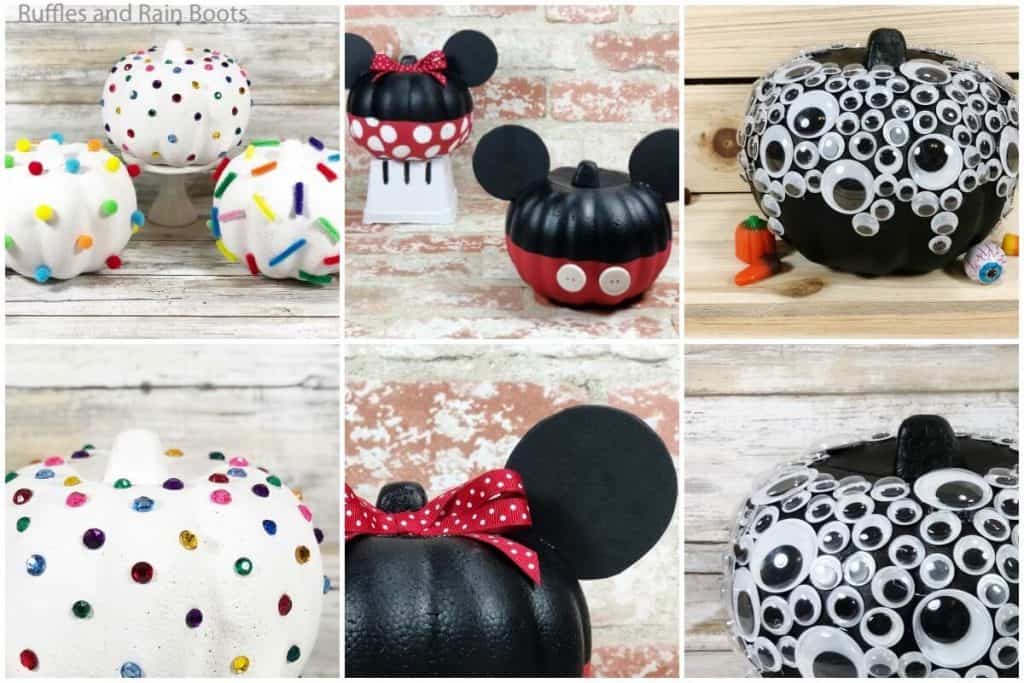
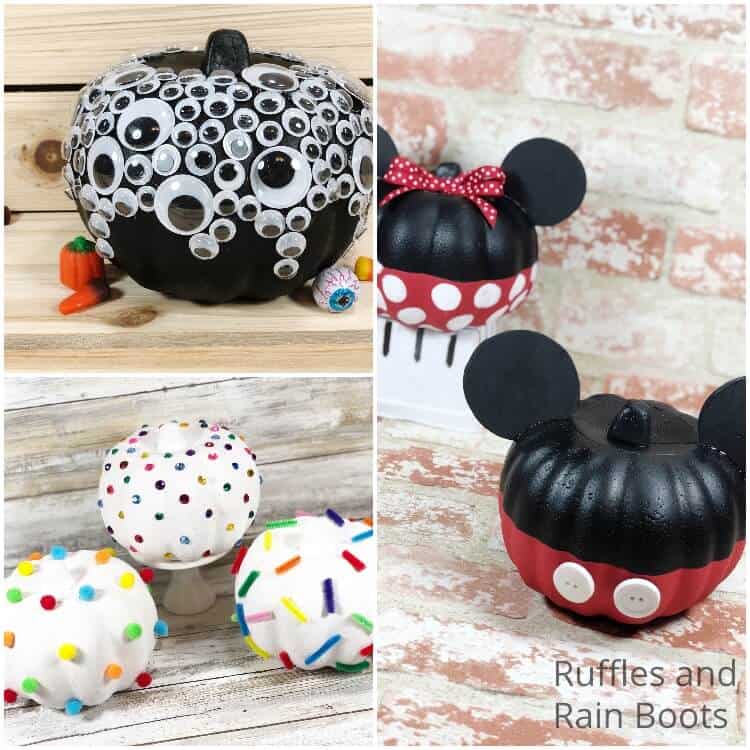
Three No-Carve Pumpkins

These three no-carve pumpkins are so cute! They're the most adorable Halloween pumpkins you can make in less than 20 minutes.
Materials
Mickey and Minnie Mouse Pumpkins
- Dollar Store Foam Pumpkins - Two
- Acrylic Craft Paint – Black, Red and White
- Black Craft Foam
- Buttons – White; Two
- Ribbon – Red with White Polka Dots
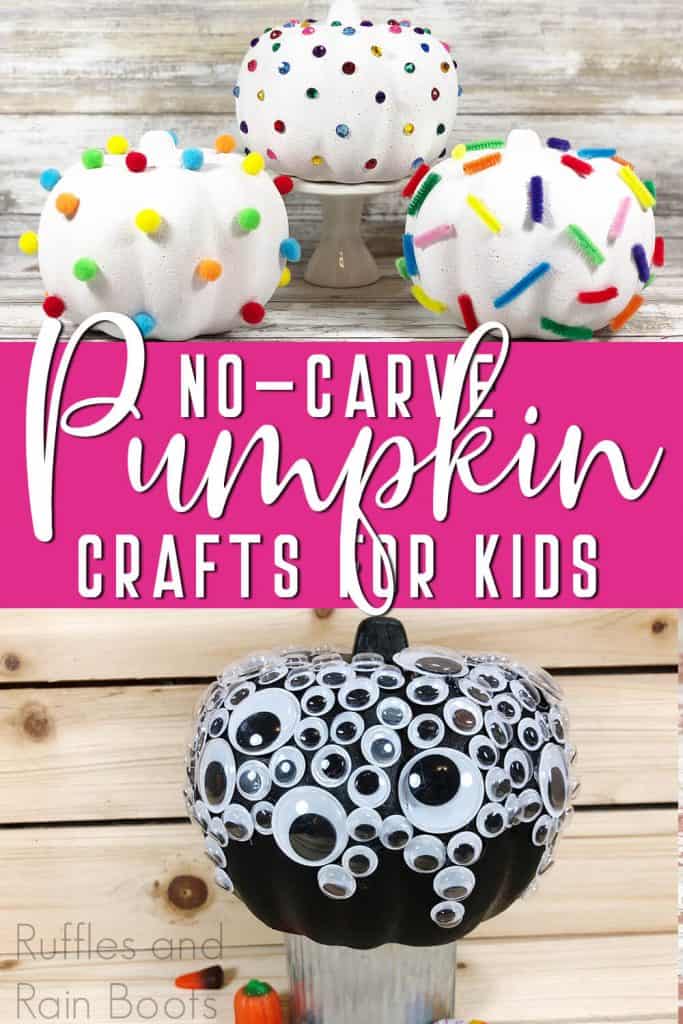
Funfetti Pumpkins
- Dollar Store Foam Pumpkins - Three
- Dollar Store Pom Poms
- Dollar Store Rhinestones
- Dollar Store Chenille Stems
- Acrylic Craft Paint – White
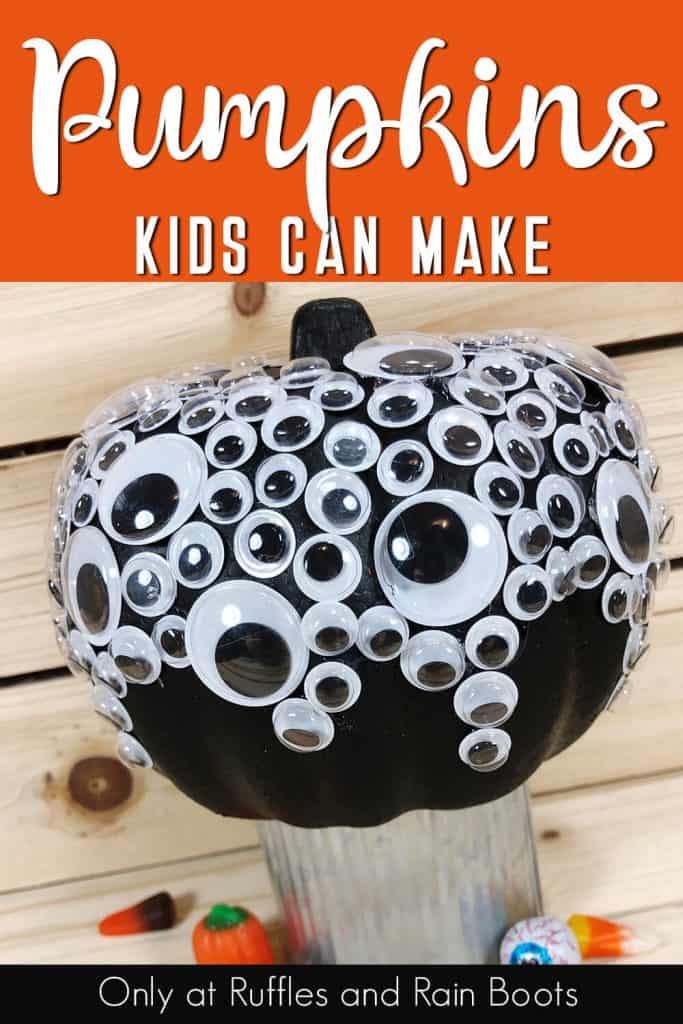
Creepy Eyeball Pumpkin
- Dollar Store Foam Pumpkin
- Dollar Store Wiggle Eyes
- Acrylic Craft Paint – Black
Tools
- Paintbrush
- Round Sponge Applicator
- Circle Template – 2 ½” diameter
- Liquid Glue
- Glue Gun and Glue Sticks
- Scissors
- Permanent Marker – Black
Instructions
!Mickey and Minnie Pumpkins
- Paint a base coat on your pumpkins with black craft paint, and allow to dry. Apply additional coats, if desired, allowing each to dry completely.
- With red paint, coat the bottom half of each pumpkin and allow to dry, applying a second coat, if desired.
- Trace the shape of eight circles with your template onto your black craft foam.
- Cut the circles out, making sure to run the scissors on the inside of the lines for a cleaner look.
- Glue together two circles to create four ears in total and allow to dry.
- Place polka dots on your Minnie pumpkin using the round sponge applicator with white craft paint, and allow this to dry completely.
- Affix two buttons onto the Mickey pumpkin below his belt line.
- Cut off a very small portion of the bottom of each ear so that the ear has a "flat place" to rest on the pumpkin.
- Affix the ears on each side of each pumpkin.
- Make the bow by wrapping your ribbon around four of your fingers three times. Remove the ribbon from your fingers and secure the center with an additional 12” length of ribbon, leaving those tails long.
- Affix the bow to the center top of the Minnie pumpkin.
!Funfetti Pumpkins
- Paint each of the pumpkins with white craft paint and allow it to dry completely. Reapply paint until you're happy with the coverage.
- To make the “sprinkle” pumpkin, cut out 1” lengths from various color chenille stems.
- Glue the sprinkles onto a pumpkin randomly.
- To make the “polka dot” pumpkin, glue pom poms of various colors on a pumpkin in all random locations.
- To make the “jeweled” pumpkin, glue rhinestones of various colors on a pumpkin in all random locations.
- Enjoy!
!Creepy Eyeball Pumpkin
- Paint the pumpkin with black craft paint and allow it to dry completely. Reapply paint until you're happy with the coverage.
- With liquid glue or hot glue, apply the googley wiggle eyes everywhere on the pumpkin, filling in spaces available.
Notes
For more fun Halloween crafts for kids, visit RufflesandRainBoots.com
More Halloween Crafts for Kids You Might Like
- Halloween Paper Plate Crafts for Kids – I can’t tell you how much fun we’ve had making the easy Halloween kid crafts we found on this list!
- Quilled Monster Craft – Nothing is more fun to my kiddo during the Halloween season than curling and quilling a little monster.
- Halloween Bat Crafts for Kids – So. Many. Fun. Bats! Eep!
Please Save This to Pinterest
Your shares are how this site grows and I am sincerely grateful. Know a friend who’d like this? Please share it on Facebook or save it to your favorite Halloween crafts for kids board on Pinterest.
Meet the Creator
Hi there, I’m Sarah Nenni-Daher. I’m a crafty gal and always have at least 14 projects going at once. I am a crafter, designer, DIYer, and pattern maker. I share my creations here and in the Ruffles and Rain Boots® Shop.
Here at Ruffles and Rain Boots®, you’ll find DIY gnomes, crafts, gifts, cupcakes, laser crafts, and so much more. I love sharing video tutorials over on YouTube and chatting with other crafters in my Facebook groups. We’d love to have you!