
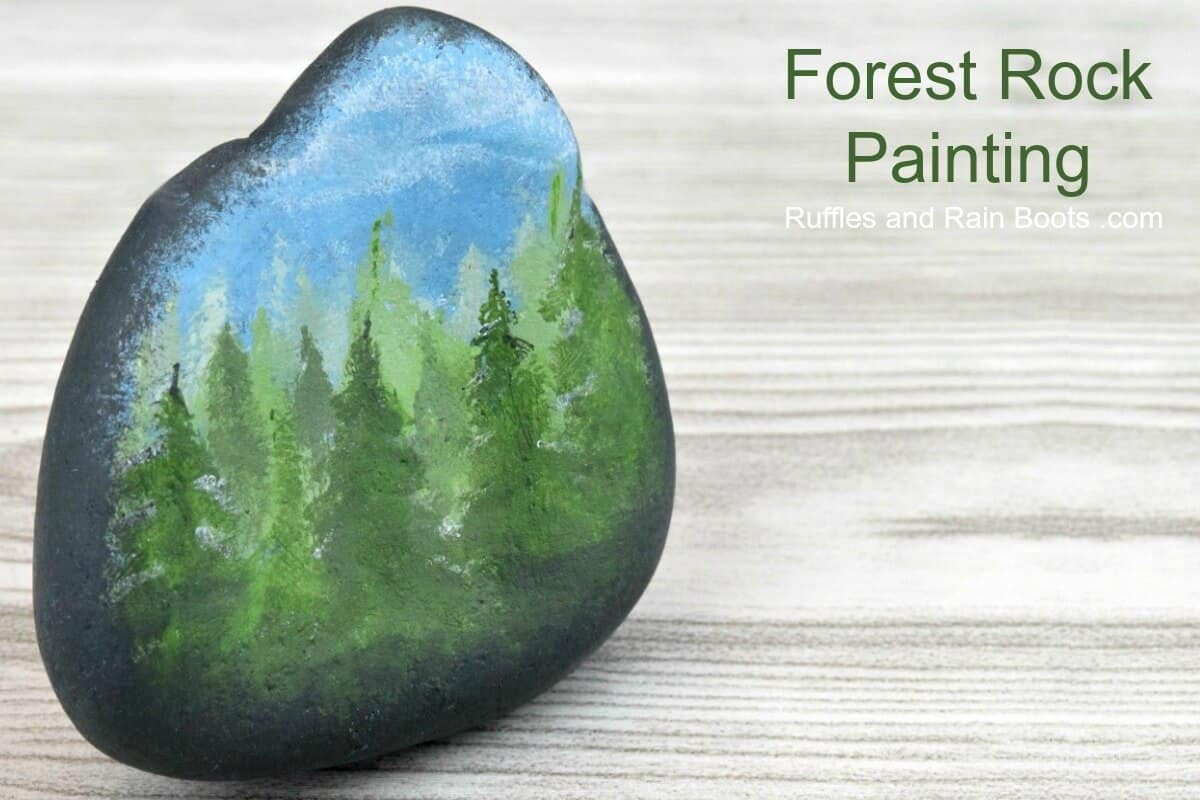
Forest Rock Painting Idea Using One Color Trees
Make this fall forest rock painting idea – a mountain forest with trees painted in a one-color variation. Click to see how fun and easy it is!
What You'll Find On This Page
Natural Rock Painting Ideas: Breathtaking Inspiration
Each year, I head out to the middle of nowhere with my family to an absolutely breathtaking area of the Pacific Northwest: the Hoh Rainforest.
Most people are familiar with the area because it’s foggy mountain trees and stretching beaches were featured in the movie series, Twilight. Yes, the vampire and werewolf movies. I do believe the movies highlighted some gorgeous sections of the area.
I decided to try my hand at a Pacific Northwest forest rock painting idea as we head out there again this year.

Supplies for Our Forest Rock Painting Idea
I tried using only one color for the trees because it’s a watercolor technique I use often and I just wanted to test if it would work with acrylics.
- clean rock
- acrylic paint in light blue, white, gray, and green
- stencil dauber (or just use your finger)
- large wash brush, small square brush, toothpick
- sealant (I choose a couple layers of a wipe on polyurethane)
RELATED READING: Browse Through These Fun and Gorgeous Rock Painting Ideas
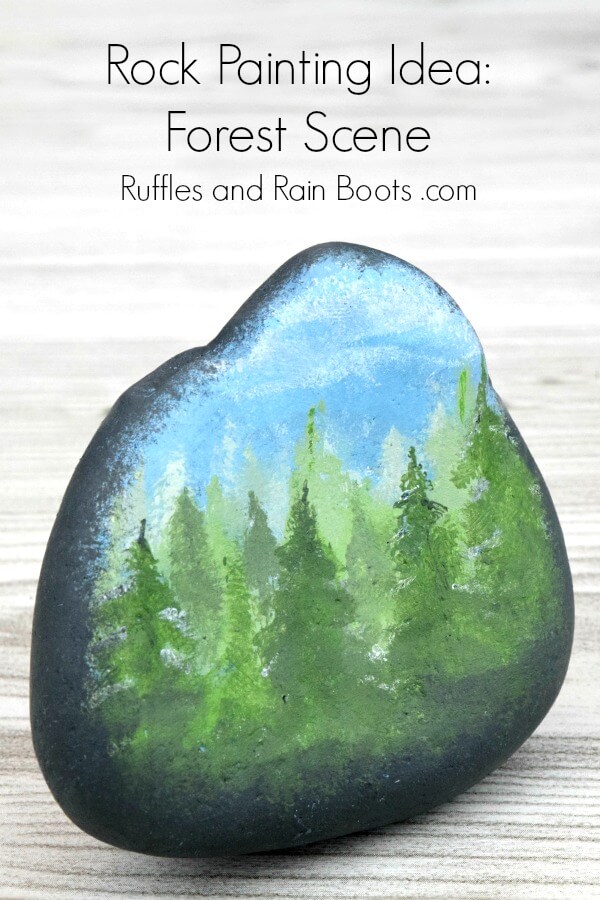
How to Paint a Forest Rock Painting
Forest Rock Painting Idea Using One Color Trees

Make this fall forest rock painting idea - a mountain forest with trees painted in a one-color variation. Click to see how fun and easy it is!
Materials
- clean rock
- acrylic paint in light blue, white, gray, and green
Tools
- stencil dauber (or just use your finger)
- large wash brush, small square brush, toothpick
- sealant (I choose a couple layers of a wipe on polyurethane)
Instructions
- With a wash brush, paint the front of the rock a sky blue. Add a very small amount of gray at the bottom and blend it with the blue.
- Next, a few clouds with the stencil brush. I like to smudge the paint with a small piece of paper towel or my finger so it looks "fuzzy" instead of perfect.
- Use a toothpick to add a bit of gray paint to indicate overlapping mountains. This will be covered up but acts as a guide for the smaller, lighter trees. Mix light green paint (green, white, and a small amount of gray).
- Use the wash brush to make vertical lines - these are the trunks of our trees. Place them along the lines of the mountain outline - on the line and in front of it. Next, use a small brush to create triangles in the same light green color varying the size. Let dry.
- Mix a medium shade of green paint, using green, white, and a little gray. Create trunks and trees the same way as described above, however, make them a larger and in front of the small trees.
- Finish the last layer of trees by mixing up the darkest shade of green paint, adding toothpick tree trunks, and building trees. These are the largest, closest trees.
- Using a toothpick, add areas of darker green and white on the branches to add depth.
- Finish painting the rock by using the stencil brush to darken the edges of the rock, making a lighter stipple near the scene and moving darker towards the edges and back of the rock painting.
- Let dry and seal with your preferred method.
Notes
For more fun rock painting ideas, visit Ruffles and Rain Boots.

Over to You
What is your favorite natural landscape to paint? Are you partial to a beach, field, forest, or other landscape? Let us know in the comments below.
Get Creativity Delivered Every Week
If you want to join the fun here on Ruffles and Rain Boots, sign up for the once-weekly newsletter. I’ll share freebies and anything new and you’ll be the first to get them all.
Share to Your Favorite Facebook Rock Painting Group
Your shares are how we grow and we are sincerely grateful.

I was so happy to find this tutorial! I just moved to Whidbey Island in the PNW and wanted to paint trees on rocks. :D
Thank you for the pictures – I could almost watch your video but the Discover Card ad kept covering it. :(
Thanks again – just what I wanted to see.