
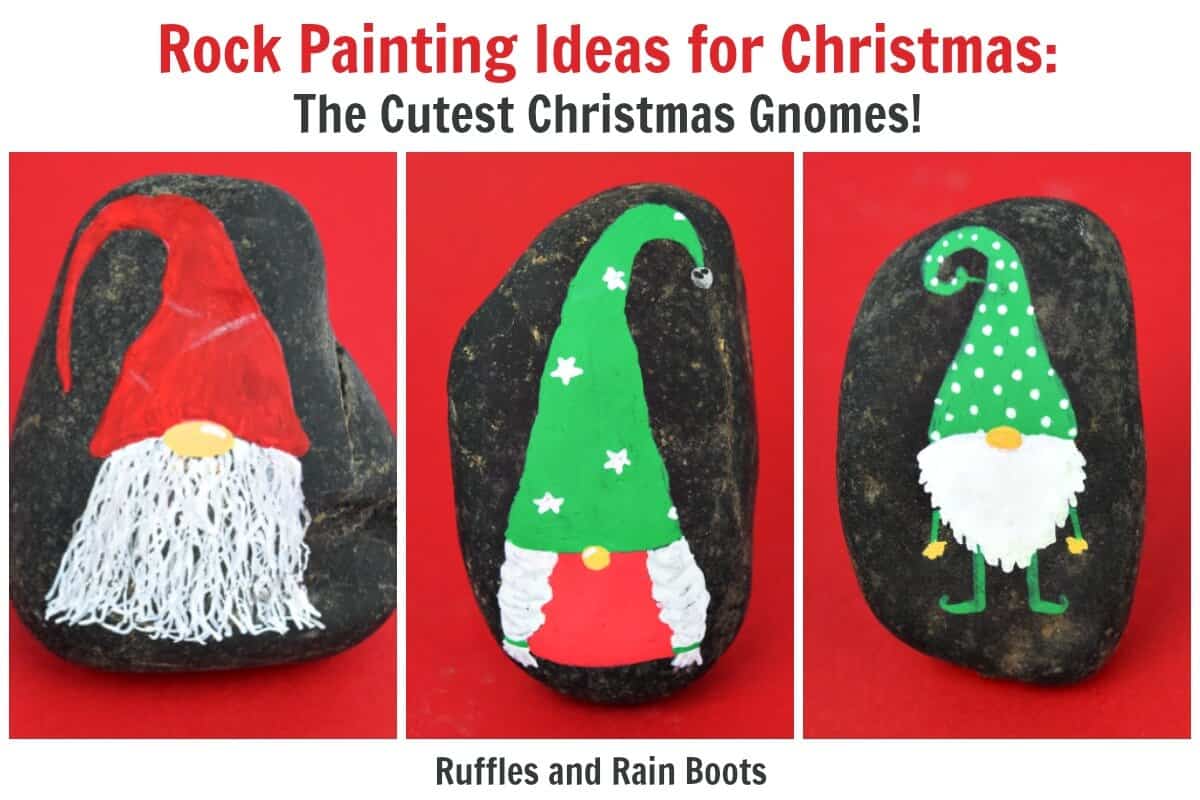
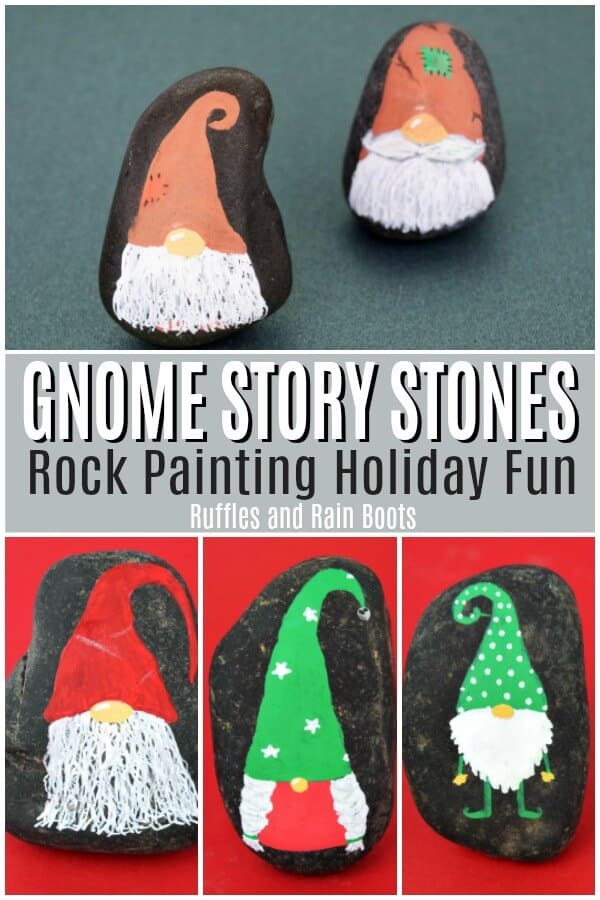
Christmas Gnome Rock Painting Idea for Story Stones
These Christmas gnome rock painting cuties are just the thing to add a little holiday cheer into your painted stone hobby. Let’s get started!

 Psst: did you spot those cute little Harvest or Fall gnomes? They’re coming next week to Ruffles and Rain Boots!
There are affiliate links in this article which means, at no additional cost to you, we could receive compensation for our recommendations. You can read our full disclosure policy.
Psst: did you spot those cute little Harvest or Fall gnomes? They’re coming next week to Ruffles and Rain Boots!
There are affiliate links in this article which means, at no additional cost to you, we could receive compensation for our recommendations. You can read our full disclosure policy.

RELATED READING: Rock Painting – Story Stones Make Wonderful Paint and Hide Rocks
What You'll Find On This Page
Christmas Gnomes Rock Painting Idea
Isn’t this gnome story stone set just adorable? We had some time before a playdate when my daughter started singing Jingle Bells. Yes, that’s enough to start me crafting Christmas stones, friends. I have no will power and cannot resist a Christmas carol. Because we used natural rocks – see which rocks we like getting at home improvement stores – this rock painting idea was very quick to come together. So let’s get started. RELATED READING: Home Improvement Store Rocks for Rock PaintingDIY Christmas Gnome Tutorials
If you’re looking for the best DIY Christmas gnome tutorials, you have come to the right place. Check out all of my favorite tomte tutorials for the holidays!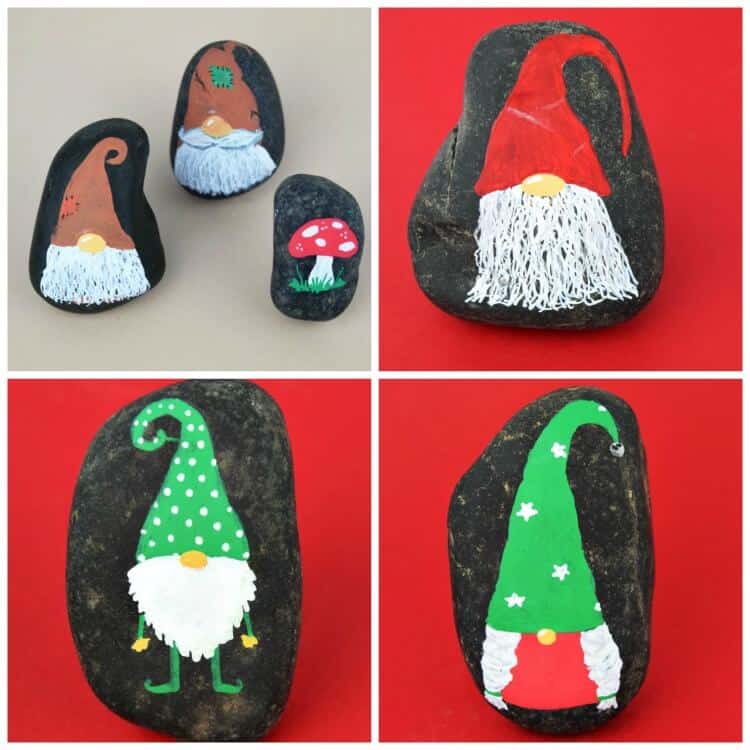 Psst: did you spot those cute little Harvest or Fall gnomes? They’re coming next week to Ruffles and Rain Boots!
There are affiliate links in this article which means, at no additional cost to you, we could receive compensation for our recommendations. You can read our full disclosure policy.
Psst: did you spot those cute little Harvest or Fall gnomes? They’re coming next week to Ruffles and Rain Boots!
There are affiliate links in this article which means, at no additional cost to you, we could receive compensation for our recommendations. You can read our full disclosure policy.
Supplies for Christmas Gnome Rock Painting
As with all of our rocks, we know the materials can make or break the fun and artistry in rock painting. Here’s what we used:- clean rocks
- acrylic paints (we use Deco Art Americana most of the time)
- this size of our favorite paint pens
- ModPodge and wipe-on polyurethane
- pencil and paintbrush (or foam brush)
Video Tutorial
Scroll back up to see the ridiculously quick video to help show you how we layer the design. The layers will help your Christmas gnome rock painting cuties be vibrant.How to Make Christmas Gnome Rock Painting Cuties
Yield: 3 stones
Christmas Gnome Rock Painting Idea for Story Stones

5.0 Stars (1 Review)
These Christmas gnome rock painting cuties are just the thing to add a little holiday cheer into your painted stone hobby.
Active Time
15 minutes
Total Time
15 minutes
Materials
- clean rocks
- acrylic paints (we use Deco Art Americana most of the time)
- this size of our favorite paint pens
- ModPodge and wipe-on polyurethane
- pencil and paintbrush (or foam brush)
Instructions
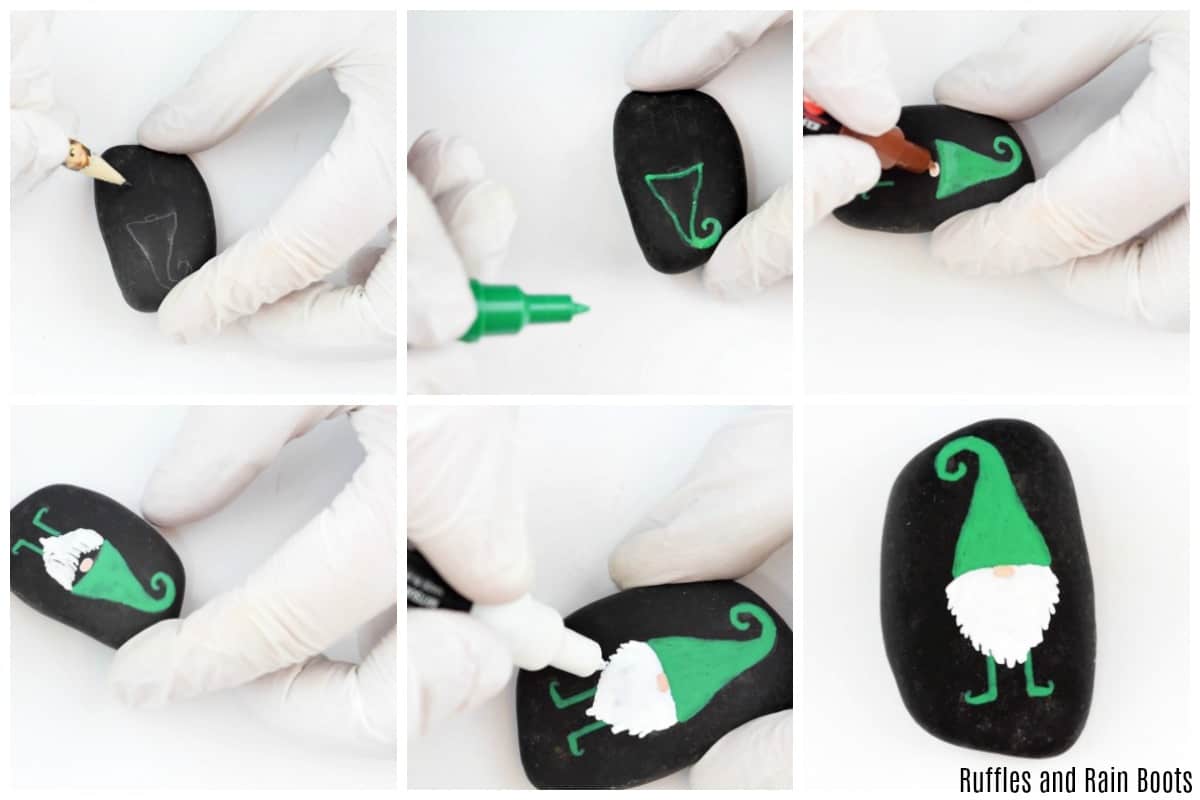
- Wipe the rock clean and use a pencil to lightly draw on a hat. Leave a middle space for as large a beard as you like and draw two sticks for legs. Draw a small swoosh for the feet (as shown in the video).
- Use a paint pen or paints to apply the first layer of color. We start with the hat and legs and let it dry completely before moving on.
- Using brown and white, layer brown, white, and brown to create the button nose. No need to be exact because you can clean anything up when painting the beard.
- Next, use a paint pen (or acrylics) to make an acorn-shaped beard. Don't worry about texture yet, we'll get that on the second pass.
- Clean up any part of the paint (or apply a second coat) while the beard dries. When it has, use the paint pen to add texture by pulling out from the beard.
- Use a paintbrush or foam brush to apply a light layer of ModPodge to seal the paint pens. Follow that up with a few layers of wipe-on polyurethane to seal and protect your Christmas gnome rock painting friends.
Notes
For more fun rock painting ideas, visit Ruffles and Rain Boots.
Meet the Creator
Hi there, I’m Sarah Nenni-Daher. I’m a crafty gal and always have at least 14 projects going at once. I am a crafter, designer, DIYer, and pattern maker. I share my creations here and in the Ruffles and Rain Boots® Shop.
Here at Ruffles and Rain Boots®, you’ll find DIY gnomes, crafts, gifts, cupcakes, laser crafts, and so much more. I love sharing video tutorials over on YouTube and chatting with other crafters in my Facebook groups. We’d love to have you!