
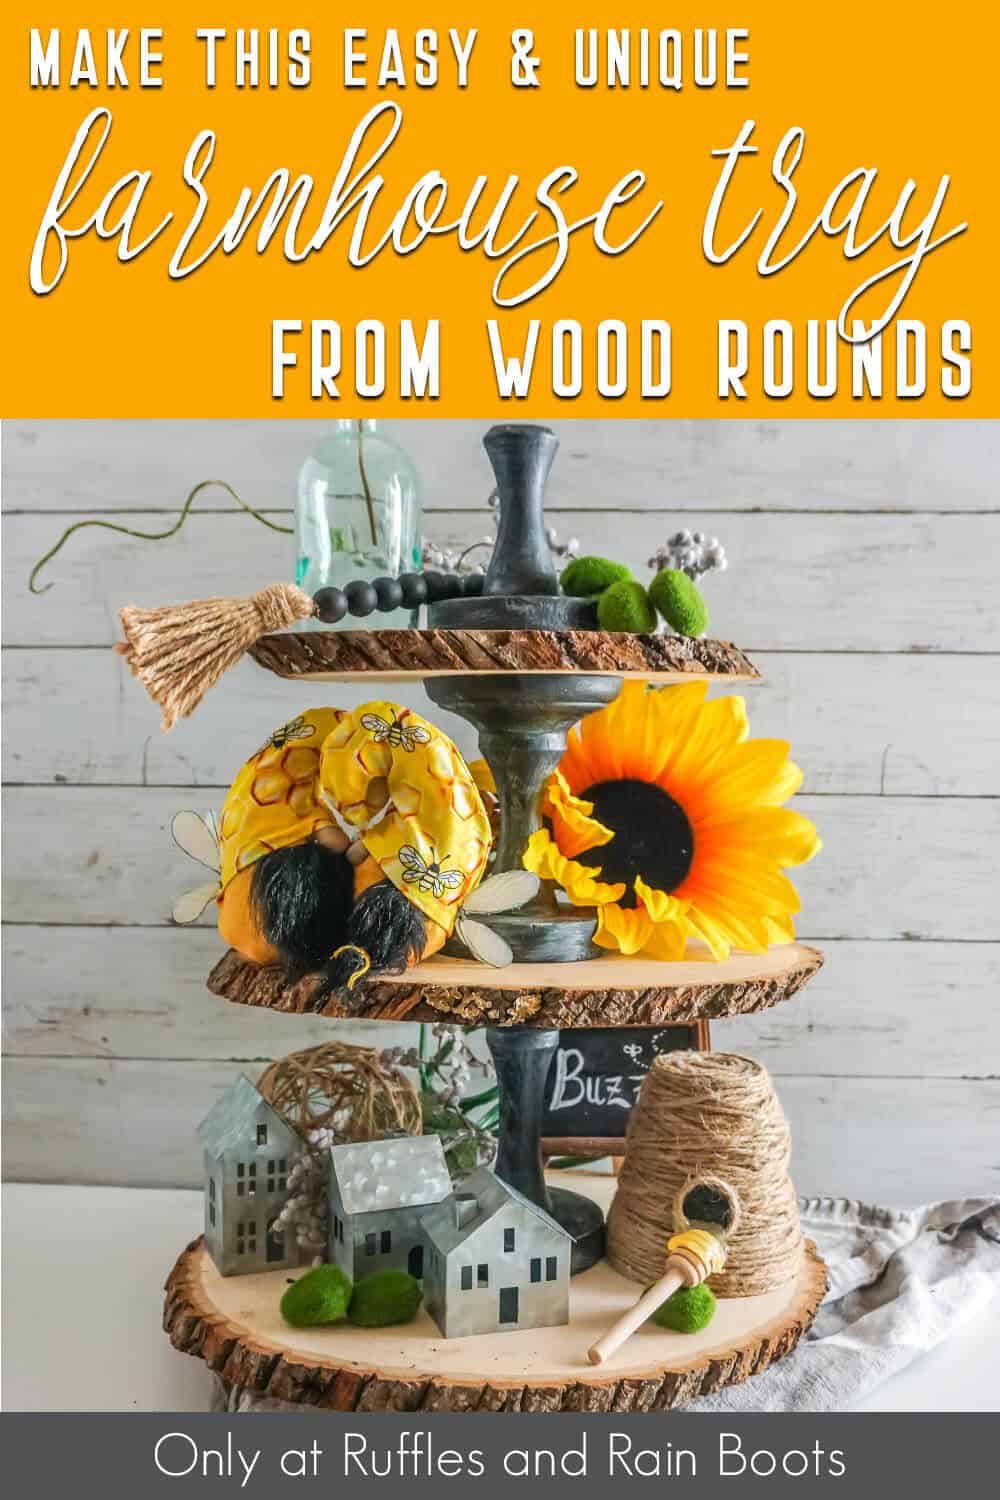
This Wood Round Tiered Tray is a Unique DIY Farmhouse Tiered Tray!
This easy and FAST wood round tiered tray makes for a really unique DIY farmhouse tiered tray to display all the best farmhouse decor!
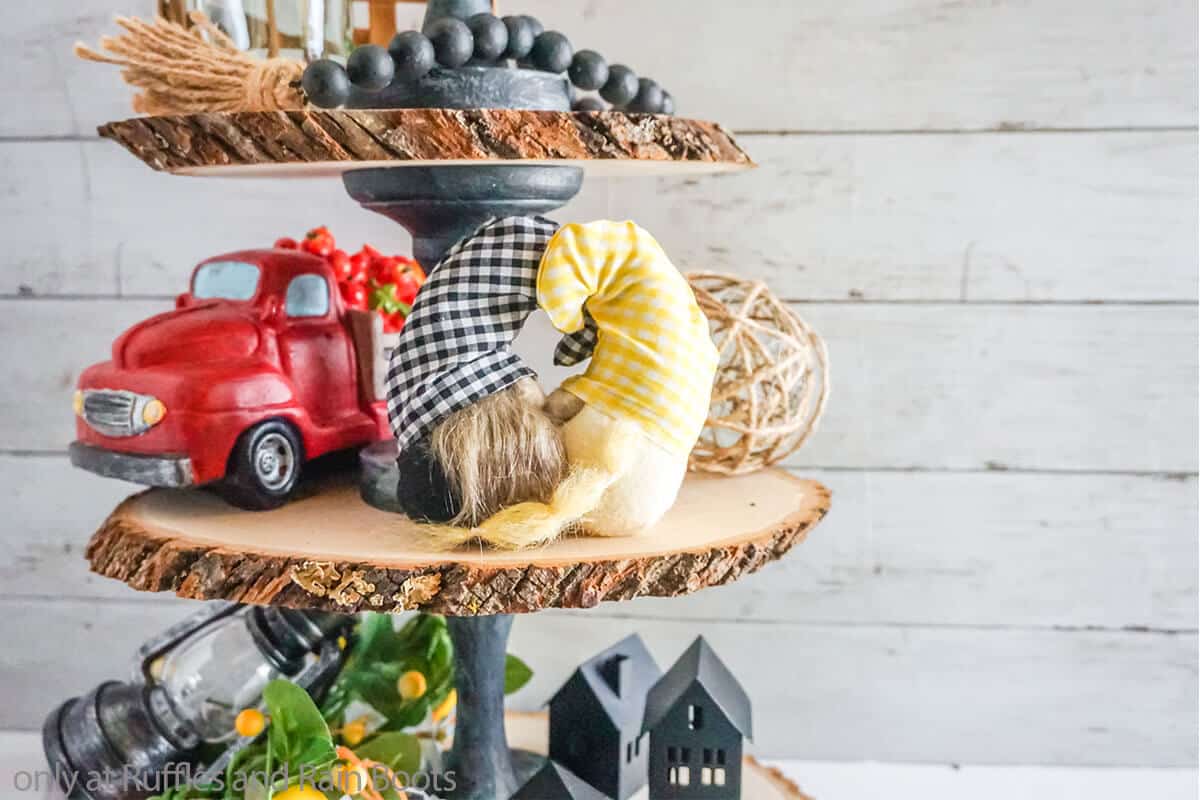
Wood Round Tiered Tray
Here at Ruffles and Rain Boots, we love making gnomes, farmhouse beads and all sorts of little DIY farmhouse crafts. But, sometimes I get tired of putting them on the same tiered tray over and over again. So, when I was at the home improvement store, I had a brilliant idea to make a wood round tiered tray that I really love!
RELATED READING: EASY DIY FARMHOUSE GNOME PATTERN
A little rustic, a little raw, this is a really unique DIY farmhouse tiered tray that I think really fits with any season – and is perfect for styling all my little DIYs! If you’re ready to make a wood round tiered tray, let’s get started.

No Time to Make This Now? Pin it for Later
You’re busy, I get it. Pin this to your favorite DIY farmhouse board on Pinterest and it’ll be here when you’re ready.

As an Amazon Associate, I can earn from qualifying purchases.
Tips to Make a DIY Farmhouse Tiered Tray
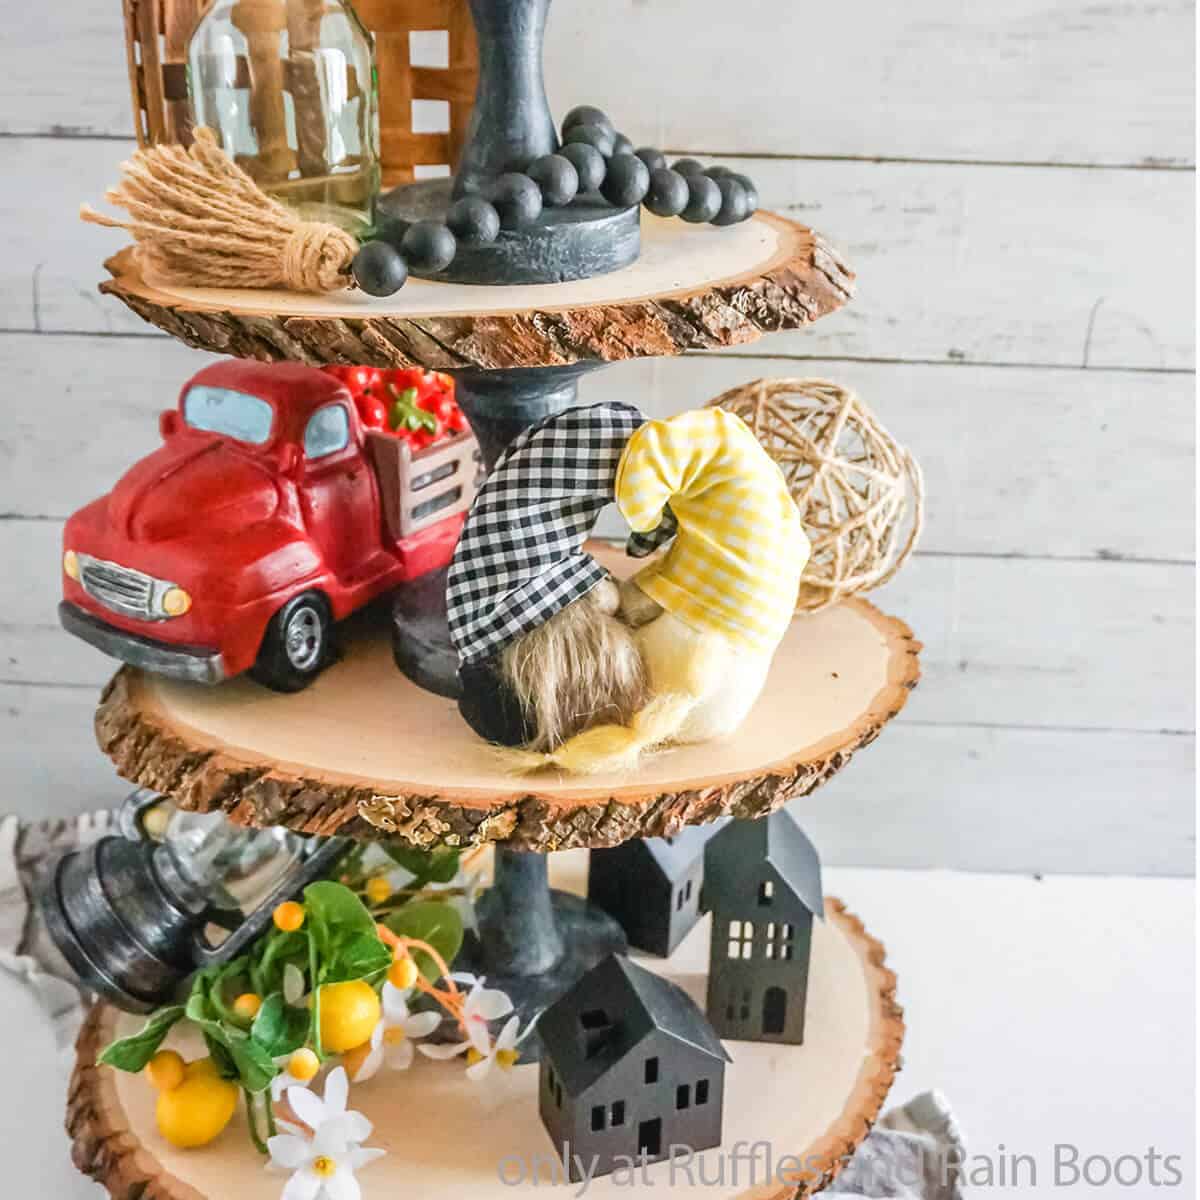
- When you’re picking out your wood rounds to make this easy DIY tiered tray, remember to snag them in graduating sizes. I went with 7, 9 and 13 inches so you can really see the difference between each tier – and have room to fill each with a few fun items, too!
- To create the spaces between the wood rounds, I used a flat-top (and bottom) finial I found at the local home improvement sore. But even better, after I made mine, I realized that you could do the same with an even smaller profile using a wooden candlestick like these. I’d definitely recommend that rather than trying to find a weird flat-top finial.
- Getting that weathered look on the pieces between the wood rounds took two layers of paint. I used both a black chalk paint for an ultra-matte base and primer. Then, on top of that I used a dry-brushing of grey weathered wood stain. I know that the stain doesn’t stain wood that’s been painted, but it makes an awfully pretty “antique” finish that I really love on a background piece like this.
How Do I Make this Wood Round Tiered Tray?
I’m so glad you asked. Below is our written tutorial. You can find the full video tutorial for this easy DIY wood tiered tray here on YouTube.
Wood Round Tiered Tray

Making this fun wood round tiered tray is such a quick and fun craft that you can make in just a few minutes to really bring a unique, rustic feel to your farmhouse decor. Definitely the most unique farmhouse tiered tray EVER!
Materials
- 1 - 7-inch Wood Round
- 1 - 9-inch Wood Round
- 1 - 13-inch Wood Round
- 3 Wood Finials with Flat Tops and Bottoms OR 3 Wood Candlesticks
- Black Chalk Paint
- Stain in Weathered Wood Coloring
Tools
- Craft Glue (like E6000)
- Saw
- Paintbrushes
- Sand Paper
Instructions
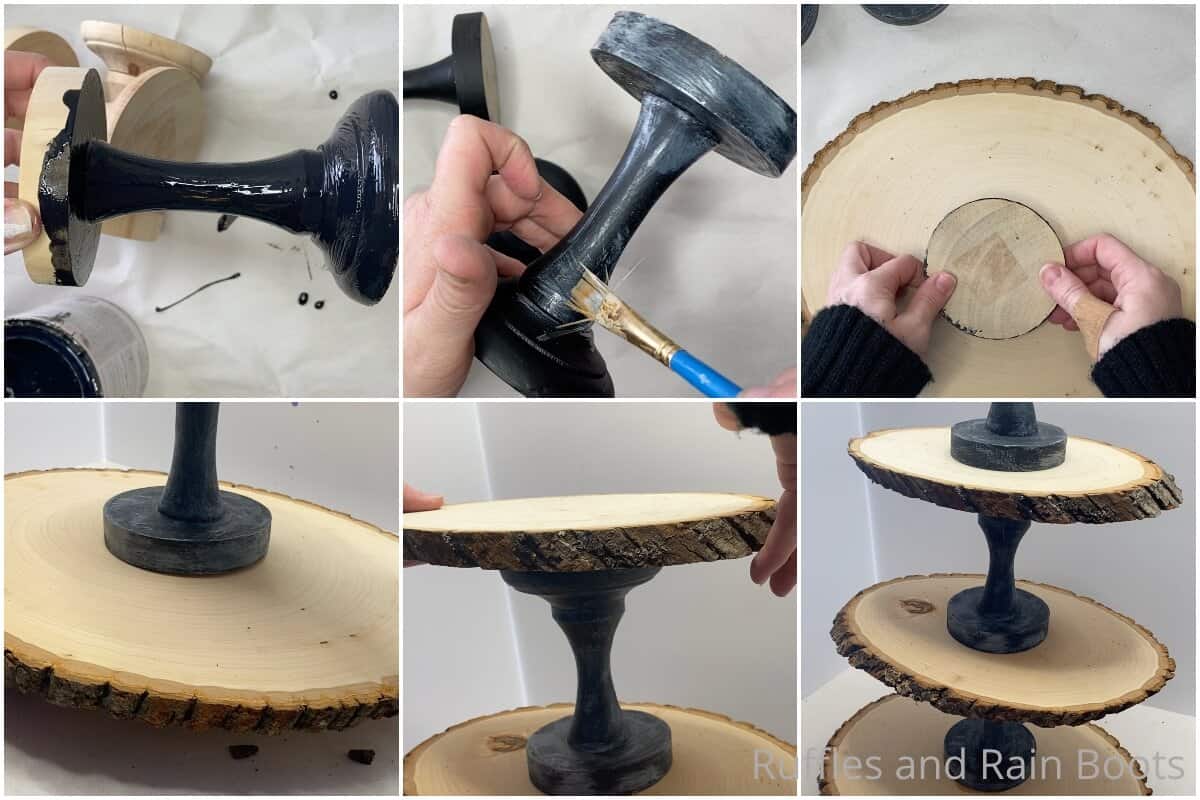
- Cut off the bottom 2-inches of a wood finial or candlestick. Do not discard the either piece. Sand them both, smoothing the top of them to a nicely finished edge.
- Paint the two whole finials and the two pieces of the cut finial with the black paint and allow it to dry completely,
- Dry brush the black painted finial pieces with the grey stain. If you feel you got a bit much on the brush, you can dab it off on a paper towel, or if you got too much stain on your piece, you can wipe it off with a paper towel. Allow the stain to dry completely.
- Using your craft glue (do not use hot glue, as that will not hold up over time as well as the craft glue against the pressures of having weight of items on the tray), glue the 2-inch piece of finial onto the center of the largest wood round. Finding the center of the wood round is not as difficult as it may seem. Because the shape is oblong, the easiest way to find the center is to look at the wood rings. Based on the center of the wood rings, you should be able to see the center of the oblong shaped wood round.
- Being gentle so as not to shift the bottom wood round, center one of the uncut painted finials squarely above the 2-inch piece of finial with the wood round sandwiched between and glue it in place.
- Repeat adding the middle-sized wood round, gluing it in place on-center on the finial sitting on top of the larger wood round then gluing the second un-cut finial on top of the middle wood round, then gluing the smallest wood round on top, being very gentle so as not to shift any of the pieces still gluing up below.
- Finally, add the larger cut piece of wood finial to the center top of the smallest wood round. Make sure that all of the finial pieces are centered on each other and look neat. Allow the glue to set completely then enjoy decorating your wood round tiered tray!

Notes
When fully assembled, there are about 5 1/2 inches between each tier so the whole thing is about 19 inches tall.
For more fun farmhouse crafts, visit Ruffles and Rain Boots!
More Farmhouse Crafts You Might Like
- Mini Farmhouse Gnome Pattern for Tiered Trays – These mini gnomes are literally the perfect addition to a tiered tray because they’re so small, but full of so much character!
- Summer Farmhouse Trees – Want to add a splash of color alongside your tiered tray? Add a couple of easy farmhouse trees made of cones!
- Farmhouse Bee Pillow – Take that farmhouse vibe from the entryway into the den by making a quick and fun farmhouse bee pillow.
Please Save This to Pinterest
Your shares are how this site grows and I am sincerely grateful. Know a friend who’d like this? Please share it on Facebook or save it to your favorite farmhouse crafts board on Pinterest.

Question ,how can you say total cost is $10 but for the wood pieces already have to pay 8.99 for one on Amazon?
Oh my gosh, Veronika, thank you for letting me know! That is part of the template that I just never updated. I’ll add it all up right now as I still have the receipt tally for the project. Thanks again.