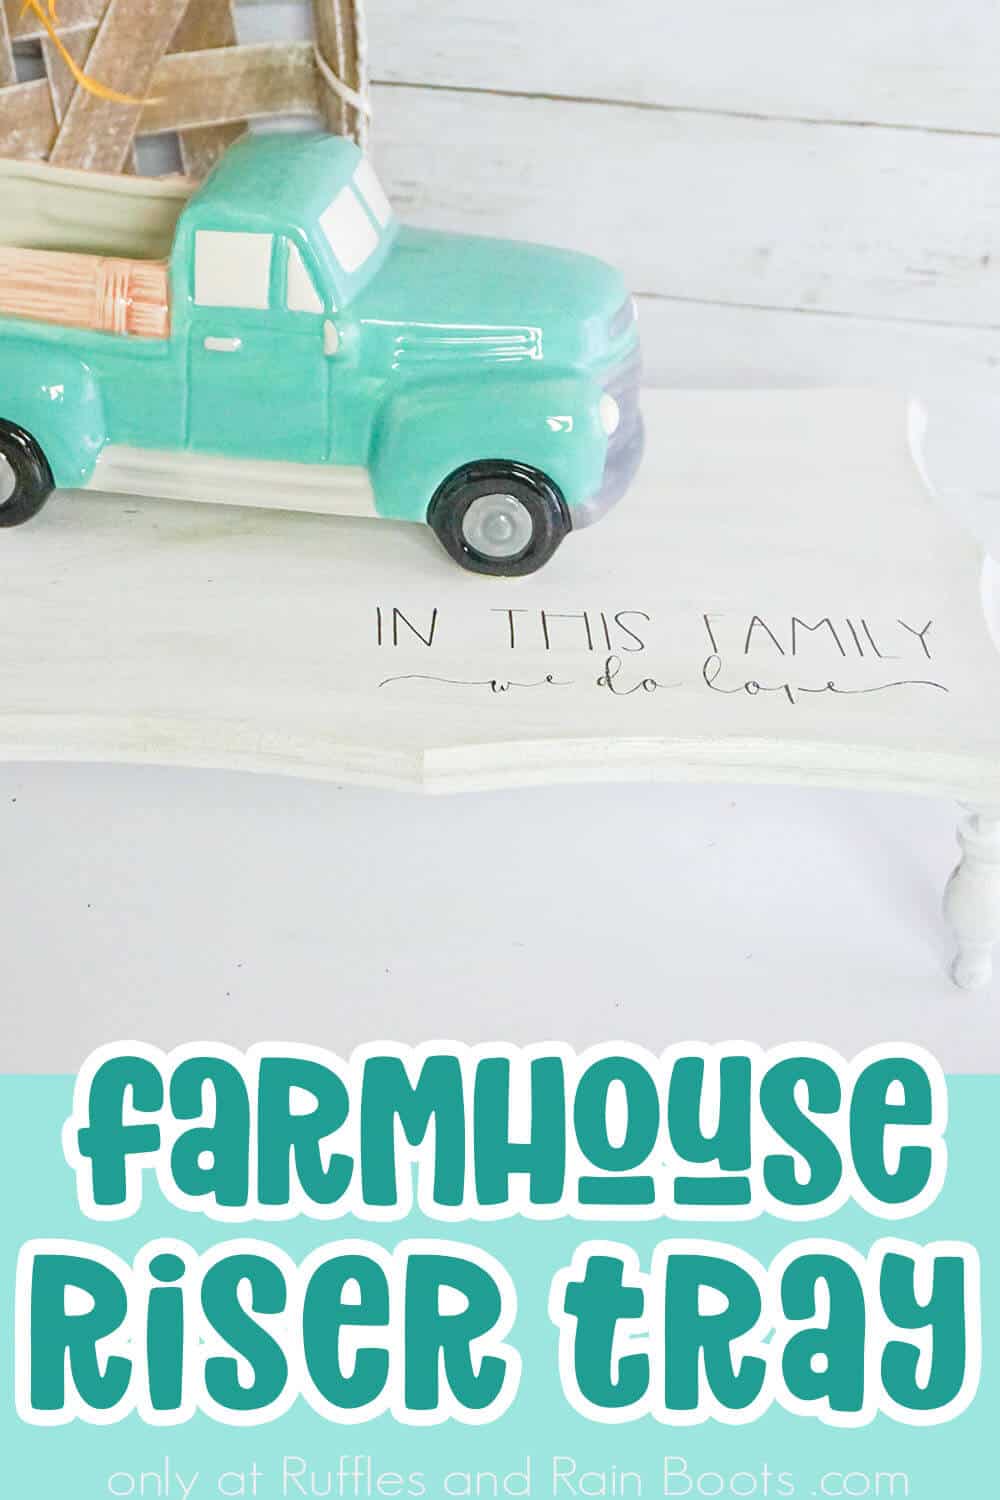
Make This Quick Farmhouse Tray Riser DIY to Display Anything
This is such a quick and fun farmhouse tray riser DIY and it makes the perfect little riser to help display gnomes and make my entryway pop!
Farmhouse Tray Riser DIY
Here at Ruffles and Rain Boots, we have a whole thing with gnomes. I mean, it’s a bit of an obsession. But the thing is, not all gnomes are created equal–and some of them need a little lift to create balance. Also, because some of my gnomes are short. There, I said it.
RELATED READING: DIY FARMHOUSE GNOME
So, I decided to make a little DIY farmhouse riser tray, or farmhouse shelf, or whatever you want to call it–it’s a mini table to put on top of a table to give a little lift to decor. I love it. Let’s get started.

No Time to Make This Now? Pin it for Later
You’re busy, I get it. Pin this to your favorite DIY farmhouse ideas board on Pinterest and it’ll be here for when you’re ready.
As an Amazon Associate, I can earn from qualifying purchases.
Tips to Make DIY Riser Tray For Gnome Display
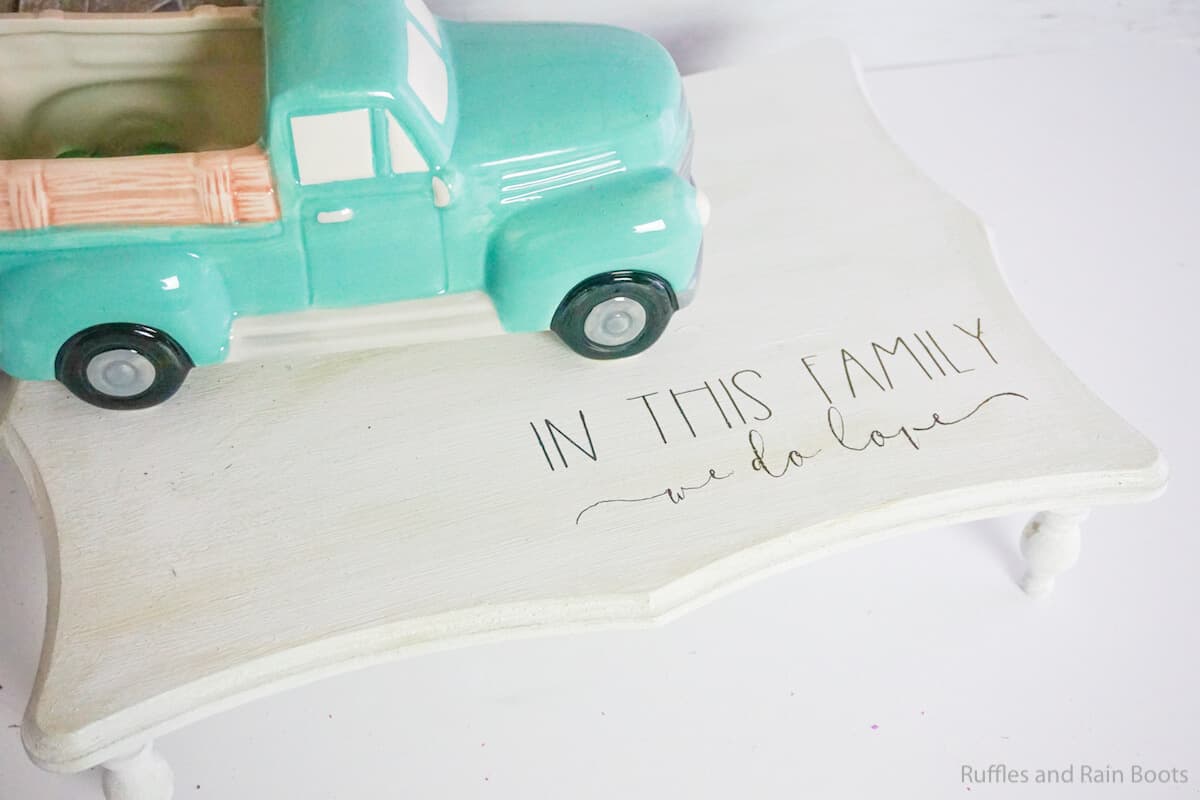
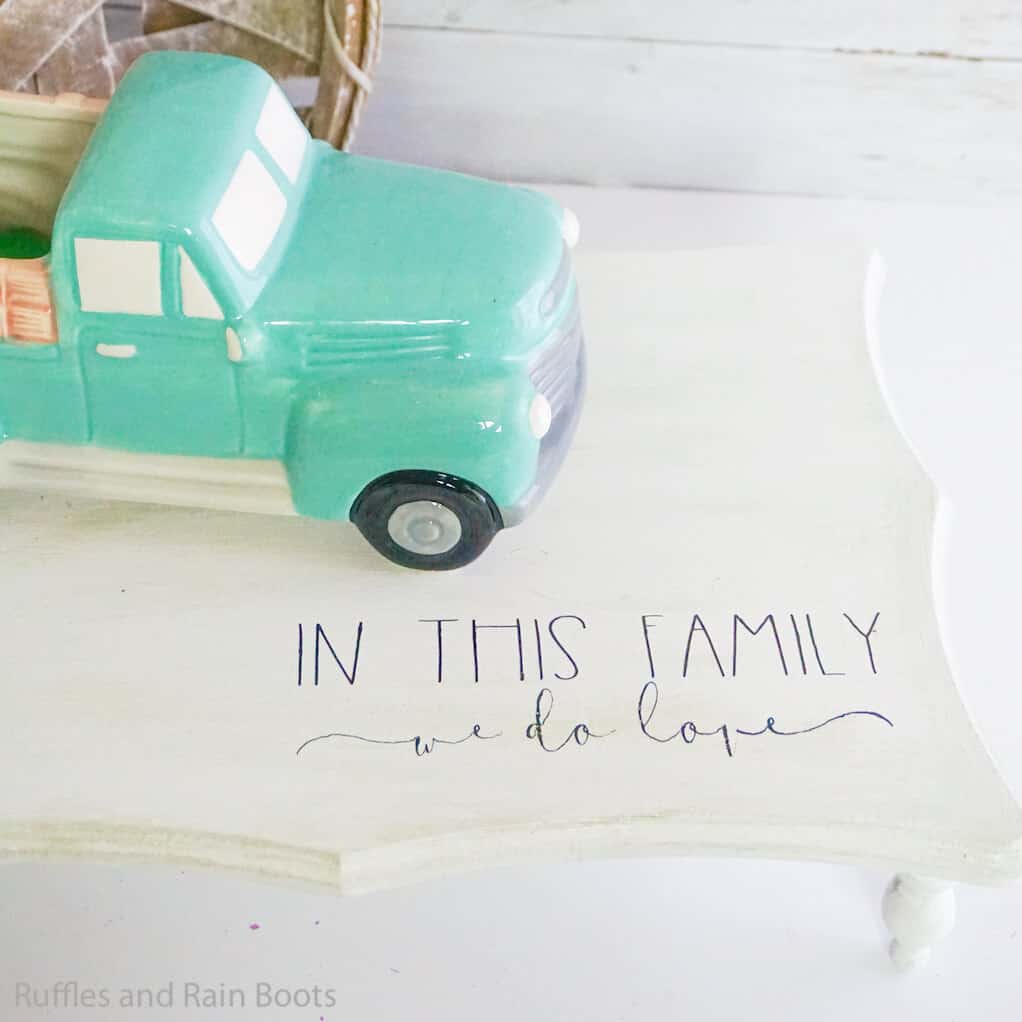
- Click here to get the (free) beautiful In This Family We Do Love SVG set. It works for Cricut or Silhouette, so you can make your riser tray any which way possible! Or, if you’d rather, you could also use this Love Is a Story SVG set.
- I prefer to use a chalk paint for my DIY farmhouse home decor projects like this. It’s about as matte finish as you can get and it has the best coverage I’ve ever found. I also like to dry brush with some grey stain, but not every time. Use your judgement to determine what’s going to work for your piece.
- You can make your DIY farmhouse tray be as tall as you’d like or as short. But I found that using little knobs from the craft store worked really well for feet on the tray. You can add height by layering more knobs, if desired.
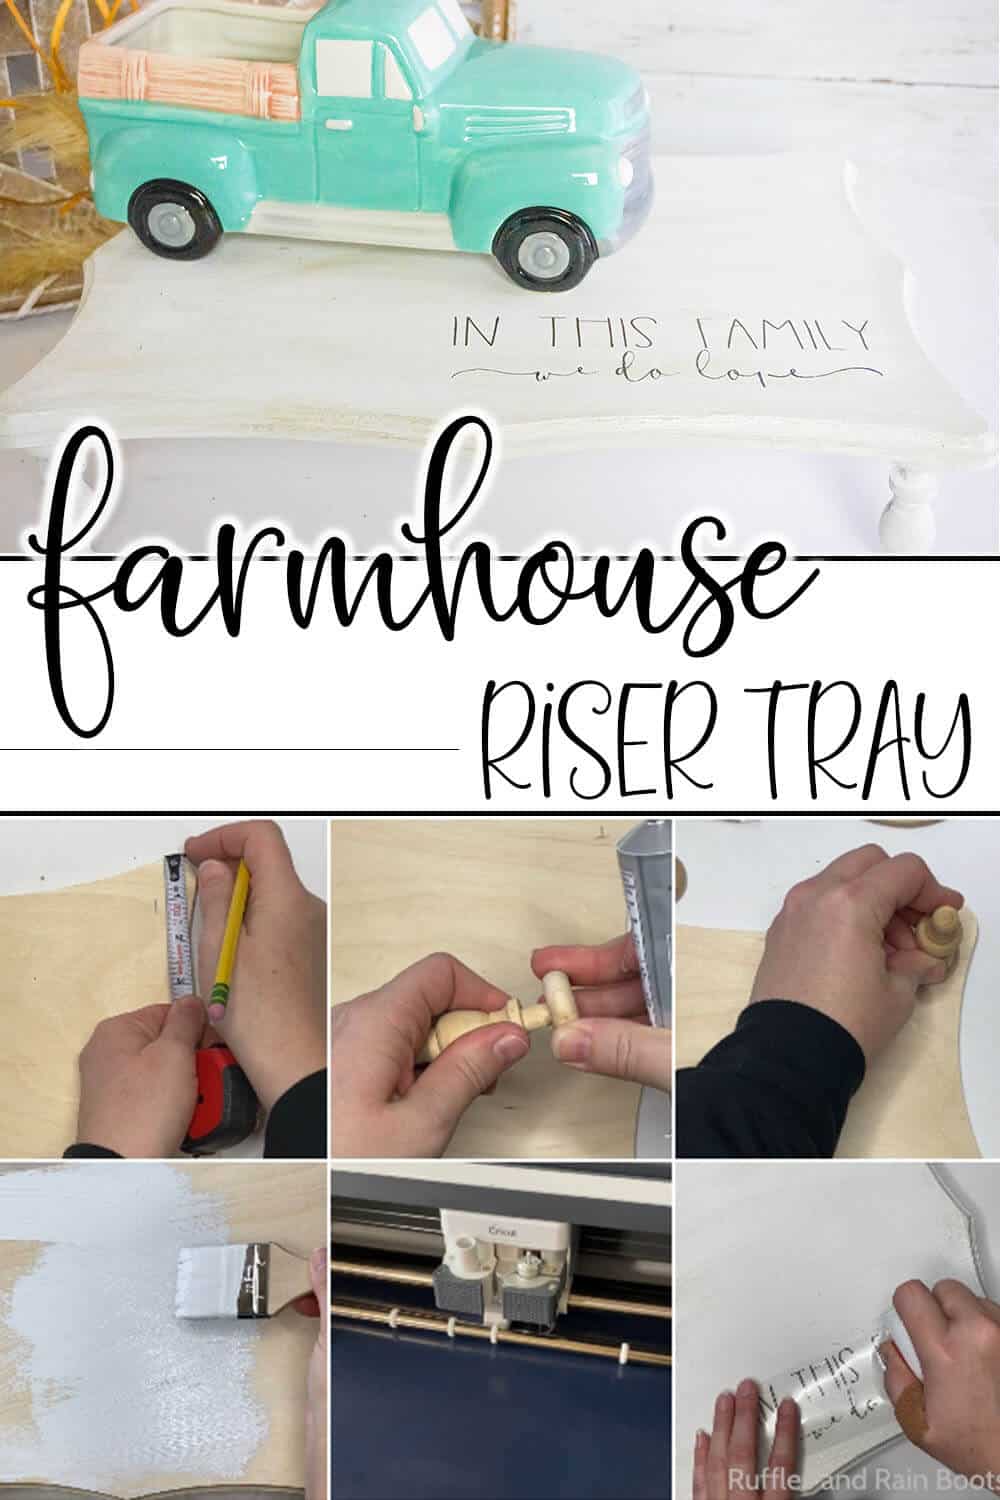
How Do I Make this Farmhouse Tray Riser DIY?
I’m so glad you asked. Below is our written tutorial.
Farmhouse Riser Tray

You're going to love having this DIY farmhouse riser tray to display your gnomes or just provide some balance for your farmhouse home decor!
Materials
- 1 Wood Blank
- 4 Long Wood Knobs (1-2 inches tall)
- 4 Short Wood Knobs (1/2 to 3/4 inches tall)
- White Chalk Paint
- Black Heat Transfer Vinyl Scraps
- Grey Wood Stain
Tools
- Paintbrush
- Tape Measure
- Pencil
- Craft Glue
- Cricut EasyPress
- Cricut Maker or Cricut Explore Air
Instructions
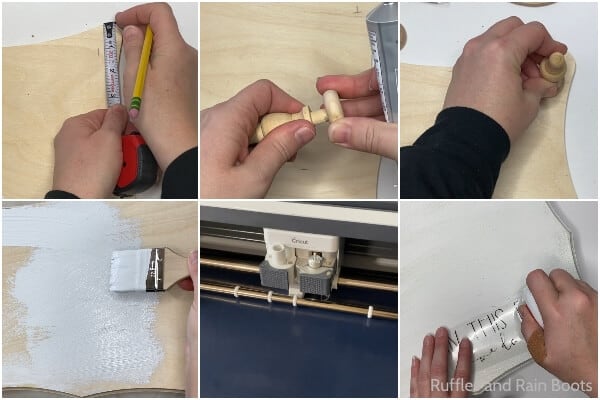
- Measure 1-inch in from each corner (approximately) of the wood blank, from each direction and mark this location.
- With the craft glue, affix the short knob to the tall knob, then glue the knobs in place as legs where you marked on the wood blank. Allow this glue to dry fully.
- Paint the top, bottom and legs of the tray with the white chalk paint. Allow the paint to dry completely.
- Dry brush the tray with the grey stain. Allow the stain to dry completely.
- Cut the desired lettering from the heat transfer vinyl on your Cricut.
- Using the EasyPress Mini, affix the lettering to the top of the tray in the bottom righthand corner and enjoy!

Notes
For more fun farmhouse home decor ideas, visit Ruffles and Rain Boots!
Creativity, Delivered
Would you like inspiration delivered right to you each week? Sign up for the once-weekly Ruffles and Rain Boots newsletter and you’ll get that and more! Get access to the exclusive libraries full of free SVGs, hand lettering practice, and so much more.
More DIY Farmhouse Ideas You Might Like
- Farmhouse Beads for Every Occassion – I love decorating with farmhouse beads and having some for every holiday…woohoo!
- DIY Farmhouse Gnomes with Boots – You’re not going to find a more fun pair of farmhouse gnomes to put on your riser tray.
- Easy Gnome Cookie Jar – One of the funnest ways to bring a gnome to your kitchen and bring some farmhouse flair to your life.
Please Save This to Pinterest
Your shares are how this site grows and I am sincerely grateful. Know a friend who’d like this? Please share it on Facebook or save it to your favorite easy farmhouse DIY ideas board on Pinterest.