
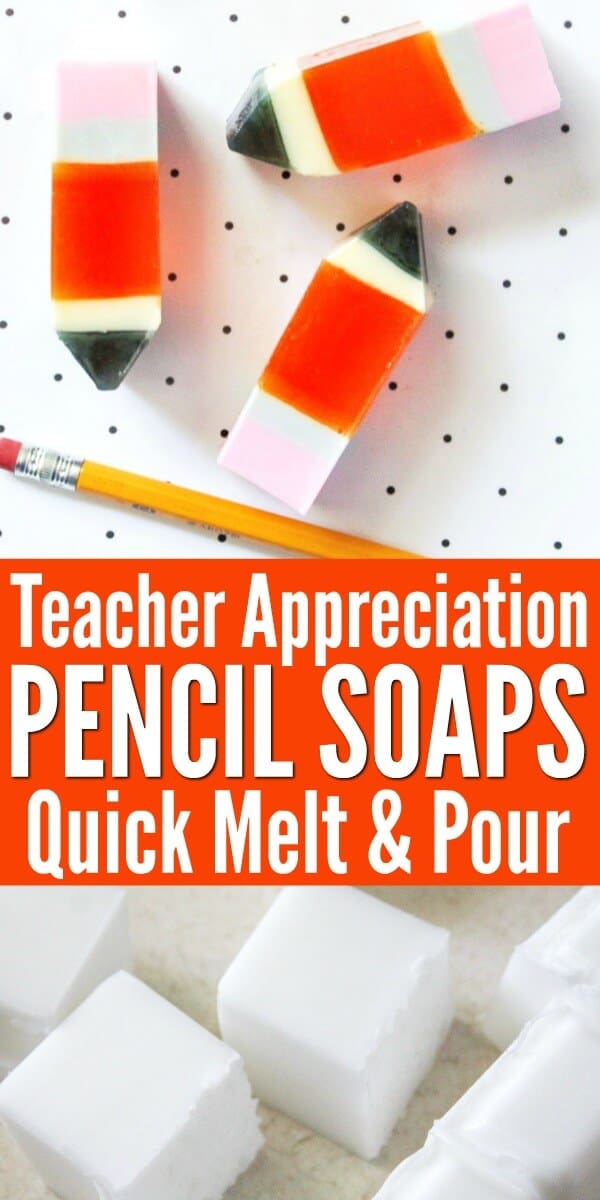
Pencil Soaps for Back to School or Teacher Appreciation
These fun melt and pour pencil soaps are perfect for a back to school gift or as a teacher appreciation gift. And they’re so easy to make!

There are affiliate links in this article which means, at no additional cost to you, we could receive compensation for our recommendations. You can read our full disclosure policy.
What You'll Find On This Page
Gifts for Teachers and Students
School is hard, not just for students and teachers but also for parents. There is a TON of activity volunteer duty, snack schedules, classroom volunteering, shows, fundraisers… The list could go on.
So one thing I vowed to do was to create easy gifts to make for kids, teachers, and office staff. That way I am able to flex my creative muscles without tearing my hair out. And because we’re BIG fans of DIY Bath and Beauty products here on Ruffles and Rain Boots…
These melt-and-pour pencil soaps are easy and a lot of fun to make for kids or adults. And I love that they help the kids to remember to wash.their.hands! :)
Supplies for Melt and Pour Pencil Soaps
If you’ve ever used melt-and-pour soaps, you likely have a couple of these supplies on hand already.
- 1 package white soap base
- 1 package opaque soap base
- soap colorants (red, pink, black, yellow)
- essential oil (anything you’d like – opt for citrus or standard aromatherapy blends)
- optional, gold cosmetic-grade glitter
- rectangle soap mold (we used this one)
- craft bowls to melt and color the mixes (microwave safe) and sticks to stir

How to Use Melt and Pour to Make Pencil Soaps
This is an easy soap to make and we will work in layers. In order to build the layers, I’m going to tell you what is in each bowl first.
The notes below (2 rows, 4 rows, etc.) refer to the rows of soap in the packages. Position the soap bases horizontally (longer side). You will cut the rows vertically.
NOTE: Cut all soap amounts, but do not mix all of the bowls up at once. Start with bowl 1 only and read through all directions before starting. :)
- Bowl 1 – Pencil Tip: opaque soap base, 2 rows, colored black
- Bowl 2 – Unsharpened Tip: white soap base, 2 rows, 2 drop amber or light yellow
- Bowl 3 – Pencil: opaque soap base, 4 rows, mix yellow, orange, gold glitter (optional)
- Bowl 4 – Metal Before Eraser: white soap base, 1 row, a few drops black to form gray
- Bowl 5 – Eraser: white soap base, 2 rows, colored with pink
Pencil Soaps

These fun melt and pour pencil soaps are perfect for a back to school gift or as a teacher appreciation gift. And they’re so easy to make!
Materials
- 1 package white soap base
- 1 package opaque soap base
- soap colorants (red, pink, black, yellow)
- essential oil (anything you’d like – opt for citrus or standard aromatherapy blends)
- optional, gold cosmetic-grade glitter
- rectangle soap mold (we used this one)
- craft bowls to melt and color the mixes (microwave safe) and sticks to stir
Instructions
- Place bowl 1 in the microwave for 30-second intervals. Stir between intervals until melted. Add black coloring once melted and stir. Add essential oils.
- Pour the black soap into the mold slowly. Allow the soap to set for 10-15 minutes.
- Repeat the process with bowls 2-5, pouring over the previous soap in the mold. For the pencil section, if you’re adding glitter, be generous with it. Pop any bubbles with a knife or toothpick. You can also scrape off any which rise to the top.
- Let the soap sit on the counter (no movement) or in the refrigerator. Be patient – this takes a while to set. Wait at least 3 hours if in the refrigerator, overnight if on the counter.
- Once the soap has set, remove the large, long rectangular soap from the mold. Cut the soap into bars and then cut each bar into thirds. Cut the bottom of each pencil (the black section) into a point.
You’re done with your melt and pour pencil soaps! Wrap them up in threes and gift them with a nice ribbon and gift tag.

Notes
The notes below (2 rows, 4 rows, etc.) refer to the rows of soap in the packages. Position the soap bases horizontally (longer side). You will cut the rows vertically.
NOTE: Cut all soap amounts, but do not mix all of the bowls up at once. Start with bowl 1 only and read through all directions before starting. :)
- Bowl 1 – Pencil Tip: opaque soap base, 2 rows, colored black
- Bowl 2 – Unsharpened Tip: white soap base, 2 rows, 2 drop amber or light yellow
- Bowl 3 – Pencil: opaque soap base, 4 rows, mix yellow, orange, gold glitter (optional)
- Bowl 4 – Metal Before Eraser: white soap base, 1 row, a few drops black to form gray
- Bowl 5 – Eraser: white soap base, 2 rows, colored with pink
Over to You
What is your favorite soap scent? Let us know below. I’m partial to vanilla – you can’t mess with a classic – and anything with a citrus scent.
Please Share This on Facebook and Pinterest
Meet the Creator
Hi there, I’m Sarah Nenni-Daher. I’m a crafty gal and always have at least 14 projects going at once. I am a crafter, designer, DIYer, and pattern maker. I share my creations here and in the Ruffles and Rain Boots® Shop.
Here at Ruffles and Rain Boots®, you’ll find DIY gnomes, crafts, gifts, cupcakes, laser crafts, and so much more. I love sharing video tutorials over on YouTube and chatting with other crafters in my Facebook groups. We’d love to have you!