
Fabric Painting Tips and Tricks
Hello, friends! If you’re going to give fabric painting a try, read through these fabric painting tips and tricks.
Fabric painting can be used on a near-limitless number of projects, and is just plain fun. If you (or the kids) are going to give fabric painting a try, here are some tips I’ve learned along the way. In this tip sheet, you’ll find project ideas, tips on fabric and paint selection, a few design options and suggestions, and helpful guidelines to keep in mind while working on your projects.

Project Ideas
If you need a few ideas for projects, try Monogrammed Napkins, curtains, painted scarves, pillows, t-shirts, purses and bags, doll clothes, dress up clothes and accessories, or ready-made storage bins.
Fabric Selection
A tightly woven fabric is best. Just know that if you are using woven fabrics, take care: the ink or paint you use might bleed no matter what you do. I monogrammed 100% cotton with both fabric paint and fabric markers and it bled a little. The project still looks good but you need to take care and test to see how your project will react.
I have had the best success on polyester blend fabrics (think 50/50 blends), but have used cottons, silks, blends and leather (note that there is some specialty paint for working with leathers). I’ve also used ready-made pillowcases and sheets for projects.

You can find some nice fabrics at thrift stores (clothing, sheets, table cloths) and the remnant bins at craft stores. If you have an Ikea near you, they often have great fabrics in various weights and blends that are inexpensive options.
Always test – always test – always test. I’m trying to make sure that you, say it with me now, always test before working on your ‘real’ piece. Many designs look great when they’ve bled a bit, but it can be downright maddening when bleeding colors are the last thing you wanted.
If you’re working on a large project (like curtains), try buying large drop cloths. You’re going to want to change up your paint selection (think a heavier paint, latex will work well).
Keep in mind the functionality of the project. If, for instance, you are making napkins, burlap might not be the best choice.
Paint Selection
We have matte fabric paints, shiny ones, metallics (probably my fave) and glitter. I’ve found that my favorite is hands-down the Tulip brand (this is NOT sponsored post, I just really like their paints).
Wanna know a secret? You can make paints into a fabric paint by picking up a “textile medium.” They have it at most craft stores and online (AMAZON LINK). How cool is this? If you have a boat load of acrylics in your craft cabinet, pick up some of this and start painting! It’s different than the fabric paints, but it works well.
If your’e working with large projects (like curtains), pick up some latex paint and test the area. Depending on your project’s design, a sample sized paint selection from a home improvement store might just be enough.
Diluting or Thinning Fabric Paint
You can dilute the paint or wet the fabric to change the look of the piece. If you work on wet fabric, the paint will bleed. This is great for creating a watercolor-like effect.
You can also add a little water to retail fabric paint, but take care not to dilute the paint too much. If you add too much water, the paint will definitely bleed (even on poly fabrics). Diluting the paint can look great and give a watercolor or faded effect, so practice on a piece of scrap fabric until you know how to get your desired look.
Tools
There are any number of tools you could use, and most can be found in your craft cabinet or around the house. The tools I find myself using the most are:
- thin / small paintbrushes
- stamps (made from cookie and aspic cutters, craft foam, or commercial)
- toothpicks (for very fine detail work)
- sponges / doppers (if using stencils)
- the end of a pencil, bottle caps, anything circular in shape – great to outline with paint and use just the outline to build upon
Fabric Painting with Kids
I gave Elise a piece of cotton and some fabric markers and she made a pillow. Another project was using the puffy fabric paint (straight from the bottle) on a craft bag – Elise had so much fun making her own ‘big girl purse.’ If you have a kid who likes to craft or want to encourage it, add this medium to your repertoire of craft ideas. They will have tons of fun!
Keep a close eye on the kiddos and I’d recommend always protecting clothes with a dedicated craft apron. I like the craft aprons because even if they get paint on themselves, it won’t seep through to their clothes.

Limitless Design Possibilities
Stencils
If you’re going to use a large stencil, a re-positionable spray adhesive is gonna be your bestie. If you’re doing small stencils, you can affix it to fabric using painter’s tape (a.k.a. blue tape). Make sure you don’t use a tape that will transfer the adhesive to your project.
Remove the stencil while the paint is wet. Seriously. Bleed through is only one of the issues that can happen when you leave a stencil on.
If you’re using a stencil, use a sponge (or a pouncer) to apply a thin coat of paint first. Then, remove the stencil and brush the paint on to get a completed design.
I recommend a flat, even surface as a backer if you’re using a stencil. Do not use anything that could shift or move the fabric while you’re working with it. Use clips to secure the backing to the fabric if you want to make doubly-certain that your project won’t move.
Make your own stencils in vinyl by using your cutting machine. Or, read on to learn about some design transfer techniques.
Design Transfers
You can use any image as a guide and transfer it to your fabric. You could print something from the Web, copy a character from a book/comic book, or even transfer one of your original drawings.
For light fabrics, put the design under the fabric and trace it onto the fabric using a chalk pen or washable marker. It might help to outline the design’s major sections in a fine tip permanent marker to see it better through the back of the fabric.
For darker designs, I have used a couple options, both with success. I have:
1. used tulle to trace the design and then transferred it to the fabric using chalk. This can be kind of tricky with the detailed parts of the design.
2. used chalk on the back of the design. For this method, you trace the design on the back of the paper in chalk, put the paper on the fabric, and then trace over the design on the top of the paper. The chalk will transfer to the fabric.
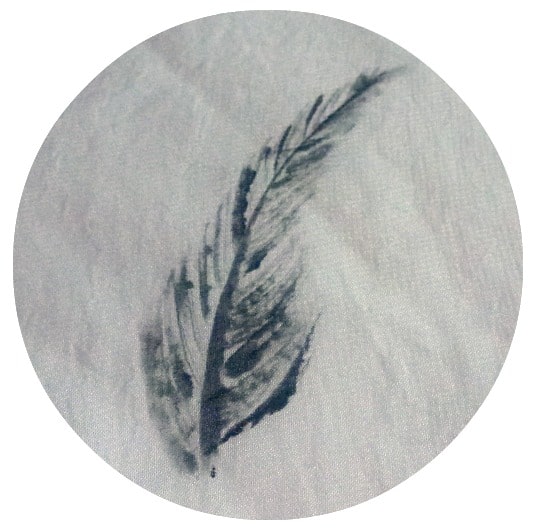
Free-Form Design
This is by far my favorite way to paint fabric. I often get an idea and sketch it out on paper but don’t make any kind of stencil. I give consideration to the project’s size and then pick out colors and begin painting. Geometric free-hand designs, nature-inspired motifs and polka dots are all easy and show up well in this medium.

General Tips
Prepare
I wash all new fabric when they cross my threshold – that’s just me. There are some pretty harsh chemicals used in textile manufacturing and transporting as well as those used for sizing. That being said, some fabrics must be washed before the paint adheres, others work right off the bolt. When you wash and dry, take care not to use any fabric softener and be sure to give it a pressing (iron it) before painting. If your fabric doesn’t allow for ironing, flatten it as much as you can before painting.
There are some fabrics that I weigh down to avoid shifting. These are mostly the lighter, scarf-like materials, but it’s a good habit to have.
Protect
Don’t forget to back the item you’re painting. That means be sure to put a barrier of some kind behind the fabric because the paint will most likely leak through. I’ve used paper towels and had mixed results: sometimes the paint seeped through and stuck, causing pieces of the paper to adhere to the back of the fabric and sometimes, the paper towels worked perfectly. Cardboard usually works the best.
I like putting a barrier like wax paper down only if the fabric is immobilized – I have had experiences where the fabric moved over the wax paper and paint transferred. Not a fun little surprise, let me tell you. There’s more about backing in the stencils section a bit later, but mostly I use a piece of scrap cardboard.
Clean. Clean Again.
Make sure you wash your hands (or wipe them with a clean cloth) repeatedly to avoid accidentally transferring paint. I have a tendency to accidentally get paint somewhere on my hand and then barely catch myself (or not) before I transfer it accidentally.
Instructions
The instructions on the paints and fabrics you use are important. If the paint recommends curing for 24 hours before washing, wait that time (or more). I have never washed out a design or had it fade, but I err on the side of giving the paint a bit more time to get to know the fabric.
If you’re going to be washing and wearing a painted piece often (like a t-shirt), look to the manufacturer’s heat setting instructions. Some techniques call for holding an iron above the fabric but not touching it and others require you to iron on the wrong side of the fabric. If you’re not washing and wearing a piece often, you make the call.
Mistakes
They suck, but they happen. First, take a deep breath and realize that it’s just paint and fabric – you’re not saving lives with your project, so that’s something to help keep you grounded. I have found that sometimes the mistake can be brushed out (with a clean brush) or even dabbed with a baby wipe. It will depend on the fabric, the paint, the amount of paint, and whether or not luck is on your side that day.
Most often however, my mistakes are forever documented in the piece. Humans are imperfect and there is beauty in that.
I hope you’ve read through these and want to get started painting some fabric. Grab an old sheet, scarf, or t-shirt and practice a little before selecting your fabric and design.