
Make a Simple Wood Round Ornament – 3 Ways and 3 SVG Files
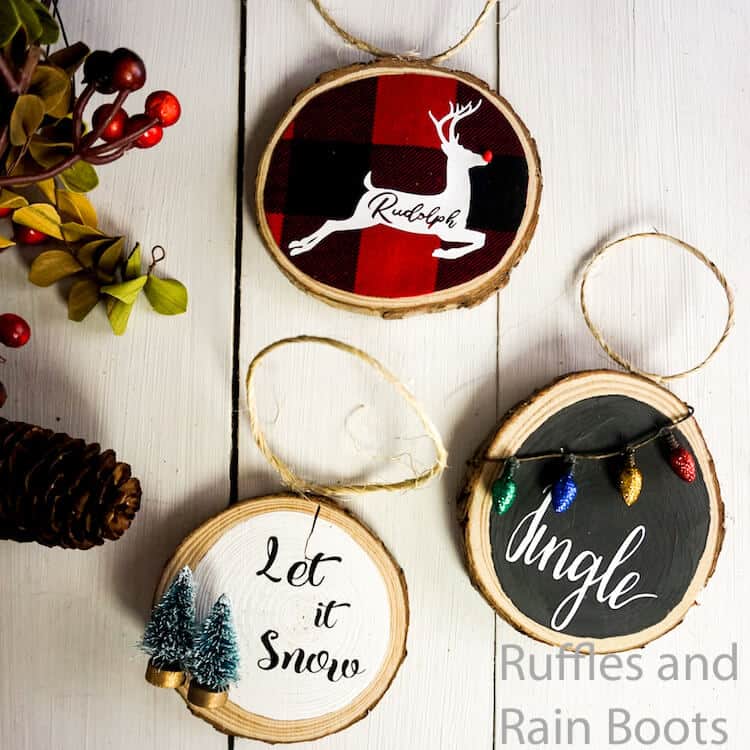
I adore how cute this simple wood round ornament turned out–and that I can make all three variations in just a few minutes.
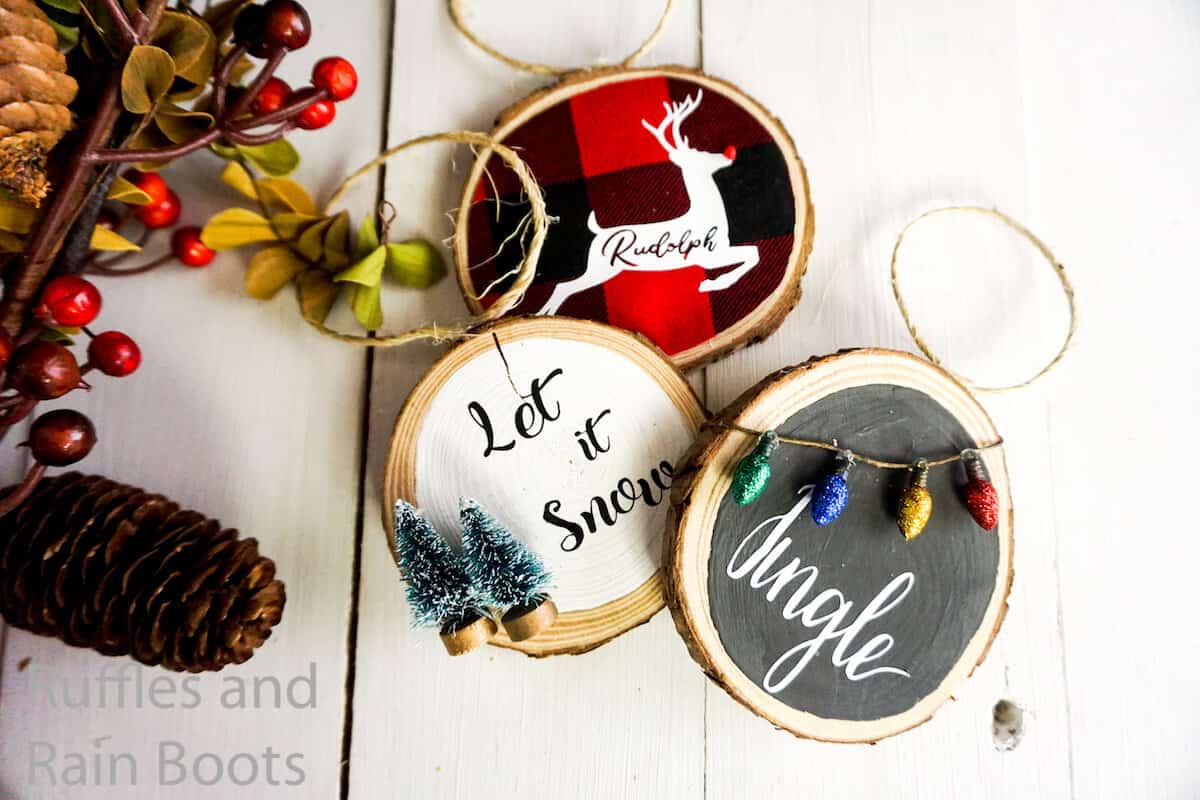
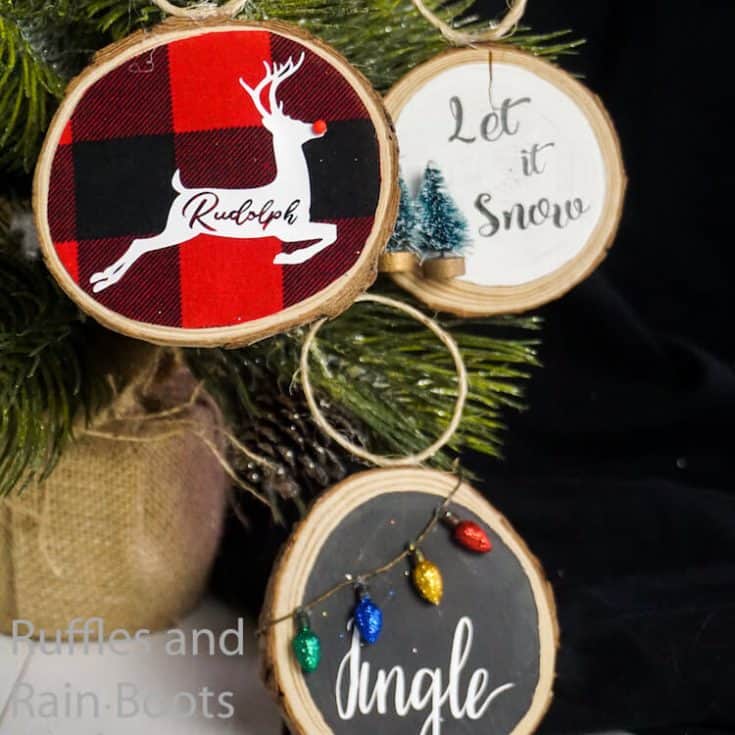
Wood Round Ornament
Here at Ruffles and Rain Boots, we have plans to do a whole farmhouse Christmas this year. The tree is going to be decked out in farmhouse ornaments, there will be Christmas gnomes, and just a schlew of other fun farmhouse Christmas decorations. One of my favorite that I just finished making is this trio of easy wood round ornament ideas.
RELATED READING: DIY GNOME TUTORIALS–FARMHOUSE, HOLIDAYS AND MORE!
Not only are these super simple, but they come together so quickly. Which is one of my favorite things about most Cricut projects, I’ll be honest. There’s nothing like skipping the hour (or two) that it might take to paint lettering on an ornament. And, I’ll be really honest here, wood is not the easiest to hand letter–the rings just catch the pen fibers and it’s all downhill from there. So, Cricut for the win!
If you’re ready to make a few Cricut ornaments for your farmhouse Christmas tree, let’s get started.
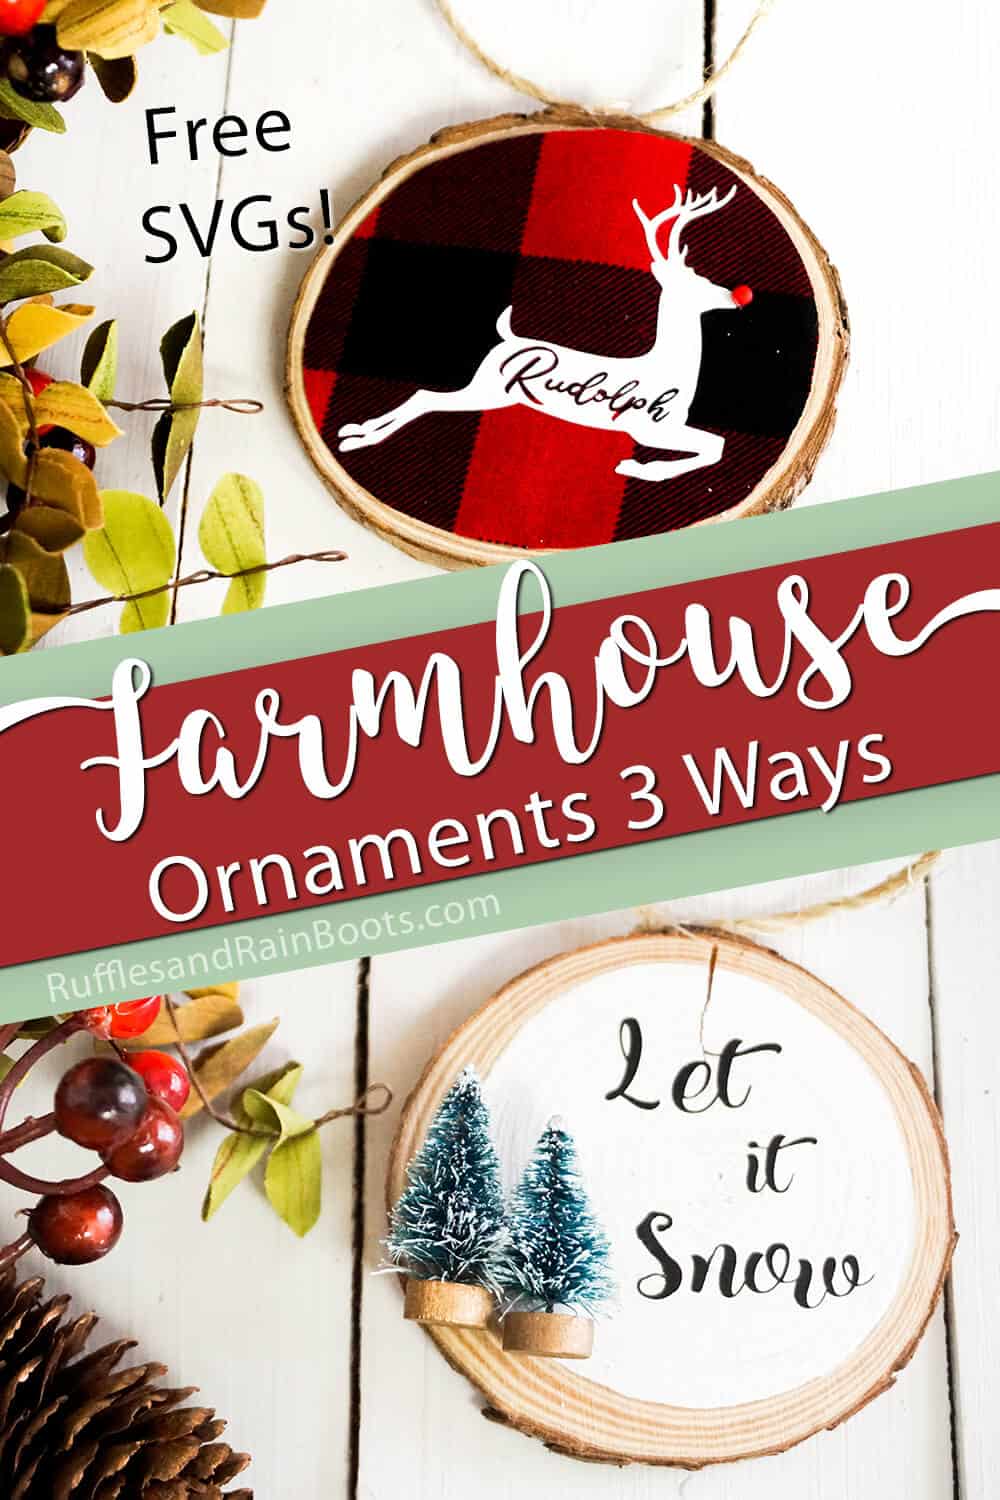
No Time to Make This Now? Pin it for Later
You’re busy, I get it. Pin this to your favorite farmhouse Christmas ideas board on Pinterest and it’ll be here for when you’re ready.
Tips to Make Cricut Ornaments
- First, you need to get your hands on some sizable wood circles (about 3 1/2 to 4 -inches around). And you’re welcome to cut your own (sometimes I do that), but for these, because a good part of the charm is seeing the wood round and the bark and all, well, I decided to buy some. They’re pre-sanded and smooth, so I don’t have to worry about that, and they’re flat–which is not something I can say about cutting wood rounds on my own. So, check out the great wood rounds I got here. The free SVGs are sized to fit this size wood round, so it should all work out in the end.
- When you are painting either of the black or white wooden ornaments, make sure to follow a ring. That way your “circle” isn’t a circle at all, but is more organic, like the wood itself. That adds a lot to the look of these farmhouse ornaments.
- Click here to find the jingle Christmas ornament SVG for Cricut or Silhouette in our shop! And while you’re there, be sure to check out all of the fun (and sometimes free) cut files and graphics I use in my digital crafting!
- Click here to find the Rudloph Christmas ornament SVG.
- Click here to find the let it snow Christmas ornament SVG.
How Do I Make this Wooden Ornament?
I’m so glad you asked. Below is our written tutorial.
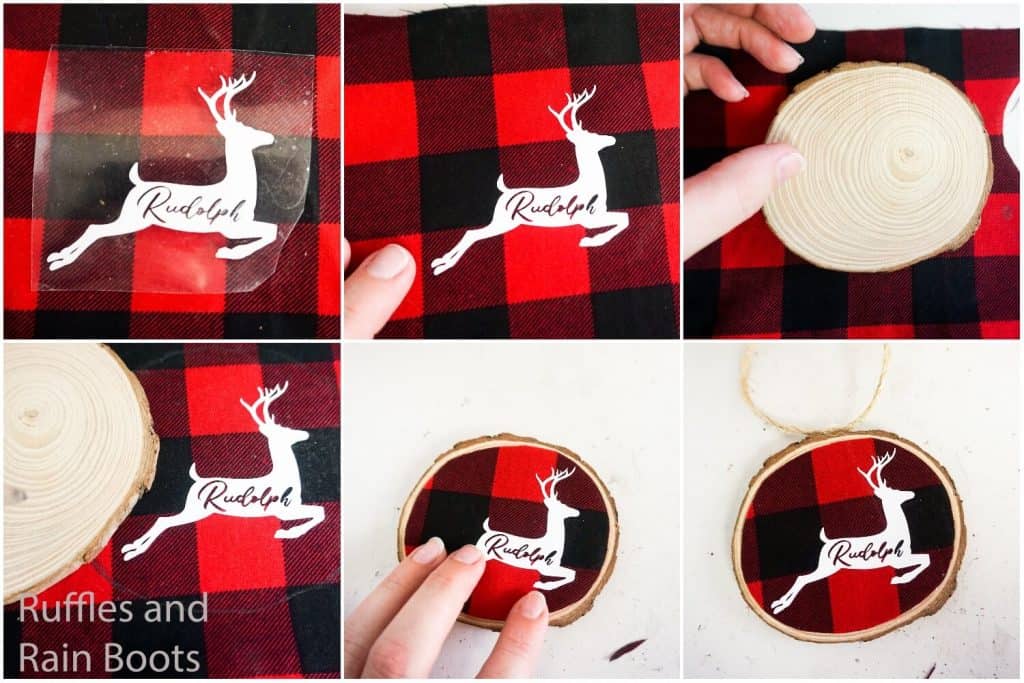
To make the Rudolph ornament, start by making the nose by rolling the tiniest pinch of red polymer clay into a neat ball and baking it per the package directions. Allow to cool fully before handling.
Following the directions of your packaging, affix your Rudolph shape to the front of the buffalo check fabric. Don’t forget to put the little pieces in place for the l, d and h.
Using a pencil, trace the shape of your wood round onto the back of your buffalo check fabric scrap with the deer shape centered in the wood round.
Cut the shape of the wood round from the buffalo check fabric inside the line by about 1/8 of an inch, with the same shape as the wood round tracing.
With as little hot glue as you can manage tack down the buffalo check circle onto the wood round circle.
Hot glue the red polymer clay ball onto the nose of your deer.
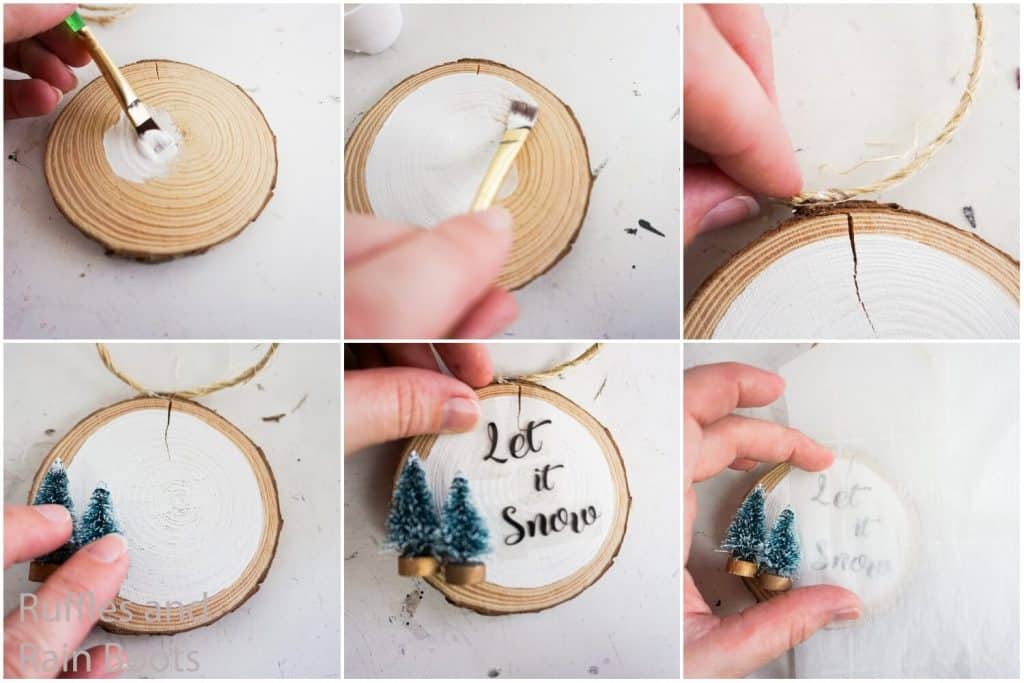
To make the Let it Snow White ornament, start by painting the majority of the center of the wood round with white craft paint. Allow paint to dry fully.
Hot glue two mini bottle brush trees to one side of the wood round, leaving plenty of room for the lettering.
Place your vinyl letters and apply per the package directions.
Cut a 4-inch length of twine.
Hot glue this twine in a circle onto the top of the ornament.
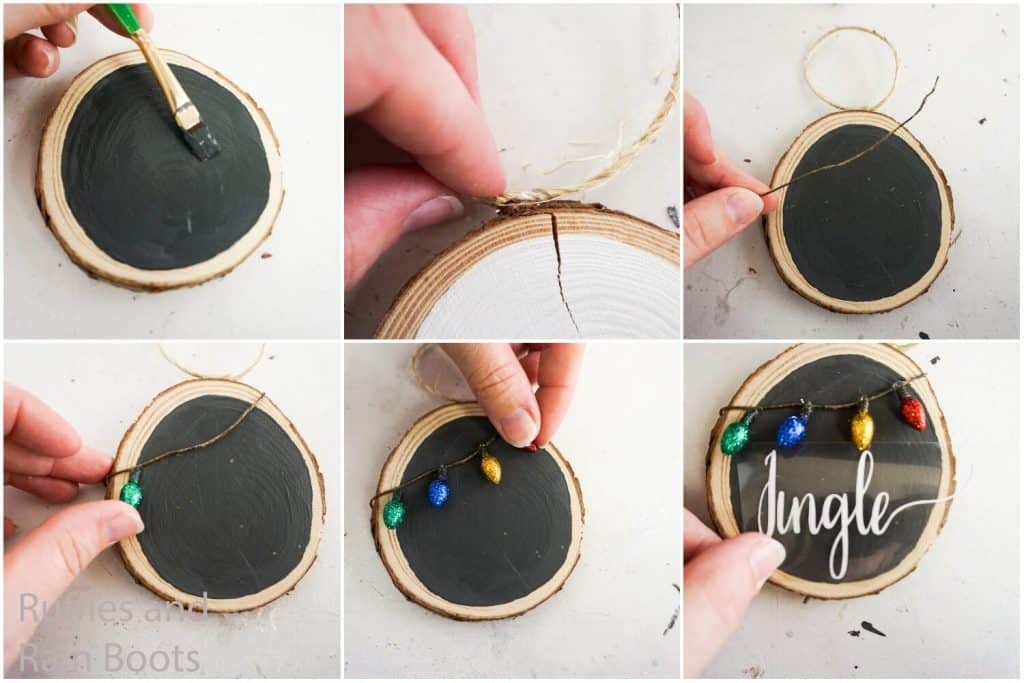
To make the Jingle black ornament, start by painting the majority of the center of the wood round with black chalkboard paint. Allow paint to dry fully.
Wrap the edges of the floral wire around the edges of the wood round and hot glue on the back.
Hot glue 3-5 mini Christmas lights in place along the floral wire length.
Place your vinyl letters and apply per the package directions.
Cut a 4-inch length of twine.
Hot glue this twine in a circle onto the top of the ornament.
Enjoy!
Get 45 More Free Christmas SVG Files
Crafting for the holidays can be hard and I’d like to help make it easy. I’ve put a ton of my brand new designs into the shop and are giving them away to subscribers for free. Happy holidays, indeed. Whether or not you’re already getting the Ruffles and Rain Boots newsletter, just pop your info into the box below and you’ll receive 12 days of crafty happiness delivered right to your inbox.
More Farmhouse Christmas Ornaments You Might Like
- Wood Gnome Ornaments – Seriously adorable and way too easy to make with your Cricut, you just cut them out, paint and attach a nose and beard. So cool!
- Christmas Gnome Ornaments – Far and above, our most popular DIY project ever, these gnome ornaments are so cute, you’ll squee.
- Gnome Felt Ornament – Easy to make and oh so cute, you can have this adorable gnome made in about 10 minutes.
Please Save This to Pinterest
Your shares are how this site grows and I am sincerely grateful. Know a friend who’d like this? Please share it on Facebook or save it to your favorite Christmas DIY ideas board on Pinterest.
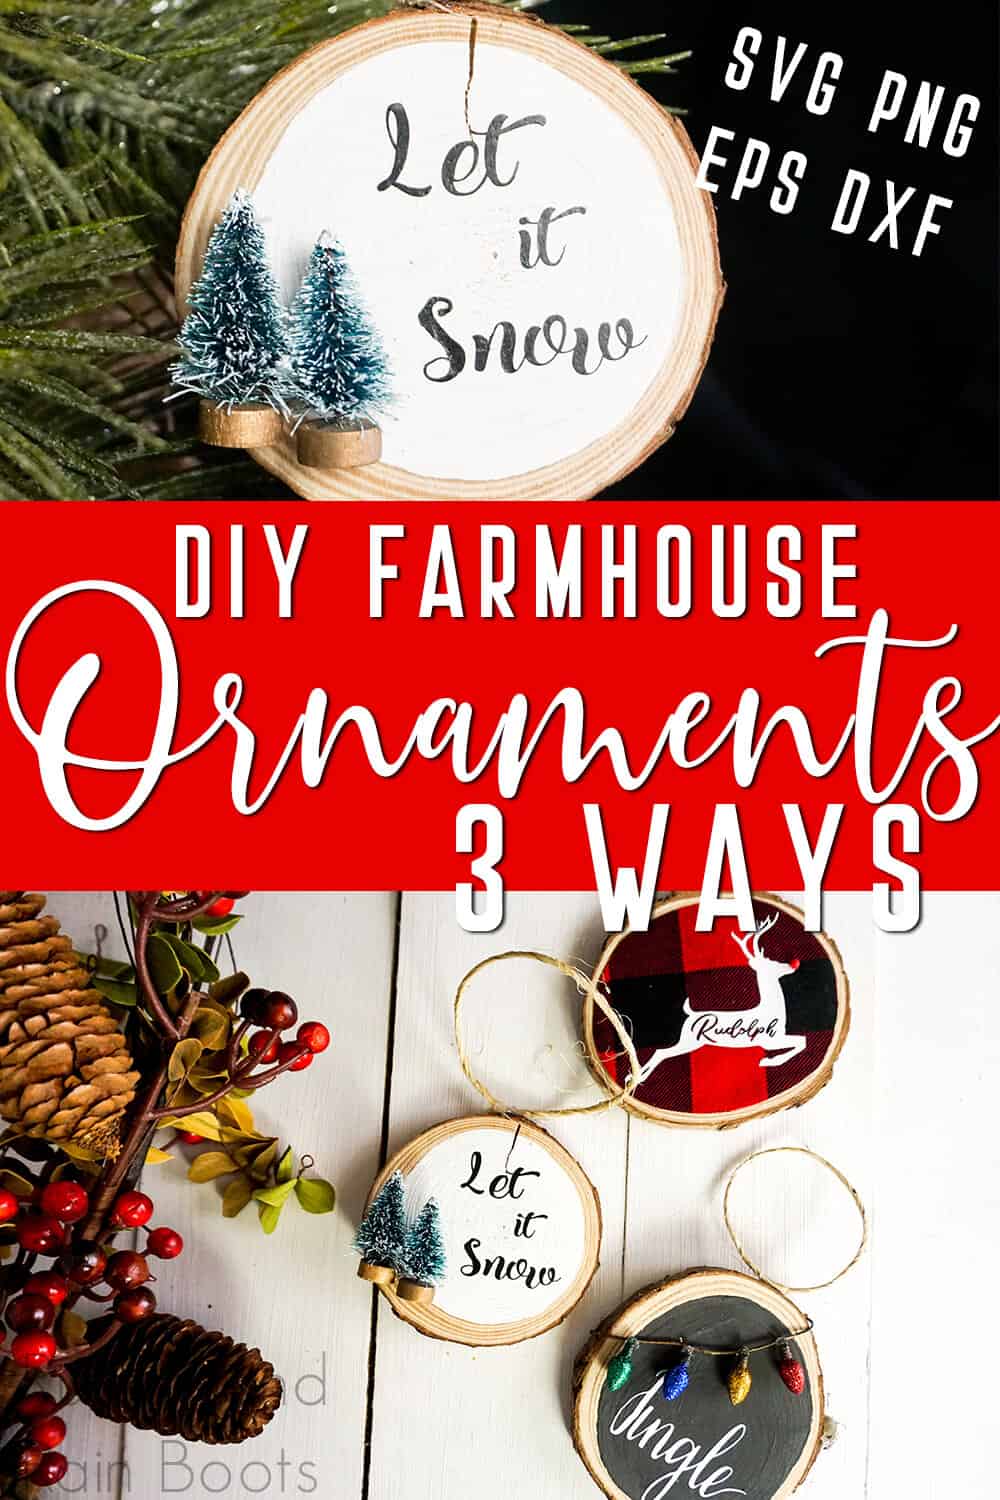
Wood Round Ornament 3 Ways
I adore how cute this simple wood round ornament turned out--and that I can make all three variations in just a few minutes.
Materials
- 3 Wood Rounds 3 1/2 to 4 -inches in diameter
- SVGs
- 12-inches of Twine or Ribbon
- Mini Bottle Brush Trees (2-inches or shorter)
- Mini Christmas Lights (I found mine at the craft store, but thees are similar)
- Scrap of Buffalo Check Fabric
- White Craft Paint
- Black Chalkboard Paint
- 5-inch Long Length of Floral Wire
- Red Polymer Clay (just a tiny pinch)
- Rudolph SVG
- Let it Snow SVG
- Jingle SVG
Tools
- Hot Glue Gun and Glue
- Paint Brushes
- Scissors
- Oven
- Pencil
Instructions
- To make the Rudolph ornament, start by making the nose by rolling the tiniest pinch of red polymer clay into a neat ball and baking it per the package directions. Allow to cool fully before handling.
- Following the directions of your packaging, affix your Rudolph shape to the front of the buffalo check fabric. Don't forget to put the little pieces in place for the l, d and h.
- Using a pencil, trace the shape of your wood round onto the back of your buffalo check fabric scrap with the deer shape centered in the wood round.
- Cut the shape of the wood round from the buffalo check fabric inside the line by about 1/8 of an inch, with the same shape as the wood round tracing.
- With as little hot glue as you can manage tack down the buffalo check circle onto the wood round circle.
- Hot glue the red polymer clay ball onto the nose of your deer.
- To make the Let it Snow White ornament, start by painting the majority of the center of the wood round with white craft paint. Allow paint to dry fully.
- Hot glue two mini bottle brush trees to one side of the wood round, leaving plenty of room for the lettering.
- Place your vinyl letters and apply per the package directions.
- Cut a 4-inch length of twine.
- Hot glue this twine in a circle onto the top of the ornament.
- To make the Jingle black ornament, start by painting the majority of the center of the wood round with black chalkboard paint. Allow paint to dry fully.
- Wrap the edges of the floral wire around the edges of the wood round and hot glue on the back.
- Hot glue 3-5 mini Christmas lights in place along the floral wire length.
- Place your vinyl letters and apply per the package directions.
- Cut a 4-inch length of twine.
- Hot glue this twine in a circle onto the top of the ornament.
- Enjoy!
Notes
For more fun Christmas ornament tutorials, visit RufflesandRainBoots.com
