
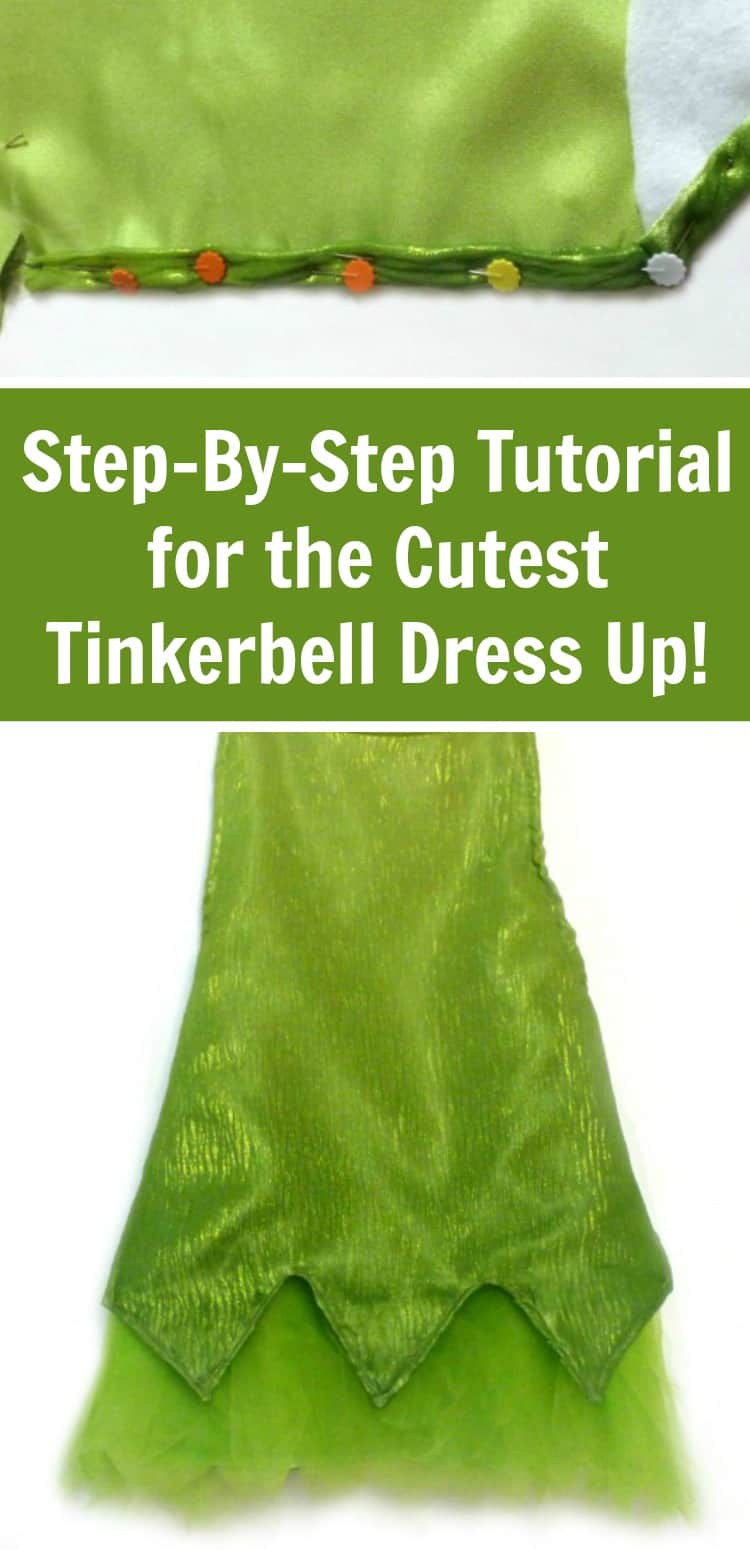
A TinkerBell Costume for Any Disney Fairies Fan
You can make this DIY TinkerBell Costume (it has a no-sew option, too)! We’ve made many dress up costumes and share our free patterns and proven beginner sewing tutorials to walk you through it step-by-step.

Beginner Level Tutorial – DIY Tinkerbell Costume
My latest dress up creation, a Tinkerbell dress-up costume, is Elise’s favorite right now. It was by far the easiest dress up apron I’ve ever put together.
This only took about 2 hours to complete and that included taking pictures and notes for this tutorial. Note that this is definitely a beginner level project, so even if you’ve never sewn a stitch, commandeer a sewing machine and start stitching!
If you have a fairy fan in your house, this is the perfect addition to their dress-up box or Halloween festivities.
RELATED READING: See All the Halloween Crafts and Food on Ruffles and Rain Boots!
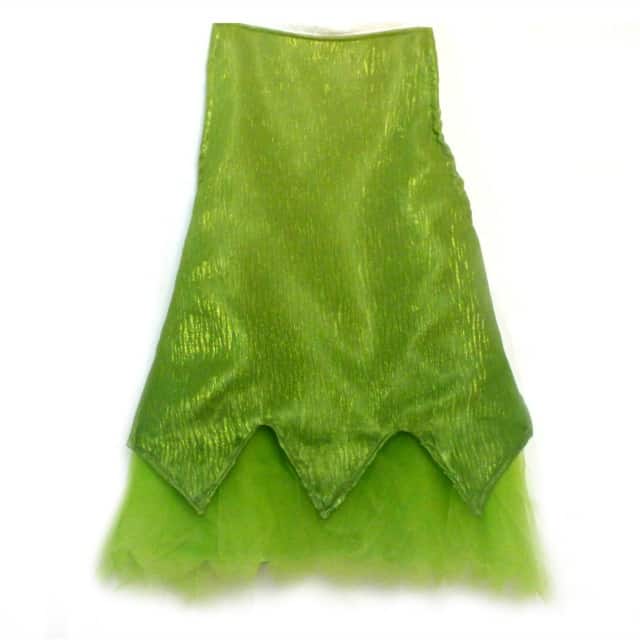
Look how cute – caught in mid-twirl! I made mine a bit big for my daughter because I want a few years out of this, but you can make it as long or short as you want. Tink’s dress might be the subject of debate, but we all have to concede: that little pixie rocks can rock a mini!
Some people might question the dress up apron concept, and to those people: I urge you to reconsider. I adore this concept for many reasons – enough reasons to warrant an entire article to themselves. They deserve it. Here are some highlights:
- Usage life, people. Kids grow fast.
- Pretend play = crucial. I can throw a whole lot of science-y stuff at ya, but this is a tutorial for TinkerBell… I think it’d be a bit out of place.
- Many ages = 1 apron. Can you say sibling love instead of rivalry? I’d like to think I’m helping to foster sisterhood that more resembles FROZEN than Cinderella.
- This bullet point is just here to see if you’re still reading – go ahead and tweet this if you are. Read the full article here for some more insight.
Tinkerbell Costume Supplies
I purchased all of my supplies at Jo-Ann’s and it cost only $15 to make this (including the coordinating green thread)! This is a very inexpensive costume to make. I’m not even sure you can buy a TinkerBell dress up outfit for $15, can you?
- craft apron
- 1/2 yard green dress up satin
- 3 yards of green tulle (matte)
- 1/2 yard of specialty fabric – I chose a pleated foil ombré because it reminded me of the veins in leaves – perfect for TinkerBell!
- sewing supplies, coordinating thread
- scraps of iron-on interfacing (optional) and fabric glue (optional)
Tips for Making a DIY Tinkerbell Costume Apron
Before we start, you might want to take some measurements or have some rough guesses flushed out. I measured the drop from the top of the apron piece to where I wanted the bottom of TinkerBell’s dress to fall (not the tulle). I used that to determine where the bottom points of TinkerBell’s dress should be cut. Then, I measured the drop from my child’s waist to where I wanted the tulle to fall (and cover the craft apron). I also measured my child’s waist to determine the width of the tulle and the cover piece to which it is attached.
For reference, my daughter is 2.5 years old and wears a 2T or 3T in clothes. Also for reference, look up back stitching if you don’t know what it is. Nearly every sewing machine has this feature, and it is important you back stitch at the start and end of a sewing interval. Do not forget to back stitch – I do not note it in every sewing step, but please remember that this is a necessary step.
Tinkerbell Costume
You can make this DIY TinkerBell Costume (it has a no-sew option, too)!
Materials
- craft apron
- 1/2 yard green dress up satin
- 3 yards of green tulle (matte)
- 1/2 yard of specialty fabric - I chose a pleated foil ombré because it reminded me of the veins in leaves - perfect for TinkerBell!
- scraps of iron-on interfacing (optional) and fabric glue (optional)
Tools
- sewing machine
- scissors
- coordinating threads
- pins
Instructions
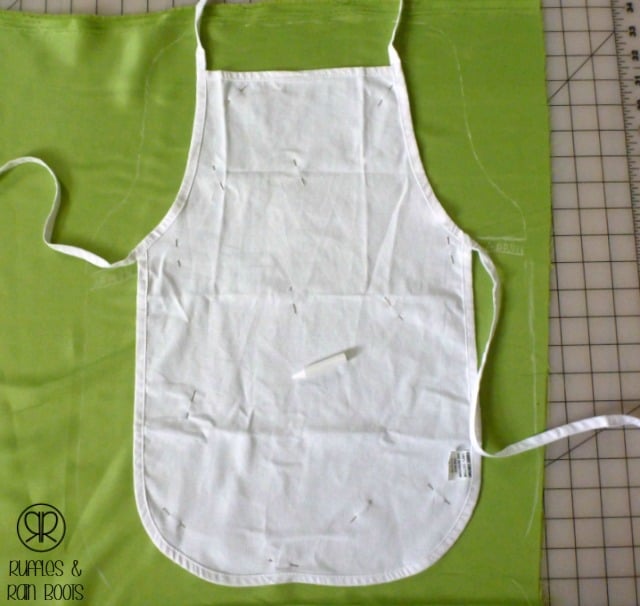
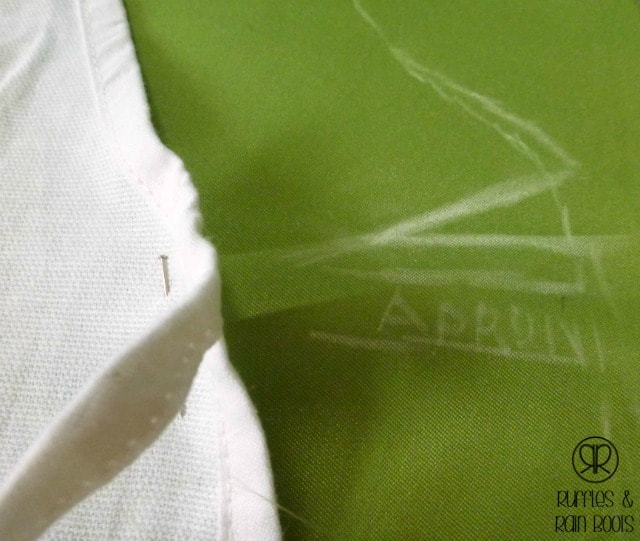
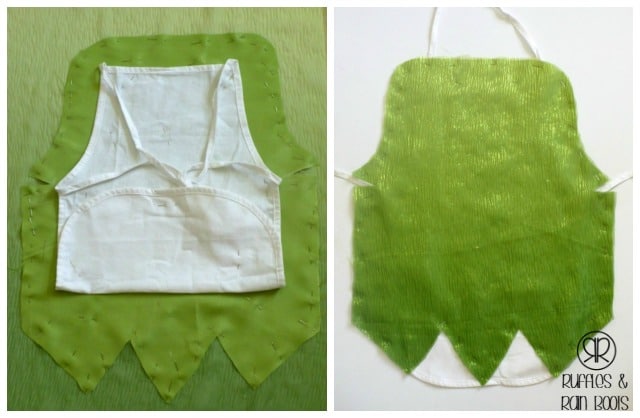
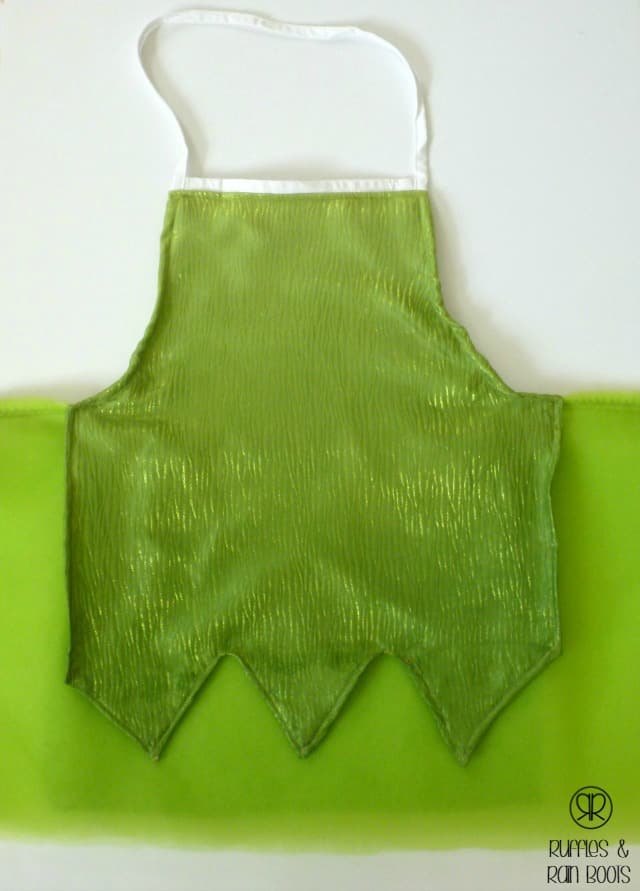
- I put the apron face down on the back of the satin and pinned them together to avoid shifting. Then, I traced around it, adding a 2-inch buffer (except the bottom). I made indications where the apron strings were so that I could cut the fabric in a notch there.
- For the bottom of the satin, I cut the satin into points shorter than the bottom of the craft apron, but you can make it longer if you like. Just measure your child from the waist down to how long you want the body piece to be. I also wanted the points to be relatively similar in size and shape, so once they were roughly cut, I folded the thing in half and trimmed up one side.
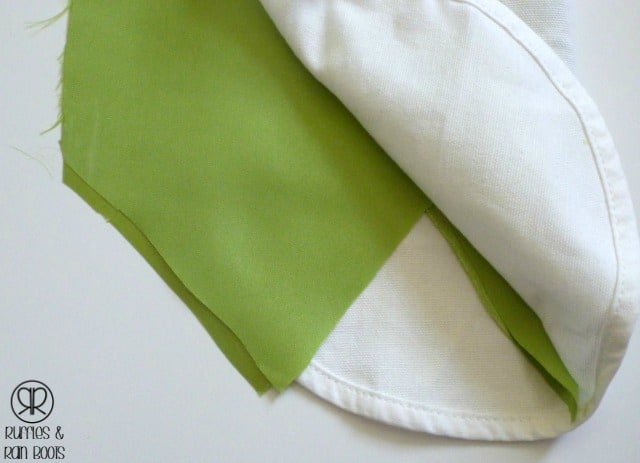
- Once the satin body piece was cut, I put it face down on the back of my 'special' ombré fabric and traced the edge of the satin. Un-pin the satin piece from the apron and pin the satin and special fabric together.
- I cut all of my tulle into 18 x 13-inch sheets. This allows the tulle to extend about 5 inches on either side of the apron's strings to wrap around the entire waist and give it that dress effect. Once all of the yards are cut, stack the pieces and line them up the top edge as best you can.
- I put a piece of satin behind the tulle to fully cover the craft apron and to add some color depth to the tulle.
- Your piece of satin should be cut to the same width and height of your tulle with 3/4 of an inch added on all sides to account for hemming. For reference, my apron cover piece should have been 19.5 inches by 14.5 inches. This would yield a piece that would line up with the tulle after hemming: 18 x 13 inches.
- Because dress up satin frays badly and we don't want our TinkerBell costume to unravel, you will want a folded over (double) hem to tuck in all raw edges. This is why we added 3/4 of an inch to all sides. Fold it in once and then again. Again, your goal is to get it to the same size as your cut pieces of tulle. Sew all sides with a top stitch and grab your tulle.
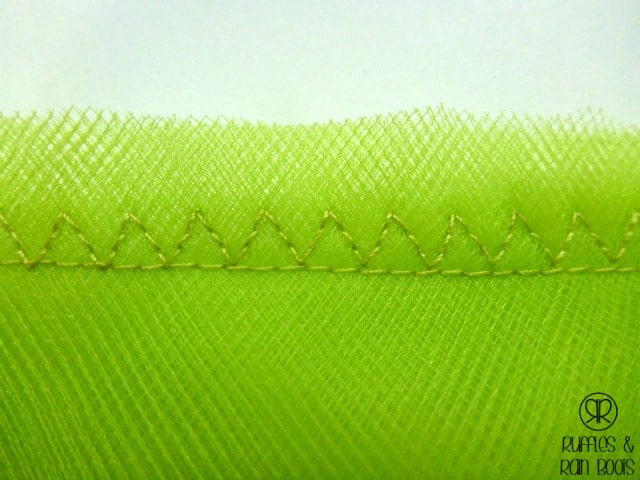
- You can choose to run a straight stitch along the top edge of the tulle stack or just pin your stack to the hemmed satin piece you just made. Either way, sew that stack of tulle to the satin and go ahead and reinforce it a bit with a zig-zag stitch if you have that stitch on your sewing machine (you should).
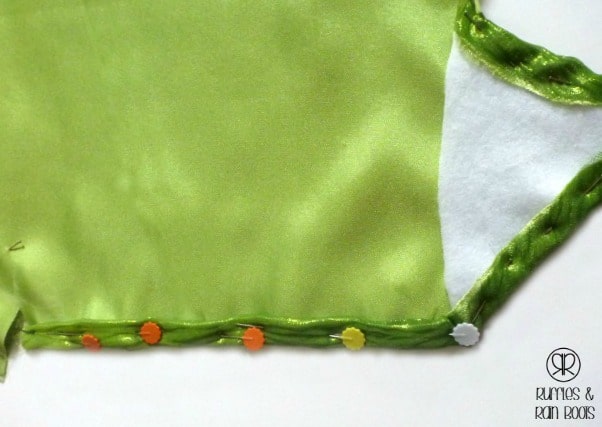
- Start on one side of the bottom of the body piece (pinned together satin and special fabrics), and by bottom I mean the bit under the notch you cut. You will pin a double hem 1/4 inch or smaller, working your way to the first point of the dress. I pinned it like crazy (yeah, I know) and it curled up a little. In order to combat this, I decided to stick some interfacing in there.
- If you're going to use the interfacing in the points, just a note: I cut it into a triangle that roughly fit the dress points with a good 1/4 inch cushion all around. I found, however, that cutting off the very tip of the interfacing (the bottom-most point) worked better to actually get the fabric to a crisp point. I use iron-on interfacing because I had to use the iron to smooth out the satin body piece anyway. Once the interfacing was ironed on, I used a bit of fabric glue on the very top edge (the only side it wouldn't be sewn down). Much like the interfacing, this step might not be entirely necessary but I did it because once I complete a project, I don't want to have to work on it again.
- Double fold over the fabric on one side of the bodice and pin. Leave the top alone for now (you don't need to fold it over or hem it at all yet). Note that you will not fold over the fabric at the notch for the apron strings.
- Center the piece and extend the edges onto the strings of the apron (line up the top of the tulle with the waist / ties of the apron). Sew along the apron string, across the body of the apron, and continue along the other apron string until you reach the end of the piece. I tend to back stitch at intervals along the waist and apron strings because it's my opinion that this area takes a lot of abuse, and a few extra stitches sure doesn't hurt.
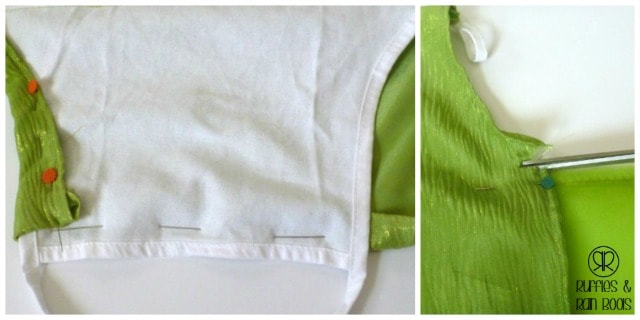
- Lay your body piece face down and then lay the craft apron's front directly on it. Wrap the bodice piece around the sides of the apron. Take care to turn down the top of the fabric before securing the very top of the first side. I was able to use the top of the apron as my guide to get a straight fold along the top of the bodice. Once the top was pinned, I continued to the other side of the bodice and pinned it as well.
- This is the part where you might need to trim your "notches" a bit more to have the body of the dress fall flat against the apron. Just snip it a bit more until the sides of the apron are wrapped around and the other part is flush against the apron string.
- Once you've pinned it so that it lies flat, top stitch the entire bodice to the apron and the notches to the apron strings.
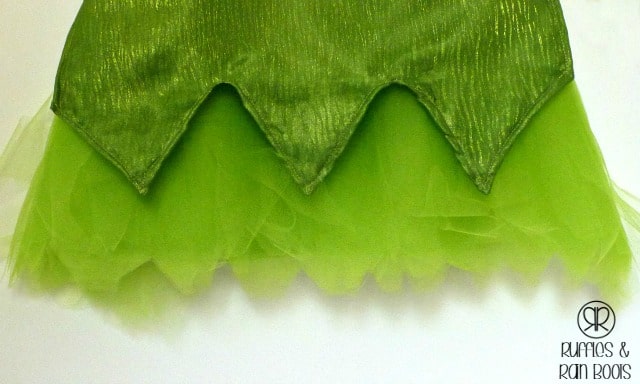
- Cut the first 2-3 layers of tulle into 2-inch strips along the full width of the tulle. Then, cut the bottom all all layers of tulle into points. I liked the uneven look, but snip 'til your hearts' content.
Notes
For more Disney dress up, visit Ruffles and Rain Boots.
Please Save This to Pinterest
Your shares are how this site grows and I am sincerely grateful.
Thank you for spending some time with us today. Before you check out some of our other awesome dress up costumes, would you consider signing up for our email newsletter? We love sharing with you!

I’m in the process of making this now and have a question since I bought everything before I read the whole instructions, :( Is there a back or is tying the strings the back?
If you’re building it on the apron base, you will have an over the head piece and the apron tie back (which goes around the waist and the back, securing the costume).
If you’re not building it on an apron base, you’ll need to create tie backs and a looo for the neck (or duplicate the front, add side panels, and see the pieces together using at least a half-inch seam.
Hope that helps!
What a FUN idea! I have never heard of a ‘dress up apron’ but it makes so much sense! Also- tinkerbell was the perfect choice, she was always the ‘princess’ I dressed up like growing up.
She is really digging the fairies and this little box has become quite the hit! Thanks for stopping by today, Colleen!
Sarah,
How CUTE is this! Wow, I had no idea you were so awesomely crafty! And also, I love your design elements here. Your logo and text dividers are so brilliant! I can’t believe I’m not subscribed to your feed yet. Remedying that now.
Well done, lady!
Brittany
Oh my goodness! This is AMAZING! Those wings look amazing – can’t wait for that tutorial too!
I actually went to our farmer’s market yesterday and a lady was selling apron dresses and I was stunned at her price – $40 ($55 if you buy a reversable one)! The thing is, they were nice but nowhere near as beautiful and intricate as the ones you’ve made.
Thanks for sharing Sarah!
xoxo