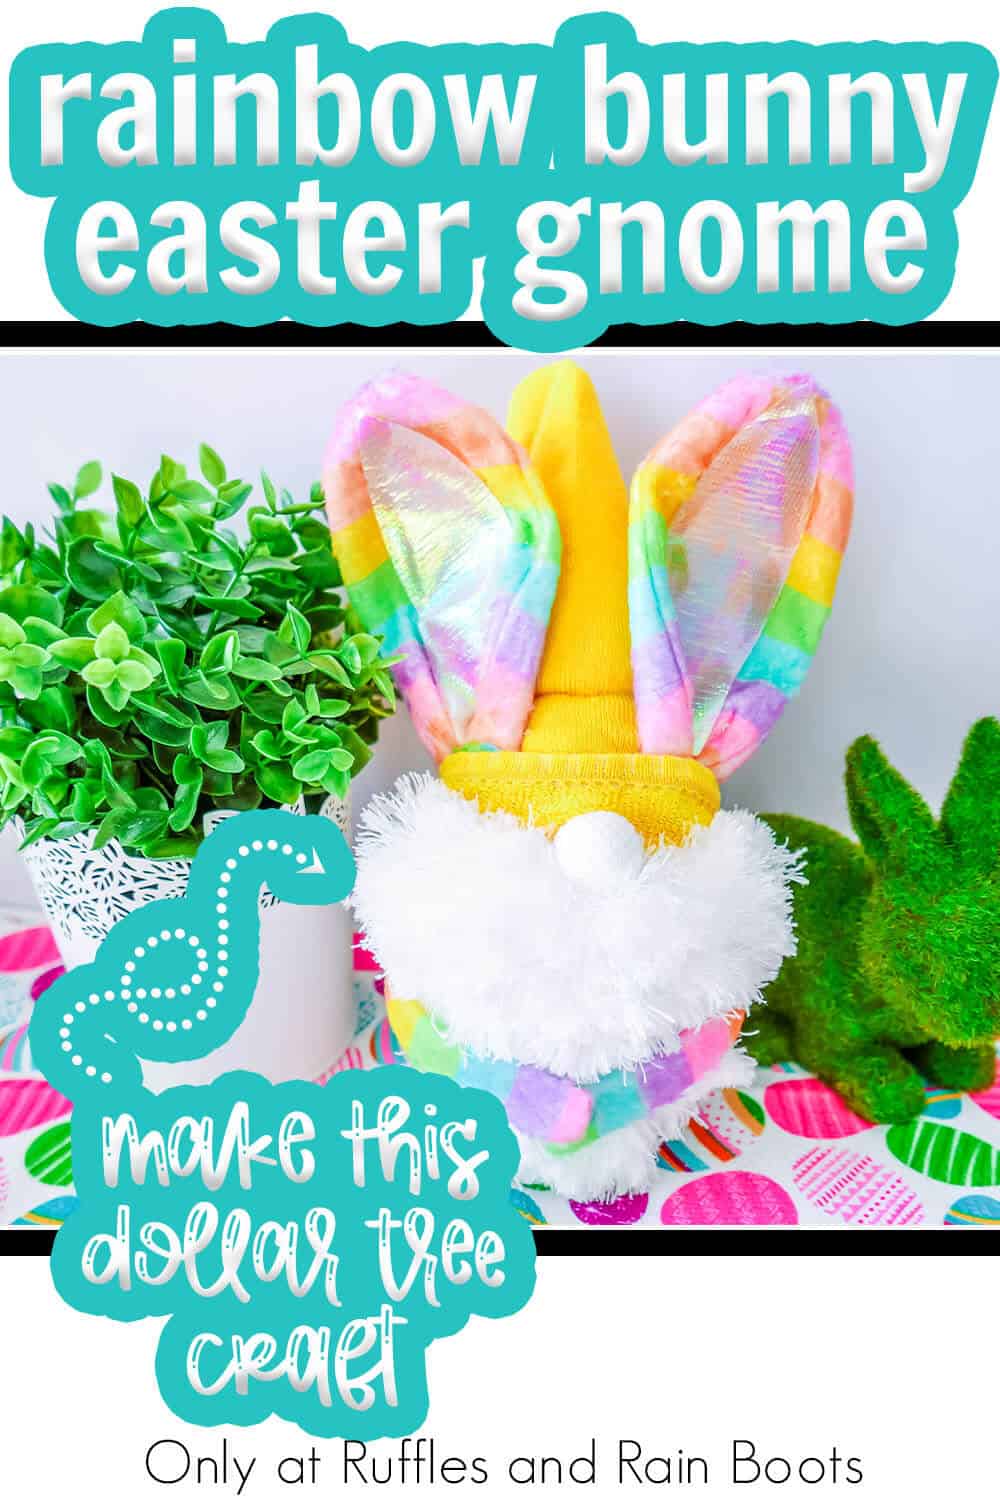
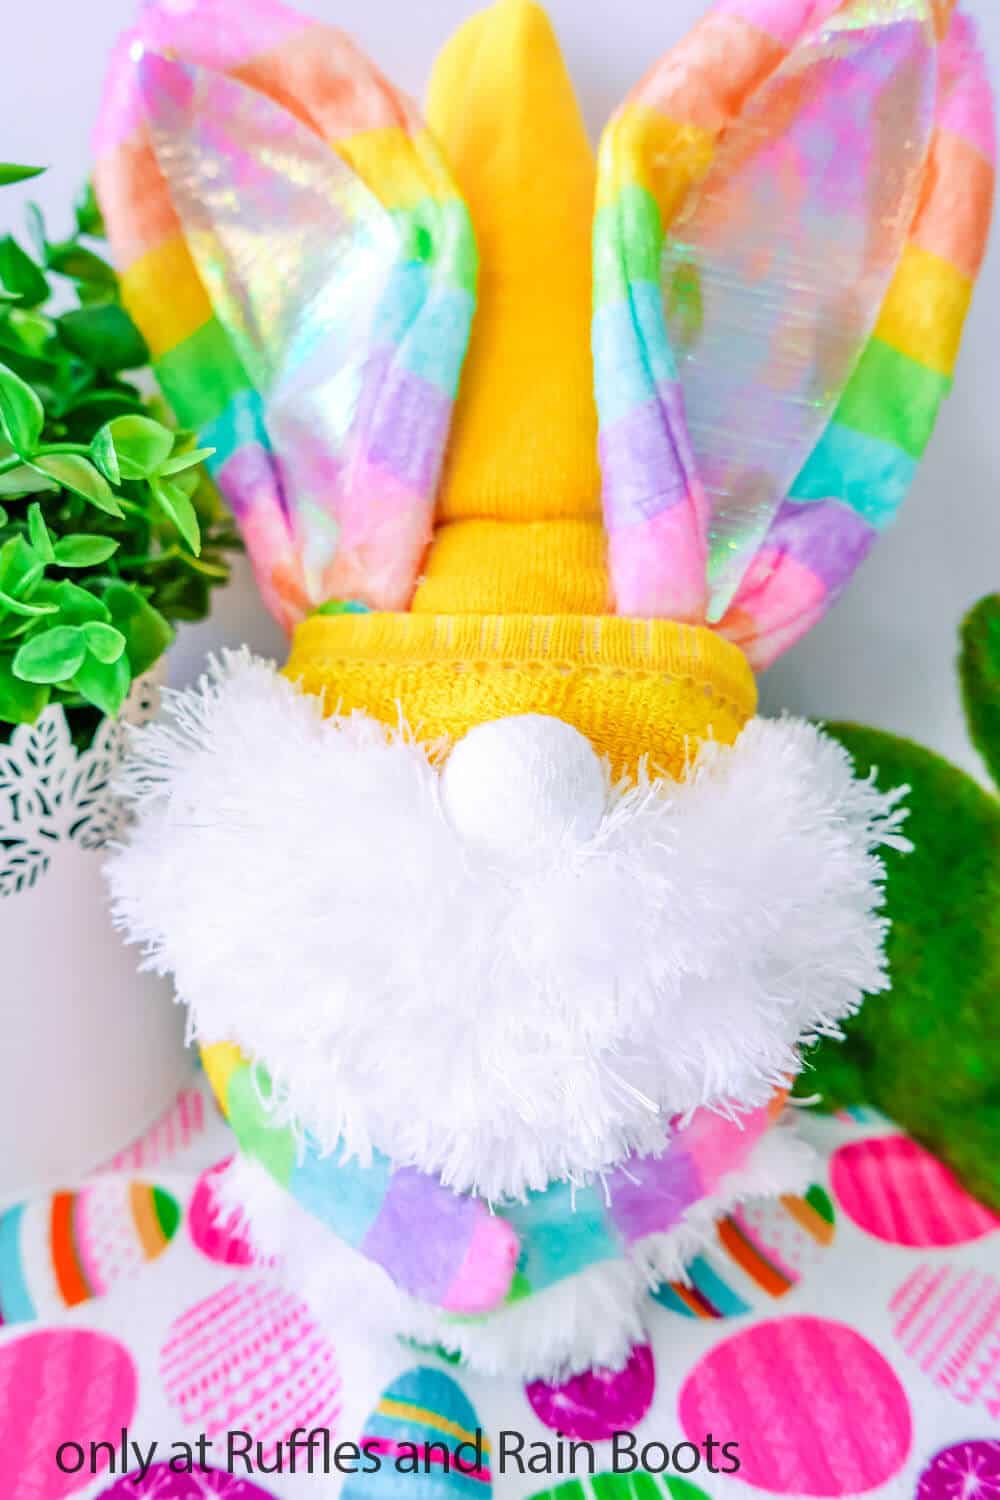
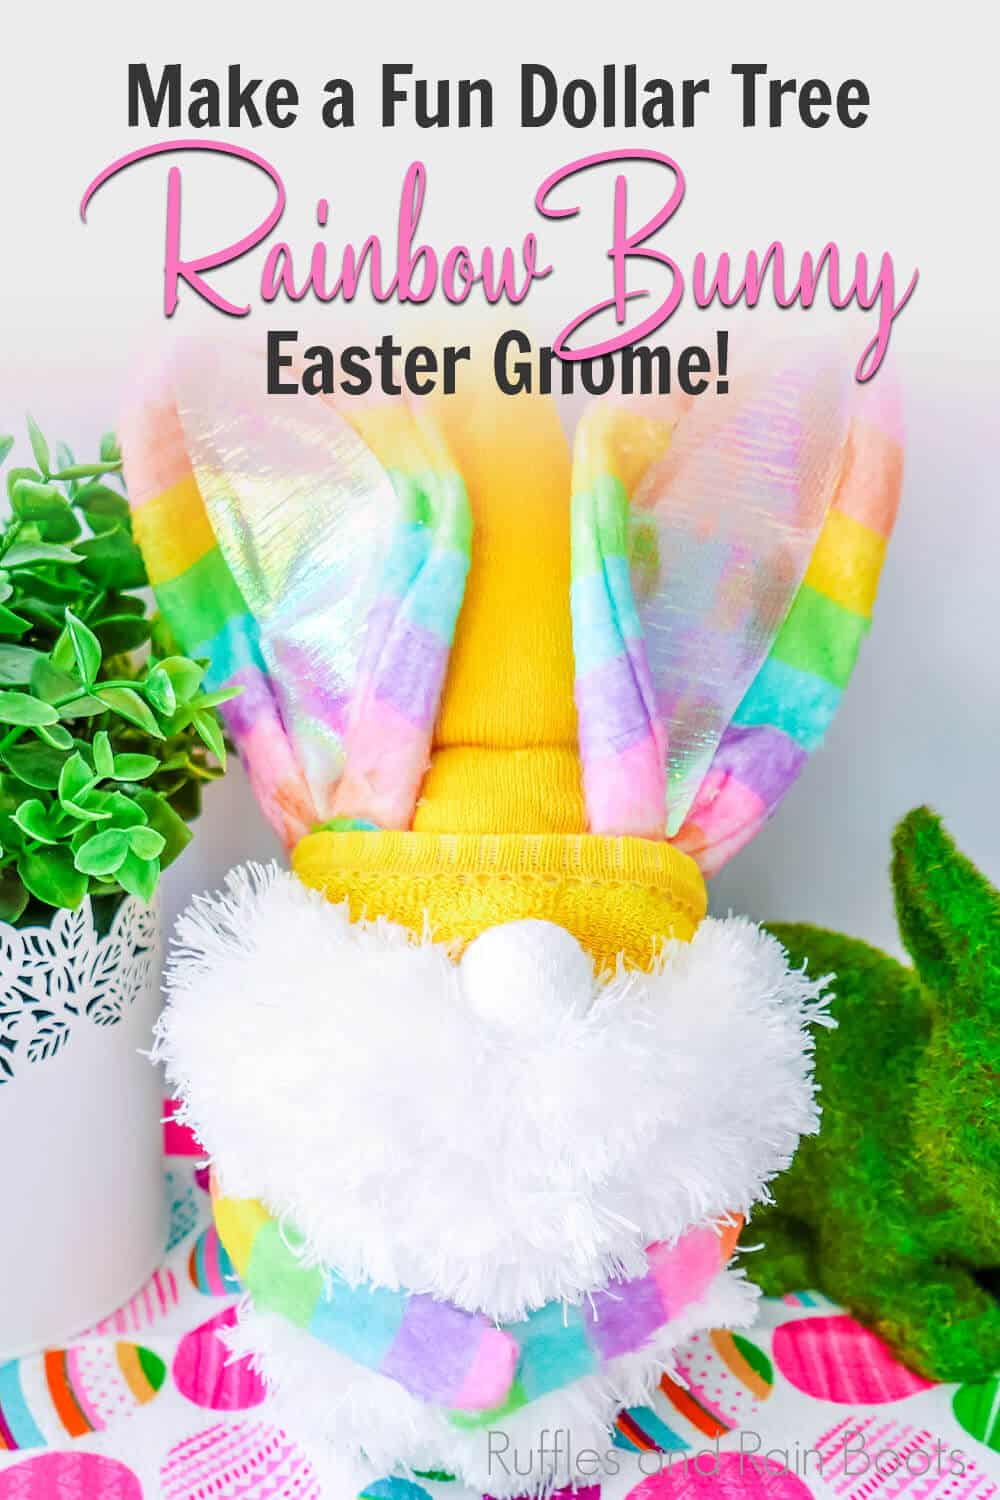
Make This Fun Dollar Tree Rainbow Bunny Gnome That’s Fun and Fast!
This rainbow bunny gnome is the easiest, cutest little Easter gnome that you can imagine – and it’s all made from Dollar Tree supplies!
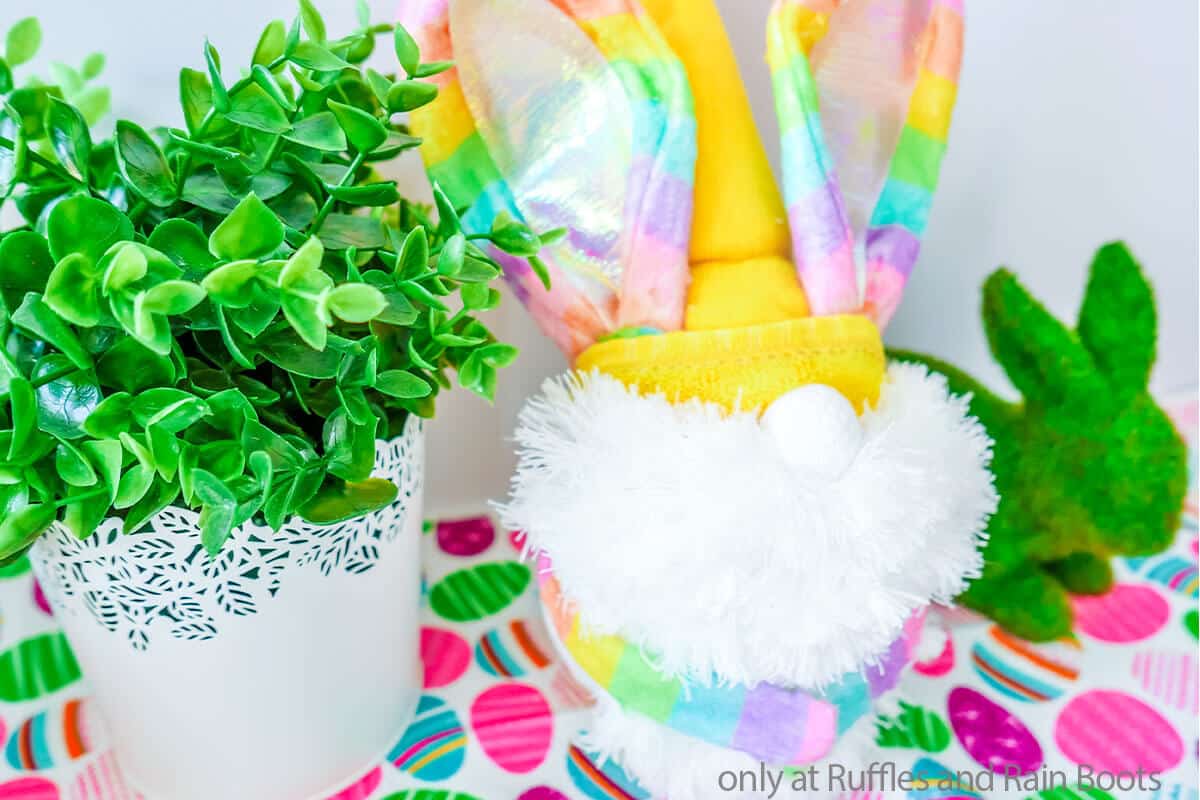
Rainbow Bunny Gnome
Here at Ruffles and Rain Boots, we are definitely connoisseurs of every type of gnome you can imagine. No matter which way they come. But the best ones are the ones that are fast, easy and unique in some fun way! This easy rainbow bunny gnome not only ticks off all of those criteria, but it’s also one of the most fun Easter gnomes I think I’ve made.
RELATED READING: THE CUTEST EASTER BUNNY GNOME
The color combination is unbelievably perfect, like the pieces were made to come together. And the resulting witty bitty gnome? I wuv him. If you’re ready to make an Easter bunny gnome that really captures the bright colors of spring, let’s get started.
Get Secret Gnomes, Tips, & Freebies Delivered!
What is the best pattern to use when you don’t want to sew? Do you know the secrets to a properly-proportioned gnome? Do you know where to get the best-priced fur?
Get all of this (and exclusive content just for you) delivered right to your inbox with the gnome-making series, free of charge. Sign up to get the once-weekly newsletter (and a jaw-dropping special offer)!

No Time to Make This Now? Pin it for Later
You’re busy, I get it. Pin this to your favorite DIY gnomes board on Pinterest and it’ll be here when you’re ready.
As an Amazon Associate, I can earn from qualifying purchases.
RELATED READING: Love Rainbows? Make This Rainbow Popcorn Recipe!
Tips to Make a Dollar Tree Easter Gnome
- If you want a pink nose, don’t panic. It’s easy for you to make that nose pink. Just grab some blush from the Dollar Tree and give that nose a light dusting of blush before you put the beard on your gnome’s face. I’ve done this several times and the blush really seems to set well and doesn’t fade.
- I never have any trouble finding the little duster mop I used for this gnome’s beard in my local Dollar Tree, but I have a friend that complains that her Dollar Tree never has them. So, I have come up with some ideas for alternative beard materials you can look for at the Dollar Tree that I’ve spotted at my local store:
- Grey Mop Heads or White Mop Heads
- Faux Fur Pillows
- Faux Fur Bath Mats
- Stuffed Animal Fur (check out the gnome I made with one stuffed bear here)
- Moss (this makes a fun rustic look)
- Curled Ribbon
- This little gnome does NOT have to be alone. I didn’t have time to whip-up a gnomette myself, but if you wanted to make one, all it would take is making a second gnome, then cutting your beard material into 1-inch wide strips before braiding them.

How Do I Make this Rainbow Bunny Gnome?
I’m so glad you asked. Below is our written tutorial.
Rainbow Bunny Gnome

I love how easy and fast making this Dollar Tree rainbow bunny gnome was. Just a great way to make an Easter gnome with a hip and a hop!
Materials
- 1 white sock
- 1 yellow sock
- Small pebbles, preferably in white, but any color will work
- Polyfill (I had some leftover from a previous project)
- 2 rubber bands
- 1 marble
- 1 small foam cone
- 1 rainbow Easter Bunny ears headband
- 1 white microfiber duster/mop head
Tools
- Scissors
- Hot glue and glue gun
- Craft Knife
- Wire cutters
Instructions
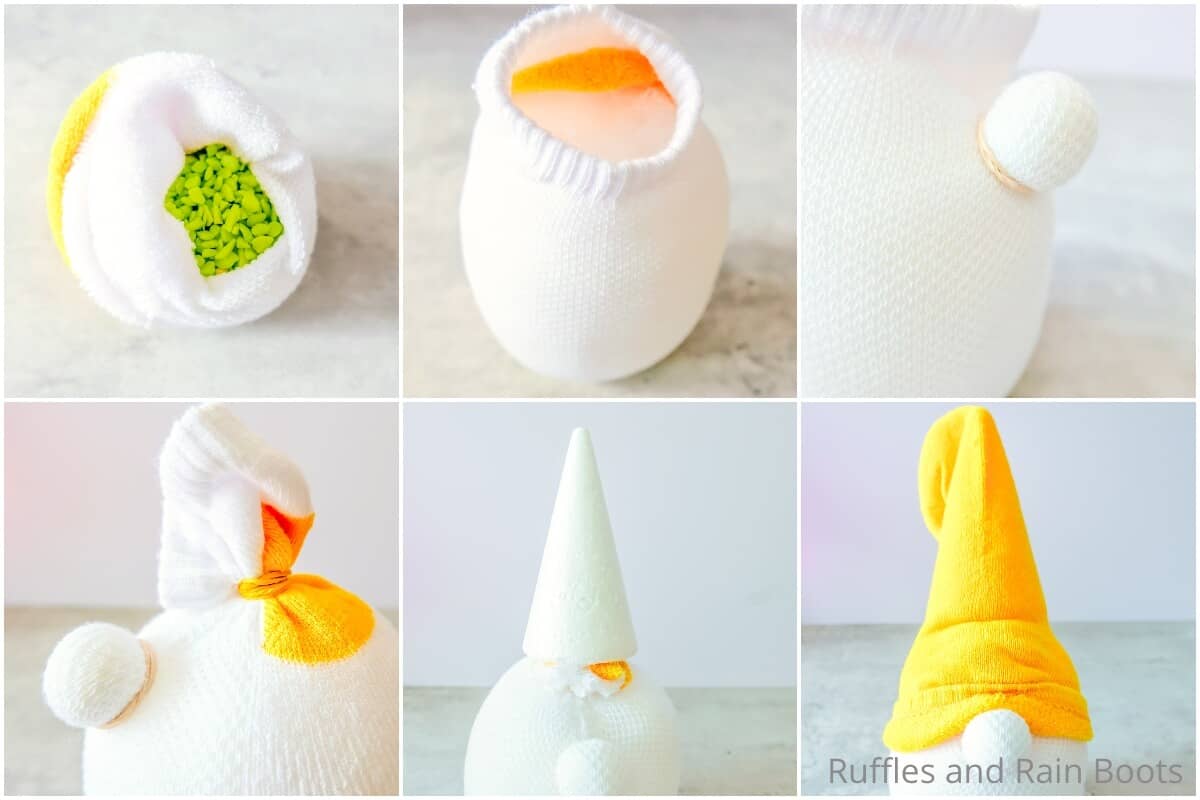
- Fill the bottom of the white sock with about a 1/2 cup of the pebbles to keep the gnome from falling over when completed. Follow by filling the sock almost full with your polyfill. Because these are ankle socks, I didn't leave any space unfilled.
- Place the marble inside of the sock, between the sock and the polyfill, located where you'd like the nose to be. Fit the rubber band around the marble, trapping the sock with the marble in it. Make sure this is tight so the marble won't slip out or move. If you want a pink nose, this is a good time to do it.
- Wrap the second rubber band around the top of the sock, closing the sock snugly. Trim the remaining portion of the sock off and hot glue the edges over to further secure the top of the sock closed.
- Hot glue the cone on top of the closed sock. This will create the structure for the gnome's hat. Pull the yellow sock over the top of the cone, pulling it down over the white sock, all the way to the nose. Pull the sock low in the back, then hot glue it in place. DO NOT HOT GLUE THE HAT TO THE NOSE YET. Pull the yellow sock over the nose, then fold the yellow sock back up in front of the nose, creating a 2-inch fold. Hot glue this fold in place only to the body and nose of the gnome, but do not secure the fold of the yellow sock to itself yet.

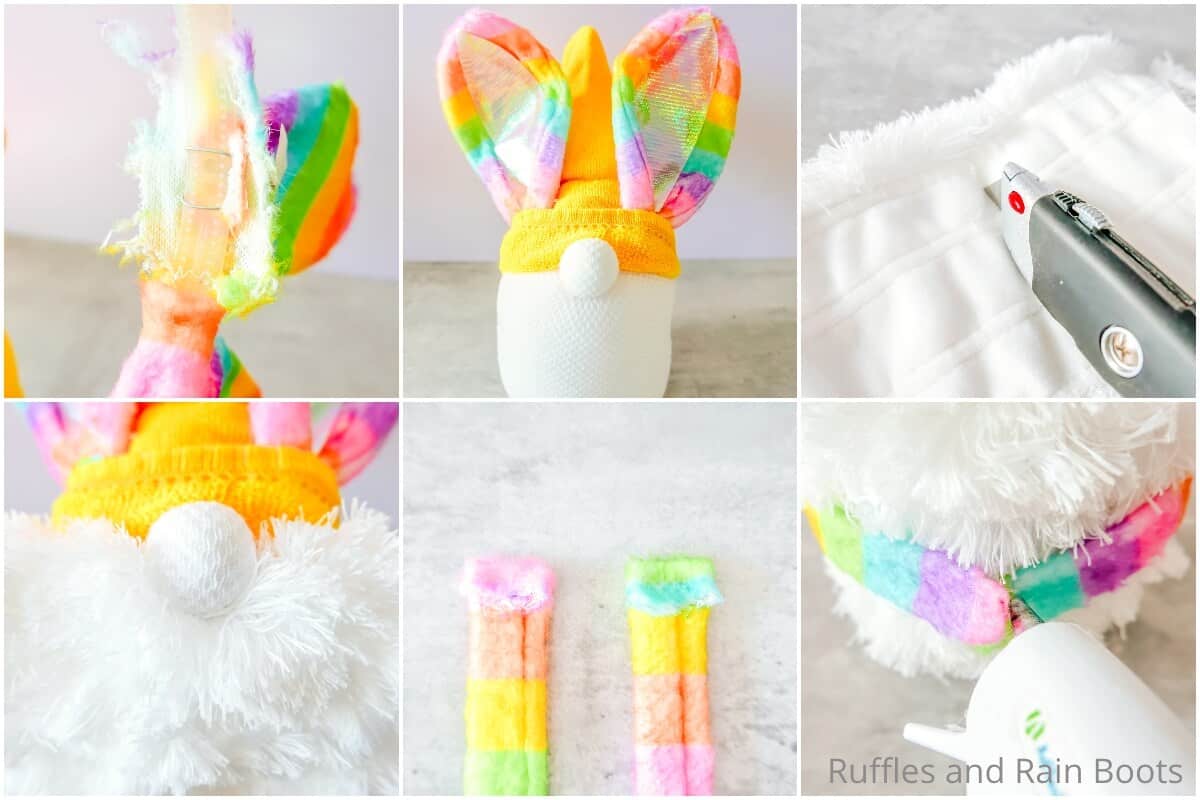
- Remove the ears from the headband, leaving about ½-inch on either side. Fold this extra fabric over and hot glue it flat to the back of the ear. Place the ears inside the folded flap of the yellow sock. Make sure you like the positioning of the ears and that they are even, then hot glue the ears in place.
- Flip the duster/mop head over, and cut the fabric backing side into the shape of a large "u". Hot glue the beard to the gnome, tucking it below the nose and tucking it up just under the edge of the hat.
- Finally, remove the remaining fabric on the headband, and cut into two equal-length sections about 4 to 6-inches long. Fold the cut edges over and hot glue hem them. Tuck the end of each of the arms up into the edge of the hat on either side of the gnome. Make sure you like the positioning and that they are even and that the ends overlap like hands, then hot glue them in place. Pop your gnome on a shelf and enjoy!
Notes
For more fun DIY gnome tutorials, visit Ruffles and Rain Boots!
More Easy Easter Bunny Crafts You Might Like
- Easter Gnomes to Make – These popular gnomes for Easter will get you creating with inspiration, techniques, and gnome patterns.
- No-Sew Bunny Gnome – This is a super quick gnome that has this adorable little bunny outfit you can make that is absolutely squee-worthy!
- Bunny Butt Hot Cocoa Bombs – They’re the most fun bunnies that you can imagine and perfect for tossing into hot milk for a yummy treat! Ha!
- Bunny in a Pot Craft – Little bunnies in a most precarious position – stealing the goodies inside the tiny pots.
Please Save This to Pinterest
Your shares are how this site grows and I am sincerely grateful. Know a friend who’d like this? Please share it on Facebook or save it to your favorite easy Easter crafts board on Pinterest.