
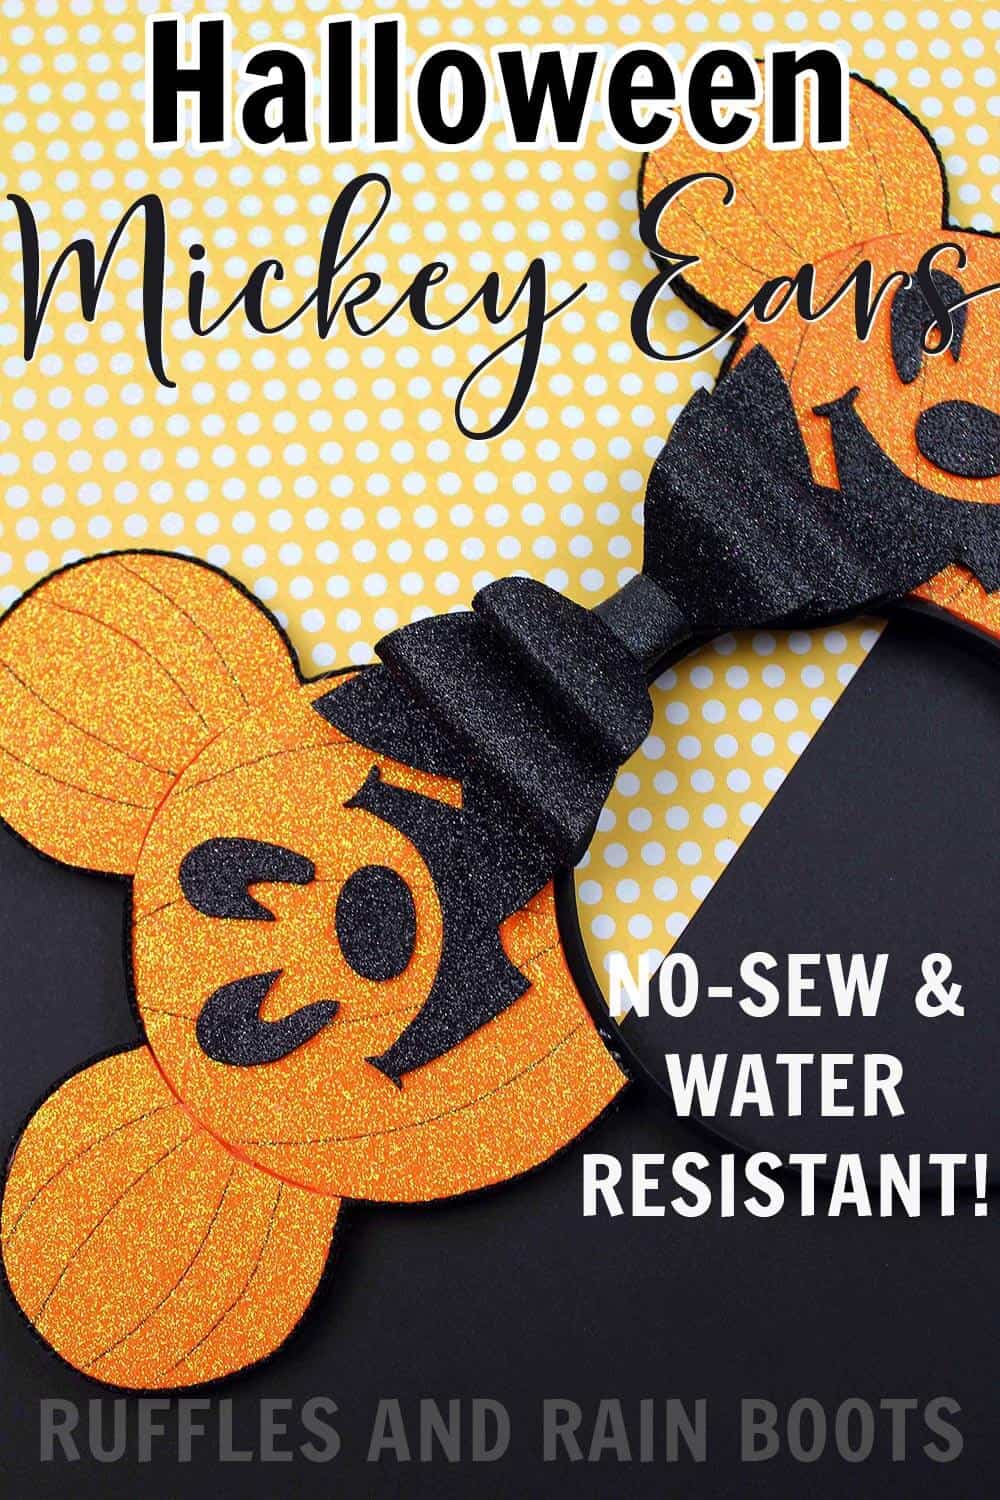
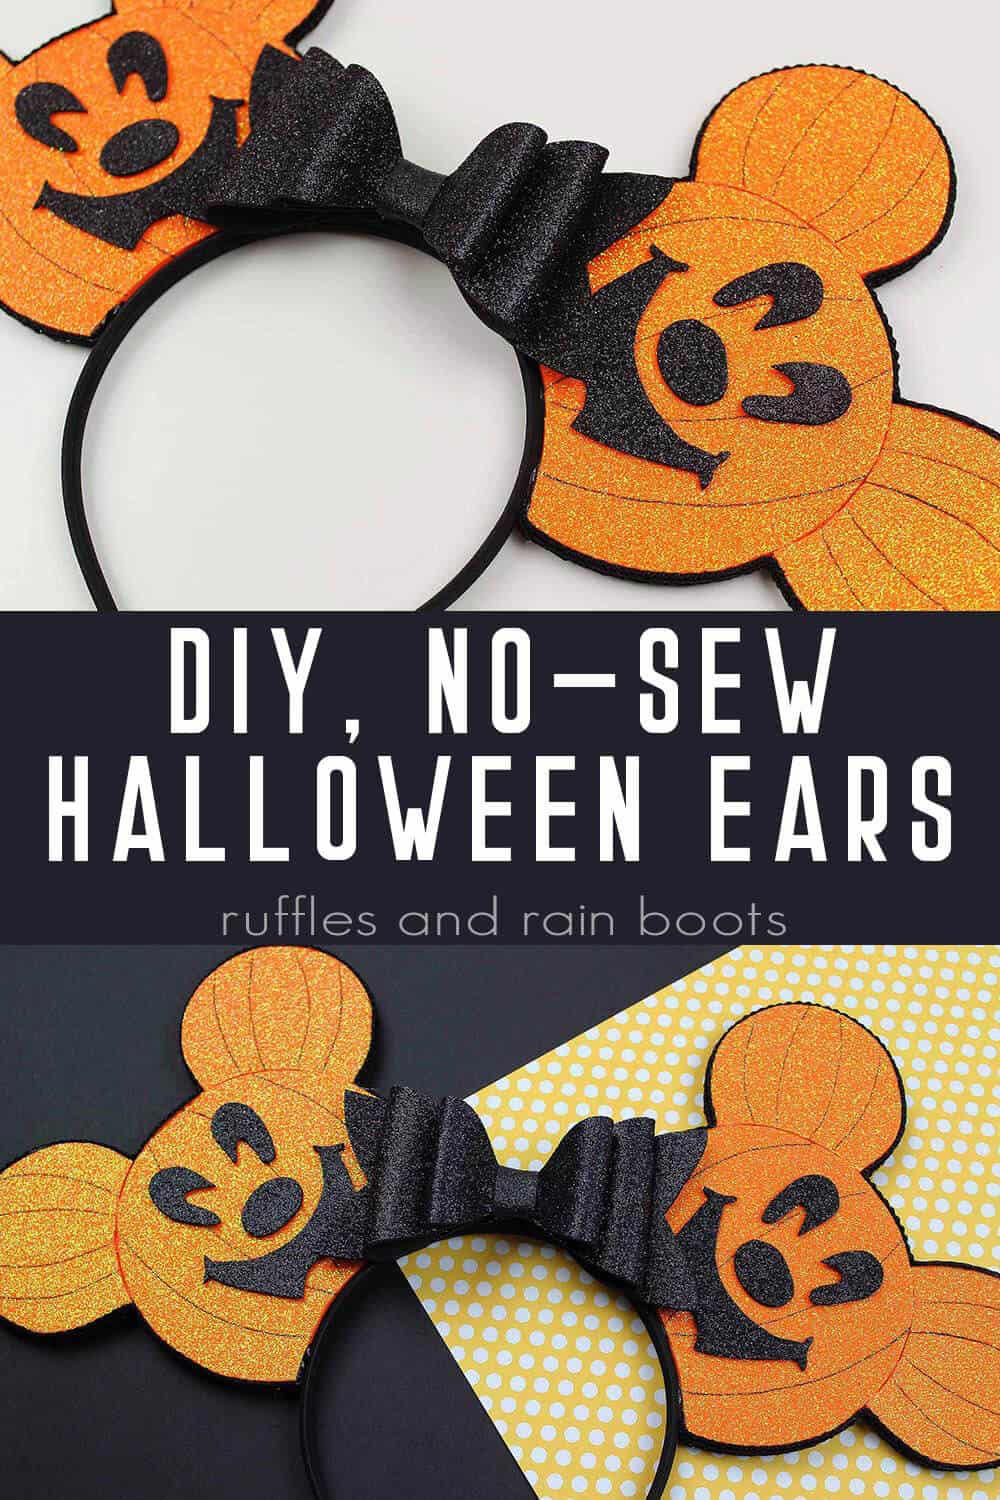
Foam Mickey Pumpkin Head Ears for Halloween
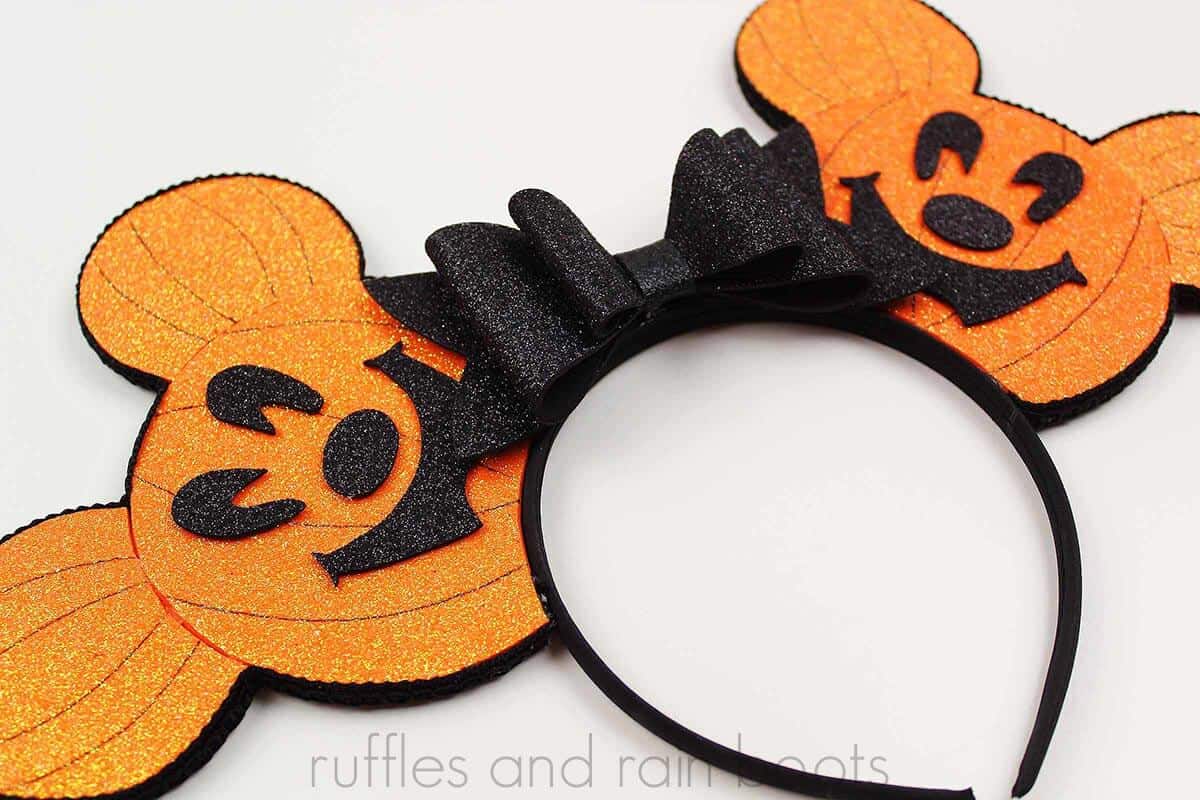
These adorable Mickey pumpkin head ears are perfect for Halloween or Mickey’s Not So Scary Halloween Party at Disney. Gather some basic craft supplies and a hot glue gun to get started with our free templates.
Add a bit of glitter for that something extra; use our bow or a pre-made fabric one – personalize it! This is a fun afternoon craft for tweens, teens, and adults to get ready for Disney.
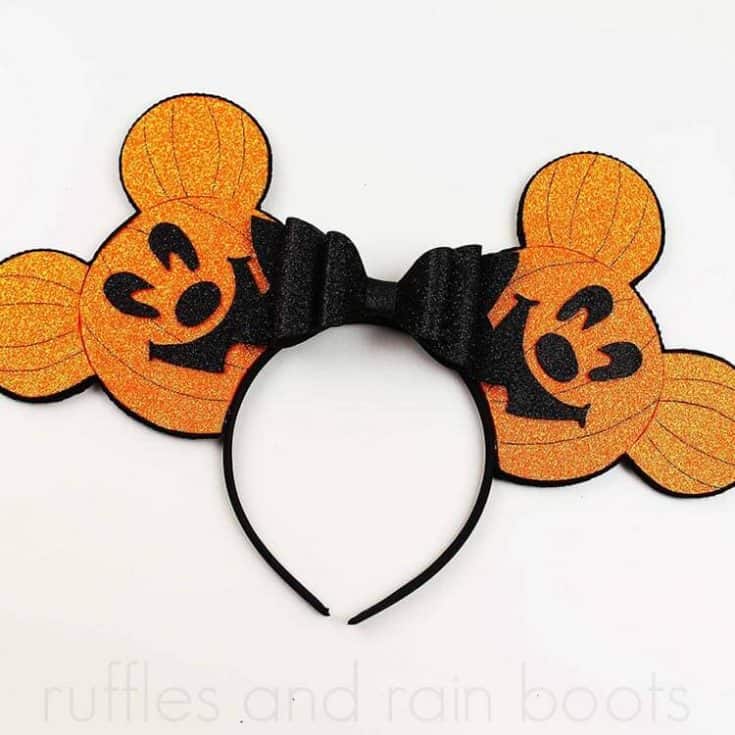
Foam Mickey Pumpkin Head Ears
Here at Ruffles and Rain Boots, it’s the worst kept secret that I love to make Mickey ears. I’ve made them for Disney vacations, parties, dress up, and even just because I had a great idea and wanted to see if I could pull it off! If you’re interested, you can see all of our DIY Mickey and Minnie ears here.
We’re heading to Disney World soon and, as you might know, they throw a little get-together called, “Mickey’s Not So Scary Halloween Party.” If you’re heading there, too, whip up a set of these fun Mickey pumpkin head mouse ears. You can make them with basic craft supplies you’re likely to have on hand. Let’s get started.
RELATED READING: Death Star Mickey Ears for Disney!
No Time to Make These Now? Save or Share Them for Later
In case you have to grab something (or want to make these in a craft group), save this to a Disney craft or Halloween pin board. It will be here when you’re ready to start.
RELATED READING: Ahsoka Minnie Ears (with Detachable Pieces)
Tips When Making Mickey Ears from Foam
I’ve been so many mouse ears, I figure it’s a good thing to share what I’ve learned with you beyond the tutorial. Here are some of my favorite tips when making your own Mickey ears or Minnie ear headbands.
- Use the tutorial as inspiration and add your own style. I often use what I have on hand but trust me when I say, craft stores and Amazon are FULL of options.
- Leave off the bow or use any bow material you want or have on hand. Check out our DIY Disney ears page for inspiration.
- If you can’t find orange sparkle foam or glitter sheets, you can make your own. Grab orange foam, add ModPodge and a lot of orange craft glitter. Finally, seal with a couple of layers of ModPodge and use them. We did this with Ursula’s Minnie ears and it worked out very well.
- Download the Mickey Pumpkin Head mouse ears template here. It makes quick work of this fun Disney craft.

As an Amazon Associate, I could earn from qualifying purchases. There could be affiliate links within this article.
How Do I Use Foam to Make Halloween Mickey Ears?
I’m so glad you asked! Below is our written tutorial. If you’re making a YouTube playlist, click here for our Foam Mickey Pumpkin Head Ears FULL video tutorial.
Mickey Pumpkin Head Ears
These DIY pumpkin head Mickey ears are perfect for Disney or to wear around the neighborhood trick-or-treating this Halloween.
Materials
- Black Headband
- Black and Orange Glitter Foam Sheets (we used these)
- 5/16th inch Black trim (grosgrain, velvet, or designed ribbon, just no satin)
- Pumpkin Head Mickey Ear Template (print)
Tools
- Scissors
- Hot Glue
- Marker or Pen (medium tip)
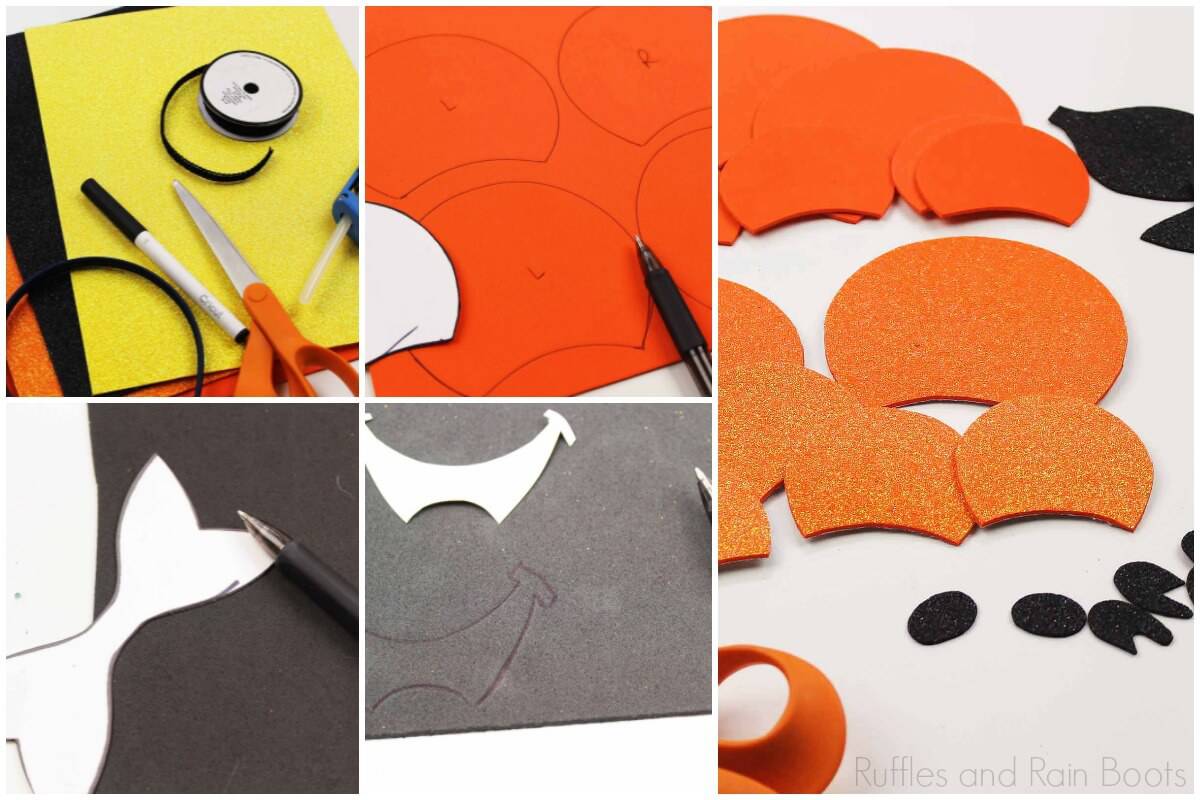
Instructions
- Cut out the templates and trace them onto the foam pieces. You will need three pieces of everything except the bow for each ear.

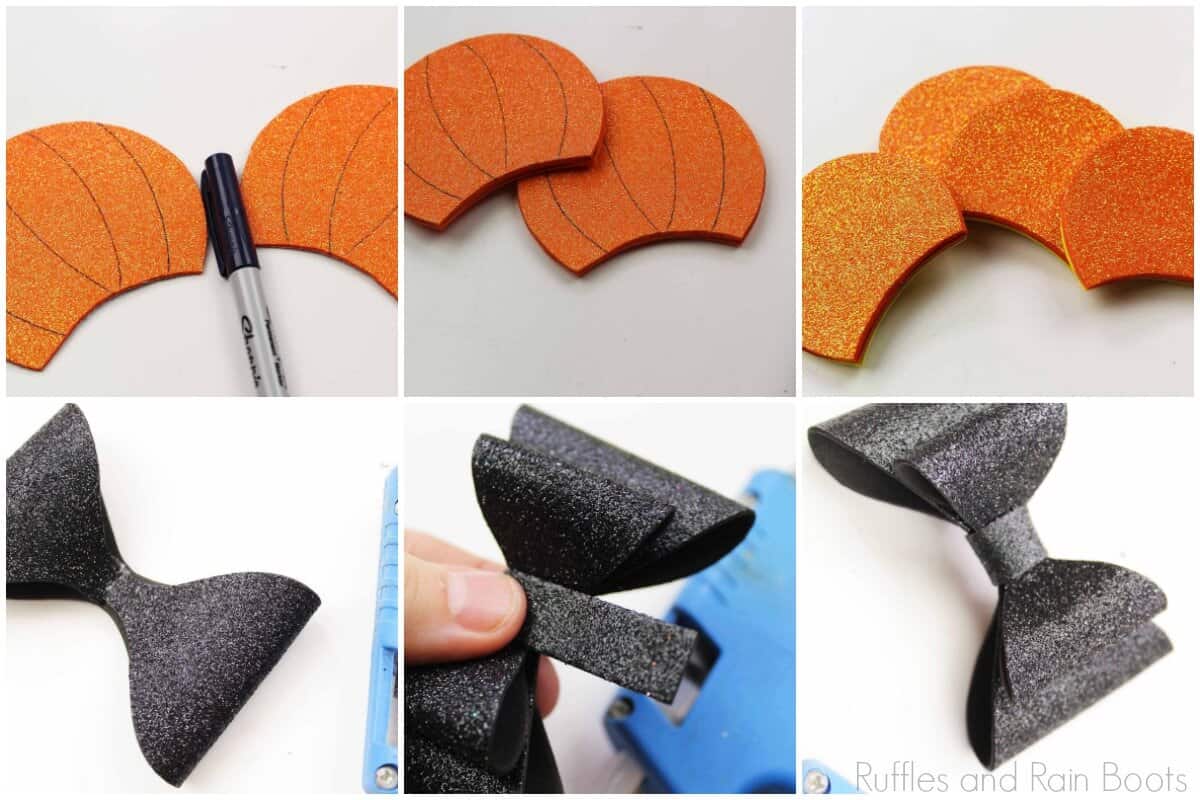
- On the orange glitter pieces (both head and ears for both sides), using the black marker, draw lines to mimic a pumpkin.
- While it dries completely, assemble the bow. Attach the ends of the smaller bow piece and repeat with the other bow piece. Attach them together with glue, attach them to the bottom piece, and secure all by wrapping a small strip in the middle. Secure all with glue.
- Glue three of the large head sections of foam together with the glitter facing the front. Repeat with the other ear.
- Next, glue three of the small foam ear sections together the same way. Repeat three times (two for each ear).
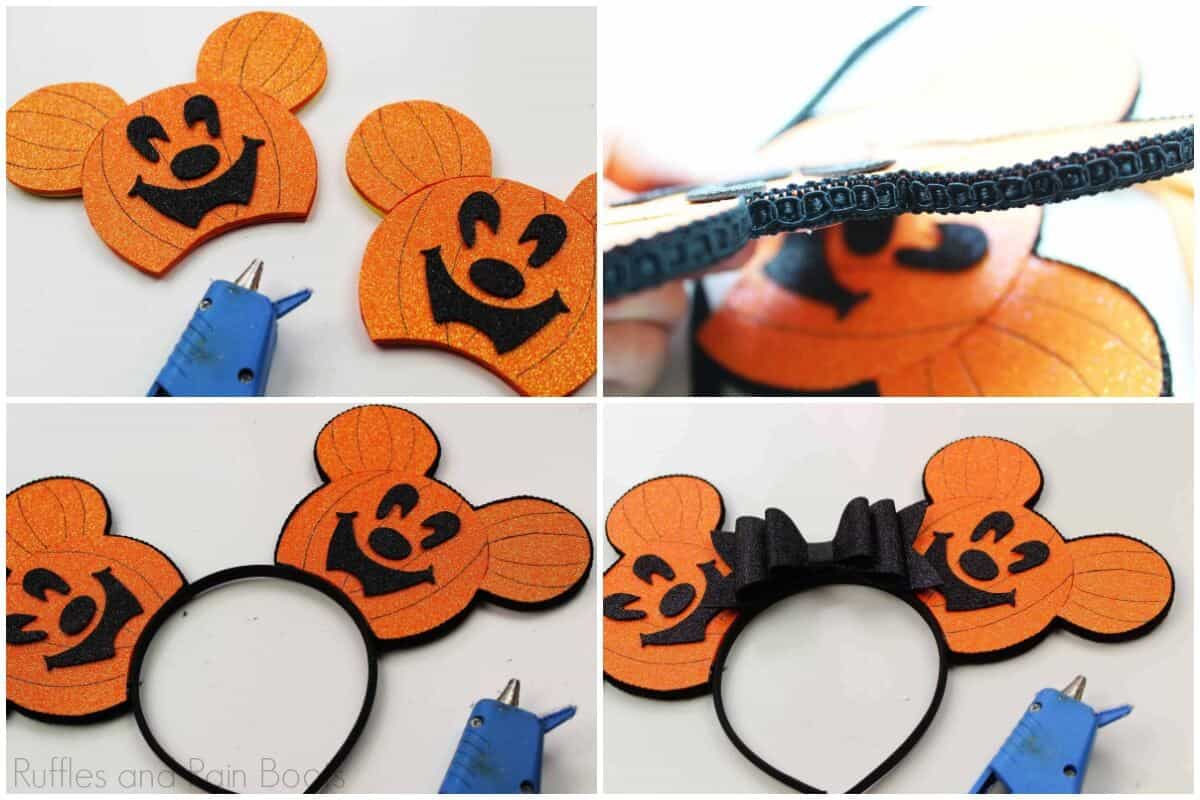
- Attach the ears to the head and add on the pumpkin facial pieces. Repeat for the other ear.
- Add the border on the edges of the entire ear (Mickey head and ears) with hot glue, working in small sections.
- Secure the ears to the headband and glue on the bow in the center.
Notes
For a ridiculous amount of DIY Mickey and Minnie ear headband tutorials, visit Ruffles and Rain Boots.
More Mickey Ear Tutorials You MIght like
It’s no secret I love designing and making my own Minnie and Mickey ears. If you need inspiration, here are a few more mouse ear tutorials you might like:
- Belle Minnie Ears – If the classics are your style, use our very unique way to make show-stopping Belle ears.
- Jasmine Minnie Mouse Ears – One of our fastest ways to make ears, these Jasmine Mickey ears light up!
- Han and Chewbacca Mickey Ears – Head over to Galaxy’s Edge and Black Spire Outpost wearing this pair.
Please Save or Share This Disney Craft Idea
Your shares are how this site grows and I am sincerely grateful. Please share this to Facebook or save it to a Halloween pin board.

Hi! First thank you for the wonderfull ideas!
I would like to make these Mickey’s Halloween ears, but when i try to download the template, the folder is empty… can you help me ?
Can you access this? https://drive.google.com/drive/folders/1g1g53k1v25bypA_9xhaOG0RLBvst-YPG?usp=sharing