
How to Make a Sock Gnome in Just 3 Steps!
Learn how to make a sock gnome with just a few simple supplies. Get tips, fun examples, and make your own gnome in just a few minutes.
What You'll Find On This Page
How to Make a Sock Gnome
Here at Ruffles and Rain Boots, I love to share the gnomes I make. From easy gnome ornaments to adorable holiday decor, coming up with new ways to make them is a fun hobby.
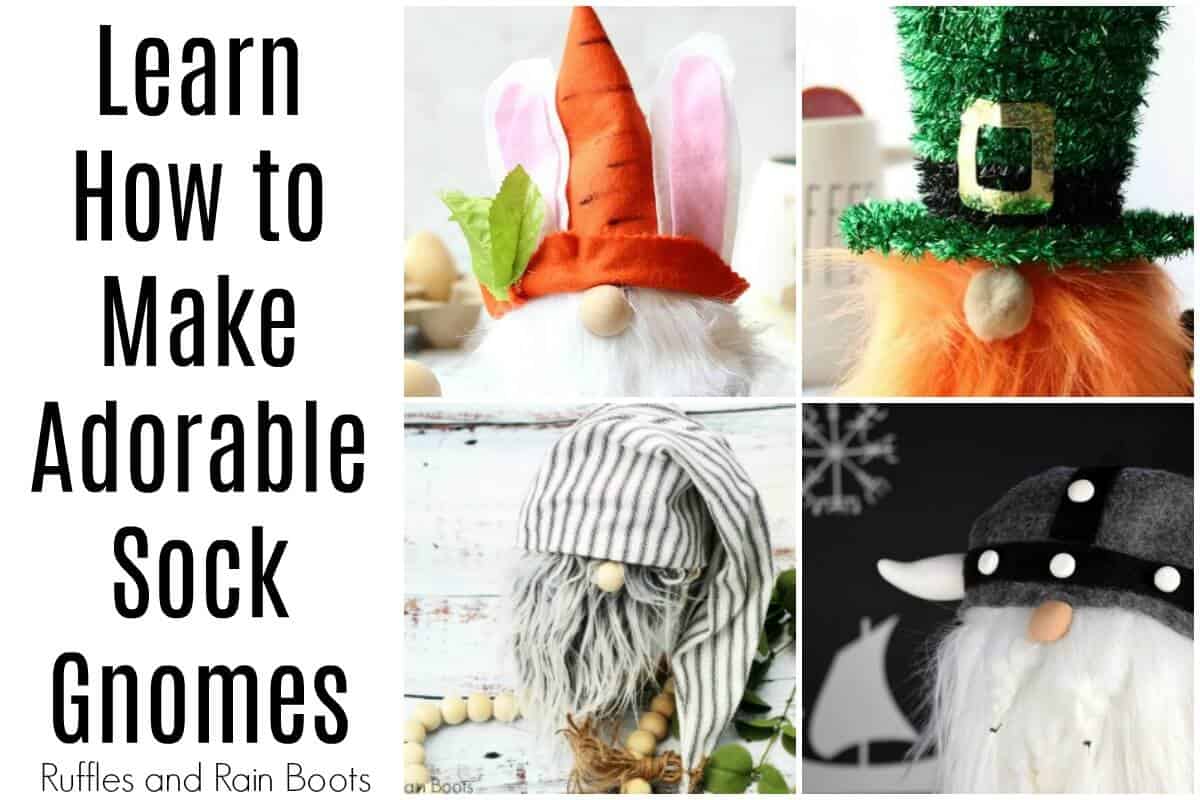
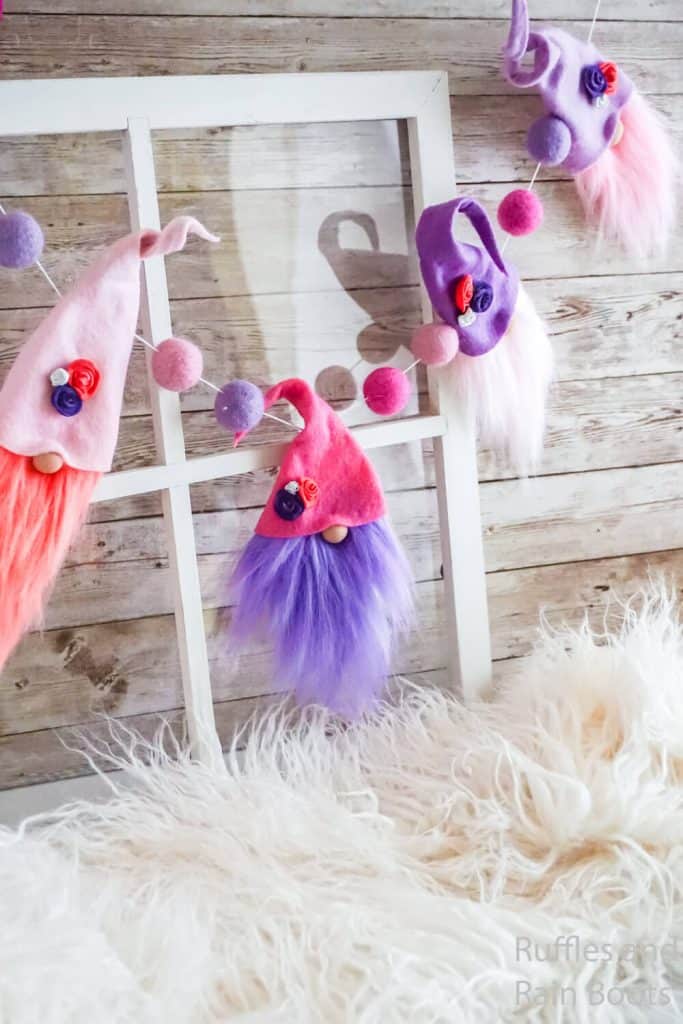
One of my favorite ways to put together a DIY gnome is by making a sock gnome. They are easy, do not require any sewing skills, and the sky is the limit when customizing them. Let’s get started.
No Time to Make One Now? Save This for Later
If you’re busy or want to save this fun DIY gnome tutorial for later, just share this to your favorite crafting group on Facebook or to a pin board. Pssst: be sure to follow along on YouTube for the quick, to-the-point gnome tutorials – link below.
Get Secret Gnomes, Tips, & Freebies Delivered!
What is the best pattern to use when you don’t want to sew? Do you know the secrets to a properly-proportioned gnome? Do you know where to get the best-priced fur?
Get all of this (and exclusive content just for you) delivered right to your inbox with the gnome-making series, free of charge. Sign up to get the once-weekly newsletter (and a jaw-dropping special offer)!

As an Amazon Associate, I could earn from qualifying purchases.
Sock Gnome Tutorials on Ruffles and Rain Boots
Before you get started making sock gnomes, here are some top resources we have for you:
- Sock Gnomes – Questions and Answers, Patterns, and More (Read First)
- Browse All Sock Gnome Tutorials on Ruffles and Rain Boots
Like to Sock Gnome Tutorial Videos Instead?
I’ve been sharing sock gnomes, no sew gnomes, and gnome sewing patterns on YouTube for years. Be sure to subscribe to the YouTube channel here and check out this how to make a sock gnome video playlist.
This Guide (and So Much More) Is Now Available in a Book!
Want to learn how to make sock gnomes from Sarah with Ruffles and Rain Boots? Cited thousands of times by major publications, I’ll share my tips and tricks learned after years of making gnomes.
Included in the new, highly-rated how to make a sock gnome ebook is everything in this article and so much more. I’ve put together the definitive guide on sock gnomes with arms, legs, and the most amazing details.
Learn how to:
- make wow-worthy, high-end gnomes without sewing a thing
- full tutorials (video and print) for best-selling and VIRAL gnomes
- create gnomes with arms and legs for which people will pay top dollar
- learn tricks to reduce your time building so you can spend more time decorating (or marketing, if you sell gnomes)
What Supplies Do I Need to Make a Sock Gnome?
Most of these supplies are available at any craft store and some can be sourced from a dollar store, as well. I’m going to detail your options for creating gnome beards, braids, and hair below, but first…
Socks to Make Easy Gnomes
You can use any sock, any color, and any material to make sock gnomes. Go to the dollar store or get socks on clearance or order some from Amazon (I LOVE these rainbow socks for the hats). For bodies, I prefer men’s ankle socks because I can make the bodies as short or as tall as I want without cutting off too much material.
Depending on the style you want, you can use just one or a pair. You can make just the gnome body from a single sock or use a pair or coordinating socks for the body and hat.
For hats, I prefer the tighter weave and added length of leg warmers and knee socks.
Filler for Gnome Body
There are two types of filler when making a sock gnome. The first is something heavy and can be dry beans, uncooked rice, or plastic beads (suggested if selling or storing). Use anything which gives the gnome some stability.
The second type of filler is polyfill fiber used for making stuffed animals and shaped pillows. You can get it on Amazon here or at any craft store.
After making quite a few of these DIY gnomes, I prefer the plastic pellets to weigh the sock down and fill the rest with polyfill fiber. That way, I don’t worry about anything wanting to snack on my gnomes while they’re in storage.
Suggestions for Gnome Noses
As with any creative, you may use whatever you’d like for your gnome nose. My preferred option is usually a polymer clay nose made from a nude-colored clay or wooden beads and rounds. You can get them from my gnome-making supplies list here.
For most of my gnomes 6 to 12 inches tall, I form about a half-inch to one-inch clay nose or use the three-quarter wood bead or round. These tend to showcase the beard to hat transition well.

When I design ornaments or garlands, I use a smaller nose – usually a half-inch or smaller clay or wood nose. For some gnome ornaments like these, I’ve used pony beads. And for very light cork gnomes or felted wool ball gnomes, I have used seed beads (very, very small).
With all of that having been said, I’ve designed many gnomes with adorable, over-sized noses! I’ve used ping pong balls, small holiday ornaments, or fabric circles sewn with a running stitch, stuffed, and pulled tight.
Other ideas for noses are pompoms, characterized styles (like a witch’s nose made from colored polymer clay like hers), or air dry creations that can be carved and made to appear rough and weathered.
Gnome Beards, Braids, and Hair
Mongolian Fur
Whether you’re making a gnome with a beard or one with braids, you’ll need some type of fiber. My favorite beard fiber is a high-quality fiber called Mongolian fur (get it here on Amazon). It’s rich, plush, and can be combed and styled without falling apart.
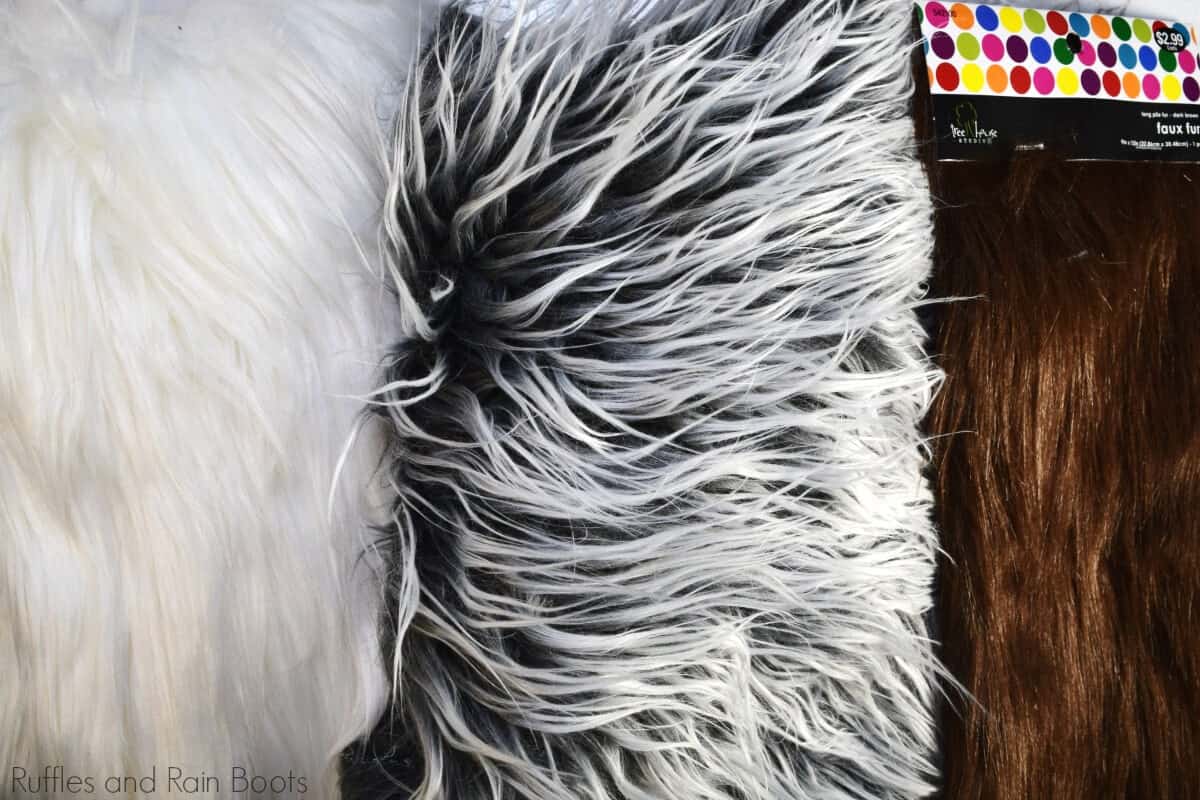
Faux Fur (Craft Fur)
Faux fur is sold at craft stores (JoAnn’s, Michael’s, Hobby Lobby, etc.) and here on Amazon. It is a piece of fur sold in a rectangle shape and can be used for gnome beards or braids. It’s lower quality than the Mongolian, however, I’ve used on many DIY gnomes.
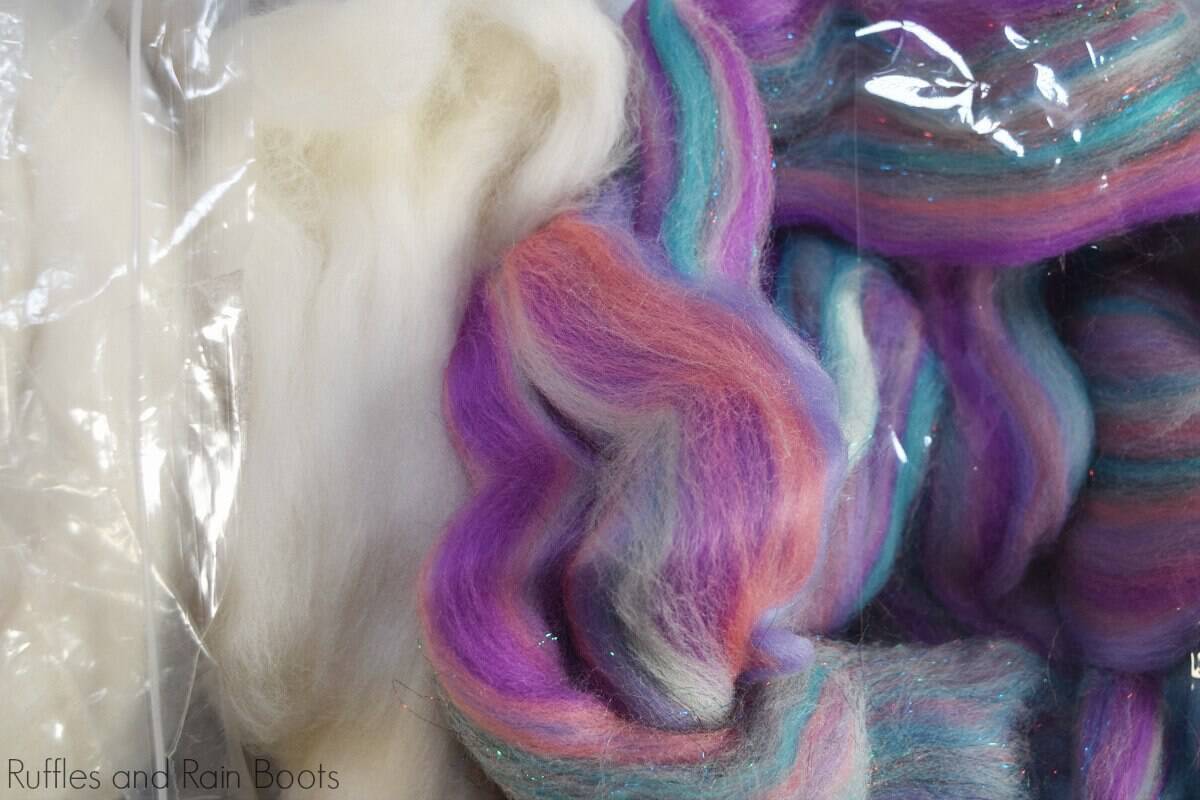
Merino Wool (and Combinations)
Another option for gnome beards and braids I would recommend is Merino wool fiber. It’s available on Etsy and here on Amazon (both handmade and general stock). The best part about this is that it comes in a HUGE variety, so you have many design options. I’m even curling it!
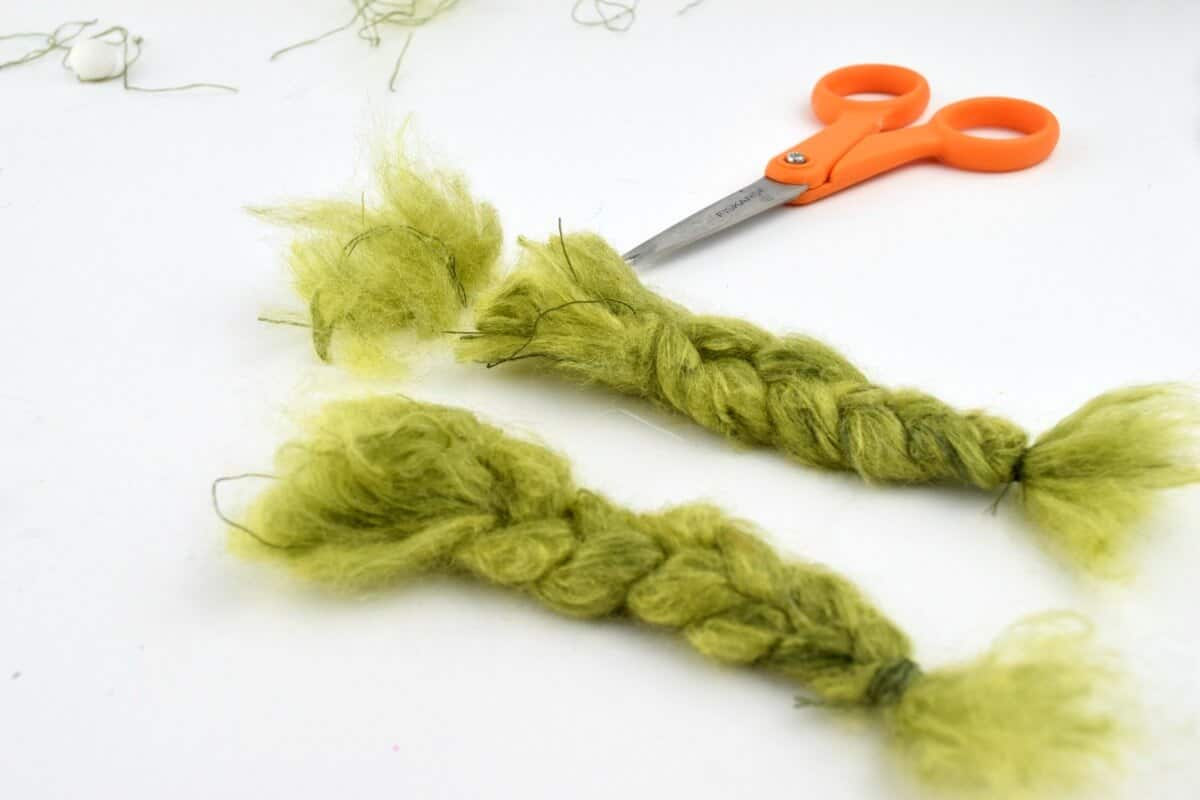
Yarn
The final option for gnome braids and beards is yarn. I’ve brushed out and felted yarn (green braids). Not all yarn will perform the same, so look for one which has high wool content if you want to felt it. If using acrylic-based yarn, look for very thick strands.
Gnome Cards, Gift Tags, and Other Custom Gnome Gifts
I’m often asked about how to gift gnomes people make for others. Additionally, because I talk openly about my gnome donations for charity fundraising work, many others have inquired about customizing the packaging or wrapping when doing the same.
I’ve put together a really fun, comprehensive list of Gnome Sayings and Gnome Puns for Any Occasion. Read through the list, find one that resonates, and create a gift tag, card, or thank you note to make it custom.
How Do I Make a Sock Gnome?
I’m so glad you asked! This is a fun and quick DIY so let’s get started. If you are a visual learner, here is our DIY sock gnome video tutorial.
HOW TO MAKE A GNOME BODY
Fill the sock with poly pellets, rice, or dry beans to add weight and stability. Then, fill up the sock with polyfil to your desired height. Keep in mind that you’ll need to tie the sock closed.
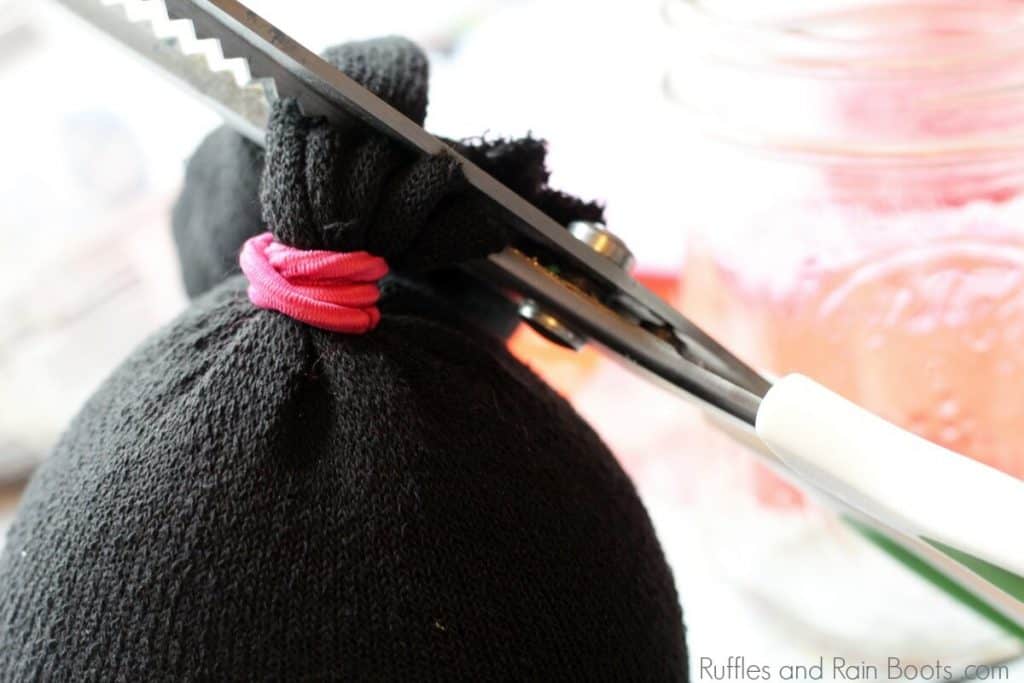
Secure the top of the sock with a rubber band at the desired height. Cut off the excess (not too close to the tie).
HOW TO MAKE A GNOME BEARD
Measure your desired size. You can choose to create a template from paper or not.
Flip the faux fur onto the back (fur side down). Draw the desired shape in pencil on the back of the fur. If you like the beard to cover the full body, measure the width of your gnome body made in step one and cut the widest part of an upside-down triangle to that size.
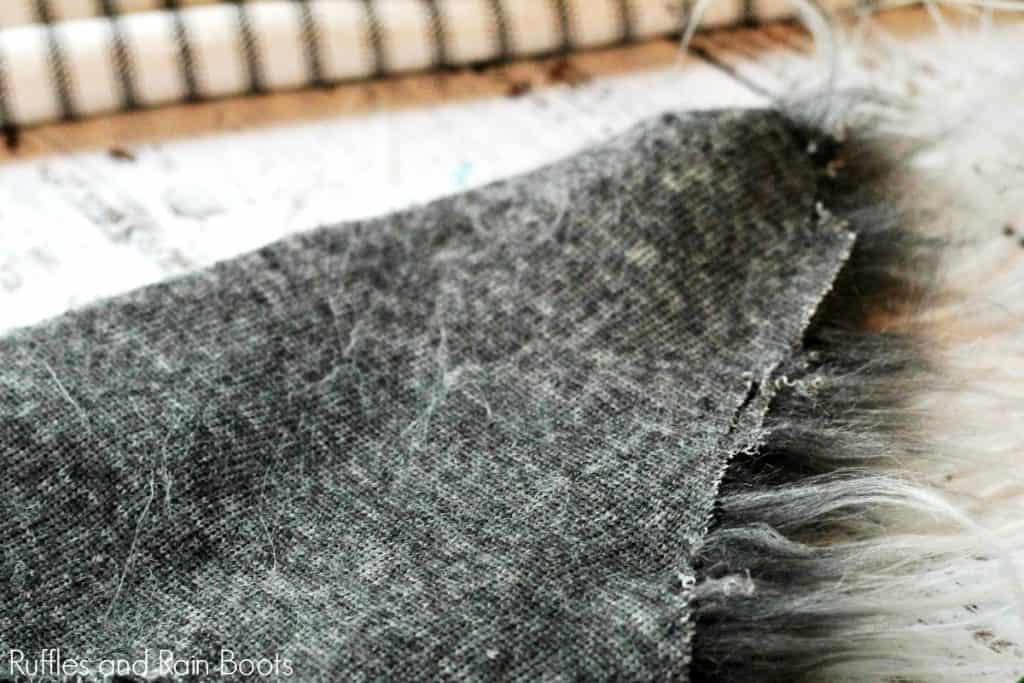
Carefully cut only the backing with a razor to ensure the fur fibers remain intact on the front. Shake it out to remove any cut fibers.
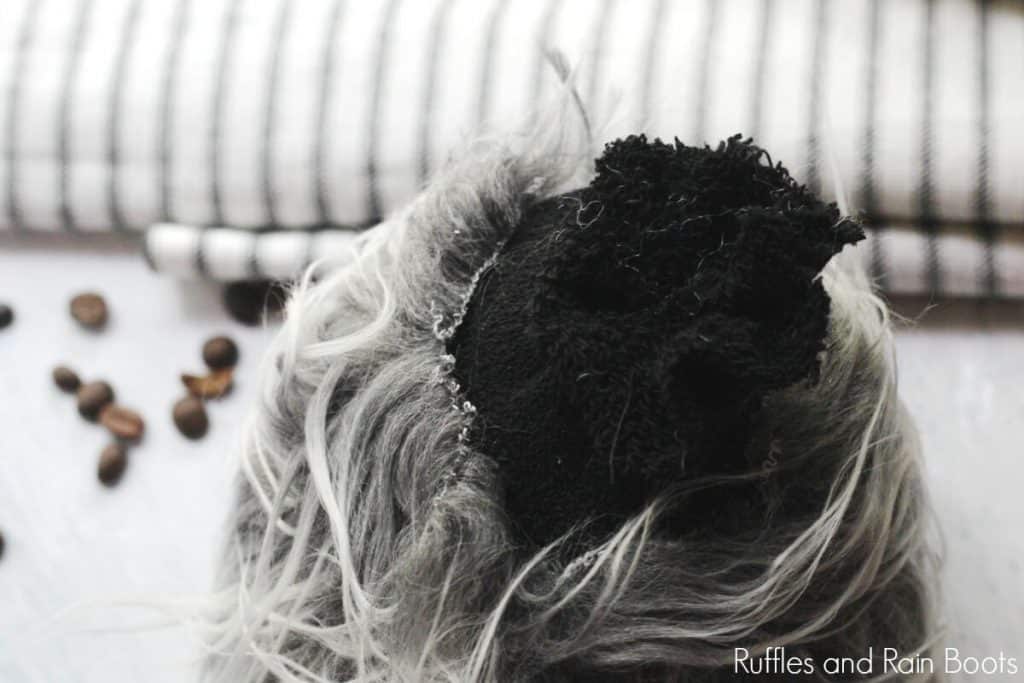
Glue the gnome beard onto the sock body about an inch under the rubber band.
HOW TO MAKE A GNOME HAT
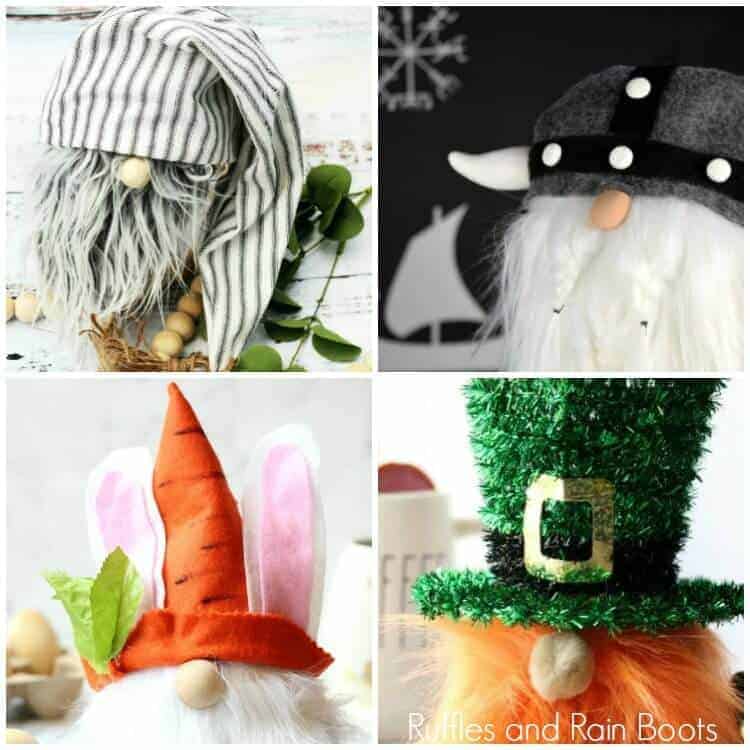
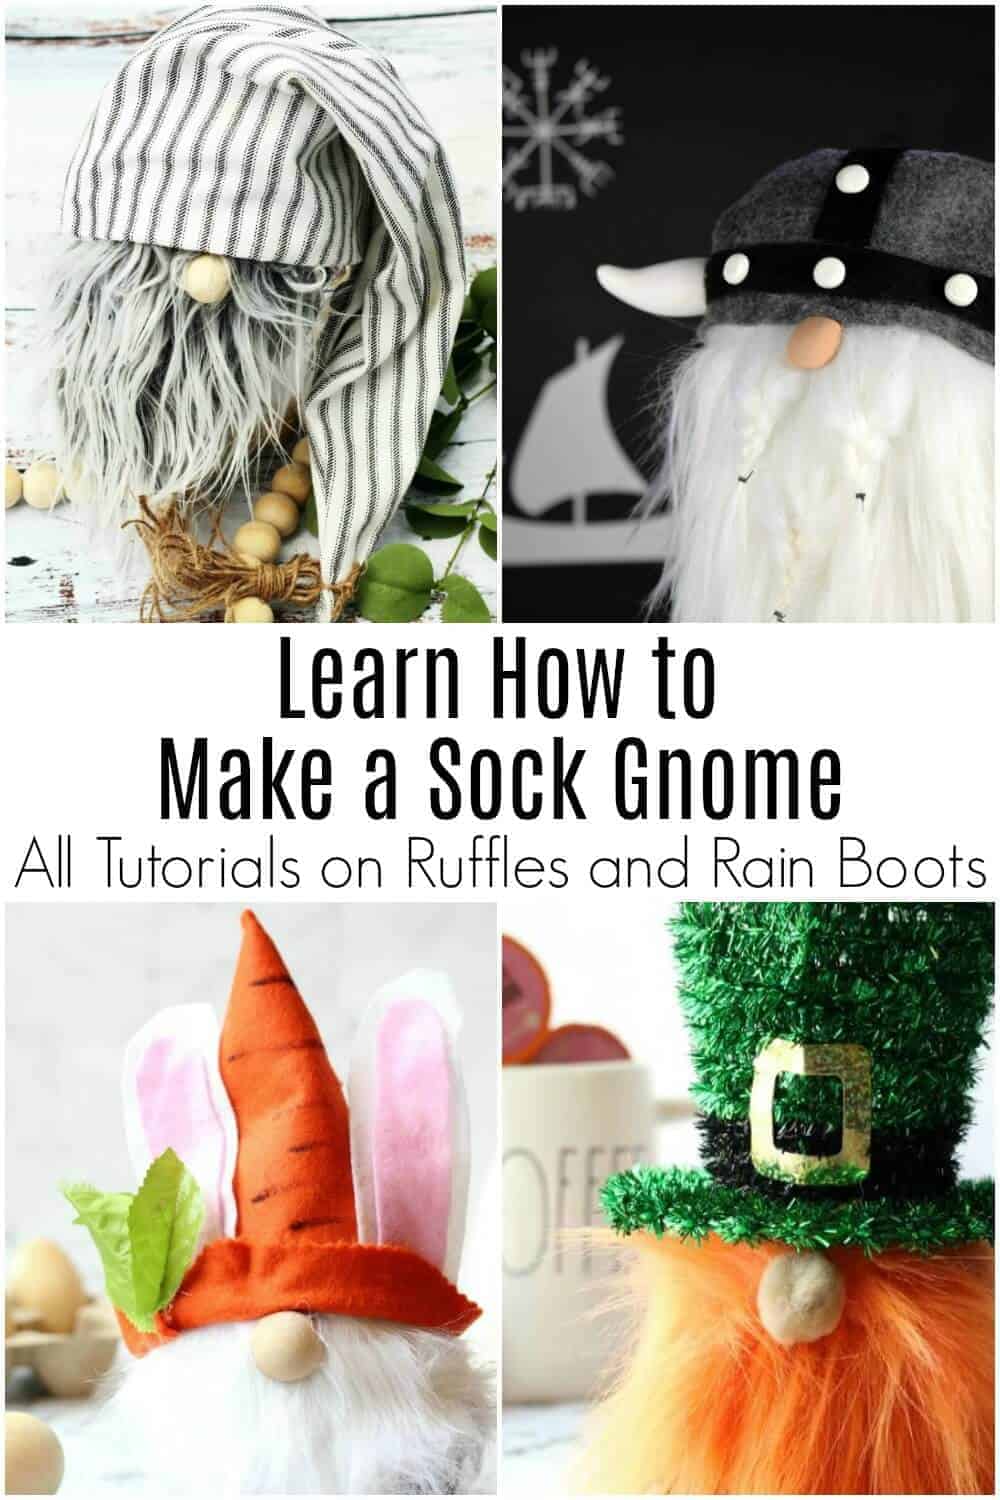
If using a store bought hat like this leprechaun gnome, skip to step 3.
If creating a hat from felt like this bunny gnome, roll the felt into a cone shape with the bottom (the wide portion) the same size as the wide top of your gnome body under the rubber band. Secure the edge with hot glue.
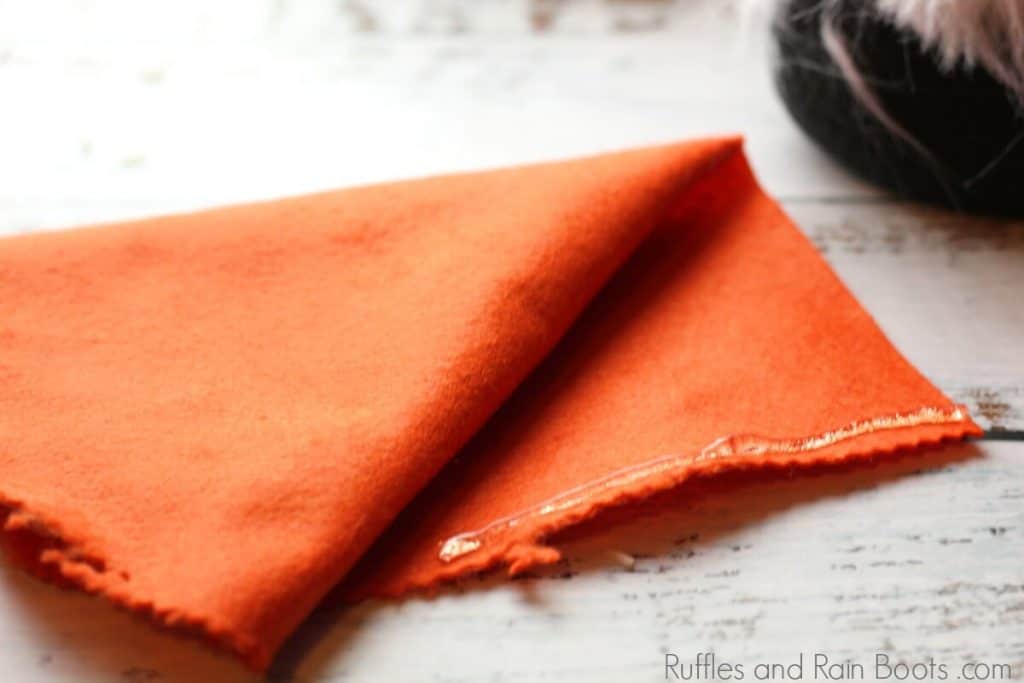
If you’re creating a hat from fabric (like this farmhouse gnome), cut two pieces of fabric, place right-sides together, and then secure the edges with hot glue (or sew them with a straight stitch). Turn right-sides out and you’re done.
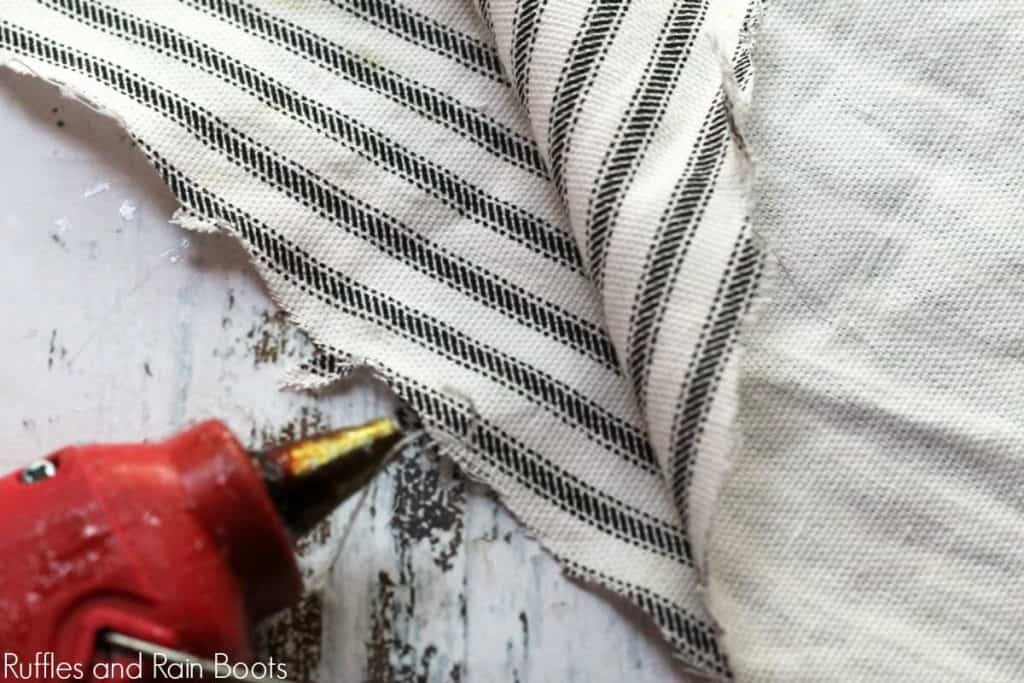
Place the hat on the sock gnome body before attaching the nose so that you may measure the placement of the nose. Hot glue the nose onto the beard.
Secure the hat onto the body with hot glue and you’re done with a fun sock gnome!
More Gnomes on Ruffles and Rain Boots
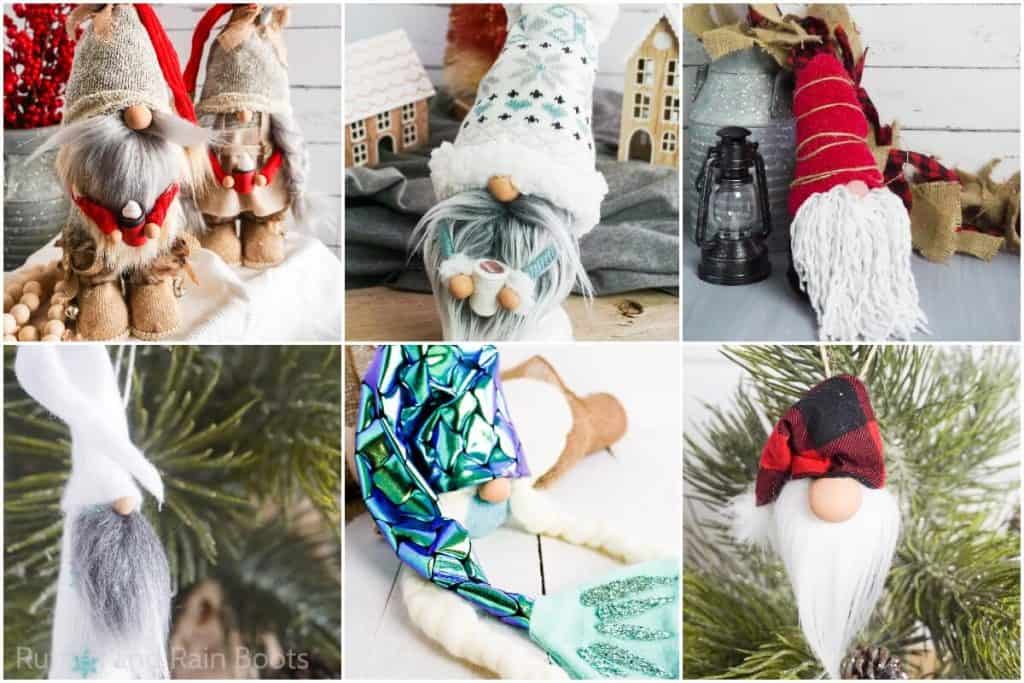
The sock gnome isn’t the only style of gnome I make… I really, really like making gnomes. Here are a few more gnomes in very different styles:
- Swedish Rice Gnome – Made in just minutes with scrap supplies, this cutie started it all for me.
- Lavender Sachet Gnome – This one is made to allow the gnome to both decorate and smell great.
- Scandinavian Gnomes – These gnomes are made using a paper mache cone (and are very easy). If you’d like to see the mini style, here are some Valentine’s Day gnomes to give you an idea.
- Gnome Ornaments – I have two styles for you – a wood slice gnome ornament (SUPER easy and VERY popular) and a wine cork ornament.
Please Save This to Pinterest
Your shares are how this site grows and I am sincerely grateful. If you found this to be a helpful resource, please save it to a Pinterest board or share on Facebook.
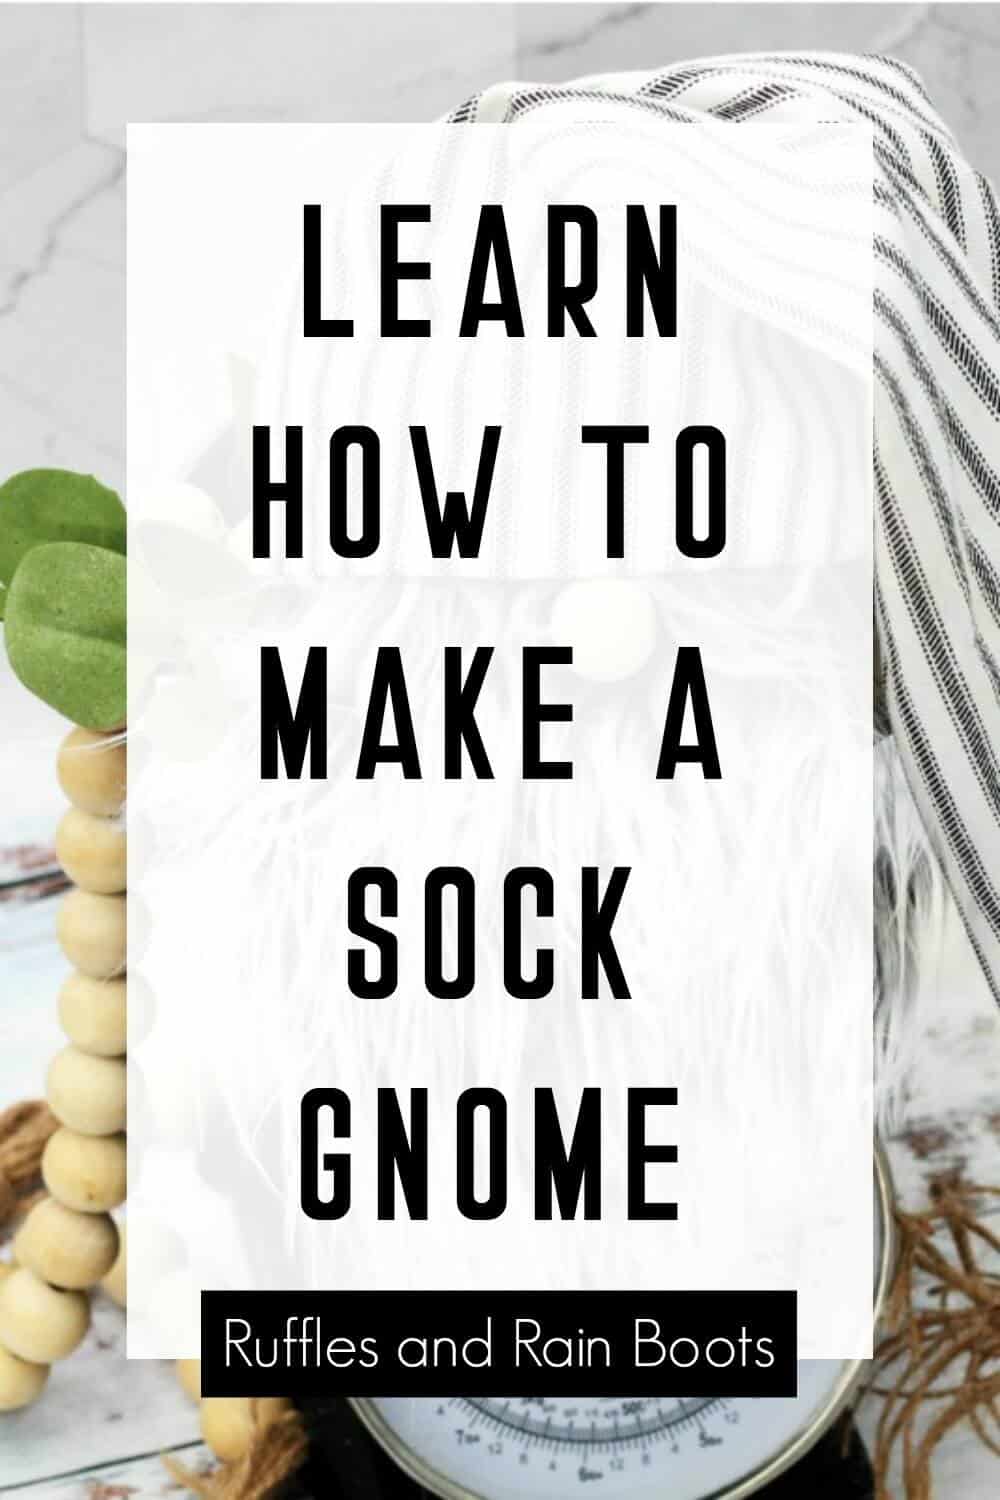
How to Make a Sock Gnome

This is how to make a sock gnome with no sewing and just a few simple craft supplies. I will provide general instructions and links to details.
Materials
Sock Gnome Body
- sock (I prefer men's ankle socks)
- plastic pellets (I use these from Amazon)
- polyfill stuffing (I get it from Amazon here)
- rubber band
- nose (I use wooden beads like these mostly)
- felt or fabric to form a hat
- Mongolian Fur, Faux Fur, or Yarn (my favorites are here)
- hot glue gun and glue sticks
- razor or straight edge to cut fur
Instructions
HOW TO MAKE A GNOME BODY
- Fill the sock with poly pellets, rice, or dry beans to add weight and stability. Then, fill up the sock with polyfil to your desired height. Keep in mind that you'll need to tie the sock closed.
- Secure the top of the sock with a rubber band at the desired height. Cut off the excess (not too close to the tie).
HOW TO MAKE A GNOME BEARD
- Measure your desired size. You can choose to create a template from paper or not.
- Flip the faux fur onto the back (fur side down). Draw the desired shape in pencil on the back of the fur. If you like the beard to cover the full body, measure the width of your gnome body made in step one and cut the widest part of an upside-down triangle to that size.
- Carefully cut only the backing with a razor to ensure the fur fibers remain intact on the front. Shake it out to remove any cut fibers.
- Glue the gnome beard onto the sock body about an inch under the rubber band.
HOW TO MAKE A GNOME HAT
- If using a store bought hat like this leprechaun gnome, skip to step 3.
- If creating a hat from felt like this bunny gnome, roll the felt into a cone shape with the bottom (the wide portion) the same size as the wide top of your gnome body under the rubber band. Secure the edge with hot glue.
- If you're creating a hat from fabric (like this farmhouse gnome), cut two pieces of fabric, place right-sides together, and then secure the edges with hot glue (or sew them with a straight stitch). Turn right-sides out and you're done.
- Place the hat on the sock gnome body before attaching the nose so that you may measure the placement of the nose. Hot glue the nose onto the beard.
- Secure the hat onto the body with hot glue and you're done with a fun sock gnome!
Notes
It's a little crazy how much I love making gnomes. If you love them, too, be sure to subscribe to Ruffles and Rain Boots for updates when we make a new one!
Recommended Products
As an Amazon Associate and member of other affiliate programs, I earn from qualifying purchases.


I’ve been using aquarium gravel, about half a cup, as the weight for my gnomes. Walmart sells it cheap and in brown, white or black so I can coordinate with the sock color. works great!
Ok am I missing something or did we skip the nose?
I don’t have a section just for noses, only the suggestion in the tutorial at the bottom and in the full video on YouTube, but I’ll write one up.
For most of my gnomes, I use either wooden beads and rounds (no holes) or noses I make from polymer clay.
I’ll pop a few more suggestions in the new nose section. :) Thanks
Love your site. I am new at making gnomes. I want make a gnome family for my daughter and her family. She has 4 children under age of 5 so I want to make 2 adult gnomes and 4 children gnomes. I am in Canada in city of Kitchener. They live 2 hours north of me. They love snowmobiling. I want to decorate their bodies with red and black plaid. I can go to the fabric store and buy material but don’t know how to wrap it around the body if you know what I mean.Would you be able to advise how I do this?
Thanks…Christine
Christine, Thank you so much. You can either use a sock gnome or a cone gnome (might be easier).
For the sock gnomes, you would need to cut a circle with the diameter which matches the height of the body of your gnome + the bottom. Once cut, you would use a running stitch around the edge and pull it to gather. Plop the sock gnome body inside and then pull it tight and tie it off. Once done, you would build the gnome the rest of the way as normal (add beard, nose, and hat).
For the cone gnomes, you will start with a paper mache form – I will soon have a tutorial for the cones (editing video now) but will explain how to cover. First, you will determine if you will cover the entire gnome or just partial (I choose just over halfway up the cone). Then, line up the pattern how you’d like (I choose a vertical orientation when using plaid, so I line up a strong vertical line with the top and bottom of the cone). Finally, you will tack that vertical line down and roll the sides up.
You can start with a square or just use the cut from the fabric store, but I wouldn’t ask for less than a 1/2 a yard for the cut (if you are using the tall cones).
You’re a great teacher! Going to make some for my girls!
Thank you so much. My daughter often absconds with the gnomes I make, so I’m sure your girls will love them. :)
Hi Sarah
I want to thank so much for the great tuts, its very kind of you to share your knowledge with us, i make gnomes too, out of socks, sooo sooo cute
Thanks again Dear, i am just finishing up 65 for the season,yup 65, they have taken on a life of their own
Keep happy, healthy and continued fun making more gorgeous gnomes
Cheers
Paddy
Thank you so much, Paddy. You’ve made 65 gnome ornaments?! That’s amazing and I’m sure everyone will be so happy to get them. It might be a bit early, but happy holidays, dear.