
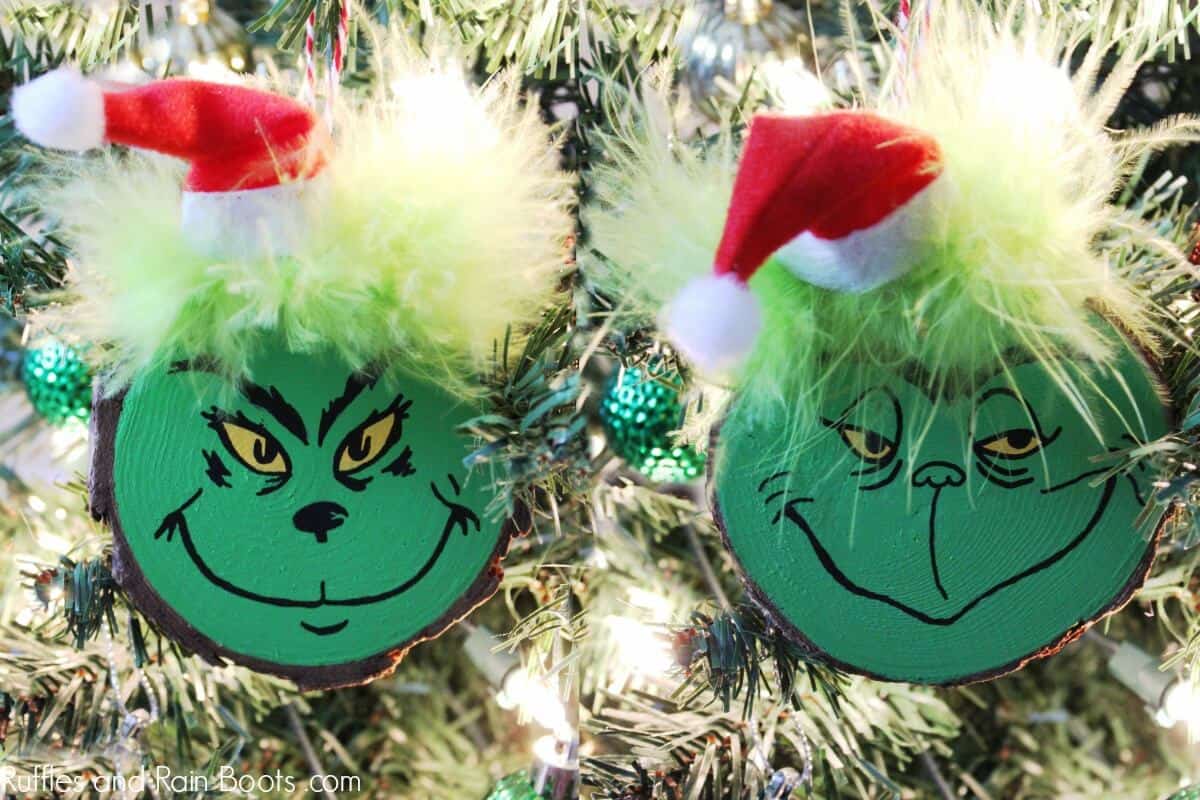
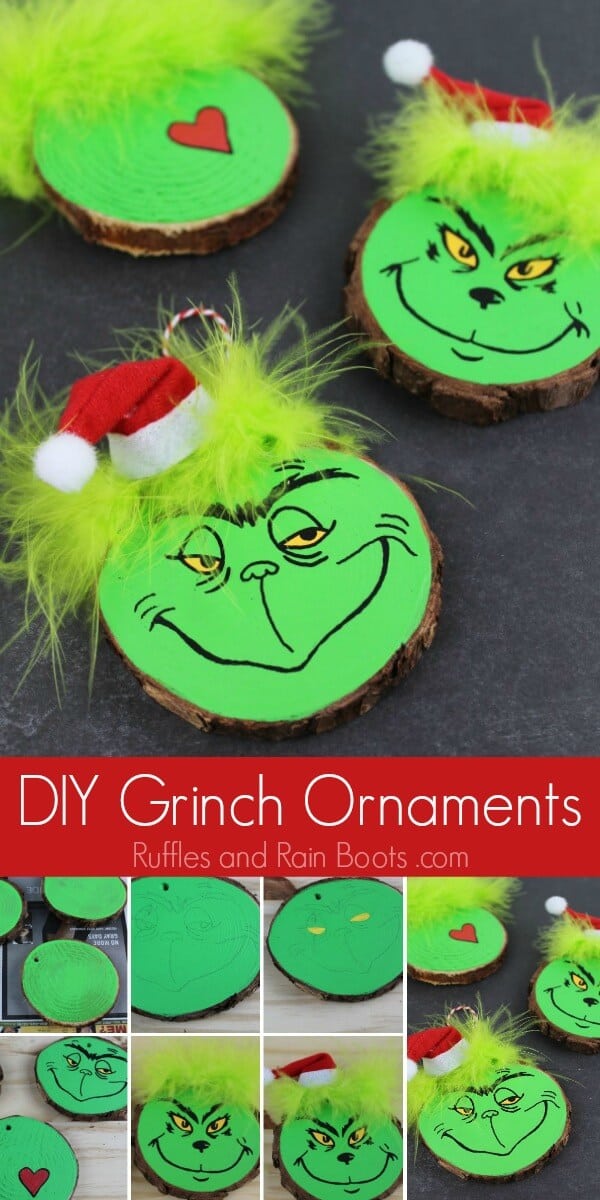
DIY Grinch Ornament Set for a Christmas Tree or Gifts
This fun DIY Grinch ornament set can be made by young and old. Get into the spirit of the season by making this simple Christmas ornament set. If you have a playlist on YouTube to which you’d like to add this project, here is our Grinch ornament video tutorial.
There are affiliate links in this article which means, at no additional cost to you, we could receive compensation for our recommendations. You can read our full disclosure policy.
What You'll Find On This Page
Fun Grinch Ornament and Variations
Here at Ruffles and Rain Boots, we are so excited to watch The Grinch each year with our daughter. She’s still at the age where Christmas is full of magic.
This year, we are so excited to see the new Grinch movie! I mean, maybe it’s sad to admit but I might be just as excited as my daughter… So, we’re making a fun Grinch Christmas ornament to celebrate the movie and the spirit of the season.
RELATED READING: Hot Chocolate Christmas Ornament Gift
Supplies for a Grinch Ornament Set
This is a simple Christmas ornament you can make with the kids. Young ones will need help with the ears.
- Wood slice and twine or a pre-strung wood slice round ornament
- Acrylic paint in green and a foam paintbrush
- Pencil, paint pens (black, red, and yellow)
- Miniature Santa hats (can make one from red felt and a white pompom)
- Green marabou feather boa (or green feathers from your craft stash)
- Scissors and Glue
- Optional, ModPodge to seal
How to Make a Grinch Ornament
This Grinch ornament set is a fun craft for all ages. Grab a couple of Grinch faces you like from the Internet. Print them out and trace them or freehand your best Grinch face!
RELATED READING: Adorable Swedish Gnome Ornaments (30-Minute Craft)
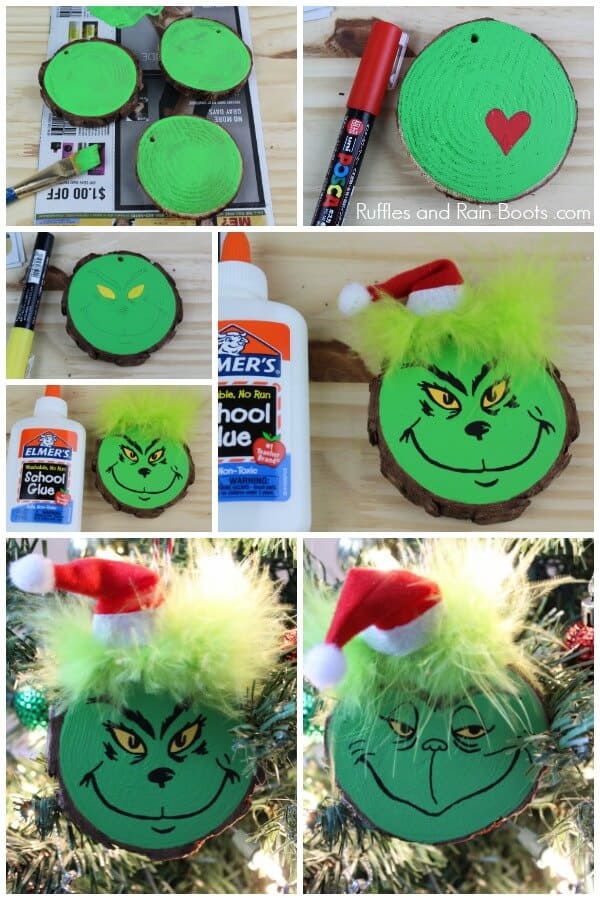
Use two or three coats to paint the wood slice green. Let dry completely.
Trace a face (we looked at a picture online) onto the wood slice. There are so many great faces online that it shouldn’t be hard to find one you like.
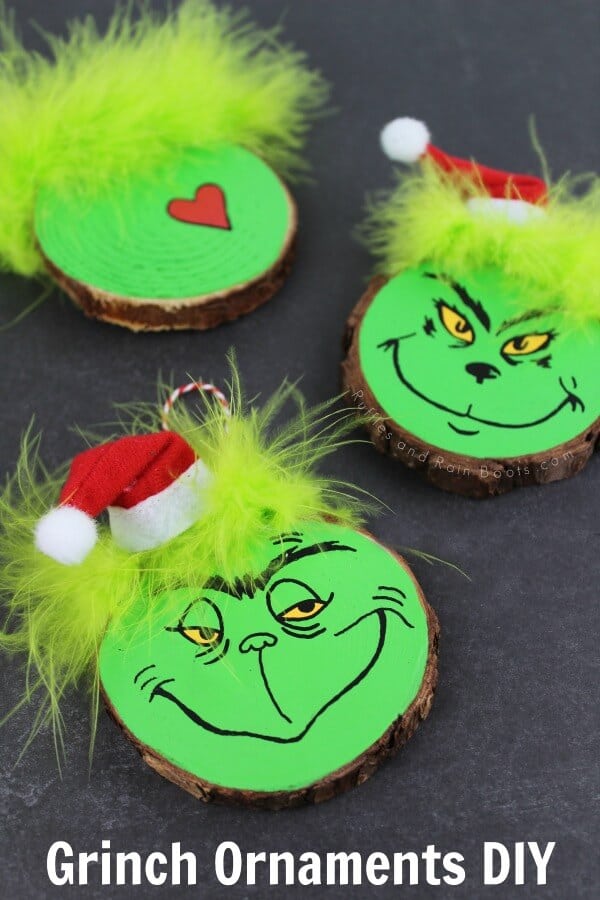
Fill in the eyes first with the yellow paint pen. Use the black paint pen to trace over the pencil. For younger kids, let them fill in the outline of the heart with red paint pen. Outline in black.
Once dry, seal the adorable ornament with ModPodge to prevent the paint from chipping.
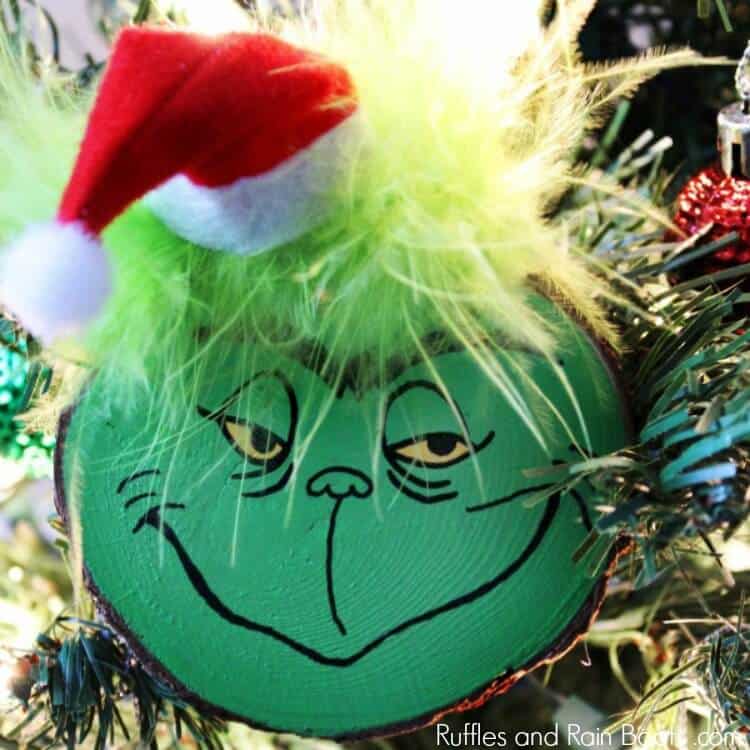
Cut a small piece of the boa or grab a few green feathers and glue them onto the top of the wood slice. Glue a mini Santa hat on top of the boa.
Glue on a hanging string, if needed.

Over to You
What ornament would you make next with a wood slice? Let us know in the comments or share a picture of one you’ve made with us over on Facebook.
Please Save This to Pinterest or Share on Facebook
Your shares are how we grow and we are sincerely grateful.
DIY Grinch Ornament Set for a Christmas Tree or Gifts

This Grinch ornament set is a fun craft for all ages. Grab a couple of Grinch faces you like from the Internet. Print them out and trace them or freehand your best Grinch face!
Materials
- Wood slice and twine or a pre-strung wood slice round ornament
- Acrylic paint in green and a foam paintbrush
- Pencil, paint pens (black, red, and yellow)
- Miniature Santa hats (can make one from red felt and a white pompom)
- Green marabou feather boa (or green feathers from your craft stash)
- Optional, ModPodge to seal
Tools
- Scissors
- Glue
Instructions
- Use two or three coats to paint the wood slice green. Let dry completely.
- Trace a face (we looked at a picture online) onto the wood slice. There are so many great faces online that it shouldn’t be hard to find one you like.
- Fill in the eyes first with the yellow paint pen. Use the black paint pen to trace over the pencil. For younger kids, let them fill in the outline of heart with red paint pen. Outline in black.
- Once dry, seal the adorable ornament with ModPodge to prevent the paint from chipping.
- Cut a small piece of the boa or grab a few green feathers and glue them onto the top of the wood slice. Glue a mini Santa hat on top of the boa.
- Glue on a hanging string, if needed.
Notes
For more fun Christmas crafts, visit Ruffles and Rain Boots
Meet the Creator
Hi there, I’m Sarah Nenni-Daher. I’m a crafty gal and always have at least 14 projects going at once. I am a crafter, designer, DIYer, and pattern maker. I share my creations here and in the Ruffles and Rain Boots® Shop.
Here at Ruffles and Rain Boots®, you’ll find DIY gnomes, crafts, gifts, cupcakes, laser crafts, and so much more. I love sharing video tutorials over on YouTube and chatting with other crafters in my Facebook groups. We’d love to have you!